11
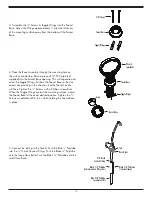
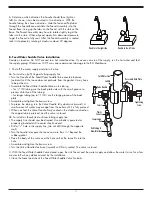
6. Determine which direction the handle should face (right or
left). As shown, it can be mounted in two directions. With the
handle facing the chosen direction, slide the fastened Polytubes
through the Faucet Base and slide the Faucet Assembly into the
Faucet Base, lining up the tabs on the Faucet with the slots on the
Base. The Faucet Assembly may have to rotate slightly to get the
tabs into the slots. When aligned, apply firm downward pressure
to get the Faucet to fully seat. After the Faucet Assembly is seated,
lock it into place by rotating it clockwise about 30 degrees.
B. Feed Water Saddle Valve Installation
Decide on location. Do NOT connect to a hot water feed line. If you are not sure of the supply, run the hot water and feel
the supply piping. Water over 100°F may cause permanent damage to the RO Membrane.
1. Shut off the water supply and drain the line.
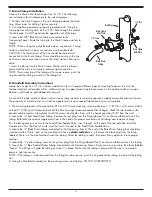
2a. To install on (soft) Copper Tubing supply line:
• Turn the Handle of the Feed Water Saddle Valve counterclockwise
(outward) until the lance does not protrude from the gasket. It may have
to be pushed in.
• Assemble the Feed Water Saddle Valve on the tubing.
– for
3
⁄
8
" OD tubing use the back plate side with the small groove to
prevent distortion of the tubing.
– for larger tubing (up to
5
⁄
8
" OD) use the large groove of the back
plate.
• Assemble and tighten the brass screw.
• To pierce the tubing, turn the Valve Handle fully clockwise (inward). A
small amount of water may escape from the outlet until it is fully pierced
• When you feel the Valve Handle firmly seated in the clockwise direction,
the copper tube is pierced, and the valve is closed.
2b. To install on (hard) steel or brass tubing supply line.
• The supply line should now be drained. Use a battery powered or
properly grounded drill to avoid shock hazard.
• Drill a
3
⁄
16
" hole in the supply line; (do not drill through the opposite
wall).
• Turn the handle to expose the lance no more than
3
⁄
16
" beyond the
rubber gasket.
• Place the body of the valve over the hole so that the lance fits into the
hole.
• Assemble and tighten the brass screw.
• Turn the Valve Handle clockwise (inward) until firmly seated. The valve is closed.
3. With the Feed Water Saddle Valve closed, open the sink faucet and the water supply and allow the water to run for a few
minutes to flush any debris caused by the installation.
• Close the faucet and check the Feed Water Saddle Valve for leaks.
Cold Water Line
Reversible Back Plate
Tightening
Screw
Saddle
Valve Handle
Insert
Plastic
Ferrule
Compression
Nut
Red Tubing To
Manifold Inlet
Handle to the right side
Handle to the left side
Summary of Contents for CWQC50
Page 1: ...INSTALLATION OPERATION AND SERVICE MANUAL RO DRINKING WATER SYSTEM MODEL CWQC50...
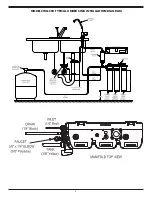
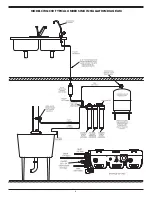
Page 5: ...5 MODEL CWQC50 TYPICAL UNDER SINK INSTALLATION DIAGRAM...
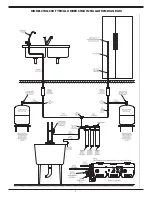
Page 6: ...6 MODEL CWQC50 TYPICAL UNDER SINK INSTALLATION DIAGRAM...
Page 7: ...7 MODEL CWQC50 TYPICAL UNDER SINK INSTALLATION DIAGRAM...


