background image

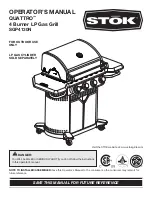
Summary of Contents for 466270909

Page 1: ...Protected under oneor moreof the following U S Patents 4 989 579 5 421 319 5 458 309 5 579 755 5 996 573 6 114 666 6 135 104 6 209 533 6 279 566 6 331 108 6 484 900 6 526 876 6 595 197 6 640 799 6 64...

Page 2: ...Extinguish any open flame 3 Open lid 4 If odor continues keep away from the appliance and immediately call your gas supplier or your fire department 1 Do not store or use gasoline or other flammable...

Page 3: ...orage and Handling Code B149 2 or the Standard for Recreational Vehicles ANSI A 119 2 NFPA1192 and CSA Z240 RV Series Recreational Vehicle Code as applicable All electrical accessories such as rotisse...

Page 4: ...45 7 cm tall with 20 lb 9 kg capacity maximum LP cylinders must be constructed and marked in accordance with specifications for LP cylinders of the U S Department of Transportation DOT or for Canada...

Page 5: ...test must be repeated each time LP cylinder is exchanged or refilled Do not smoke during leak test Do not use an open flame to check for gas leaks Grill must be leak tested outdoors in a well ventilat...

Page 6: ...ps 5 and 6 If you are still unable to complete the connection do not use this regulator Do not insert any tool or foreignobject into the valve outlet or safety relief valve You may damage the valve an...

Page 7: ...n any of the grill cooking surfaces ensure no loose bristles remain on cooking surfaces prior to grilling It is not recommended to clean cooking surfaces while grill is hot A If you notice grease or o...

Page 8: ...hold electronic ignitor button Click should be heard and spark seen each time between collector box or burner and electrode See Troubleshooting if no click or spark Valve Check important Make sure ga...

Page 9: ...ll 1 Turn gas off at control knobs and LP cylinder 2 Remove cooking grates and flame tamers 3 Remove hitch pins and carryover tubes from rear of burners 4 Remove Hitch pin to disengage burner from bra...

Page 10: ...cations made to the product 9 The removal and or reinstallation of your product DISCLAIMER OF IMPLIED WARRANTIES and LIMITATION OF REMEDIES Repair or replacement of defective parts is your exclusive r...

Page 11: ...l MODULE X 1 GREASE TRAY Y 1 ELECTRODE WIRE F SlDEBURNER Z 4 BEZEL F CONTROL KNOB AA 4 CONTROL KNOB BB 3 TEMPERATURE GAUGE UFC MOUNTED CC 1 CART UPPER BACK PANEL DD 1 LEFT SIDE SHELF F S B EE 1 FASCIA...

Page 12: ...YY MM Q Q WW WW WW VV VV VV PP FF II S z_ y _ _AA N i_ _T NN _qF O0 KK LL J 1 TT _ tX L K o _ _ _ _ I TT UU C _ I F B t I u _ D 12...

Page 13: ...Locking caster __ __ _ _ Bottom Attach side panels to bottom shelf using three 1 4 20x1 2 screws 7mm lock washers and 7ram flat washers per panel IMPORTANT Panel with large hole must be on left side...

Page 14: ...side Lower back panel 1 4 20xl 2 screw 7ramlock washer 7ramflat washer This step requires two people to lift and position grill head onto cart Carefully lower the grill head onto the cart aligning sl...

Page 15: ...o side shelf brackets on side of firebox Attach right side shelf using three 1 4 20x3 4 screws 7ram lock washers 7ram flat washers 1 4 nuts shown A Attach rear of shelf using one 1 4 20x11 _ screw 7ra...

Page 16: ...ck washer and 7ram flat washer in lower hole shown B Attach front of shelf and fascia using one 8x3 8 self tapping screw and large flat washer shown C Under main control panel attach front of shelf an...

Page 17: ...fascia Attach using two 8 32x3 8 screws and 4ram lock washers Press sideburner control knob onto valve stem Screws andWashers removedfrom valve bracket Valve stem Note Use left and right holes on fasc...

Page 18: ...rip pan with one Wing nut shown B Make sure burner tube engages sideburner valve shown C Wing nut Sideburner burner Sidebur6er drip pan Sideburner drip pan Under sideburner shelf attach sideburner ign...

Page 19: ...MOUNTEDiN THE MOST DOWNWARD POSITIONWHEN ASSEMBLED TO CART 7mmflat 7mmlock 1 4 20x1W washer washer screw Inside of cart insert rear shield tab into left slot on upper of lower back panel Insert left...

Page 20: ...gr_iti _ moStlle acdh _shieldto tileca_f _ sidepanewilhlhe n aid p shown A Connect eachof thewiresImmthemanburner ele S_fsS6 andsideb_Jrnef oh odenb ise b xk ot lheEbdrofl gn tios Mod e 1 lal termedon...

Page 21: ...tamer _te slots at ffol_t of firebo at8 eslilsg pasite era ol_ pi_s in back of t_ebox Phce coekirlg graes ohio lie 8_ebsx asshown_ Ir _rtheIv _o wire eiasal_ea_ oI _ _a_m _ack btoholes i_back el _ebo...

Page 22: ...re to install grease tray will cause hot grease to drip from bottom of grill with risk of fire or property damage Greasetray Unscrew electronic ignition cap on cart right side panel Insert AA battery...

Page 23: ...linder screw under bottom shelf Insert regulator through large hole in left side panel See Use Care section of this manual to perform the Burner Flame Check and for important safety instructions befor...

Page 24: ...and excessgreasefrominsidefireboxarea greasetray andother surfaces Troubleshooting Burner s will not light usingignitor SeeElectronicIgnition Troubleshooting also Continuedonnext page GASISSUES Trying...

Page 25: ...lesin end s of carryovertube s SeeSectionI of ElectronicIgnitionSystem SeeSectionII of ElectronicIgnitionSystem SeeSectionIII of ElectronicIgnitionSystem Uselong stemmatch fireplacematch See Match Lig...

Page 26: ...ndtight Unscrewbuttoncapassemblyand reinstall making sure threadsarealignedandengagedfully Replacesparkmoduleassembly Removeandreconnectalloutputconnections at moduleandelectrodes module L _ SECTION i...

Page 27: ...usceptibles de vous int_resser I J Example yourname yourhost cam Ejemplo su nombre su host cam Example votrenom votre hSte com 1 0 Attachcopyof yoursalesreceipthere Adjanteaqui la copiadosu recihodeco...

Page 28: ...Oklahoma Joe s sauces rubs and marinades We also have a Special Offers section so be sure to check often for specials deals In addition to the online store charbroil com offers you a wealth of informa...

Reviews: