4
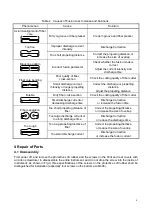
Table 2 Causes of Fusion Loss Increase and Solutions
Phenomenon
Cause
Solution
Axial misalignment of fiber
core
Dirty V-groove or fiber presser
Clean V-groove and fiber presser
Too fine
Improper discharge current
intensity
Discharge Correction
Too short propelling distance
Correct the propelling distance or
increase the size of overlap
Black line pattern
Incorrect fusion parameter
Check whether the fusion mode is
correct
Adjust the current intensity and
discharge time
Fiber core bending
Poor quality of fiber
cross-section
Check the cutting quality of fiber cutter
Small discharge current
intensity or longer propelling
distance
Correct the discharge or propelling
distance
Adjust the propelling distance
Bubble
Dirty fiber cross-section
Check the cutting quality of fiber cutter
Small discharge current or
decreasing discharge time
Discharge Correction
or increase the fusion time
Fiber separation
Too short propelling distance of
fiber
Correct the propelling distance
or increase the size of overlap
Too large discharge current or
too long discharge time
Discharge Correction
or reduce the discharge time
Too rough
Too long propelling distance of
fiber
Correct the propelling distance
or reduce the size of overlap
Too small discharge current
Discharge Correction
or increase the fusion current
4 Repair of Parts
4.1 Disassembly
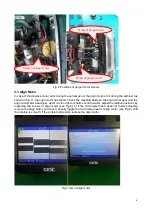
First power off, and remove the protective soft rubber and the screws on the front and rear covers with
an Allen screwdriver to disassemble the entire instrument, and do not drop the screw into the inside of
instrument. As shown in Fig.3, three specifications of the screws on the protective soft rubber shall be
distinguished for installation (especially four screws on the bottom are M3X6).


