background image

11

OPERATION IN

STRU

CTIONS

STRAIGHT CUTTING (Fig. 6)

Mark the cut. Position the saw so that the 
blade is in line with the desired cut. Mark the 
position of the side edge of the saw base and 
then clamp the straight edge on the mark, 
parallel to the cut. Make the cut from one 
direction only. Never cut halfway and then 
complete the cut from the opposite end.

GENERAL CUTTING

1.  Firmly clamp the workpiece in place.
2.  Use the appropriate type and size of blade for the workpiece.
3.  Check the clearance behind the workpiece and assure that the blade will not impact 

another surface.

4.  Clearly mark the line of cut.
5.  Hold the saw firmly. Make sure that your hand is on the insulated gripping areas only.
6.  Rest the base plate on the workpiece so that the blade is not in contact with the 

workpiece

7.  Turn on the jigsaw and bring it to the maximum desired cutting speed before applying 

the blade to the workpiece.

8.  Slowly move the jig saw into the workpiece.
9.  Do not force the tool. Keep the base plate flat against the workpiece while cutting. Use 

only enough steady pressure on the blade to keep the saw cutting.

10. Reduce pressure as the blade comes to the end of the cut.
11.  Allow the saw to come to a complete stop before removing the blade from the workpiece.
12. If sawing fibreglass, plaster, wallboard, or spackling compound, clean the saw motor 

vents frequently with a vacuum or compressed air. Always wear safety goggles when 
cleaning tools using compressed air. These materials are highly abrasive and may 
accelerate the wear on motor bearings and brushes.

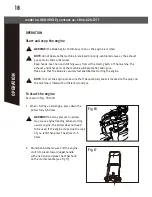
Fig. 6

WARNING!

•  Before attempting to use this tool, become familiar with all of its operating features and safety 

requirements.

•  Always securely and support the workpiece. Always maintain proper control of the jigsaw. Failure to 

clamp and support the workpiece and loss of control of the saw could result in serious injury.

NOTE:

Always apply a steady, firm, downward pressure on the front of the saw as you cut. This will keep the saw blade from 
jumping out of the workpiece.

Safety instructions

Safe Practices for Pedestrian-controlled 
Mowers

This cutting machine is capable of amputat-
ing hands and feet and throwing objects. 
Failure to observe the following safety 
instructions could result in serious injury or 
death.

I.    GENERAL OPERATION

1.     Read, understand, and follow all 

instructions on the machine and in the 
manual(s) before starting.

2.     Do not put hands or feet near or under 

the machine. Keep clear of the discharge 
opening at all times.

3.     Only allow responsible adults who are 

familiar with the instructions to operate 
this machine.

4.     Clear the area of objects such as rocks, 

wire, toys, etc., which could be thrown by 
the blade. Stay behind the handle when 
the engine (motor) is running.

5.     Be sure the area is clear of bystanders 

before operating. Stop machine if anyone 
enters the area.

6.     Do not operate machine barefooted or 

while wearing sandals. Always wear 
substantial footwear.

7.     Do not pull machine backward unless 

absolutely necessary. Always look down 
and behind before and while moving 
backward.

8.     Never direct discharged material toward 

anyone. Avoid discharging material 
against a wall or obstruction. Material 
may ricochet back toward the operator. 
Stop the blade when crossing gravel 
surfaces.

9.     Do not operate machine without the 

entire grass catcher, discharge guard, 
rear guard, or other safety protective 
devices in place and working.

10.   Never leave a running machine unattend-

ed.

11.   Stop the engine (motor) and wait until the 

blade comes to a complete stop before 
cleaning the machine, removing grass 
catcher, or unclogging the discharge 
guard.

12.   Operate machine only in daylight or good 

artificial light.

13.   Do not operate machine while under the 

influence of alcohol or drugs.

14.   Never operate mower in wet grass. Always 

be sure of your footing; walk, never run.

15.   Disengage the drive system, if so 

equipped, before starting the engine 
(motor).

16.   If the machine should start to vibrate 

abnormally, stop the engine (motor) and 
check for the cause immediately. 
Vibration is generally a warning of 
trouble.

17.   Always wear eye protection when 

operating machine.

18.   See manufacturer’s instructions for 

proper operation and installation of 
accessories. Only use accessories 
approved by the manufacturer.

II. SLOPE OPERATION

Slopes are a major factor related to slip and 
fall accidents, which can result in severe 
injury. Operation on all slopes requires extra 
caution. If you feel uneasy on a slope, do not 
mow it.
1.     Mow across the face of slopes; never up 

and down. Exercise extreme caution 
when changing direction on slopes.

2.     Watch for holes, ruts, bumps, rocks, or 

other hidden objects. Uneven terrain 
could cause a slip and fall accident. Tall 
grass can hide obstacles.

3.     Do not mow on wet grass or excessively 

steep slopes. Poor footing could cause a 
slip and fall accident.

4.     Do not mow near drop offs, ditches, or 

embankments. You could lose your 
footing or balance.

III.   CHILDREN

Tragic accidents can occur if the operator is 
not alert to the presence of children. Children 
are often attracted to the machine and the 
mowing activity. Never assume that children 
will remain where you last saw them.
1.     Keep children out of the mowing area and 

under the watchful care of a responsible 
adult other than the operator.

2.    Be alert and turn mower off if a child 

enters the area.

3.     Never allow children to operate the 

machine.

4.     Use extra care when approaching blind 

corners, shrubs, trees, or other objects 
that may block your view of a child.

IV. SERVICE

*SAFE HANDLING OF GASOLINE:
To avoid personal injury or property damage, 
use extreme care in handling gasoline. 
Gasoline is extremely flammable and the 
vapours are explosive.
1.     Extinguish all cigarettes, cigars, pipes, 

and other sources of ignition.

2.     Use only an approved gasoline container.
3.     Never remove gas cap or add fuel with 

the engine running.

4.     Allow engine to cool before refueling.

5.     Never refuel the machine indoors.
6.     Never store the machine or fuel 

container where there is an open flame, 
spark, or pilot light such as on a water 
heater or on other appliances.

7.     Never fill containers inside a vehicle or on 

a truck or trailer bed with a plastic liner. 
Always place containers on the ground 
away from your vehicle before filling.

8.     Remove gas powered equipment from the 

truck or trailer and refuel it on the 
ground. If this is not possible, then refuel 
such equipment with a portable 
container, rather than from a gasoline 
dispenser nozzle.

9.     Keep the nozzle in contact with the rim 

of the fuel tank or container opening at 
all times until fueling is complete. Do not 
use a nozzle lock open device.

10.    If fuel is spilled on clothing, change 

clothing immediately.

11.    Never overfill fuel tank. Replace gas cap 

and tighten securely.

GENERAL SERVICE

1.     *Never operate machine in a closed area.
2.     Keep all nuts and bolts tight to be sure 

the equipment is in safe working 
condition.

3.     Never remove or tamper with safety 

devices. Check their proper operation 
regularly. Never do anything to interfere 
with the intended function of a safety 
device or to reduce the protection 
provided by a safety device.

4.     Keep machine free of grass, leaves, or 

other debris build up. *Clean up oil or fuel 
spillage and remove any fuel-soaked  
debris. Allow machine to cool before 
storing.

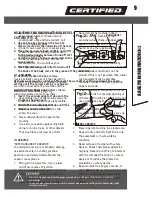
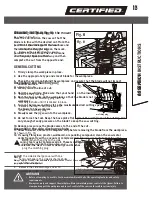
Attaching the grass bag to the mower

As shown in Fig. 8.

1.     Lift the ejector flap with one hand 

and hook in the grass bag. 

2.     Release the ejector flap to secure 

the grass bag in position.

Assembling the mulching plug

As shown in Fig. 9.

1.      Remove the grass bag.
2.     Push the plastic mulching plug into the 
        discharge chute until it is locked in place.
3.     Release the flap. It will close back to 
        cover the mulching plug.

Assembling the side discharge chute

As shown in Fig. 10.

NOTE: 

When changing to the side 

discharge, remove the grass bag  and 
plug the mulching plug.

1.     Lift the side discharge cover with one  

hand and hook in the side discharge chute 
with the other hand.

2.     Release the side discharge cover to

secure the chute in position.

Fig. 8

Fig. 9

Checking and filling engine oil  

As shown in Figs. 11 to 13.

CAUTION! 

The following procedures and 

adjustments must be performed before the
engine is started.
Do not attempt to make any of these 
adjustments while the engine is running.

CAUTION! 

To prevent engine damage the 

engine is shipped without oil or gas. 
The engine must be filled with the correct 
grade of oil and gas before starting the 
engine.

NOTE! 

Running the engine with a low oil level will cause engine damage. It is recommend 

that high detergent, premium quality 4-stroke engine oil be used. Using non-detergent oil 
can shorten the engine’s service life, and using 2-stroke oil will damage the engine.

CAUTION! 

Always use high quality detergent oil classified SAE30 oil (or equivalent, such 

as SAE 10W/30, often termed as 4-stroke lawnmower oil).
Never use additives with recommended oil. 
To prolong the life of your engine it is important that the oil is changed after the first 5 
hours of use.

NOTE:

 To check the engine oil level, stop engine and place the mower on a level surface.

1.     Remove the oil filler dipstick and wipe oil 
        from it with a clean cloth (see Fig. 11). 
2.     Insert the dipstick into the oil filler neck, 
        but do not twist it closed (see Fig. 11-1). 

Fig. 10

3.     Remove the dipstick and check the oil 

level: the oil level must be between the 
Min and Max marks on the dipstick. If near
the lower level, fill to upper lever with 
the recommended oil (SAE30 or equivalent). 
Do not overfill. Wipe away any spilled oil 
(see Fig. 12). 

4.     Align the ribs of the cap with the groove of

the filler neck, then rotate 1/4 turn to 
secure it (see Fig. 13). 

Filling with engine fuel

As shown in Fig. 14.

CAUTION! 

Always use clean, fresh unleaded gas. Purchase fuel in quantities that can be 

used within 30 days. Never mix oil with gas.

CAUTION! 

Do not fill into the base of neck to allow for fuel expansion. Do not overfill the 

fuel tank.

CAUTION! WARNING!

 Gas is highly flammable and extreme caution must be taken when 

handling or working with it. Keep out of reach of children.

CAUTION!

 To prevent engine damage the engine is shipped without oil or gas. The engine 

must be filled with the correct grade of oil and gas before starting the engine.

WARNING! 

Refuel in a well-ventilated area with the engine stopped. Do not smoke or allow 

flame or sparks in the area where the engine is refueled or where gas is stored. Avoid 
repeated or prolonged contact with skin or inhalation of vapour.

WARNING! 

Gasoline with up to 10% ethanol (gasohol) is acceptable.

Do not use unapproved gasoline, such as E15 and E85.

1.     Clean the area around the gas filler cap

before removing the cap. Remove the 
warning tag, and check the fuel level 
(see Fig. 14). 

2.     Refill the tank if the fuel level is low.
3.     Refuel carefully to avoid overfilling or 

spilling fuel.
There should be no fuel in the filler neck.

4.     Clean up any overflow or splashes of gas

before starting the engine.

5.     Tighten the filler cap after filling: finger 

tight only (see Fig. 14-1).

ejector flap

grass bag

side discharge chute

side discharge cover

mulching plug 

5.     If you strike a foreign object, stop and 

inspect the machine. Repair, if 
necessary, before starting.

6.     Never make any adjustments or repairs 

with the engine (motor) running. 
*Disconnect the spark plug wire and 
ground against engine to prevent 
unintended starting.

7.     Always unplug electric mowers before 

adjusting, cleaning, or repairing.

8.     Check grass catcher components and 

the discharge guard frequently and 
replace with manufacturer’s recommend-
ed parts, when necessary.

9.     Mower blades are sharp. Wrap the blade 

or wear gloves, and use extra caution 
when servicing them.

10.    *Do not change engine governor setting 

or over speed the engine.

11.    Maintain or replace safety and instruc-

tion labels, as necessary.
* Asterisked items do not apply to 
electric mowers.

Maintenance and storage

1.     Keep all nuts, bolts and screws tight to 

be sure the equipment is in safe working 
condition.

2.     Never store the equipment with gas in 

the tank inside a building where fumes 
can reach an open flame or spark.

3.     Allow the engine to cool before storing in 

any enclosure.

4.     To reduce the fire hazard, keep the 

engine, muffler, battery compartment 
and gas storage area free of grass, 
leaves, or excessive grease.

5.     Check the grass catcher frequently for 

wear or deterioration.

6.     Replace worn or damaged parts for 

safety.

7.     If the fuel tank has to be drained, this 

should be done outdoors.

13

ASSEMBLY

Summary of Contents for 060-0190-2

Page 1: ...E GUIDE D UTILISATION INSTRUCTION MANUAL IMPORTANT Please read this manual carefully before running this gas powered lawn mower and save it for reference model number numéro de modèle 060 0190 2 IMPORTANT Veuillez lire attentivement ce guide d utilisation avant d utiliser cette tondeuse à essence et le conserver aux fins de consultation ultérieure English version Page 2 French version Page 32 ...

Page 2: ... to assist you En cas de problèmes ou si vous avez des questions NE RETOURNEZ PAS L ARTICLE AU MAGASIN Contactez plutôt un de nos agents du service à la clientèle qui se fera un plaisir de vous aider For Customer Assistance Please Call Pour le service à la clientèle veuillez composer CANADA 1 866 523 5218 1 844 428 7277 ...

Page 3: ...echnical Specifications 3 Parts List 4 Intended Use 6 Safety Information 7 Adjustment 17 Operation 18 Troubleshooting 27 Exploded View 29 31 Assembly 11 Storing and Maintenance 22 Warranty model no 060 0190 2 I contact us 1 844 428 7277 2 TABLE OF CONTENTS SAVE THESE INSTRUCTIONS This manual contains important safety and operating instructions Read all instructions and follow them with use of this...

Page 4: ...capacity Torque Height adjustments Front wheel diameter Back wheel diameter Ignition Fuel tank Oil tank Spark plug type Weight Single cylinder 4 stroke 140 cc 2 2 kW 3600 RPM 3200 RPM 20 51 cm 60 L 4 15 4 97 ft lb 1 1 4 to 3 3 4 3 1 to 9 5 cm 8 20 cm 12 30 cm TCI 0 8 L 0 47 L QC12YC CHAMPION 74 lb 8 oz 33 8 kg 3 TECHNICAL SPECIFICATIONS ...

Page 5: ...er tools to rain or wet conditions Water entering a power tool will increase the risk of electric shock Do not abuse the cord Never use the cord for carrying pulling or unplugging the power tool Keep cord away from heat oil sharp edges or moving parts Damaged or entangled cords increase the risk of electric shock When operating a power tool outdoors use an extension cord suitable for outdoor use U...

Page 6: ...the plug from the power source and or the battery pack from the power tool before making any adjustments changing accessories or storing power tools Such preventive safety measures reduce the risk of starting the power tool accidentally Store idle power tools out of the reach of children and do not allow persons unfamiliar with the power tool or these instructions to operate the power tool Power t...

Page 7: ... from this product may contribute to hearing loss The label on your tool may include the following symbols The symbols and their definitions are as follows V Volts A Amperes Hz Hertz W Watts min Minutes Alternating current Direct current n0 No load speed Class II Construction min Revolutions or reciprocations per minute Grounding terminal BPM Beats per minute SPM Strokes per minute WARNING To redu...

Page 8: ...FETY INFORMATION IMPORTANT Please read these instructions fully before assembling and operating Description of Symbols Symbols are used in this manual to attract your attention to possible risks The safety symbols and the explanations which accompany them must be perfectly understood The warnings themselves do not prevent the risks and cannot be a substitute for proper methods of avoiding accident...

Page 9: ...p clear of the discharge opening at all times 3 Only allow responsible adults who are familiar with the instructions to operate this machine 4 Clear the area of objects such as rocks wire toys etc which could be thrown by the blade Stay behind the handle when the engine motor is running 5 Be sure the area is clear of bystanders before operating Stop machine if anyone enters the area 6 Do not opera...

Page 10: ...Never allow children to operate the machine 4 Use extra care when approaching blind corners shrubs trees or other objects that may block your view of a child IV SERVICE SAFE HANDLING OF GASOLINE To avoid personal injury or property damage use extreme care in handling gasoline Gasoline is extremely flammable and the vapours are explosive 1 Extinguish all cigarettes cigars pipes and other sources of...

Page 11: ...or over speed the engine 11 Maintain or replace safety and instruc tion labels as necessary Asterisked items do not apply to electric mowers Maintenance and storage 1 Keep all nuts bolts and screws tight to be sure the equipment is in safe working condition 2 Never store the equipment with gas in the tank inside a building where fumes can reach an open flame or spark 3 Allow the engine to cool bef...

Page 12: ...s As shown in Figs 3 and 4 1 Loosen the nut and gasket ensuring the corrugated gasket be well assembled on the axle then install the wheel and fasten the nut tightly 2 Install the other wheel in the same way Fig 3 Fig 4 11 ASSEMBLY ...

Page 13: ...ss of the workpiece As a general rule slower speeds are best for denser materials and faster speeds are best for soft materials OPERATION INSTRUCTIONS On off Trigger Switch Lock on Button Fig 4 Fig 5 Variable speed dial MAX MIN NOTE Determine the optimum speed for cutting your workpiece by making a trial cut in a scrap piece of material WARNING Do not use the jigsaw for plunge or pocket cuts The j...

Page 14: ...e saw motor vents frequently with a vacuum or compressed air Always wear safety goggles when cleaning tools using compressed air These materials are highly abrasive and may accelerate the wear on motor bearings and brushes Fig 6 WARNING Before attempting to use this tool become familiar with all of its operating features and safety requirements Always securely and support the workpiece Always main...

Page 15: ...e is running CAUTION To prevent engine damage the engine is shipped without oil or gas The engine must be filled with the correct grade of oil and gas before starting the engine NOTE Running the engine with a low oil level will cause engine damage It is recommend that high detergent premium quality 4 stroke engine oil be used Using non detergent oil can shorten the engine s service life and using ...

Page 16: ...nt parts The use of any other parts may create a hazard or cause damage to the product Use only accessories that are recommended for this jigsaw by the manufacturer Accessories that may be suitable for one tool may become hazardous when used with another tool Maintain tools with care Keep cutting tools sharp and clean Properly maintained tools with sharp cutting edges are less likely to bind and a...

Page 17: ...the engine is shipped without oil or gas The engine must be filled with the correct grade of oil and gas before starting the engine WARNING Refuel in a well ventilated area with the engine stopped Do not smoke or allow flame or sparks in the area where the engine is refueled or where gas is stored Avoid repeated or prolonged contact with skin or inhalation of vapour WARNING Gasoline with up to 10 ...

Page 18: ...andle out and select the desired cutting height The handle snaps into the desired position From position 1 to position 7 the cutting heights range from 1 1 4 to 3 3 4 31 95 mm Setting required function NOTE This lawnmower has three functions Change functions by changing the installed accessories as shown in the following chart installed removed Fig 15 To convert mower For rear bagging For mulching...

Page 19: ...rt the engine make sure that the spark plug cover is located on the plug and the machine is filled with sufficient oil and gas To start the engine As shown in Figs 16 to 18 1 When starting a cold engine press down the primer fully 3 5 times WARNING Too many presses on primer may cause engine flooding When starting a warm engine the primer does not need to be used If the engine stops due to a lack ...

Page 20: ... sharp pull see Fig 17 1 NOTE If the engine fails to start after three pulls repeat the process 4 Once the engine is running put the starter rope into the rope guide see Fig 18 To stop the engine As shown in Fig 19 Release the engine start stop lever It will return to its initial position and the engine will automatically switch off 19 OPERATION ...

Page 21: ...stall the spark plug carefully by hand to avoid cross threading After the plug is seated tighten 1 8 to 1 4 turn with the spark plug socket wrench to compress the washer 3 Pull the engine start stop lever toward upper handle 4 Operate the starter as described above Mowing WARNING Always observe the strictest safety procedures when using the lawnmower Carefully read the safety instructions of this ...

Page 22: ...be scattered effectively When you have been cutting for several minutes please stop the mower and clean the blade and the deck 9 Do not remove grass debris in the mower casing or on the blade by hand or with your feet Instead use suitable tools such as a brush or broom Emptying the grass bag As soon as grass clippings start to trail the lawnmower it is time to empty the grass bag NOTE Before takin...

Page 23: ...r and the blade mount When checking tilt the lawnmower onto its left side opposite the oil filler neck NOTE Before placing the lawnmower on its side fully drain the fuel tank using a gas extraction pump Do not tilt the lawnmower by more than 90 degrees Maintenance of the spark plug As shown in Fig 21 1 Once the engine has cooled pull off the spark cover with a twist 2 Remove the spark plug using a...

Page 24: ...eze the foam element in a clean cloth 5 Install the foam element 6 Close the cover Changing the engine oil Tilt the lawnmower towards the oil filler Have a container ready to catch the oil and remove the dipstick Once the oil has been emptied replace the dipstick and wipe clean any spillages Refill with 470 mL SAE30 oil or equivalent ie SAE5W 30 SAE10W 30 To ensure the correct oil level replace di...

Page 25: ...dition WARNING If the blade is cracked or damaged replace it with a new one WARNING Don t hold the blade by hand directly NOTE Maintain the sharpness of the blade when cutting grass If the blade has worn excessively and become pitted and blunt it should be replaced or sharpened The sharpness of the blade will affect the performance of the lawnmower For safety reasons we recommend that the blade on...

Page 26: ...te the lawnmower it may not start correctly and may need to be serviced CAUTION Do not empty the gas tank in enclosed areas near fire or when smoking Gas fumes can cause explosions and fire 1 Empty the gas tank with a gas suction pump if available 2 Start the engine and let it run until any remaining gas has been used up 3 Change the oil at the end of every season To do so remove the used engine o...

Page 27: ...ne oil from the warm engine Remove the spark plug cover from the spark plug Clean the cooling fins of the cylinder and the housing Use the original packaging to ship whenever possible Air filter Spark plug Engine oil 12 hours of use Clean Check Check 24 hours of use Clean Clean Replace 36 hours of use Replace Replace Check 26 STORING AND MAINTENANCE model no 060 0190 2 I contact us 1 844 428 7277 ...

Page 28: ...s which cannot be rectified with the aid of following table may be rectified by a specialist company only customer service centre Please be aware that any improper repairs will also invalidate the warranty and additional costs may be incurred Use only genuine spare parts Only these spare parts are designed and suitable for the product The use of other spare parts not only voids the warranty you ca...

Page 29: ... Blade is worn Grass bag is clogged Cutting height is not right The lawn grass is wet Discharge channel housing is blocked Underside of the mower deck is clogged Tighten screws Tighten blade fasteners Replace blade Press start stop lever Replace spark plug Have the blade replaced at a customer service centre Refill with fuel Remove plug and dry Clean the air filter Clean the spark plug Sharpen the...

Page 30: ...EXPLODED VIEW 29 EXPLODED VIEW ...

Page 31: ...ith flange 35 36 37 38 39 40 41 42 43 44 45 46 47 48 49 50 51 52 53 54 55 56 57 58 59 60 61 62 63 64 65 66 67 68 rear wheel corrugated gasket φ12 plastic shaft bush rear shaft spring hook self locking nut M6 connecting rod pull spring circlip 8 height adjustment spring height adjustment lever height adjustment handle self tapping screw ST4 8X16 safe flap engine fixing bolt front shaft flat key bla...

Page 32: ...t apply to normal wear and tear or to expendable parts or accessories that may be supplied with the product that are expected to become inoperative or unusable after a reasonable period of use d this warranty will not apply to routine maintenance and consumable items such as but not limited to fuel lubricants vacuum bags blades belts sandpaper bits fluids tune ups or adjustments e this warranty wi...

Page 33: ... the sale use or inability to use this product Notice to Consumer This warranty gives you specific legal rights and you may have other rights which may vary from province to province The provisions contained in this warranty are not intended to limit modify take away from disclaim or exclude any statutory warranties set forth in any applicable provincial or federal legislation Made in China Import...

Page 34: ......

Page 35: ...Liste des pièces Utilisation prévue Consignes de sécurité Assemblage Réglage Utilisation Entreposage et entretien Dépannage Vue éclatée Garantie 35 36 38 39 44 50 51 56 61 63 65 N de modèle 060 0190 2 I Nous joindre 1 844 428 7277 34 TABLE DES MATIÈRES CONSERVEZ CES CONSIGNES Ce guide contient des consignes de sécurité et d utilisation importantes Lisez et respectez toutes les instructions lorsque...

Page 36: ...auteur Diamètre de la roue avant Diamètre de la roue arrière Système d allumage Réservoir de carburant Réservoir d huile Type de bougie d allumage Poids Cylindre unique à quatre temps 140 cm3 2 2 kW 3 600 tr min 3 200 tr min 20 po 51 cm 60 L 4 15 à 4 97 pi lb 1 1 4 po à 3 3 4 po 3 1 à 9 5 cm 8 po 20 cm 12 po 30 cm TCI 0 8 L 0 47 L QC12YC CHAMPION 74 lb 8 oz 33 8 kg 35 FICHE TECHNIQUE ...

Page 37: ...e the risk of electric shock Do not abuse the cord Never use the cord for carrying pulling or unplugging the power tool Keep cord away from heat oil sharp edges or moving parts Damaged or entangled cords increase the risk of electric shock When operating a power tool outdoors use an extension cord suitable for outdoor use Use of a cord suitable for outdoor use reduces the risk of electric shock If...

Page 38: ...ents changing accessories or storing power tools Such preventive safety measures reduce the risk of starting the power tool accidentally Store idle power tools out of the reach of children and do not allow persons unfamiliar with the power tool or these instructions to operate the power tool Power tools are dangerous in the hands of untrained users Maintain power tools Check for misalignment or bi...

Page 39: ...loss The label on your tool may include the following symbols The symbols and their definitions are as follows V Volts A Amperes Hz Hertz W Watts min Minutes Alternating current Direct current n0 No load speed Class II Construction min Revolutions or reciprocations per minute Grounding terminal BPM Beats per minute SPM Strokes per minute WARNING To reduce the risk of injury user must read instruct...

Page 40: ...és dans ce guide pour attirer votre attention sur certains risques potentiels Les symboles de sécurité et les explications qui les accompagnent doivent être bien compris Les avertisse ments en soi ne préviennent pas les risques et n agissent pas à titre de substituts pour de bonnes méthodes visant à éviter les accidents Symboles d avertissement sur la machine AVERTISSEMENT Afin de réduire le risqu...

Page 41: ...s loin de la conduite d éjection en tout temps 3 Seuls les adultes responsables qui connaissent bien le fonctionnement de cette machine peuvent l utiliser 4 Enlevez de la zone à tondre tout objet s y trouvant comme des pierres des câbles des jouets etc qui pourraient être projetés par la lame Restez derrière la poignée lorsque le moteur tourne 5 Assurez vous que personne ne se trouve dans la zone ...

Page 42: ...proximité de ravins de fossés ou d accotements Vous pourriez perdre l équilibre III ENFANTS Des accidents tragiques peuvent se produire si l utilisateur n est pas attentif à la présence des enfants Les enfants sont souvent attirés par l appareil et l activité de tonte Ne tenez jamais pour acquis que les enfants resteront au dernier endroit où vous les avez vues 1 Tenez les enfants à l écart de la ...

Page 43: ...ine dans un endroit clos 2 Gardez toujours les écrous et les boulons bien serrés pour vous assurer que l appareil est en bon état de fonctionne ment 3 Ne retirez ou ne manipulez jamais les dispositifs de sécurité Vérifiez leur bon fonctionnement régulièrement Ne tentez jamais de détourner un dispositif de sécurité ou de réduire la protection fournie par un dispositif de sécurité 4 Nettoyez l herbe...

Page 44: ...t against the workpiece while cutting Use only enough steady pressure on the blade to keep the saw cutting 10 Reduce pressure as the blade comes to the end of the cut 11 Allow the saw to come to a complete stop before removing the blade from the workpiece 12 If sawing fibreglass plaster wallboard or spackling compound clean the saw motor vents frequently with a vacuum or compressed air Always wear...

Page 45: ... 1 Desserrez l écrou et le joint en vous assurant que le joint ondulé est bien monté sur l essieu puis installez la roue et serrez fermement l écrou 2 Installez l autre roue de la même manière Fig 3 Fig 4 44 ASSEMBLAGE N de modèle 060 0190 2 I Nous joindre 1 844 428 7277 ...

Page 46: ...é 2 Dépliez la poignée supérieure et fixez la à la poignée inférieure en utilisant les pinces rapides et les boulons à collet carré de chaque côté Rangez le fil de raccordement Comme illustré dans la figure 7 Reliez le fil de raccordement à la poignée avec la bride du cordon fournie boutons de réglage guide câble bouton de réglage bride du cordon boulon Fig 5 Fig 6 Fig 7 45 ASSEMBLAGE ...

Page 47: ...ez y le sac à herbe 2 Relâchez le volet d éjection pour maintenir le sac à herbe en position Assemblage du déflecteur de déchiquetage Comme illustré dans la figure 9 1 Retirez le sac à herbe 2 Poussez le déflecteur de déchiquetage en plastique vers le volet d éjection jusqu à ce qu il soit verrouillé en place 3 Relâchez le volet Il se refermera et couvrira le déflecteur de déchiquetage Assemblage ...

Page 48: ...he manufacturer or his agent in order to avoid a safety hazard Vérification de l huile moteur et remplissage Comme illustré dans les figures 11 à 13 ATTENTION Les procédures et les réglages qui suivent doivent être effectués avant la mise en marche du moteur Ne tentez pas d effectuer n importe lequel de ces réglages alors que le moteur est en marche ATTENTION Pour éviter tout dommage au moteur cel...

Page 49: ...la goulotte puis faites le tourner d un quart de 1 4 tour pour le fixer voir figure 13 Remplir avec de l essence Comme illustré dans la figure 14 ATTENTION Utilisez toujours de l essence sans plomb fraîche et propre Achetez de l essence en quantité pouvant être utilisée dans une période de 30 jours Ne mélangez jamais de l huile avec de l essence ATTENTION Ne remplissez pas jusqu à la base de la go...

Page 50: ...E15 et l E85 1 Nettoyez la surface autour du bouchon de la goulotte d essence avant d enlever le bouchon Retirez l étiquette d avertissement et vérifiez le niveau de l essence voir figure 14 2 Faites le plein du réservoir si le niveau d essence est bas 3 Faites le plein soigneusement pour éviter tout renversement ou déversement d essence Il ne devrait pas y avoir d essence dans la goulotte de remp...

Page 51: ...otre préférence La poignée se place dans la position désirée De la position 1 à la position 7 les hauteurs de coupe varient de 1 1 4 po à 3 3 4 po 31 à 95 mm Réglage de la fonction requise REMARQUE Cette tondeuse est munie de trois fonctions Vous pouvez changer la fonction en changeant les accessoires installés comme indiqué au tableau suivant installé x retiré Fig 15 Fonction de la tondeuse Ensac...

Page 52: ...ugie d allumage se trouve sur la bougie et qu il y a suffisamment d huile et d essence dans la machine Pour mettre en marche le moteur Comme illustré dans les figures 16 à 18 1 Lors d une mise en marche d un moteur froid appuyez fermement sur l injecteur de départ 3 5 fois AVERTISSEMENT Appuyer sur l injecteur de départ trop de fois pourrait noyer le moteur Lors de la mise en marche d un moteur ch...

Page 53: ...près trois tirs répétez la procédure 4 Une fois le moteur en marche placez le câble de démarreur dans le guide câble voir figure 18 Pour arrêter le moteur Comme illustré dans la figure 19 Relâchez la commande de démarrage d arrêt du moteur La commande retournera à sa position d origine et le moteur s arrêtera immédiatement Fig 17 1 Fig 18 Fig 19 52 UTILISATION N de modèle 060 0190 2 I Nous joindre...

Page 54: ...ougie d allumage voir figure 20 1 3 Après l avoir séchée replacez la bougie d allumage REMARQUE Installez la bougie d allumage soigneusement à la main pour éviter l arrache ment des filets Une fois la bougie bien en place resserrez avec 1 8 à 1 4 de tour de la clé à douille de la bougie d allumage pour comprimer la rondelle 3 Tirez avec une main la commande de démarrage d arrêt du moteur vers la p...

Page 55: ... extrêmement raides 5 Vous obtiendrez de meilleurs résultats si le gazon est sec Le gazon mouillé aura tendance à obstruer la lame et le système de collecte d herbe 6 Le gazon pousse à différentes vitesses selon les différentes périodes de l année N utilisez jamais la plus basse hauteur de coupe pour la première tonte de la saison ou dans des conditions de sécheresse 7 Seul environ un tiers de la ...

Page 56: ...replacez le sac à herbe REMARQUE Si tout résidu d herbe est pris dans la conduite d éjection nettoyez le à l aide d une brosse N utilisez pas vos mains ou vos pieds pour enlever les débris d herbes qui se trouvent sur le carter de la tondeuse ou sur la lame Utilisez plutôt un outil approprié comme une brosse ou un balai Pour assurer que l herbe coupée soit ramassée dans le sac à herbe la conduite ...

Page 57: ...sur la gauche de l autre côté de la goulotte de remplissage de l huile REMARQUE Avant de placer la tondeuse à gazon sur le côté videz entièrement le réservoir de carburant avec une pompe d extraction d essence Ne basculez pas la tondeuse à gazon à plus de 90 degrés Entretien de la bougie d allumage Comme illustré dans la figure 21 1 Une fois le moteur refroidi retirez le capuchon de la bougie avec...

Page 58: ... chiffon propre 5 Installez l élément en mousse 6 Fermez le capuchon Changement de l huile moteur Basculez la tondeuse à gazon vers l orifice de remplissage d huile Ayez un récipient prêt à récupérer l huile et retirez la jauge Une fois l huile vidée replacez la jauge et nettoyez tout déversement Remplissez avec 470 ml d huile SAE30 ou une huile équivalente c à d SAE5W 30 SAE10W 30 Pour vous assur...

Page 59: ...ANTS Remplacez votre lame métallique après 50 heures de tonte ou deux ans selon la première de ces éventualités indépendamment de la condition de la lame AVERTISSEMENT Si la lame est fracturée ou endommagée remplacez la avec une nouvelle lame AVERTISSEMENT Ne tenez pas la lame directement avec vos mains REMARQUE Maintenez le tranchant de la lame lors de la tonte de gazon Si la lame a subi de l usu...

Page 60: ... utilisation de la tondeuse Entreposage à long terme de la tondeuse à gazon Si la tondeuse à gazon doit être entreposée pour plus de 15 jours alors de l entretien d entrepos age doit être effectué sur celle ci Si les étapes qui suivent ne sont pas suivies la prochaine fois que vous utilisez la tondeuse à gazon il se pourrait qu elle ne démarre pas correctement et de l entretien pourrait être requi...

Page 61: ...e la tondeuse à gazon Videz le réservoir d essence Laissez toujours le moteur rouler jusqu à ce qu il ait utilisé l essence restante dans le réservoir Retirez l huile moteur du moteur chaud Retirez la cache de la bougie d allumage de la bougie d allumage Nettoyez les ailettes de refroidissement du cylindre et du boîtier Dans la mesure du possible utilisez l emballage d origine pour expédier Filtre...

Page 62: ...ialisée centre de service à la clientèle soit requise pour les défauts qui ne peuvent pas être rectifiés à l aide du tableau qui suit Veuillez noter que toute réparation non conforme pourrait entraîner l annulation de la garantie et des frais additionnels N utilisez que des pièces de rechange d origine Seules ces pièces de rechange sont conçues pour votre produit et lui conviennent L utilisation d...

Page 63: ...asse La lame est usée Le sac à herbe est bouché La hauteur de la coupe n est pas correcte La pelouse ou le gazon est mouillé e La conduite ou le boîtier d éjection est bloqué Le dessous du plateau de tonte est bouché Serrez les vis Resserrez le matériel de fixation Remplacez la lame Appuyez sur la commande de démarrage d arrêt Remplacez la bougie d allumage Faites remplacer la lame dans un centre ...

Page 64: ...VUE ÉCLATÉE 63 VUE ÉCLATÉE ...

Page 65: ...7 38 39 40 41 42 43 44 45 46 47 48 49 50 51 52 53 54 55 56 57 58 59 60 61 62 63 64 65 66 67 68 roue arrière joint ondulé φ12 bague d arbre en plastique arbre arrière mousqueton écrou auto bloquant M6 tige de connexion ressort de traction anneau de retenue 8 ressort de réglage de la hauteur levier de réglage de la hauteur poignée de réglage de la hauteur vis autotaraudeuse ST4 8X16 volet de sécurit...

Page 66: ...rraient être fournis avec le produit qui doivent cesser de fonctionner ou est devenir inutilisable après une période d utilisation raisonnable d cette garantie ne s applique pas à l entretien périodique aux mises au point et aux réglages ni aux articles consommables tels que entre autres le carburant les lubrifiants les sacs sous vide les lames les courroies le papier abrasif les mèches les liquid...

Page 67: ...l incapacité d utiliser ce produit Avis au consommateur La garantie vous accorde des droits juridiques spécifiques et vous pourriez avoir d autres droits qui peuvent varier d une province à l autre Les dispositions figurant dans la présente garantie ne visent pas à limiter modifier retirer de renoncer à ou exclure toutes garanties légales présentées dans toute loi provinciale ou fédérale en vigueu...

Reviews: