3.2 CNC 11 S
OFTWARE
I
NSTALLATION
With your bench configuration completely powered as described in Section 2.4 and your PC powered up, install the CNC11
Software as follows:
1. Download the latest CNC11 Software version:
The latest version can be found here:
http://www.centroidcnc.com/usersupport/support_files/latest_release/cnc11_latest.zip
2. Copy the downloaded file to your desktop:
Depending on
your Windows 7 settings, the file you downloaded will be displayed as either
cnc11_win7_latest.zip
or
cnc11_win7_latest
. Copy this file to your desktop and then double click on the file from your desktop.
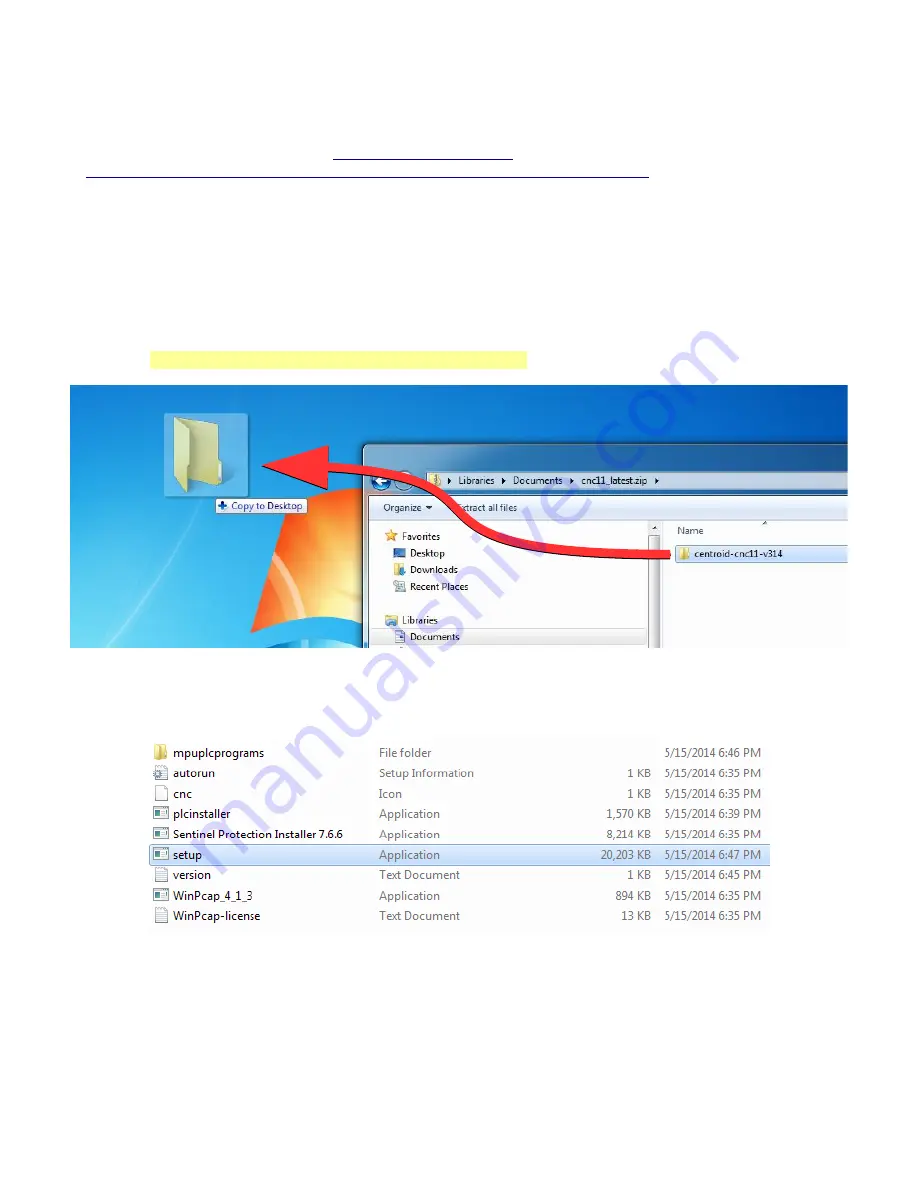
3. Drag the installation folder from the compressed file to your desktop as shown below in Figure 3.2.1:
Enter or extract the cnc11_win7_latest folder, you will see the installation folder inside.
The installation folder in this example is called
centroid-cnc11-v314
. The “v314” signifies the CNC11 version, yours may
be newer, do not use a version lower than v314 with the Oak Board. Copy this to the desktop.
4. Double click the centroid-cnc11-v314 folder. Then double click “setup” to begin CNC11 install as seen in Figure
3.2.2
5.
Windows may ask
“
Do you want to allow the following program from an unknown publisher to make changes on this
computer?
”
Click “
Yes
”.
Page 15 of 72
3.2 CNC 11 Software Installation
T:\_Docs working\Oak Board Manual\Oakboard install manual V2 4-10-15.odt
Figure 3.2.1
Copy to desktop
Figure 3.2.2
Double click
Setup
Summary of Contents for OAK
Page 3: ......


