background image

ENGLISH | 1

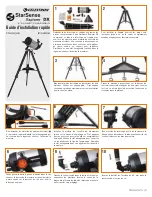
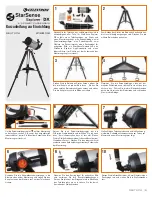
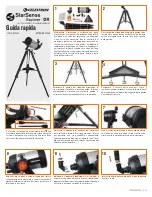
Unpack your telescope and verify that all parts are 
present. Your StarSense Explorer DX includes: 
a telescope tube, a tripod and mount head, an 
accessory bag, slow motion controls, an accessory 
tray, two eyepieces, an erect image diagonal, a 
fi nderscope, a StarSense phone dock, StarSense 
Explorer app code card, and a hex key (hidden inside 
the slot in the front of the mount head).

To set up the tripod, spread the legs outward until 
they are fully extended and push down the center 
leg brace.

ITEM #22463

Extend the legs of the tripod by loosening the three 
hand knobs on each leg.  Pull each leg section all 
the way out and tighten the hand knobs to secure 
them in place. 

ENGLISH

6” SCHMIDT-CASSEGRAIN

Quick Setup Guide

Place the accessory tray on top of the center brace 
and line up the three holes.  Insert the three thumb 
screws through the bottom of the leg brace and 
thread them into the tray.

To attach the slow-motion knobs   to your mount, 
fi rst locate the supplied hex key hidden inside the 
slot in the front of your mount.  

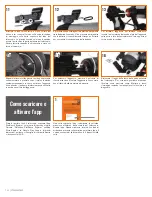
Place the slow-motion control knob over the 
D-shaped gear shaft and push inward to make sure 
it is fully seated. Use the hex key to tighten the 
setscrews onto the gear shaft.  Return the hex key to 
its storage position in the front of the mount.

Hold the telescope tube next to the mount with the 
dovetail bar on the tube facing the clamp on the top 
of the mount arm.  

Slide the dovetail bar into the clamp at the top of 
the mount and tighten the hand knob on the bottom 
of the clamp to secure the telescope in place.

Locate the erect image diagonal and remove the 
plastic covers. Insert the barrel of the diagonal into 
the back of the telescope tube and secure in place 
by tightening the set screws.

Insert the barrel of the 40 mm eyepiece into the 
diagonal and tighten the set screw. 

2

4

5

6

7

8

10

1

3

9

Summary of Contents for 22463

Page 1: ...ee thumb screws through the bottom of the leg brace and thread them into the tray To attach the slow motion knobs to your mount first locate the supplied hex key hidden inside the slot in the front of your mount Place the slow motion control knob over the D shaped gear shaft and push inward to make sure it is fully seated Use the hex key to tighten the setscrews onto the gear shaft Return the hex ...

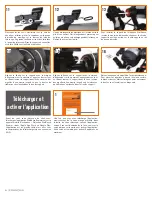
Page 2: ... the dock clockwise until the bayonet mount releases Remove the lens cap from the front of the telescope To observe look through the eyepiece as shown above Focus the image by turning the knob below the eyepiece and diagonal There is a small clear plastic tab inserted between the battery and the contact This was included to prevent the battery from discharging during shipment Pull this out to allo...

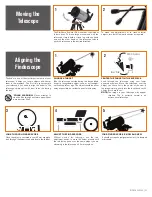
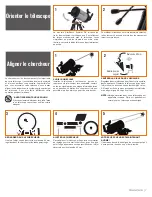
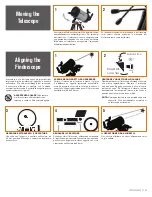
Page 3: ...ur telescope It helps you locate objects and center them in the eyepiece The first time you assemble your telescope you need to align the finder to the telescope s main optics It s best to do this during the day SOLAR WARNING Never attempt to view the Sun through any telescope without a proper solar filter CHOOSE A TARGET Take the telescope outside during the day and find an easily recognizable ob...

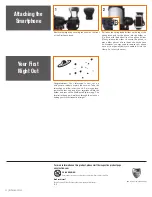
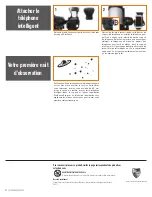
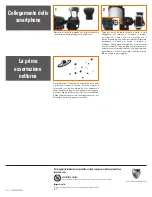
Page 4: ...g loaded slider on the top of the phone dock and set the phone into the holder so it is flush with the bottom lip of the phone holder Slowly release the slider to secure the phone in place Most phones fit into the dock with the case on However you may need to remove your phone case if it is especially bulky or unable to fit into the clamp i e folio style cases For more information on this product ...

Page 5: ...ain dans le dessous de l entretoise et vissez les dans le plateau Pour attacher les molettes de mouvement ralenti à la monture repérez d abord la clef hexagonale qui se trouve dans le logement situé sur l avant de la monture Installez la molette de contrôle de mouvement ralenti sur le moyeu d engrenage en D et appuyez dessus pour vous assurer qu elle est complètement enfoncée Utilisez la clef hexa...

Page 6: ... une montre jusqu à ce que le bouton de libération s enclenche dans le trou du support Retirez le capuchon d objectif de l avant du télescope Pour observer regardez à travers l oculaire comme indiqué ci dessus Mettez l image au point en tournant le bouton sous l oculaire et en diagonale Télécharger et activer l application Avant de sortir votre télescope de chez vous téléchargez l application Star...

Page 7: ...trer dans votre oculaire La première fois que vous assemblez votre télescope vous devez aligner le chercheur avec le système optique principal du télescope Il est plus facile d effectuer cette opération pendant la journée AVERTISSEMENT SUR LE SOLEIL N essayez jamais d observer le soleil à l aide d un télescope sans utiliser un filtre solaire adéquat CHOISIR UNE CIBLE Installez le télescope à l ext...

Page 8: ...licitations Votre télescope est maintenant configuré et vous êtes prêt à explorer le cosmos Sortez avec votre télescope insérez votre oculaire de 40 mm retirez le cache de lentille insérez votre téléphone intelligent dans le support et lancez l application StarSense Explorer Le tutoriel de l application vous expliquera les étapes nécessaires pour trouver votre première cible astronomique Votre pre...

Page 9: ...rauben durch die Unterseite der Beinstrebe und schrauben Sie sie in die Ablage Um die Feineinstellungsregler an Ihrer Montierung zu befestigen suchen Sie zuerst den mitgelieferten Inbusschlüssel der im Schlitz auf der Vorderseite Ihrer Montierung versteckt ist Setzen Sie den Feineinstellungsregler auf die D förmige Getriebewelle und drücken Sie ihn nach innen um sicherzustellen dass er fest sitzt ...

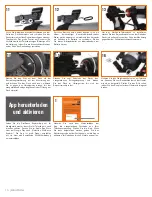
Page 10: ...sinn bis sich der Bajonettverschluss löst Um das StarSense Telefondock zu installieren stecken Sie den Bajonettverschluss an der Seite des Docks in den Anschluss auf der Seite der Montierung gegenüber der Schwalbenschwanzklemme ein App herunterladen und aktivieren Laden Sie die StarSense Explorer App auf Ihr Mobilgerät herunter bevor Sie Ihr Teleskop mit nach draußen nehmen Suchen Sie im Apple App...

Page 11: ...ten Teile Ihres Teleskops Es hilft Ihnen Objekte zu suchen und im Okular zu zentrieren Wenn Sie Ihr Teleskop zum ersten Mal zusammenbauen müssen Sie das Sucherfernrohr auf die Hauptoptik des Teleskops ausrichten Dies tun Sie am besten tagsüber SONNENSTRAHLEN WARNHINWEIS Niemals ohne einen vorschriftsmäßigen Sonnenfilter durch ein Teleskop in die Sonne schauen WÄHLEN SIE EIN ZIEL Nehmen Sie das Tel...

Page 12: ...ckwunsch Nun ist Ihr Teleskop vollständig zusammengebaut und Sie sind bereit den Kosmos zu erforschen Nehmen Sie das Teleskop nach draußen setzen Sie Ihr 40 mm Okular ein entfernen Sie den Objektivdeckel setzen Sie Ihr Smartphone in die Halterung ein und starten Sie die StarSense Explorer App Das Tutorial der App führt Sie durch die Schritte zum Auffinden Ihres ersten astronomischen Ziels Ihre ers...

Page 13: ...ugola fornita in dotazione che è nascosta all interno della fessura nella parte anteriore della montatura Sistemare la manopola di controllo del movimento lento sull asta a forma di D e spingere verso l interno per garantire che sia posizionata correttamente Utilizzare la chiave a brugola per serrare le viti sull asta Riporre la chiave a brugola nel relativo vano nella parte anteriore della montat...

Page 14: ...ario fino al rilascio della montatura a baionetta Rimuovere il tappo della lente dalla parte anteriore del telescopio Per osservare guardare attraverso l oculare come mostrato sopra Mettere a fuoco l immagine ruotando la manopola sotto l oculare e in diagonale Come scaricare e attivare l app Prima di portare fuori il telescopio scaricare l app StarSense Explorer sul proprio dispositivo mobile Cerc...

Page 15: ...OCULARE Guardare attraverso il telescopio utilizzando l oculare con minore ingrandimento Muovere il telescopio fino a quando l oggetto prescelto si trova al centro del campo visivo Se l immagine è sfocata ruotare delicatamente la manopola di messa a fuoco fino a quando non viene messa a fuoco nitida NOTA L immagine del telescopio potrebbe apparire capovolta Ciò è perfettamente normale per un teles...

Page 16: ... portafoglio Collegamento dello smartphone La prima osservazione notturna Congratulazioni Il telescopio è ora configurato e tutto è pronto per esplorare il cosmo Portare all esterno il telescopio inserire l oculare da 40 mm rimuovere il tappo dalla lente inserire lo smartphone nel supporto e avviare l app StarSense Explorer Il tutorial dell app guida l utente attraverso i vari passaggi necessari p...

Page 17: ... inferior del soporte de la pata y enrósquelos en la bandeja Para instalar los mandos de movimiento lento en el soporte localice primero la llave hexagonal incluida oculta en la ranura de la parte anterior del soporte Coloque el mando de control de movimiento lento sobre el eje del engranaje en forma de D y presiónelo hacia dentro para asegurarse de que esté totalmente introducido Use la llave hex...

Page 18: ... liberación naranja y gire el conector en el sentido de las agujas del reloj hasta que el soporte de bayoneta se suelte Saque la tapa de la lente de la parte anterior del telescopio Para observar mire por el ocular como se indica anteriormente Enfoque la imagen girando el mando bajo el ocular y diagonal Descarga y activación de la app Antes de sacar el telescopio al exterior descargue la app StarS...

Page 19: ...ible hacerlo de día AVISO SOLAR No intente nunca observar el sol por un telescopio sin un filtro solar adecuado ELEGIR UN OBJETO Saque el telescopio de día y localice un objeto fácilmente reconocible como una farola una matrícula de coche o una señal El objeto debe estar lo más lejos posible al menos a 400 m AJUSTAR EL LOCALIZADOR Sin mover el telescopio use los dos mandos de ajuste para moverlo h...

Page 20: ...a en la fijación por ejemplo fundas con tapa Su primera noche fuera Felicidades El telescopio está totalmente montado y listo para explorar el cosmos Saque el telescopio al exterior introduzca el ocular de 40 mm saque la tapa de la lente introduzca el teléfono en su soporte y ejecute la app StarSense Explorer El tutorial de la app le guiará por los pasos para localizar su primer objetivo astronómi...

Reviews: