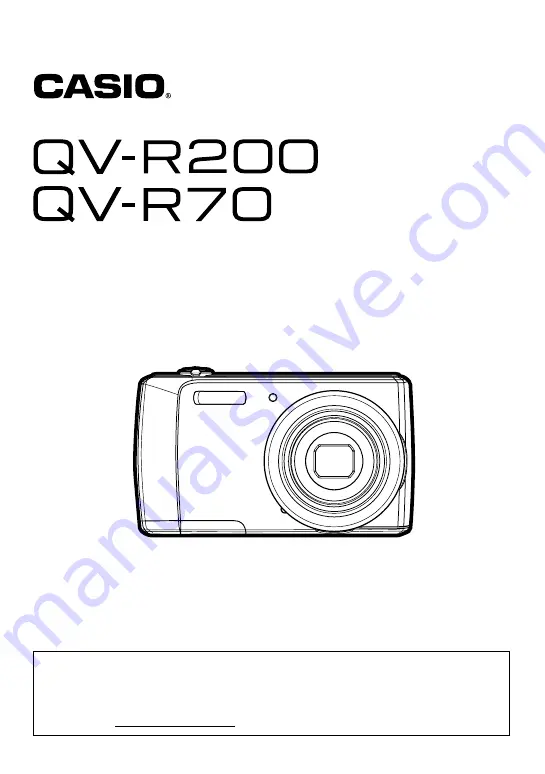
background image

Digital Camera

Thank you for purchasing this CASIO product.

• Before using it, be sure to read the precautions contained in this User’s Guide.
• Keep the User’s Guide in a safe place for future reference.
• For the most up-to-date information about this product, visit the official EXILIM 

Website at http://www.exilim.com/

E

User’s Guide

Summary of Contents for QV-R200

Page 1: ...ore using it be sure to read the precautions contained in this User s Guide Keep the User s Guide in a safe place for future reference For the most up to date information about this product visit the...

Page 2: ...n below are included If anything is missing contact your original retailer Accessories Rechargeable lithium ion battery NP 80 USB AC adaptor AD C53U Power cord Strap USB cable Basic Reference The shap...

Page 3: ...o the use or malfunction of this product CASIO COMPUTER CO LTD shall not be held liable for any damages or lost profits caused by loss of memory contents due to malfunction repair or any other reason...

Page 4: ...Turning the Power On and Off 17 Initial Settings 17 Modes 18 Using the LCD monitor 19 LCD Monitor Layout 19 Changing the LCD Monitor Display 23 Recording Images and Videos 24 Taking Images 24 Setting...

Page 5: ...age 63 Setting File Numbering 64 Setting TV Out 64 Setting Memory Kit 64 Reset All 65 Making Connections 66 Connecting the Camera to a TV 66 Connecting the Camera to a Computer 67 Appendix 70 Precauti...

Page 6: ...a your computer must meet the following system requirements For Windows Windows XP Windows Vista Windows 7 Processor Pentium II 450MHz or above Memory Minimum 512MB RAM Over 1GB recommended HDD space...

Page 7: ...Lens 4Microphone Back View 5LCD monitor 6Movie button 7Menu button 8OK button 4 way navigation control 8 2 4 6 9Playback button bkFUNC Delete button Top View blPOWER button bmZoom dial bnShutter butto...

Page 8: ...n image Zoom dial In Still image record mode rotate the zoom dial counterclockwise to zoom out clockwise to zoom in In Playback mode rotate to zoom in to magnify image or zoom out enter 9 image calend...

Page 9: ...s to start video playback Flash Right 1 In Record mode press to scroll through the Flash mode options Auto Red eye Reduction Forced On Slow Sync and Forced Off 2 In Playback mode press to view the nex...

Page 10: ...rd IMPORTANT Not all cards may be compatible with your camera When purchasing a card please check the card s specifications and take the camera with you Up Face Tracking Rotate 1 In Record mode press...

Page 11: ...thium ion battery NP 80 for power Never try to use any other type of battery 1 Make sure the power is off before inserting the battery 2 Unlock and open the battery memory card compartment at the bott...

Page 12: ...dicated by the arrow in the illustration After the battery pops out pull it the rest of the way out of the camera 2 Insert a new battery You can use either of the two following methods to charge the c...

Page 13: ...pending on charging conditions LED indicator Operation 4 After charging is complete disconnect the USB cable from the camera and then unplug the power cord from the power outlet Indicator Status Descr...

Page 14: ...era to a computer for the first time after you purchase it while the camera is turned on the computer will enter a camera recognition operation If this happens perform the procedure on page 67 After t...

Page 15: ...ult in unexpected accident USB charging devices and power supply devices are subject to fixed standards Use of an inferior device or a device that is not up to standard can cause malfunction and or fa...

Page 16: ...ssociation specification 1 Unlock and open the battery memory card compartment at the bottom of the camera 2 Insert the memory card into the memory card slot with the metallic part facing the back LCD...

Page 17: ...until the LED indicator lights This turns on the camera in the Playback mode The zoom lens is not extended To turn off the camera press the POWER button See Modes on page 18 to know more about Record...

Page 18: ...ing the battery from the camera too soon after configuring time and date settings for the first time can cause the settings to be reset to their factory defaults Do not remove the battery for at least...

Page 19: ...aining Indicates the remaining shots available 6 Battery Indicates battery level 7 Storage media Indicates current storage media in use 8 Movie size Indicates video size 9 Date stamp Indicates date st...

Page 20: ...ing is enabled 23 White balance Displays white balance settings 24 Metering Displays metering settings 25 Sharpness Displays sharpness settings 26 Quality Displays quality settings 27 Photo size Displ...

Page 21: ...e Indicates Playback mode 2 Protect Indicates file is protected 3 File no Total no Indicates the file number over the total number of files in the storage card 4 Battery Indicates battery level 5 Stor...

Page 22: ...e number over the total number of files in the storage card 6 Battery Indicates battery level 7 Storage media Indicates used storage memory 8 Recording date time Displays the date and time of the vide...

Page 23: ...ormation may vary depending on the record mode type The following icons if enabled are still displayed on the LCD even when OSD off or Guideline is on AEB Face tracking Drive mode Stabilizer and Focus...

Page 24: ...s If the shake warning icon appears hold the camera steadily with your arms at your side or use a tripod to stabilize the camera to prevent blurred images Using a combination of 5 times optical zoom a...

Page 25: ...oom out To adjusts the digital zoom 1 Activate digital zoom See Setting the Digital Zoom on page 44 2 Rotating the Zoom dial clockwise counterclockwise optically zooms in out to the maximum until it s...

Page 26: ...OTE The flash function is available only when shooting still images It is not available for the Burst and AEB modes The flash does not charge while the Zoom dial is rotated To enable flash charging re...

Page 27: ...a supports the four focus modes Setting the Focus Mode Normal With normal focus the focus range starts from 15 cm 5 9 Wide Angle When the camera is set to Normal mode there is no icon displayed on the...

Page 28: ...ions Use the 4 or 6 keys to move through the menu selections and then press the OK button to save and apply changes My Mode shows the available Scene Modes with the currently selected Scene Mode highl...

Page 29: ...The table below shows the Photo Size values for still images when selecting Aspect ratio 4 3 The table below shows the Photo Size values for still images when selecting Aspect ratio 3 2 Photo Size Ico...

Page 30: ...oto Size values for still images when selecting Aspect ratio 1 1 Icon Pixel Size Printing Size Suggestion 4320 x 2424 HDTV 3264 x 1832 HDTV 2592 x 1456 HDTV 2048 x 1152 HDTV 640 x 360 E mail Icon Pixe...

Page 31: ...V settings Press the OK button to save and apply changes This sets the white balance for a variety of lighting conditions and permits images to be captured that approach the conditions that are seen b...

Page 32: ...This sets the metering method for calculating the exposure Custom Used when light source cannot be specified Press the Shutter button for the camera to automatically adjust the appropriate white bala...

Page 33: ...ivid The camera captures the image with more contrast and saturation emphasizing on the bold colors Sepia Images are captured in sepia tones B W Images are captured in black and white Vivid Red Captur...

Page 34: ...ng 4 To pause recording press the 8 key 5 To continue recording press the 8 key again 6 To stop recording press the Movie button NOTE When the camera stop recording due to reaching maximum time 29 min...

Page 35: ...n result in too much time being required to record data which can result in breaks in the image and or audio during playback Movie Size Icon Item Description 1280 x 720 HDTV The maximum length of a si...

Page 36: ...setting causes a folder named 100UTUBE to be created for storage of movie files This helps to simplify uploading to YouTube You can catch the first three seconds of action you would have potentially m...

Page 37: ...lose the menu anytime press the Menu button again The Record menu allows you to change modes and setup other capture settings To go to Record Menu Turn on the camera by pressing POWER button 1 Press t...

Page 38: ...e OK button to save and activate the selected Scene mode The table below shows the available Scene mode settings The Scene Mode can also be configured using the Function Menu My Mode setting page 28 S...

Page 39: ...2 keys to go through the selection 3 Press the OK button to save and apply changes The table below shows the available Drive mode settings Setting the Drive Mode Icon Item Description Off Captures an...

Page 40: ...lection 3 Press the OK button to save and apply changes AF stands for Automatic Focus This feature determines the area on which the camera focuses To set AF Area 1 From the Record menu select AF Area...

Page 41: ...Sharpness 1 From the Record menu select Sharpness 2 Use the 8 or 2 keys to go through the selection 3 Press the OK button to save and apply changes The table below shows the available Sharpness settin...

Page 42: ...ration setting for more natural tones To set Saturation 1 From the Record menu select Saturation 2 Use the 8 or 2 keys to go through the selection 3 Press the OK button to save and apply changes The t...

Page 43: ...the image is captured The quality determines the amount of compression applied to your images Fine quality would give you the best images with sharper details and less compression However the higher t...

Page 44: ...and apply changes The table below shows the available Digital Zoom settings NOTE Zoom operation is not available in Face Tracking on and video image record modes The maximum Intelligent zoom scale va...

Page 45: ...nu select Date Stamp 2 Use the 8 or 2 keys to go through the selection 3 Press the OK button to save and apply changes The Auto Review function lets you view the captured image right after shooting it...

Page 46: ...keys to view next previous image video 4 To play a video clip press the OK button See Playing Videos on page 48 for more details This function allows you to view 9 thumbnail images or by calendar mod...

Page 47: ...move through the items 4 Press the OK button to select an image and view it normally NOTE In calendar mode The first file including image video and error file recorded on each date appears on the scr...

Page 48: ...r 6 keys to fast forward or rewind the video The camera supports forward and rewind speed of up to 4x 5 During playback use the Zoom dial to control volume Rotate clockwise right to increase volume Ro...

Page 49: ...frame to capture 2 Press the Shutter button to capture a screenshot 3 The camera stops playback The LCD monitor displays the captured image in Single navigation mode NOTE This feature does not functi...

Page 50: ...Delete button 5 A confirmation selection appears on screen 6 Select Delete 7 Press the OK button to delete 8 The next image is displayed on the LCD monitor To delete another file use the 4 or 6 keys...

Page 51: ...memory or on the memory card Protected files cannot be erased to delete unprotect the file first See Protect on page 54 To delete an image video clip 1 From the Playback menu select Delete 2 The Delet...

Page 52: ...umbnail view on the LCD monitor 2 Use the navigation control to move through the files 3 When the desired image video clip is highlighted press the OK button to mark image video clip for deletion 4 Re...

Page 53: ...r 2 keys to move through the options Select whether to Continue or Exit the slide show 6 Press the OK button to apply selected option To change slide show settings 1 From the Slide show menu use the 8...

Page 54: ...to lock unlock Multi Select multiple files from the thumbnail view to lock unlock Lock all Lock all files Unlock all Unlock all files To protect unprotect a single file 1 Select Single in the Protect...

Page 55: ...n 4 Repeat step 3 until all desired files to protect are marked 5 Press the Menu button A confirmation selection appears 6 Select Yes 7 Press the OK button to lock files and go back to Playback mode T...

Page 56: ...the Playback menu 4 Select Color Mode The Color mode submenu appears 5 Press the 4 or 6 keys to scroll and select an option As you move through the selection the preview on the LCD monitor changes sy...

Page 57: ...launch the Playback menu 4 Select Effect The Effect submenu appears 5 Press the 4 or 6 keys to scroll and select an option As you move through the selection the preview on the LCD monitor changes syn...

Page 58: ...ze as zoom in out 6 Use the navigation control to move the image 7 Press the OK button to apply changes A menu selection appears 8 Select an available setting Overwrite Save and replace the old file w...

Page 59: ...displayed on the LCD monitor 5 Select size among 8M 5M 3M and VGA Available size settings may vary depending on original image size Unavailable settings appear as gray icons in Resize submenu 6 After...

Page 60: ...s the abbreviation for Digital Print Order Format which allows you to embed printing information on your memory card You can select the images to be printed and how many prints to make with the DPOF m...

Page 61: ...u A confirmation message appears 2 Select Yes 3 Press the OK button to reset DPOF settings Radial Blur blurs the area around a point To set Radial blur for an image 1 Press the Menu button to launch t...

Page 62: ...button or 6 key 5 Change the submenu settings using the 4 way navigation control 6 Press the OK button to save and apply settings Use the Sound menu functions to control the sounds produced by the cam...

Page 63: ...nd enters LCD Save mode when no buttons are pressed LCD Save though enabled does not function during video playback slide show and video recording Use the Date Time function to set the date and time o...

Page 64: ...ble settings are NTSC Applicable in USA Canada and others PAL Applicable in Europe Asia excluding Taiwan Oceania and others This utility formats the internal memory or memory card and erases all store...

Page 65: ...he Setup Menu Use this function to reset the camera to its factory settings However the following settings are exceptions and not affected by Reset Date Time Language TV Out Custom White Balance data...

Page 66: ...connect to the camera As an AV cable use the separately sold EMC 7A To connect your camera to a TV 1 Turn on the camera 2 Set the TV out to match the TV s video out format See Setting TV Out on page...

Page 67: ...on the LCD monitor 6 Access the files in the camera by your computer NOTE The camera s internal memory and memory card would display as removable drives in computer After the connection no image is d...

Page 68: ...sta or My Documents Windows XP the next step will overwrite it If you want to keep the existing DCIM folder you need to change its name or move it to a different location before performing the next st...

Page 69: ...ges you want to view 3 Double click the image file you want to view For information about file names see Memory Folder Structure on page 80 An image that was rotated on the camera will be displayed on...

Page 70: ...loss of eyesight Monitor Screen Should the monitor screen ever become cracked never touch any of the liquid inside the monitor screen Doing so creates the risk of skin inflammation Should monitor scr...

Page 71: ...snowing near the ocean or other body of water or in a bathroom 1 Turn off the camera 2 Remove the battery from the camera 3 Contact your dealer or nearest CASIO authorized service center Dropping and...

Page 72: ...an result in corruption or loss of data in camera memory Rechargeable Battery Use only the USB AC adaptor AD C53U or the specified device to charge the battery Attempting to charge the battery by an u...

Page 73: ...battery is to be used by young children make sure that a responsible adult makes them aware of the precautions and proper handling instructions and make sure that they handle the battery correctly Sh...

Page 74: ...following locations In an area exposed to direct sunlight or large amounts of moisture dust or sand Near an air conditioner or in other areas subjected to extreme temperature or humidity Inside of a m...

Page 75: ...s the risk of fire 0 Never plug the power cord into an outlet whose voltage rating is different from that marked on the power cord Doing so creates the risk of fire malfunction and electric shock 0 Ta...

Page 76: ...et images of TV programs live concerts music videos etc that were photographed or recorded by you may infringe upon the rights of others Note that CASIO COMPUTER CO LTD shall not be held liable for us...

Page 77: ...al or even fail Do not tear or remove the battery outer label If a battery provides only very limited operation following a full charge it probably means the battery has reached the end of its service...

Page 78: ...protect switch Use the switch when you need to guard against accidentally deleting data Note however if you write protect an SD memory card you must then turn write protection off whenever you want t...

Page 79: ...g or transferring ownership of the camera Your camera automatically creates specific directory of folders in the internal memory or memory card to organize captured images and videos File names begin...

Page 80: ...py it to your computer If you later decided to return the folder to the camera however be sure to change its name back to DCIM The camera is designed to recognize only a root file with the name DCIM N...

Page 81: ...format is not supported LCD monitor displays Memory full Memory card is full Replace the memory card with a new one or delete unnecessary images LCD monitor displays File locked This file is locked U...

Page 82: ...y power level is too low Change the battery or charge the battery before using the camera LCD monitor Displays Auto Shutdown The camera s protection function may have activated because camera temperat...

Page 83: ...ity 14M 4320x3240 Superfine 5 19MB 7 2669 Fine 3 35MB 11 4225 Normal 2 11MB 17 6310 8M 3264x2448 Superfine 3 12MB 12 4627 Fine 1 82MB 20 7252 Normal 1 26MB 30 10798 5M 2592x1944 Superfine 2 13MB 20 72...

Page 84: ...mate and intended for reference only Actual values depend on the type of image being shot When using a memory card with a different capacity calculate the number of images as a percentage of 16GB Imag...

Page 85: ...Movie 16 9 1280x720 640 640x480 320 320x240 Web 640x480 Effective Pixels 14 10 Megapixels Imaging Element Size 1 2 3 inch square pixel CCD Total Pixels 14 53 Megapixels Lens Focal Distance F2 8 W F6...

Page 86: ...uto Red eye Reduction Forced On Slow Sync Forced Off Flash Range ISO Sensitivity Auto Wide Angle 0 5 m to 1 5 m 1 6 to 4 9 Telephoto 0 6 m to 1 m 2 0 to 3 3 Flash Charging Time Approximately 5 seconds...

Page 87: ...e shot 2 Approximate playback time Standard temperature 23 C 73 F one image scroll approximately every 10 seconds 3 Approximate time for a repeated cycle of 10 minutes recording followed by deletion o...

Page 88: ...Rated Voltage 3 7 V Rated Capacitance 700 mAh Operating Temperature Requirements 0 to 40 C 32 to 104 F Dimensions 31 4 W x 39 5 H x 5 9 D mm 1 24 W x 1 56 H x 0 23 D Weight Approximately 15g 0 53 oz...

Page 89: ...2012 CASIO COMPUTER CO LTD 6 2 Hon machi 1 chome Shibuya ku Tokyo 151 8543 Japan MA1203 A M29...

Reviews: