background image

QV-7000SX

LCD Digital Camera

Owner's Manual

If you need help with 
your camera, please 
call: 1(800)435-7732

2

LOCK

3

2

1

LOCK

1

2

3

QUICK REFERENCE

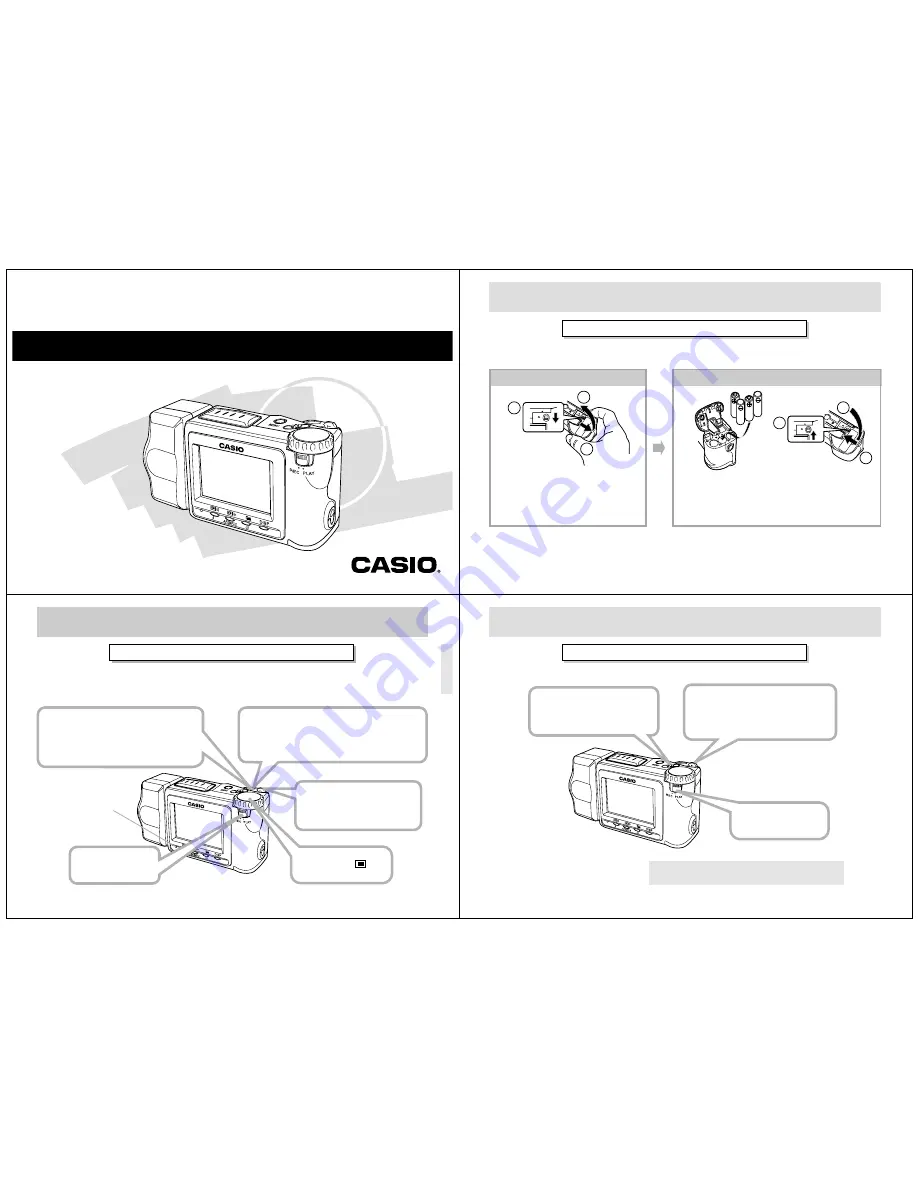
Loading Batteries (page 27)

Be sure to load the four AA size batteries that come with the camera before using it.

• Be sure to use alkaline, lithium or Ni-MH batteries. Never use manganese batteries.
• Make sure the battery compartment cover is locked securely. Failure to do so can result in the cover

opening, creating the danger of personal injury and corruption of image data.

On the bottom of the camera, slide the bat-
tery  compartment  cover  lock  towards  the
front of the camera (

1

1

1

1

1

) to release the cover.

Grasping both sides of the battery compart-
ment cover, swing it open (

2 3

2 3

2 3

2 3

2 3

)

.

Load batteries so their plus (+) and minus (–) ends are facing
as shown in the illustration.

Close the battery compartment cover (

1

1

1

1

1


2

2

2

2

2

), and then slide

the battery compartment cover lock towards the back of the
camera to lock the cover in place (

3

3

3

3

3

).

2

1

3

QUICK REFERENCE

Recording Images (page 37)

Be sure to perform the following operations after replacing batteries or loading batteries for the first time.
• Set the camera’s built-in clock (page 34).

5

1

2

4

3

Slide the Function 
Switch to REC.

Set the dial to 


for normal recording.

After confirming that the Auto Focus 
operation is complete (the operation 
indicator lights green), press the shutter 
button all the way down to record the image. 

Slide the POWER Switch in 
the direction indicated by 
arrow to turn on the camera.

After composing the image on the 
monitor screen, press the shutter but-
ton about half way and hold it there.

* The camera’s Auto Focus feature automatically 

focuses the image.

Operation indicator

4

QUICK REFERENCE

Playing Back Images (page 67)

3

2

1

Slide the POWER Switch in the 
direction indicated by arrow.

• The image you recorded appears 

on the monitor screen.

The camera may contain pre-recorded demonstration images 
when you purchase it. To delete these images, see page 5.

Use [+] and [–] to scroll 
through the images stored 
in camera memory.

Slide the Function 
Switch to PLAY.

Summary of Contents for QV-7000SX

Page 1: ...e back of the camera to lock the cover in place 3 3 3 3 3 2 1 3 QUICK REFERENCE Recording Images page 37 Be sure to perform the following operations after replacing batteries or loading batteries for the first time Set the camera s built in clock page 34 5 1 2 4 3 Slide the Function Switch to REC Set the dial to for normal recording After confirming that the Auto Focus operation is complete the op...

Page 2: ...ck 71 Using Zoom 74 Displaying Multiple Images 75 Auto Play 76 Screen Saver 78 80 EDITING IMAGES Adding a Title to an Image 80 84 USING FOLDERS Recording an Image in a Specific Folder 84 Selecting a Folder to Save Images 84 To Move a Single Image from One Folder to Another 85 To Move All the Contents in One Folder to Another Folder 87 88 IMAGE PROTECTION To Protect and Unprotect a Single Image 88 ...

Page 3: ...om the power outlet Using the camera under these conditions creates the danger of fire and electrical shock After making sure there is no more smoke coming from the camera take it to your nearest CASIO service pro vider for repair Never attempt your own maintenance If the camera s case should ever become cracked due to dropping it or otherwise subjecting it to rough treatment immediately turn powe...

Page 4: ...onditions 1 this device may not cause harmful in terference and 2 this device must accept any interference received in cluding interference that may cause undesired operation NOTICE This equipment has been tested and found to comply with the limits for a Class B peripheral pursuant to Part 15 of the FCC Rules These limits are designed to provide reasonable protection against harmful interference i...

Page 5: ... illustrations show the names of each component button and switch on the camera 1 2 3 5 4 6 7 0 9 8 A LCD MENU button Dial Operation indicator FLASH Tran P SEND button FOCUS Tran P RECEIVE button SELF TIMER FOLDER button DISP button Function Switch 19 GENERAL GUIDE Dial Setup Timer Recording Night Mode Sports Mode Normal Recording Movie Recording Selects power save setup memory page 32 For image r...

Page 6: ... you insert or remove a memory card When inserting a memory card into the camera make sure that the card is oriented correctly Make sure that the correct side of the card is facing up and that you insert the correct end of the card into the camera To insert a memory card into the camera 1 Open the memory card slot cover 2 As shown in the illustra tion slide the memory card into the slot and push i...

Page 7: ...whenever loading or replacing batteries 1 On the bottom of the camera slide the battery compartment cover lock towards the front of the camera 1 1 1 1 1 to release the cover 2 Grasping both sides of the battery compartment cover swing it open 2 2 2 2 2 3 3 3 3 3 3 Load batteries so their plus and minus ends are facing as shown in the illustration 4 Close the battery com partment cover 1 2 1 2 1 2 ...

Page 8: ...camera operation for a specific period See page 32 for details about how you can specify the Auto Power Off time To restore power simply slide the POWER Switch again IMPORTANT The Auto Power Off function does not operate under the following conditions During Auto Play page 76 While the camera is being operated from a computer or printer over a cable connection or infrared connec tion page 100 101 ...

Page 9: ...ges are recorded with the de fault date and time which probably is not your correct current date and time Be sure to correctly set the clock before you use the camera To set the date and time 1 Slide the Function Switch to PLAY 2 Press MENU 3 Use and to select SETUP and then press the shutter button 35 4 Use and to select DATE and then press the shutter button 5 Use and to select ADJUST and then p...

Page 10: ...or screen remaining red When this happens switch to the Manual Mode for fo cusing page 49 Carefully press the shutter button taking care not to move the camera as you do W T NO 39 RECORDING 5 After confirming that the Auto Focus operation is complete operation indicator is green press the shutter button all the way down to record the image Pressing the shutter button releases the shutter even if A...

Page 11: ...on may not work well when the cam era is not pointed directly at the subject or when the subject is far from the camera In the Red eye Reduction Mode the flash is fired au tomatically in accordance with exposure Because of this the flash will not fire in a well lit area White balance is fixed while the flash is being used so the coloring of the recorded image may be affected by sunlight fluorescen...

Page 12: ... This section describes more advanced recording operations that are also provided by this camera Using the Zoom Feature The zoom features let you move in closer on subjects that are located far from the camera You can choose either opti cal zoom or digital zoom or even use them in combination to increase the size of the original image by four or eight times its original size Using Optical Zoom Opt...

Page 13: ...to Focus automatically adjusts in accordance with the movement of the subject 4 After confirming that the Auto Focus operation is complete operation indicator is green press the shutter button all the way down to record the image See Playing Back a Movie on page 68 for details on playing back a movie PAST 1 Slide the Function Switch to REC 2 Align the dial with to select Movie Record ing Mode 3 Co...

Page 14: ... all the way down to record the image When recording images of people on a twilight or night time background you can use the flash in combination with the Night Mode for slow synchro recording IMPORTANT The shutter speed is quite slow in the Night Mode so you should be sure to use a tripod to hold the camera steady Note that the camera shake indicator does not appear in the Night Mode Slow shutter...

Page 15: ...ower During a Timer Operation The monitor screen of the camera turns off between shots of a timer operation If you turn on camera power during this time the message shown below appears and the timer op eration is cancelled Using the Record Menu Normally the camera s automatic features and functions provide the best image recording results The Record Menu lets you set up the camera manually when yo...

Page 16: ...ss the shutter button 4 Use and to select MWB and then press the shutter button 5 Press MENU to start manual white balance set ting Keep the camera pointed at the white piece of paper Pressing the shutter button at this time returns the camera to the white balance setting that was obtained the last time you performed this manual white balance procedure 6 The manual white balance procedure stops au...

Page 17: ...EC selects the Record Mode 2 Use and to scroll through the images stored in camera memory Press to scroll forward and to scroll back Hold ing down either button scrolls at high speed NOTES Sliding the Function Switch to PLAY immediately after recording an image displays the image you just re corded first Pressing the shutter button while a movie or pan orama image is on the monitor screen starts p...

Page 18: ...nt to use as the final image is on the display 9 Press the shutter button to re group the movie images The movie playback screen page 68 appears after the re grouping operation is complete 71 PLAYBACK Pressing the shutter button during panorama play pauses playback Press the shutter button again to re sume playback While panorama playback is paused you can use forward and reverse to move frame by ...

Page 19: ...art of it that you want 7 After you are finished press any button be sides or DISP return the image to its normal size 75 PLAYBACK Enlarged Image Movement Pressing slides the image in the opposite direction NOTE Zooming an image while image information is turned on page 21 an image part indicator appears in the upper right corner to indicate which part of the image is currently on the screen Displ...

Page 20: ...hile the screen saver is turned on Make sure you turn off the screen saver before trying to perform any image transfer operation Note that the screen saver is turned on when you purchase the camera 79 PLAYBACK To turn the screen saver on and off 1 Slide the Function Switch to PLAY 2 Press MENU 3 Use and to select SETUP and then press the shutter button 4 Use and to select SCREEN SAVER and then pre...

Page 21: ...g the shutter button here performs title super impose using the last method you previously se lected EDITING IMAGES 83 9 Use and to select the color you want the plate to be and then press the shutter button Each press of or scrolls through the selec tion of 12 available plate colors 10 Use and to select the position of the title on the image and then press the shutter but ton Each press of or cha...

Page 22: ...on 5 Use and to select MOVE and then press the shutter button 6 Use and to select the folder to which you want to move the im ages and then press the shutter button 7 Use and to select ALL and then press the shutter button To Move All the Contents in One Folder to Another Folder IMPORTANT Select the folder whose images you want to move be fore starting the following procedure 1 Slide the Function ...

Page 23: ...ess the shutter button 6 Use and to select ALL protect or CAN CEL unprotect and then press the shutter button The indicator that is shown in the upper left corner of the images when image information is turned on page 88 indicates they are protected The indicator does not appear when images are not protected IMAGE PROTECTION To Protect and Unprotect All Images on the Memory Card 1 Slide the Functi...

Page 24: ...DELETING IMAGES 95 DELETING IMAGES To Delete All Unprotected Images See Image Protection on page 88 for details on protecting and unprotecting images 1 Slide the Function Switch to PLAY 2 Press MENU 3 Use and to select DELETE and then press the shutter button 4 Use and to select ALL and then press the shutter button IMPORTANT The next step deletes all unprotected images on the memory card To abort...

Page 25: ... the video cable to the cam era and the other end to the television 2 Set up the television for video input See the documentation that comes with the television for information about how to do this 3 Use the operations under Playback on page 67 to playback images on the television screen IMPORTANT A television must have a video input terminal like the one shown in the illustration to connect to th...

Page 26: ...depending on how the equipment was set up by the manufacturer When performing IrTran P data communication with another QV 7000SX camera images are transferred as is without any change in size 1280 x 960 or 640 x 480 pixels When using IrTran P data communication to send im age data to a CASIO QV 770 digital camera QV 7000SX 1280 x 960 images are converted to 640 x 480 images How images are affected...

Page 27: ... Position the cameras so they are 10cm to 30cm 3 9 to 11 8 apart from each other To cancel an image data send operation press MENU 107 INFRARED DATA TRANSFER 5 Use and to select SEND and then press the shutter button 6 Use and to select FOLDER and then press the shutter button 7 Use and to select the destination and then press the shutter button This causes the send standby screen to appear Positi...

Page 28: ...ING CompactFlash CARDS WITH YOUR COMPUTER USING CompactFlash CARDS WITH YOUR COMPUTER Setting Up to Access CompactFlash Card Contents From Your Computer You can use any of the three methods described below to access the contents of a memory card with your computer If you use your computer to change the fixed names of the folders created by this camera the camera will no longer dis play the renamed...

Page 29: ...C EX CHANGE to associate the files on the card with QV LINK or some other application that can open JPEG files 115 USING CompactFlash CARDS WITH YOUR COMPUTER 3 Use and to select SETUP and then press the shutter button 4 Use and to select HTML and then press the shutter button 5 Use and to select ON and then press the shutter button Turning on HTML file generation causes an HTML file to be generat...

Page 30: ...g it 2 Use the Normal Mode for scenery and group shots 3 Use the Macro Mode for close ups Shoot under incandescent or other non fluorescent lighting page 39 Hold the camera correctly making sure that your finger or the wrist strap is not blocking the lens 1 Select the Movie Record Mode page 50 2 Delete images you no longer need from camera memory so there are at least two SUPER FINE images worth o...

Page 31: ...her recording Delete some images from memory card page 92 QVIMG folder or other file page 112 cannot be cre ated due to insufficient memory when downloading data from a computer to the memory card Use your computer to delete unneeded images to free up memory card space for the images you are down loading You could also press the MENU button and format the memory card in the camera but doing so del...

Page 32: ...lowing conditions Flash turned off One zoom slider switching between T Telephoto and W Wide angle Regardless of use of the camera s flash zoom function turning on and off the POWER Switch as well as other operating conditions may affect the above val ues AA size Alkaline Batteries LR6 80 minutes 210 shots Type of Operation Continuous Playback Continuous Recording AA size Lithium Batteries FR6 190 ...

Reviews: