background image

20050401

4-2-1

Quadratic and Cubic Equations

# Internal calculations are performed using a

15-digit mantissa, but results are displayed
using a 10-digit mantissa and a 2-digit
exponent.

# It may take considerable time for the

calculation result of cubic equations to
appear on the display.

# An error occurs if the calculator is unable to find

a solution.

# After calculation is complete, you can press

1

(REPT), change coefficient values, and then

re-calculate.

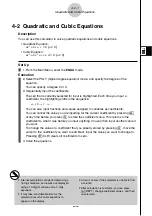
4-2 Quadratic and Cubic Equations

Description

You can use this calculator to solve quadratic equations and cubic equations.

Quadratic Equation:

ax

2

 + 

bx

 + 

c

 = 

(

a


0

)

Cubic Equation:

ax

3

 + 

bx

2

 + 

cx

 + 

(

a


0

)

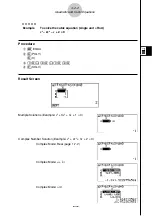
Set Up

1. From the Main Menu, enter the 

EQUA

 mode.

Execution

2. Select the POLY (higher degree equation) mode, and specify the degree of the

equation.
You can specify a degree 2 or 3.

3. Sequentially input the coefficients.

The cell that is currently selected for input is highlighted. Each time you input a
coefficient, the highlighting shifts in the sequence:

a


b


c


 …

You can also input fractions and values assigned to variables as coefficients.

You can cancel the value you are inputting for the current coefficient by pressing 

J

at any time before you press 

w

 to store the coefficient value. This returns to the

coefficient to what it was before you input anything. You can then input another value if
you want.
To change the value of a coefficient that you already stored by pressing 

w

, move the

cursor to the coefficient you want to edit. Next, input the value you want to change to.

Pressing 

3

(CLR) clears all coefficients to zero.

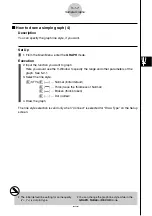
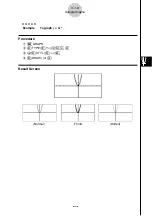
4. Solve the equations.

Summary of Contents for fx-9860G AU PLUS

Page 1: ...fx 9860G AU User s Guide E http edu casio com ...

Page 2: ...Important Please keep your manual and all information handy for future reference ...

Page 3: ... turn the calculator over Remove the back cover from the calculator by pulling with your finger at the point marked 1 2 Load the four batteries that come with the calculator Make sure that the positive and negative ends of the batteries are facing correctly 3 Remove the insulating sheet at the location marked BACK UP by pulling in the direction indicated by the arrow 4 Replace the back cover makin...

Page 4: ...t 5 Use the cursor keys f c d e to select the SYSTEM icon and press w then press 1 to display the contrast adjustment screen 6 Adjust the contrast The e cursor key makes display contrast darker The d cursor key makes display contrast lighter 1 INIT returns display contrast to its initial default 7 To exit display contrast adjustment press m 20060601 ...

Page 5: ...20050401 TURNING POWER ON AND OFF USING MODES BASIC CALCULATIONS REPLAY FEATURE FRACTION CALCULATIONS EXPONENTS GRAPH FUNCTIONS DUAL GRAPH DYNAMIC GRAPH TABLE FUNCTION Quick Start ...

Page 6: ... Press fh Whenever necessary we ve included samples of what your screen should look like If you find that your screen doesn t match the sample you can restart from the begin ning by pressing the All Clear button o TURNING POWER ON AND OFF To turn power on press o To turn power off press o OFF Calculator power turns off automatically if you do not perform any operation within the Auto Power Off tri...

Page 7: ... include mixed arithmetic operators and parentheses the calculator automatically applies true algebraic logic to calculate the result Example 15 3 61 1 Press o to clear the calculator 2 Press bf d gbw Parentheses Calculations Example 15 3 61 1 Press bf d gb w Built In Functions This calculator includes a number of built in scientific functions including trigonometric and logarithmic functions Exam...

Page 8: ...lay feature simply press dor eto recall the last calculation that was performed so you can make changes or re execute it as it is Example To change the calculation in the last example from 25 sin 45 to 25 sin 55 1 Press d to display the last calculation 2 Press d to move the cursor I to the right side of 4 3 Press D to delete 4 4 Press f 5 Press w to execute the calculation again 3 Quick Start SET...

Page 9: ...verting an Improper Fraction to a Mixed Fraction While an improper fraction is shown on the display press Mto convert it to a mixed fraction Press Magain to convert back to an improper fraction Converting a Fraction to Its Decimal Equivalent While a fraction is shown on the display press Mto convert it to its decimal equivalent Press Magain to convert back to a fraction Indicates 871 144 4 Quick S...

Page 10: ...0050401 EXPONENTS Example 1250 2 065 1 Press o 2 Press bcfa c ag 3 Press M and the indicator appears on the display 4 Press f The 5 on the display indicates that 5 is an exponent 5 Press w 5 Quick Start ...

Page 11: ...angle θ distance from origin r All of the following graphing examples are performed starting from the calculator setup in effect immediately following a reset operation Example 1 To graph Y X X 1 X 2 1 Press m 2 Use defc to highlight GRAPH and then press w 3 Input the formula v v b v c w 4 Press 6 DRAW or w to draw the graph Example 2 To determine the roots of Y X X 1 X 2 1 Press 5 G SLV 6 Quick S...

Page 12: ... and the X 1 root obtained for Y X X 1 X 2 1 Press 5 G SLV 6 g 2 Press 3 dx 3 Use dto move the pointer to the location where X 1 and then press w Next use e to move the pointer to the location where X 0 and then press w to input the integration range which becomes shaded on the display 7 Quick Start ...

Page 13: ... X X 1 X 2 Y2 X 1 2 1 Press mcc1 G G to specify G G for the Dual Screen setting 2 Press J and then input the two functions v v b v c w v b cw 3 Press 6 DRAW or w to draw the graphs Box Zoom Use the Box Zoom function to specify areas of a graph for enlargement 1 Press 2 ZOOM 1 BOX 2 Use d e f c to move the pointer to one corner of the area you want to specify and then press w 8 Quick Start SET UP ...

Page 14: ...n the inactive right side screen DYNAMIC GRAPH Dynamic Graph lets you see how the shape of a graph is affected as the value assigned to one of the coefficients of its function changes Example To draw graphs as the value of coefficient A in the following function changes from 1 to 3 Y AX 2 1 Press m 2 Use d e f c to highlight DYNA and then press w 3 Input the formula av A vxw 12356 9 Quick Start ...

Page 15: ... coefficient A 5 Press 2 SET bwdwb wto specify the range and increment of change in coefficient A 6 Press J 7 Press 6 DYNA to start Dynamic Graph drawing The graphs are drawn 10 times To interrupt an ongoing Dynamic Graph drawing operation press o 10 Quick Start ...

Page 16: ...the variables of a function Example To create a number table for the following function Y X X 1 X 2 1 Press m 2 Use defc to highlight TABLE and then press w 3 Input the formula v v b v c w 4 Press 6 TABL to generate the number table To learn all about the many powerful features of this calculator read on and explore 11 Quick Start ...

Page 17: ... 7 MEMORY Mode in the User s Guide You can also transfer data to a computer using the Program Link software FA 124 that comes bundled with the calculator The Program Link software can also be used to backup data to a computer Precautions when Connecting to a Computer A special USB driver must be installed on your computer in order to connect to the calculator The driver is installed along with the...

Page 18: ... gentle when wiping dust off the display to avoid scratching it In no event will the manufacturer and its suppliers be liable to you or any other person for any damages expenses lost profits lost savings or any other damages arising out of loss of data and or formulas arising out of malfunction repairs or battery replacement It is up to you to prepare physical records of data to protect against su...

Page 19: ...llateral incidental or consequential damages in connection with or arising out of the purchase or use of these materials Moreover CASIO Computer Co Ltd shall not be liable for any claim of any kind whatsoever against the use of these materials by any other party The contents of this user s guide are subject to change without notice No part of this user s guide may be reproduced in any form without...

Page 20: ... 2 3 Specifying the Angle Unit and Display Format 2 3 1 2 4 Function Calculations 2 4 1 2 5 Numerical Calculations 2 5 1 2 6 Complex Number Calculations 2 6 1 2 7 Binary Octal Decimal and Hexadecimal Calculations with Integers 2 7 1 2 8 Matrix Calculations 2 8 1 Chapter 3 List Function 3 1 Inputting and Editing a List 3 1 1 3 2 Manipulating List Data 3 2 1 3 3 Arithmetic Calculations Using Lists 3...

Page 21: ...hs and Calculations 6 1 Before Performing Statistical Calculations 6 1 1 6 2 Calculating and Graphing Single Variable Statistical Data 6 2 1 6 3 Calculating and Graphing Paired Variable Statistical Data 6 3 1 6 4 Performing Statistical Calculations 6 4 1 6 5 Tests 6 5 1 6 6 Confidence Interval 6 6 1 6 7 Distribution 6 7 1 Chapter 7 Financial Calculation TVM 7 1 Before Performing Financial Calculat...

Page 22: ... Using the CALC Function 9 7 1 9 8 Using Memory in the S SHT Mode 9 8 1 Chapter 10 eActivity 10 1 eActivity Overview 10 1 1 10 2 Working with eActivity Files 10 2 1 10 3 Inputting and Editing eActivity File Data 10 3 1 10 4 Using Matrix Editor and List Editor 10 4 1 10 5 eActivity File Memory Usage Screen 10 5 1 Chapter 11 System Settings Menu 11 1 Using the System Settings Menu 11 1 1 11 2 System...

Page 23: ...20050401 4 Contents Appendix 1 Error Message Table α 1 1 2 Input Ranges α 2 1 3 Specifications α 3 1 4 Key Index α 4 1 5 P Button In case of hang up α 5 1 6 Power Supply α 6 1 ...

Page 24: ... each function key changes according to the mode the calculator is in and current operation assignments are indicated by function menus that appear at the bottom of the display This user s guide shows the current operation assigned to a function key in parentheses following the key cap for that key 1 Comp for example indicates that pressing 1 selects Comp which is also indicated in the function me...

Page 25: ...ge and to draw graphs RECUR Use this mode to store recursion formulas to generate a Recursion numeric table of different solutions as the values assigned to variables in a function change and to draw graphs CONICS Use this mode to draw graphs of conic sections EQUA Use this mode to solve linear equations with two through six Equation unknowns quadratic equations and cubic equations PRGM Use this m...

Page 26: ...1 1 Keys 1 2 Display 1 3 Inputting and Editing Calculations 1 4 Option OPTN Menu 1 5 Variable Data VARS Menu 1 6 Program PRGM Menu 1 7 Using the Setup Screen 1 8 Using Screen Capture 1 9 When you keep having problems Chapter 1 ...

Page 27: ...20050401 1 1 Keys 1 1 1 Keys ...

Page 28: ... 1 5 11 9 1 2 3 1 6 1 1 1 3 1 4 1 1 5 1 1 2 1 1 7 1 2 4 5 2 4 5 2 4 5 2 4 5 2 4 4 2 4 4 2 4 4 2 4 4 1 3 2 1 3 1 2 1 1 2 1 1 2 1 1 2 1 1 2 2 5 2 1 1 2 1 1 2 4 7 2 1 1 2 4 10 2 4 10 3 1 2 2 6 2 2 4 4 2 8 11 1 8 1 1 3 7 1 3 5 1 3 7 2 4 12 2 4 7 2 1 1 10 3 13 10 3 12 2 4 4 2 4 4 2 2 1 2 4 11 1 1 2 Keys k k k k k Key Table ...

Page 29: ...log l 2 10x l 3 B al The following describes the color coding used for key markings Color Key Operation Orange Press and then the key to perform the marked function Red Press a and then the key to perform the marked function Alpha Lock Normally once you press a and then a key to input an alphabetic character the keyboard reverts to its primary functions immediately If you press and then a the keyb...

Page 30: ...n the lower right corner of the icon Currently selected icon Icon Mode Name Description RUN MAT Use this mode for arithmetic calculations and function Run Matrix calculations and for calculations involving binary octal decimal and hexadecimal values and matrices STAT Use this mode to perform single variable standard deviation Statistics and paired variable regression statistical calculations to pe...

Page 31: ...different solutions as the values assigned to variables in a function change and to draw graphs RECUR Use this mode to store recursion formulas to generate a Recursion numeric table of different solutions as the values assigned to variables in a function change and to draw graphs CONICS Use this mode to draw graphs of conic sections EQUA Use this mode to solve linear equations with two through six...

Page 32: ...e sinh command Direct Command Execution Example Selecting executes the DRAW command k k k k k About Display Screens This calculator uses two types of display screens a text screen and a graph screen The text screen can show 21 columns and 8 lines of characters with the bottom line used for the function key menu The graph screen uses an area that measures 127 W 63 H dots Text Screen Graph Screen Th...

Page 33: ...use the exponent is positive This results in the value 1 200 000 000 000 1 2E 03 indicates that the result is equivalent to 1 2 10 3 This means that you should move the decimal point in 1 2 three places to the left because the exponent is negative This results in the value 0 0012 You can specify one of two different ranges for automatic changeover to normal display Norm 1 10 2 0 01 x x 1010 Norm 2...

Page 34: ...s Indicates 12 34 56 78 In addition to the above this calculator also uses other indicators or symbols which are described in each applicable section of this manual as they come up k k k k k Calculation Execution Indicator Whenever the calculator is busy drawing a graph or executing a long complex calculation or program a black box k flashes in the upper right corner of the display This black box ...

Page 35: ... they are written from left to right and press w to obtain the result Example 1 2 3 4 10 Ac d e baw Example 2 2 5 4 23 5 Ac f e cd f w k Editing Calculations Use the d and e keys to move the cursor to the position you want to change and then perform one of the operations described below After you edit the calculation you can execute it by pressing w Or you can use e to move to the end of the calcu...

Page 36: ...a step Example To change 369 2 to 369 2 Adgj c dD In the insert mode the D key operates as a backspace key 1 3 2 Inputting and Editing Calculations The cursor is a vertical flashing line I when the insert mode is selected The cursor is a horizontal flashing line when the overwrite mode is selected The initial default for Linear input mode is the insert mode You can switch to the overwrite mode by ...

Page 37: ...20050401 1 3 3 Inputting and Editing Calculations u To insert a step Example To change 2 362 to sin2 362 Ac dgx ddddd s u To change the last step you input Example To change 369 3 to 369 2 Adgj d D c ...

Page 38: ...us calculations in sequence from the newest to the oldest Multi Replay Function Once you recall a calculation you can use e and d to move the cursor around the calculation and make changes in it to create a new calculation Example 2 Abcd efgw cde fghw A f One calculation back f Two calculations back 1 3 4 Inputting and Editing Calculations A calculation remains stored in replay memory until you pe...

Page 39: ...hanges db Execute again w k k k k k Using the Clipboard for Copy and Paste You can copy or cut a function command or other input to the clipboard and then paste the clipboard contents at another location u To specify the copy range Linear input mode 1 Move the cursor I to the beginning or end of the range of text you want to copy and then press i CLIP This changes the cursor to 2 Use the cursor ke...

Page 40: ... clipboard u To cut the text 1 Move the cursor I to the beginning or end of the range of text you want to cut and then press i CLIP This changes the cursor to 2 Use the cursor keys to move the cursor and highlight the range of text you want to cut 3 Press 2 CUT to cut the highlighted text to the clipboard The CUT operation is supported for the Linear input mode only It is not supported for the Mat...

Page 41: ... up the Catalog and then selecting the command you want u To use the Catalog to input a command 1 Press e CATALOG to display an alphabetic Catalog list of commands 2 Input the first letter of the command you want to input This will display the first command that starts with that letter 3 Use the cursor keys f c to highlight the command you want to input and then press w Example To use the Catalog ...

Page 42: ...e operations explained in this section be sure to change the Input Mode setting to Math In the Math input mode all input is insert mode not overwrite mode input Note that the D INS operation page 1 3 2 you use in the Linear input mode to switch to insert mode input performs a completely different function in the Math input mode For more information see Inserting a Function into an Existing Express...

Page 43: ...Quadratic Differential 3 Input from MATH menu 2 7 Integral 3 Input from MATH menu 2 8 Σ Calculation 4 Input from MATH menu 2 11 Matrix Input from MATH menu 2 14 5 Parentheses and 1 Braces Used during list input and 1 Brackets Used during matrix input and 1 1 3 9 Inputting and Editing Calculations 1 Mixed fraction is supported in the Math input mode only 2 For information about function input from ...

Page 44: ...nput of absolute value X d dx starts natural input of linear differential dx d f x x a d2 dx2 starts natural input of quadratic differential dx2 d2 f x x a dx starts natural input of integral f x dx a b Σ starts natural input of Σ calculation f x x α β α Σ u Math Input Mode Input Examples This section provides a number of different examples showing how the MATH function menu and other keys can be ...

Page 45: ...20050401 Example 2 To input 1 2 5 2 A b cc f e x w J Example 3 To input 1 x 1dx 0 1 Ab 4 MATH 6 g 1 dx a X b ea fb e w J 1 3 11 Inputting and Editing Calculations ...

Page 46: ... the display window Arrows appear at the left right top or bottom edge of the display to let you know when there is more of the calculation off the screen in the corresponding direction When you see an arrow you can use the cursor keys to scroll the screen contents and view the part you want 1 3 12 Inputting and Editing Calculations ...

Page 47: ...gument of the function you will insert 2 Press D INS This changes the cursor to an insert cursor 3 Press x to insert the function This inserts the function and makes the parenthetical expression its argument u Function Insert Rules The following are the basic rules that govern how a value or expressions becomes the argument of an inserted function If the insert cursor is located immediately to the...

Page 48: ...4 d dx Quadratic Differential 4 MATH 5 d2 dx2 Integral 4 MATH 6 g 1 dx Original Expression Σ Calculation 4 MATH 6 g 2 Σ u Editing Calculations in the Math Input Mode The procedures for editing calculations in the Math input mode are basically the same as those for the Linear input mode For more information see Editing Calculations page 1 3 1 Note however that the following points are different bet...

Page 49: ...ns will be displayed on a MatAns screen which is the same screen used in the Linear input mode Lists are displayed in natural format for up to 20 elements A list that has more than 20 elements will be displayed on a ListAns screen which is the same screen used in the Linear input mode Arrows appear at the left right top or bottom edge of the display to let you know when there is more data off the ...

Page 50: ...ply during input of the Math input mode Certain types of expressions can cause the vertical width of a calculation formula to be greater than one display line The maximum allowable vertical width of a calculation formula is about two display screens 120 dots You cannot input any expression that exceeds this limitation 20060601 ...

Page 51: ...number calculation menu CALC functional analysis menu STAT paired variable statistical estimated value menu HYP hyperbolic calculation menu PROB probability distribution calculation menu NUM numeric calculation menu ANGL menu for angle coordinate conversion DMS input conversion ESYM engineering symbol menu PICT picture memory menu 1 FMEM function memory menu 1 LOGIC logic operator menu CAPT screen...

Page 52: ... input in the GRAPH DYNA TABLE RECUR and EQUA modes List CALC HYP PROB NUM FMEM LOGIC The following shows the function menus that appear under other conditions u Option menu when a number table value is displayed in the TABLE or RECUR mode LMEM list memory menu ENG ENG The meanings of the option menu items are described in the sections that cover each mode 1 4 2 Option OPTN Menu ...

Page 53: ...cale dot value 2 pitch u FACT Recalling zoom factors Xfact Yfact x axis factor y axis factor 1 5 1 Variable Data VARS Menu 1 The EQUA and TVM items appear only when you access the variable data menu from the RUN MAT PRGM or e ACT mode The variable data menu does not appear if you press J while binary octal decimal or hexadecimal is set as the default number system 2 The dot value indicates the dis...

Page 54: ... sum sum of squares sum of products of x data and y data population standard deviation sample standard deviation minimum value maximum value GRPH graph data menu a b c d e regression coefficient and polynomial coefficients r r2 correlation coefficient coefficient of determination MSe mean square error Q1 Q3 first quartile third quartile Med Mod median mode of input data Strt Pitch histogram start ...

Page 55: ...rage memory u DYNA Recalling Dynamic Graph Set Up Data Strt End Pitch coefficient range start value coefficient range end value coefficient value increment u TABL Recalling Table Set Up and Content Data Strt End Pitch table range start value table range end value table value increment Reslt 1 matrix of table contents 1 5 3 Variable Data VARS Menu 1 The Reslt item appears only when the TABL menu is...

Page 56: ...ubic equation u TVM Recalling Financial Calculation Data n I PV PMT FV payment periods installments interest principal payment amount account balance or principal plus interest following the final installment P Y C Y number of installment periods per year number of compounding periods per year 1 5 4 Variable Data VARS Menu 1 An error occurs when there is no function or recursion formula numeric ta...

Page 57: ... command menu REL conditional jump relational operator menu I O I O control transfer command menu multistatement connector The following function key menu appears if you press J PRGM in the RUN MAT mode or the PRGM mode while binary octal decimal or hexadecimal is set as the default number system Prog program recall JUMP REL The functions assigned to the function keys are the same as those in the ...

Page 58: ...one possible example Actual Setup screen contents will differ according to the mode you are in and that mode s current settings 3 Use the f and c cursor keys to move the highlighting to the item whose setting you want to change 4 Press the function key 1 to 6 that is marked with the setting you want to make 5 After you are finished making any changes you want press J to exit the Setup screen k Set...

Page 59: ...onstant graph Y Y Yt Ys y f x y f x y f x y f x inequality graph u Draw Type graph drawing method Con Plot connected points unconnected points u Derivative derivative value display On Off display on display off while Graph to Table Table Graph and Trace are being used u Angle default angle unit Deg Rad Gra degrees radians grads u Complex Mode Real calculation in real number range only a bi r θ rec...

Page 60: ...specification for the calculated residual data u List File list file display settings FILE settings of list file on the display u Sub Name list naming On Off display on display off u Graph Func function display during graph drawing and trace On Off display on display off u Dual Screen dual screen mode status G G GtoT Off graphing on both sides of dual screen graph on one side and numeric table on ...

Page 61: ... On Off locus drawn locus not drawn u Y Draw Speed dynamic graph draw speed Norm High normal high speed u Variable table generation and graph draw settings RANG LIST use table range use list data u Σ Display Σ value display in recursion table On Off display on display off u Slope display of derivative at current pointer location in conic section graph On Off display on display off u Payment paymen...

Page 62: ...n you press the w key to register cell input when the Sequence command generates a number table and when you recall data from List memory u Date Mode number of days per year setting 365 360 interest calculations using 365 1 360 days per year u Auto Calc spreadsheet auto calc On Off execute not execute the formulas automatically u Show Cell spreadsheet cell display mode Form Val formula 2 value u M...

Page 63: ...will capture the screen image and save it in capture memory area named Capt n n the value you input You cannot capture the screen image of a message indicating that an operation or data communication is in progress A memory error will occur if there is not enough room in main memory to store the screen capture u To recall a screen image from capture memory 1 In the RUN MAT mode Linear input mode p...

Page 64: ...de 2 Press 5 RSET 3 Press 1 STUP and then press 1 Yes 4 Press Jm to return to the Main Menu Now enter the correct mode and perform your calculation again monitoring the results on the display k k k k k In Case of Hang Up Should the unit hang up and stop responding to input from the keyboard press the P button on the back of the calculator to reset the calculator to its initial defaults see page α ...

Page 65: ...using the calculator without replacing main batteries power will automatically turn off to protect memory contents Once this happens you will not be able to turn power back on and there is the danger that memory contents will be corrupted or lost entirely You will not be able to perform data communications operations after the low battery message appears 1 9 2 When you keep having problems ...

Page 66: ...ex Number Calculations 2 7 Binary Octal Decimal and Hexadecimal Calculations with Integers 2 8 Matrix Calculations Chapter 2 Linear Math input mode page 1 3 8 Unless specifically noted otherwise all of the operations in this chapter are explained using the Linear input mode When necessary the input mode is indicated by the following symbols Math Math input mode Line Linear input mode ...

Page 67: ...over addition and subtraction Example Operation 23 4 5 53 25 5 23 4 5 53w 56 12 2 5 268 8 56 12 2 5w 2 3 102 500 2 3 1E2w 1 1 2 3 4 5 6 6 6 1 2 3 4 5 6w 100 2 3 4 80 100 2 3 4w 2 3 4 5 29 2 3 4 5w 2 7 2 8 5 65 7 2 8 5 w 3 Line 6 0 3 3 6 4 5 w 4 4 5 10 Math 6c4 5w 1 2i 2 3i 3 5i b c a i c d a i w 2 i 2 i 5 c a i c a i w 1 2 3 E2 does not produce the correct result Be sure to enter this calculation ...

Page 68: ... digit mantissa Use Rnd of the Numeric Calculation Menu NUM page 2 4 1 to round the displayed value off to the number of decimal place and significant digit settings Number of decimal place Fix and significant digit Sci settings normally remain in effect until you change them or until you change the normal display range Norm setting Example 100 6 16 66666666 Condition Operation Display 100 6w 16 6...

Page 69: ...culator employs true algebraic logic to calculate the parts of a formula in the following order 1 Type A functions Coordinate transformation Pol x y Rec r θ Derivatives second derivatives integrations Σ calculations d dx d2 dx2 dx Σ Mat Solve FMin FMax List Mat Seq Min Max Median Mean Augment Mat List P Q R t List RndFix log ab Composite functions 2 fn Yn rn Xtn Ytn Xn 2 1 3 Basic Calculations 1 T...

Page 70: ...rn Dim Identity Sum Prod Cuml Percent AList Abs Int Frac Intg Arg Conjg ReP ImP 7 Abbreviated multiplication format in front of Type A functions Type C functions and parenthesis 2 A log2 etc 3 8 Permutation combination nPr nCr 9 0 Relational operators And logical operator and bitwise operator Or logical operator or xor xnor bitwise operator Example 2 3 log sin2π2 6 8 22 07101691 angle unit Rad 1 2...

Page 71: ... on the display When any result whether intermediate or final or any value in memory exceeds 9 999999999 1099 Ma ERROR When an attempt is made to perform a function calculation that exceeds the input range Ma ERROR When an illegal operation is attempted during statistical calculations Ma ERROR For example attempting to obtain 1VAR without data input When an improper data type is specified for the ...

Page 72: ...input mode each time you press a key either one byte or two bytes is used Some of the functions that require one byte are b c d sin cos tan log In and π Some of the functions that take up two bytes are d dx Mat Xmin If For Return DrawGraph SortA PxIOn Sum and an 1 For details about the number of bytes required for each function in the Math input mode see page 1 3 9 2 1 6 Basic Calculations As you ...

Page 73: ...f calculations Variables are identified by single letter names which are made up of the 26 letters of the alphabet plus r and θ The maximum size of values that you can assign to variables is 15 digits for the mantissa and 2 digits for the exponent u To assign a value to a variable value a variable name w Example To assign 123 to variable A Abcdaav A w Example To add 456 to variable A and store the...

Page 74: ... assign a value of 10 to variables A through F Abaaav A a3 at F w uFunction Memory OPTN FMEM Function memory f1 f20 is convenient for temporary storage of often used expressions For longer term storage we recommend that you use the GRAPH mode for expressions and the PRGM mode for programs STO RCL fn SEE function store function recall function area specification as a variable name inside an express...

Page 75: ...mber 1 K6 g 6 g 3 FMEM 2 RCL bw u To recall a function as a variable daav A w baal B w K6 g 6 g 3 FMEM 3 fn b cw u To display a list of available functions K6 g 6 g 3 FMEM 4 SEE 2 2 3 Special Functions If the function memory number to which you store a function already contains a function the previous function is replaced with the new one The recalled function appears at the current location of th...

Page 76: ... store x3 1 x2 x into function memory and then graph y x3 x2 x 1 Use the following V Window settings Xmin 4 Xmax 4 Xscale 1 Ymin 10 Ymax 10 Yscale 1 m SET UP ccc1 Y J AvMd bK6 g 6 g 3 FMEM 1 STO bw stores x3 1 JAvx v1 STO cw stores x2 x JA 4 SKTCH 1 Cls w 5 GRPH 1 Y K6 g 6 g 3 FMEM 3 fn b 3 fn cw For full details about graphing see 5 Graphing You can also use a to store a function in function memo...

Page 77: ...6 k k k k k Performing Continuous Calculations Answer memory also lets you use the result of one calculation as one of the arguments in the next calculation Example 1 3 1 3 3 Ab dw Continuing dw Continuous calculations can also be used with Type B functions x2 x 1 x page 2 1 4 xy x etc 2 2 5 Special Functions The largest value that the answer memory can hold is 15 digits for the mantissa and 2 dig...

Page 78: ...the sample shown above ffffdDdw The value stored in the answer memory is always dependent on the result produced by the last calculation performed If history contents include operations that use the answer memory editing a calculation may affect the answer memory value used in subsequent calculations If you have a series of calculations that use the answer memory to include the result of the previ...

Page 79: ...y of available numeric value stack or command stack space or if execution of a program subroutine exceeds the capacity of the subroutine stack Example 2 2 7 Special Functions 1 2 3 4 5 b c d e f g h 2 3 4 5 4 Numeric Value Stack Command Stack Calculations are performed according to the priority sequence Once a calculation is executed it is cleared from the stack Storing a complex number takes up t...

Page 80: ...ith colons are executed from left to right without stopping Display Result Command When execution reaches the end of a statement followed by a display result command execution stops and the result up to that point appears on the display You can resume execution by pressing the w key Example 6 9 123 848 7 123 3 2 38 4375 Abcdaav A J PRGM 6 g 5 g j av A J PRGM 5 av A d cw w 2 2 8 Special Functions Y...

Page 81: ...adians 400 grads 90 π 2 radians 100 grads k k k k k Setting the Display Format SET UP Display 1 On the Setup screen highlight Display 2 Press the function key for the item you want to set then press J Fix Sci Norm Eng fixed number of decimal places specification number of significant digits specification normal display Engineering mode u To specify the number of decimal places Fix Example To speci...

Page 82: ...on display Eng mode Press 4 Eng to switch between engineering notation and standard notation The indicator E is on the display while engineering notation is in effect You can use the following symbols to convert values to engineering notation such as 2 000 2 103 2k E Exa 1018 m milli 10 3 P Peta 1015 µ micro 10 6 T Tera 1012 n nano 10 9 G Giga 109 p pico 10 12 M Mega 106 f femto 10 15 k kilo 103 2...

Page 83: ... factorial of the value nPr nCr permutation combination Ran pseudo random number generation 0 to 1 P Q R normal distribution probability P t Q t R t t value of normalized variate t x u u u u u Numeric Calculations NUM OPTN NUM Abs select this item and input a value to obtain the absolute value of the value Int Frac select the item and input a value to extract the integer fraction part Rnd rounds o...

Page 84: ...polar to rectangular coordinate conversion DMS converts decimal value to sexagesimal value u u u u u Engineering Symbol ESYM OPTN ESYM m µ n p f milli 10 3 micro 10 6 nano 10 9 pico 10 12 femto 10 15 k M G T P E kilo 103 mega 106 giga 109 tera 1012 peta 1015 exa 1018 ENG ENG shifts the decimal place of the displayed value three digits to the left right and decreases increases the exponent by three...

Page 85: ...tion To convert 4 25 rad to degrees m SET UP cccccc1 Deg J 243 5070629 4 25K6 g 5 ANGL 2 r w 47 3 82 5rad 4774 20181 47 3 82 5K6 g 5 ANGL 2 r w 2 20 30 39 30 3 00 00 2K6 g 5 ANGL 4 204 30 4 04 394 304 w 5 2 255 2 15 18 2 255K6 g 5 ANGL 6 g 3 DMS w 2 4 3 Function Calculations Once you specify an angle unit it remains in effect until you specify a different one The specification is retained even if ...

Page 86: ...0065242 m SET UP cccccc 1 Deg J s63w π cos rad 0 5 m SET UP cccccc 3 2 Rad J Line c E π 3 w Math c E π c3w tan 35gra 0 6128007881 m SET UP cccccc 3 Gra J t 35w 2 sin 45 cos 65 0 5976724775 m SET UP cccccc 1 Deg J 2 s45 c65w 1 cosec 30 1 2 m SET UP cccccc sin30 1 Deg J Line 1 s30w Math 1cs30w sin 1 0 5 30 m SET UP cccccc x when sinx 0 5 1 Deg J s sin 1 0 5 2 w 2 4 4 Function Calculations 1 can be o...

Page 87: ...4 3 3 3 3 81 3M4w 1 Line 7 1237 1 988647795 7 M x 123w 123 Math M x 7e123w Line 2 3 3 4 10 2 3 3 M x 64 4w 1 64 Math 2 3 M x 3e64e 4w 2 4 5 Function Calculations 1 xy and x take precedence over multiplication and division You cannot use a differential quadratic differential integration Σ maximum minimum value Solve RndFix or log ab calculation expression inside of a log ab calculation term The Lin...

Page 88: ...sh 1 5 sinh 1 5 K6 g 2 HYP 2 cosh 1 5 0 2231301601 1 sinh 1 5w e 1 5 Display 1 5 I Ans w Proof of cosh x sinh x e x cosh 1 20 0 7953654612 Line 15 K6 g 2 HYP 5 cosh 1 20 15 w Math K6 g 2 HYP 5 cosh 1 20c15w Determine the value of x when tanh 4 x 0 88 x tanh 1 0 88 Line 4 K6 g 2 HYP 6 tanh 1 0 88 4w 0 3439419141 Math K6 g 2 HYP 6 tanh 1 0 88c4w 2 4 6 Function Calculations ...

Page 89: ...c4w 8 1 2 3 8 8K6 g 3 PROB 1 x w 40320 3 42 Line 36 42 49 3 36 42 49 w Math 3 36 42 49w What is the absolute value of the common logarithm of log 0 1249387366 Line K6 g 4 NUM 1 Abs l 3 4 w Math 4 MATH 3 Abs l 3c4w What is the integer part of K6 g 4 NUM 2 Int 3 5w 3 5 3 What is the decimal part of K6 g 4 NUM 3 Frac 3 5w 3 5 0 5 What is the nearest integer K6 g 4 NUM 5 Intg 3 5w not exceeding 3 5 4 ...

Page 90: ...ndom w number w Specifying an argument from 1 to 9 generates random numbers based on that sequence Specifying an argument of 0 initializes the sequence 1 Example Operation Ran 1 Generates the first random number in sequence 1 K6 g 3 PROB 4 Ran bw Generates the second random number in sequence 1 w Ran 0 Initializes the sequence 4 Ran aw Ran 1 Generates the first random number in sequence 1 4 Ran bw...

Page 91: ...ayed within a range of 180 θ 180 radians and grads have same range Be sure to specify Comp for Mode in the Setup screen Example Operation Calculate r and θ when x 14 and y 20 7 m SET UP cccccc 1 Deg J K6 g 5 ANGL 6 g 1 Pol 14 20 7 wJ Calculate x and y when r 25 and θ 56 2 Rec 25 56 w 1 24 989 24 98979792 r 2 55 928 55 92839019 θ 1 13 979 13 97982259 x 2 20 725 20 72593931 y ...

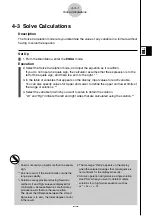
Page 92: ...ble number of different combinations of 4 items that can be selected from among 10 items Formula Operation 10C4 210 10K6 g 3 PROB 3 nCr 4w k k k k k Fractions How you should input fractions depends on the input mode that is currently selected For information about the Math input mode see Input Operations in the Math Input Mode on page 1 3 8 Fraction calculation results are always reduced before be...

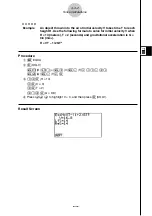
Page 93: ... 6 066202547 10 4 1 1 0 5 0 25 2 2 1 When the total number of characters including integer numerator denominator and delimiter marks exceeds 10 the fraction is automatically displayed in decimal format 2 Calculations containing both fractions and decimals are calculated in decimal format 3 Pressing M once when converting the decimal part of a complex number to a fraction first displays the real pa...

Page 94: ... of digits used in the mixed fraction including integer numerator denominator and separator symbols is greater than 10 k Engineering Notation Calculations Input engineering symbols using the engineering notation menu Be sure to specify Comp for Mode in the Setup screen Example Operation m SET UP f or c 12 times 4 Eng J 999k kilo 25k kilo 999K6 g 6 g 1 EYSM 6 g 1 k 1 024M mega 251 k w 9 10 0 9 900m...

Page 95: ...ere are two different input methods that can be used for Solve calculations direct assignment and variable table input With the direct assignment method the one described here you assign values directly to variables This type of input is identical to that used with the Solve command used in the PRGM mode Variable table input is used with the Solve function in the EQUA mode This input method is rec...

Page 96: ... Calculation in a Graph Function Omitting the tolerance tol value when using the differential command inside of a graph function simplifies the calculation for drawing the graph In such a case precision is sacrificed for the sake of faster drawing The tolerance value is specified the graph is drawn with the same precision obtained when you normally perform a differential calculation You can also o...

Page 97: ...l value and the closing parenthesis can be omitted If you omit tolerance tol value the calculator automati cally uses a value for tol as 1E 10 Specify a tolerance tol value of 1E 14 or greater An error Time Out occurs whenever no solution that satisfies the tolerance value can be obtained In the Math input mode the tolerance value is fixed at 1E 10 and cannot be changed Inaccurate results and erro...

Page 98: ...ol of a differential 2 5 4 Numerical Calculations You cannot use a differential quadratic differential integration Σ maximum minimum value Solve RndFix or log ab calculation expression inside a differential calculation term Pressing A during calculation of a differential while the cursor is not shown on the display interrupts the calculation Always use radians Rad mode as the angle unit when perfo...

Page 99: ...differential coefficient at the point where x 3 for the function y x3 4x2 x 6 Here we will use a tolerance tol 1E 5 Input the function f x AK4 CALC 3 d2 dx2 vMd evx v g Input 3 as point a which is the differential coefficient point d Input the tolerance value bE f w 2 5 5 Numerical Calculations a differential coefficient point tol tolerance d2 d2 f x a f a dx2 dx2 In the function f x only X can be...

Page 100: ...differential calculation for the graph formula see page 2 5 2 Inaccurate results and errors can be caused by the following discontinuous points in x values extreme changes in x values inclusion of the local maximum point and local minimum point in x values inclusion of the inflection point in x values inclusion of undifferentiable points in x values differential calculation results approaching zer...

Page 101: ...r the function y f x where a x b and f x 0 This in effect calculates the surface area of the shaded area in the illustration Example To perform the integration calculation for the function shown below with a tolerance of tol 1E 4 1 5 2x2 3x 4 dx Input the function f x AK4 CALC 4 dx cvx dv e Input the start point and end point b f Input the tolerance value bE e w 2 5 7 Numerical Calculations Area o...

Page 102: ...alculations In the Math input mode the tolerance value is fixed at 1E 5 and cannot be changed In the function f x only X can be used as a variable in expressions Other variables A through Z excluding X r θ are treated as constants and the value currently assigned to that variable is applied during the calculation Input of tol and closing parenthesis can be omitted If you omit tol the calculator au...

Page 103: ...ons produce large fluctuations in integration values calculate the integration divisions separately divide the large fluctuation areas into smaller divisions and then add the results together a b f x dx a x1 f x dx x1 x2 f x dx x4 b f x dx 2 5 9 Numerical Calculations Negative part S Positive part S Pressing A during calculation of an integral while the cursor is not shown on the display interrupt...

Page 104: ... the specified variable changes during a Σ calculation Be sure to keep separate written records of the specified variable values you might need later before you perform the calculation You can use only one variable in the function for input sequence ak Input integers only for the initial term α of sequence ak and last term β of sequence ak Input of n and the closing parentheses can be omitted If y...

Page 105: ...sink k 1 5 etc 2 5 11 Numerical Calculations n n Sn Σ ak Tn Σ bk k 1 k 1 You cannot use a differential quadratic differential integration Σ maximum minimum value Solve RndFix or log ab calculation expression inside of a Σ calculation term Make sure that the value used as the final term β is greater than the value used as the initial term α Otherwise an error will occur To interrupt an ongoing Σ ca...

Page 106: ... u u uMinimum Value K4 CALC 6 g 1 FMin f x a b n a start point of interval b end point of interval n precision n 1 to 9 u u u u uMaximum Value K4 CALC 6 g 2 FMax f x a b n a start point of interval b end point of interval n precision n 1 to 9 Example 1 To determine the minimum value for the interval defined by start point a 0 and end point b 3 with a precision of n 6 for the function y x2 4x 9 Inp...

Page 107: ...aximum minimum calculation term Inputting a larger value for n increases the precision of the calculation but it also increases the amount of time required to perform the calculation The value you input for the end point of the interval b must be greater than the value you input for the start point a Otherwise an error occurs You can interrupt an ongoing maximum minimum calculation by pressing the...

Page 108: ...number menu which contains the following items i imaginary unit i input Abs Arg obtains absolute value argument Conj obtains conjugate ReP ImP real imaginary part extraction r θ a bi converts the result to polar rectangular form 2 6 1 Complex Number Calculations 1 When there is an imaginary number in the argument however complex number calculation is performed and the result is displayed using rec...

Page 109: ...ou can even use parentheses and memory Example 1 1 2i 2 3i AK3 CPLX b c1 i c d1 i w Example 2 2 i 2 i AK3 CPLX c 1 i c 1 i w k k k k k Reciprocals Square Roots and Squares Example 3 i AK3 CPLX x d 1 i w k k k k k Complex Number Format Using Polar Form Example 2 30 3 45 6 75 m SET UP cccccc 1 Deg c3 r θ J Ac v da d v efw You can also use a i in place of K3 CPLX 1 i ...

Page 110: ...th the angle unit set for degrees AK3 CPLX 2 Abs d e1 i w Calculation of absolute value AK3 CPLX 3 Arg d e1 i w Calculation of argument k k k k k Conjugate Complex Numbers OPTN CPLX Conj A complex number of the form a bi becomes a conjugate complex number of the form a bi Example To calculate the conjugate complex number for the complex number 2 4i AK3 CPLX 4 Conj c e1 i w The result of the argume...

Page 111: ...i w Imaginary part extraction 2 6 4 Complex Number Calculations The input output range of complex numbers is normally 10 digits for the mantissa and two digits for the exponent When a complex number has more than 21 digits the real part and imaginary part are displayed on separate lines When either the real part or imaginary part of a complex number equals zero that part is not displayed in rectan...

Page 112: ...LX r θ a bi Use the following procedure to transform a complex number displayed in rectangular form to polar form and vice versa Example To transform the rectangular form of complex number 1 3i to its polar form m SET UP cccccc 1 Deg c2 a bi J Ab x d K3 CPLX 1 i 6 g 3 r θ w Ac v ga K3 CPLX 6 g 4 a bi w ...

Page 113: ...ter a value that is invalid for the number system binary octal decimal hexadecimal you are using the calculator displays an error message The following shows the numerals that can be used in each number system Binary 0 1 Octal 0 1 2 3 4 5 6 7 Decimal 0 1 2 3 4 5 6 7 8 9 Hexadecimal 0 1 2 3 4 5 6 7 8 9 A B C D E F Negative binary octal and hexadecimal values are produced using the two s comple ment...

Page 114: ...0 x FFFFFFFF u u u u u To perform a binary octal decimal or hexadecimal calculation 1 In the main menu select RUN MAT SET UP Mode Dec Hex Bin Oct 2 Press m SET UP c and then specify the default number system by pressing 2 Dec 3 Hex 4 Bin or 5 Oct for the Mode setting 3 Press J to change to the screen for calculation input This causes a function menu with the following items to appear d o LOG DISP ...

Page 115: ...f number system symbols Press the function key that corresponds to the symbol you want to select and then input the value d h b o decimal hexadecimal binary octal u u u u u To input values of mixed number systems Example To input 12310 or 10102 when the default number system is hexadecimal m SET UP c3 Hex J A1 d o 1 d bcdw 3 b babaw k k k k k Arithmetic Operations Example 1 To calculate 101112 110...

Page 116: ...gative of 1100102 m SET UP c4 Bin J A2 LOG 1 Neg bbaabaw uBitwise Operations Example 1 To input and execute 12016 and AD16 m SET UP c3 Hex J Abca2 LOG 3 and AD 1 w 2 7 4 Binary Octal Decimal and Hexadecimal Calculations with Integers 1 See page 2 7 1 2 two s complement 3 one s complement bitwise complement 4 bitwise AND bitwise OR bitwise XOR bitwise XNOR Negative binary octal and hexadecimal valu...

Page 117: ...display a menu of number system transformation functions Dec Hex Bin Oct transformation of displayed value to its decimal hexadecimal binary octal equivalent u To convert a displayed value from one number system to another Example To convert 2210 default number system to its binary or octal value A m SET UP c2 Dec J 1 d o 1 d ccw J3 DISP 3 Bin w 4 Oct w 2 7 5 Binary Octal Decimal and Hexadecimal C...

Page 118: ...Absolute value integer part extraction fractional part extraction maximum integer calculations Matrix modification using matrix commands The maximum number of rows that can be specified for a matrix is 255 and the maximum number of columns is 255 About Matrix Answer Memory MatAns The calculator automatically stores matrix calculation results in Matrix Answer Memory Note the following points about ...

Page 119: ...en you can input values into the matrix u To specify the dimensions size of a matrix Example To create a 2 row 3 column matrix in the area named Mat B Highlight Mat B c 3 DIM This step can be omitted Specify the number of rows cw Specify the number of columns dw w All of the cells of a new matrix contain the value 0 2 8 2 Matrix Calculations If Memory ERROR remains next to the matrix area name aft...

Page 120: ...o exit the Matrix input screen press J You cannot input complex numbers into the cell of a matrix Displayed cell values show positive integers up to six digits and negative integers up to five digits one digit used for the negative sign Exponential values are shown with up to two digits for the exponent Fractional values are not displayed You can see the entire value assigned to a cell by using th...

Page 121: ...es to delete the matrix or 6 No to abort the operation without deleting anything u To delete all matrices 1 While the Matrix Editor is on the display press 2 DEL A 2 Press 1 Yes to delete all matrices in memory or 6 No to abort the operation without deleting anything 2 8 4 Matrix Calculations The indicator None replaces the dimensions of the matrix you delete Inputting the format or changing the d...

Page 122: ...ars R OP row operation menu ROW DEL INS ADD row delete insert add COL DEL INS ADD column delete insert add EDIT cell editing screen All of the following examples use Matrix A u Row Calculations The following menu appears whenever you press 1 R OP while a recalled matrix is on the display Swap row swap Rw product of specified row and scalar Rw addition of one row and the product of a specified row ...

Page 123: ...r cw 6 EXE orw u u u u u To calculate the scalar multiplication of a row and add the result to another row Example To calculate the product of row 2 of the following matrix and the scalar 4 then add the result to row 3 1 2 Matrix A 3 4 5 6 1 R OP 3 Rw Input multiplier value ew Specify number of row whose product should be calculated cw Specify number of row where result should be added dw 6 EXE or...

Page 124: ...rix A 3 4 5 6 1 R OP 4 Rw Specify number of row to be added cw Specify number of row to be added to dw 6 EXE or w u Row Operations DEL delete row INS insert row ADD add row u To delete a row Example To delete row 2 of the following matrix 1 2 Matrix A 3 4 5 6 c 2 ROW 1 DEL 2 8 7 Matrix Calculations ...

Page 125: ... insert a new row between rows one and two of the following matrix 1 2 Matrix A 3 4 5 6 c 2 ROW 2 INS u To add a row Example To add a new row below row 3 of the following matrix 1 2 Matrix A 3 4 5 6 cc 2 ROW 3 ADD 2 8 8 Matrix Calculations ...

Page 126: ...INS insert column ADD add column u To delete a column Example To delete column 2 of the following matrix 1 2 Matrix A 3 4 5 6 e 3 COL 1 DEL u To insert a column Example To insert a new column between columns 1 and 2 of the following matrix 1 2 Matrix A 3 4 5 6 e 3 COL 2 INS ...

Page 127: ... to display the matrix command menu The following describes only the matrix command menu items that are used for creating matrices and inputting matrix data Mat Mat command matrix specification M L Mat List command assign contents of selected column to list file Det Det command determinant command Trn Trn command transpose matrix command Aug Augment command link two matrices Iden Identity command ...

Page 128: ...1 a22 a2n am1 am2 amn Mat letter A through Z Example 1 To input the following data as Matrix A 1 3 5 2 4 6 b d f c e g aK2 MAT 1 Mat av A w 2 8 11 Matrix Calculations You can also use c Mat in place of K2 MAT 1 Mat The maximum value of both m and n is 255 An error occurs if memory becomes full as you are inputting data You can also use the above format inside a program that inputs matrix data Matr...

Page 129: ...e dimensions of an existing matrix Example 3 To check the dimensions of Matrix A which was input in Example 1 K2 MAT 6 g 2 Dim 6 g 1 Mat av A w The display shows that Matrix A consists of two rows and three columns Since the result of the Dim command is list type data it is stored in ListAns memory You can also use Dim to specify the dimensions of the matrix Example 4 To specify dimensions of 2 ro...

Page 130: ...matrix column to a list file u To assign values to and recall values from an existing matrix OPTN MAT Mat Use the following format with the Mat command to specify a cell for value assignment and recall Mat X m n X matrix name A through Z or Ans m row number n column number Example 1 Assign 10 to the cell at row 1 column 2 of the following matrix 1 2 Matrix A 3 4 5 6 baaK2 MAT 1 Mat av A b c w JJ1 ...

Page 131: ...mple 2 To combine the following two matrices A 1 B 3 2 4 K2 MAT 5 Aug 1 Mat av A 1 Mat al B w 2 8 14 Matrix Calculations The two matrices you combine must have the same number of rows An error occurs if you try to combine two matrices that have different number of rows You can use Matrix Answer Memory to assign the results of the above matrix input and edit operations to a matrix variable To do so...

Page 132: ...cify a column and a list Mat List Mat X m List n X matrix name A through Z or Ans m column number n list number Example To assign the contents of column 2 of the following matrix to list 1 1 2 Matrix A 3 4 5 6 K2 MAT 2 M L 1 Mat av A c aK1 LIST 1 List bw 1 List bw You can also use b List in place of K1 LIST 1 List 2 8 15 Matrix Calculations ...

Page 133: ...n menu 3 Press 2 MAT to display the matrix command menu The following describes only the matrix commands that are used for matrix arithmetic operations Mat Mat command matrix specification Det Det command determinant command Trn Trn command transpose matrix command Iden Identity command identity matrix input All of the following examples assume that matrix data is already stored in memory 2 8 16 M...

Page 134: ... Matrix A from Example 1 by a 2 2 identity matrix AK2 MAT 1 Mat av A 6 g 1 Iden cw Number of rows and columns The two matrices must have the same dimensions in order to be added or subtracted An error occurs if you try to add or subtract matrices of different dimensions For multiplication Matrix 1 Matrix 2 the number of columns in Matrix 1 must match the number of rows in Matrix 2 Other wise an er...

Page 135: ...trix 1 2 Matrix A 3 4 5 6 K2 MAT 4 Trn 1 Mat av A w 2 8 18 Matrix Calculations Determinants can be obtained only for square matrices same number of rows and columns Trying to obtain a determinant for a matrix that is not square produces an error The determinant of a 2 2 matrix is calculated as shown below The determinant of a 3 3 matrix is calculated as shown below A a11 a12 a11a22 a12a21 a21 a22 ...

Page 136: ...olumns can be inverted Trying to invert a matrix that is not square produces an error A matrix with a determinant of zero cannot be inverted Trying to invert a matrix with determinant of zero produces an error Calculation precision is affected for matrices whose determinant is near zero A matrix being inverted must satisfy the conditions shown below The following shows the formula used to invert M...

Page 137: ...atrix operations are performed individually on each cell so calculations may require considerable time to complete The calculation precision of displayed results for matrix calculations is 1 at the least significant digit If a matrix calculation result is too large to fit into Matrix Answer Memory an error occurs You can use the following operation to transfer Matrix Answer Memory contents to anot...

Page 138: ...1 In the RUN MAT mode press m SET UP 1 Math J 2 Press 4 MATH to display the MATH menu 3 Press 1 MAT to display the following menu 2 2 inputs a 2 2 matrix 3 3 inputs a 3 3 matrix m n inputs an m row n column matrix up to 6 6 Example To create a 2 row 3 column matrix 3 m n Specify the number of rows cw Specify the number of columns dw w ...

Page 139: ... a continuation of the example calculation on the previous page be bcceedde bdceee x f eege iw u To assign a matrix created using natural input to a MAT mode matrix Example To assign the calculation result to Mat J c Mat Ans a c Mat a J w Pressing the D key while the cursor is located at the top upper left of the matrix will delete the entire matrix D ...

Page 140: ...al calculations and for graphing 3 1 Inputting and Editing a List 3 2 Manipulating List Data 3 3 Arithmetic Calculations Using Lists 3 4 Switching Between List Files Chapter 3 List 1 List 2 List 3 List 4 List 5 List 26 1 SUB 56 1 107 3 5 4 0 2 37 2 75 6 0 0 3 21 4 122 2 1 0 0 4 69 8 87 4 4 2 0 5 40 16 298 3 0 0 6 48 32 48 6 8 3 0 7 93 64 338 2 9 0 8 30 128 49 8 7 0 0 Element number Display range C...

Page 141: ...tomatically scrolls when the highlighting is located at either edge of the screen The following example is performed starting with the highlighting located at Cell 1 of List 1 1 Input a value and press w to store it in the list dw The highlighting automatically moves down to the next cell for input 2 Input the value 4 in the second cell and then input the result of 2 3 in the next cell ewc dw 3 1 ...

Page 142: ...into another cell The following example shows how to add the values in each row in List 1 and List 2 and input the result into List 3 1 Use the cursor keys to move the highlighting to the name of the list where you want the calculation results to be input 2 Press K and input the expression K1 LIST 1 List b K1 LIST 1 List cw 3 1 2 Inputting and Editing a List You can also use b List in place of K1 ...

Page 143: ...contents you want to edit 2 Press 6 䉯 2 EDIT 3 Make any changes in the data you want u u u u u To delete a cell 1 Use the cursor keys to move the highlighting to the cell you want to delete 2 Press 6 䉯 3 DEL to delete the selected cell and cause everything below it to be shifted up 3 1 3 Inputting and Editing a List The cell delete operation does not affect cells in other lists If the data in the ...

Page 144: ...he delete operation without deleting anything u u u u u To insert a new cell 1 Use the cursor keys to move the highlighting to the location where you want to insert the new cell 2 Press 6 䉯 5 INS to insert a new cell which contains a value of 0 causing everything below it to be shifted down The cell insert operation does not affect cells in other lists If the data in the list where you insert a ce...

Page 145: ...the list you want to name 3 Type in the name and then press w To type in a name using alpha characters press a to enter the ALPHA LOCK mode Example YEAR Y c E v A g R The following operation displays a sub name in the RUN MAT mode b List n a w n list number from 1 to 26 Though you can input up to 8 bytes for the sub name only the characters that can fit within the List Editor cell will be displaye...

Page 146: ...ss 6 䉯 1 TOOL 1 SRT A 2 The prompt How Many Lists appears to ask how many lists you want to sort Here we will input 1 to indicate we want to sort only one list bw 3 In response to the Select List List No prompt input the number of the list you want to sort bw Descending order Use the same procedure as that for the ascending order sort The only difference is that you should press 2 SRT D in place o...

Page 147: ...scending order 1 While the lists are on the screen press 6 䉯 1 TOOL 1 SRT A 2 The prompt How Many Lists appears to ask how many lists you want to sort Here we will sort one base list linked to one other list so we should input 2 cw 3 In response to the Select Base List List No prompt input the number of the list you want to sort into ascending order Here we will specify List 1 bw 4 In response to ...

Page 148: ...t The only difference is that you should press 2 SRT D in place of 1 SRT A You can specify a value from 1 to 6 as the number of lists for sorting If you specify a list more than once for a single sort operation an error occurs An error also occurs if lists specified for sorting do not have the same number of values rows ...

Page 149: ... the following items List L M Dim Fill Seq Min Max Mean Med Aug Sum Prod Cuml A A A A A Note that all closing parentheses at the end of the following operations can be omitted u To transfer list contents to Matrix Answer Memory OPTN LIST L M K1 LIST 2 L M 1 List list number 1 26 1 List list number 1 26 1 List list number 1 26 w You can skip input 1 List in the part of the above operation All the l...

Page 150: ...fy the number of data in the assignment statement and create a list number of data n aK1 LIST 3 Dim 1 List list number 1 26 w n 1 999 Example To create five data items each of which contains 0 in List 1 AfaK1 LIST 3 Dim 1 List bw You can view the newly created list by entering the STAT mode Use the following procedure to specify the number of data rows and columns and the matrix name in the assign...

Page 151: ...4 Fill d 1 List b w The following shows the new contents of List 1 u To generate a sequence of numbers OPTN LIST Seq K1 LIST 5 Seq expression variable name start value end value increment w The result of this operation is stored in ListAns Memory Example To input the number sequence 12 62 112 into a list using the function f x X2 Use a starting value of 1 an ending value of 11 and an increment of ...

Page 152: ...IST 6 g 1 Min 6 g 6 g 1 List list number 1 26 1 List list number 1 26 w The two lists must contain the same number of data items If they don t an error occurs The result of this operation is stored in ListAns Memory Example To find whether List 1 75 16 98 46 56 or List 2 35 59 58 72 67 contains the smallest value K1 LIST 6 g 1 Min 6 g 6 g 1 List b 1 List c w u To find which of two lists contains t...

Page 153: ...irst list is indicated by the value in Cell 1 of the second list etc The two lists must contain the same number of data items If they don t an error occurs K1 LIST 6 g 3 Mean 6 g 6 g 1 List list number 1 26 data 1 List list number 1 26 frequency w Example To calculate the mean of data items in List 1 36 16 58 46 56 whose frequency is indicated by List 2 75 89 98 72 67 AK1 LIST 6 g 3 Mean 6 g 6 g 1...

Page 154: ...median of values in List 1 36 16 58 46 56 whose frequency is indicated by List 2 75 89 98 72 67 AK1 LIST 6 g 4 Med 6 g 6 g 1 List b 1 List c w u u u u u To combine lists OPTN LIST Aug You can combine two different lists into a single list The result of a list combination operation is stored in ListAns memory K1 LIST 6 g 5 Aug 6 g 6 g 1 List list number 1 26 1 List list number 1 26 w Example To com...

Page 155: ...st list number 1 26 w The result of this operation is stored in ListAns Memory Example To calculate the cumulative frequency of each data item in List 1 2 3 6 5 4 AK1 LIST 6 g 6 g 3 Cuml 6 g 1 List bw u To calculate the percentage represented by each data item OPTN LIST K1 LIST 6 g 6 g 4 6 g 1 List list number 1 26 w The above operation calculates what percentage of the list total is represented b...

Page 156: ...List 1 1 3 8 5 4 AK1 LIST 6 g 6 g 5 A bw 3 2 8 Manipulating List Data 2 2 3 6 5 4 100 3 2 3 6 5 4 100 6 2 3 6 5 4 100 5 2 3 6 5 4 100 4 2 3 6 5 4 100 3 1 8 3 5 8 4 5 You can specify the storage location in list memory for a calculation result produced by a list calculation whose result is stored in ListAns memory For example specifying AList 1 List 2 will store the result of AList 1 in List 2 The ...

Page 157: ...ns An error occurs whenever an operation involving any two cells generates a mathematical error k Inputting a List into a Calculation There are two methods you can use to input a list into a calculation u To input a specific list by name 1 Press K to display the first Operation Menu This is the function key menu that appears in the RUN MAT mode when you press K 2 Press 1 LIST to display the List D...

Page 158: ...g list 0 is stored in ListAns Memory 88 u To assign the contents of one list to another list Use a to assign the contents of one list to another list Example 1 To assign the contents of List 3 to List 1 K1 LIST 1 List da1 List bw In place of K1 LIST 1 List d operation in the above procedure you could input eb gf cc Example 2 To assign the list in ListAns Memory to List 1 K1 LIST 1 List Ans a1 List...

Page 159: ...e you input Example To input the value 25 into Cell 2 of List 3 cfaK1 LIST 1 List d c w k Recalling List Contents Example To recall the contents of List 1 K1 LIST 1 List bw The above operation displays the contents of the list you specify and also stores them in ListAns Memory You can then use the ListAns Memory contents in a calculation u To use list contents in ListAns Memory in a calculation Ex...

Page 160: ...ist bvw 3 Graph the data which will produce three graphs k Inputting Scientific Calculations into a List You can use the numeric table generation functions in the TABLE mode to input values that result from certain scientific function calculations into a list To do this first generate a table and then use the list copy function to copy the values from the table to the list Example To use the TABLE...

Page 161: ... ListAns Memory 41 Example To use List 3 65 to perform sin List 3 22 Use radians as the angle unit sK1 LIST 1 List dw 0 158 The resulting list 0 8268 is stored in ListAns Memory 8E 3 In place of the K1 LIST 1 List d operation in the above procedure you could input eb gf cc 1 4 Example To use List 1 2 and List 2 5 to perform List 1List 2 3 6 This creates a list with the results of 14 25 36 K1 LIST ...

Page 162: ...list files u To switch between list files 1 From the Main Menu enter the STAT mode Press m SET UP to display the STAT mode Setup screen 2 Use c to highlight List File 3 Press 1 FILE and then input the number of the list file you want to use Example To select File 3 1 FILE d w All subsequent list operations are applied to the lists contained in the file you select List File 3 in the above example ...

Page 163: ...us linear equations Quadratic and cubic equations Solve calculations From the Main Menu enter the EQUA mode SIML linear equation with 2 to 6 unknowns POLY degree 2 or 3 equation SOLV solve calculation 4 1 Simultaneous Linear Equations 4 2 Quadratic and Cubic Equations 4 3 Solve Calculations 4 4 What to Do When an Error Occurs 4 ...

Page 164: ...ficients The cell that is currently selected for input is highlighted Each time you input a coefficient the highlighting shifts in the sequence a1 b1 c1 an bn cn n 2 to 6 You can also input fractions and values assigned to variables as coefficients You can cancel the value you are inputting for the current coefficient by pressing J at any time before you press w to store the coefficient value This...

Page 165: ...inear equations are solved by inverting the matrix containing the coefficients of the equations For example the following shows the solution x1 x2 x3 of a simultane ous linear equation with three unknowns x1 a1 b1 c1 1 d1 x2 a2 b2 c2 d2 x3 a3 b3 c3 d3 Because of this precision is reduced as the value of the determinant approaches zero Also simultaneous equations with three or more unknowns may tak...

Page 166: ...xecution 2 Select the POLY higher degree equation mode and specify the degree of the equation You can specify a degree 2 or 3 3 Sequentially input the coefficients The cell that is currently selected for input is highlighted Each time you input a coefficient the highlighting shifts in the sequence a b c You can also input fractions and values assigned to variables as coefficients You can cancel th...

Page 167: ...he cubic equation Angle unit Rad x3 2x2 x 2 0 Procedure 1 m EQUA 2 2 POLY 2 3 3 bw cw bwcw 4 1 SOLV Result Screen Multiple Solutions Example x3 3x2 3x 1 0 Complex Number Solution Example x3 2x2 3x 2 0 Complex Mode Real page 1 7 2 Complex Mode a bi Complex Mode r θ ...

Page 168: ...solutions 2 4 Select the variable for which you want to solve to obtain the solution Lft and Rgt indicate the left and right sides that are calculated using the solution 3 1 An error occurs if you input more than one equals sign 2 An error occurs if the solution falls outside the range you specify 3 Solutions are approximated using Newton s method Lft and Rgt values are displayed for confirmation ...

Page 169: ...ch height H Use the following formula to solve for initial velocity V when H 14 meters T 2 seconds and gravitational acceleration is G 9 8 m s2 H VT 1 2 GT2 Procedure 1 m EQUA 2 3 SOLV aM H ac V a T b c a G a T xw 3 bew H 14 aw V 0 cw T 2 j iw G 9 8 4 Press fff to highlight V 0 and then press 6 SOLV Result Screen ...

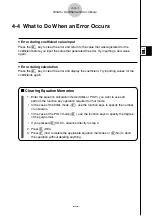
Page 170: ...the coefficients again 4 4 1 What to Do When an Error Occurs k k k k k Clearing Equation Memories 1 Enter the equation calculation mode SIML or POLY you want to use and perform the function key operation required for that mode In the case of the SIML mode 1 use the function keys to specify the number of unknowns In the case of the POLY mode 2 use the function keys to specify the degree of the poly...

Page 171: ...ICS Conic section graphing 5 1 5 5 1 6 5 11 17 5 11 22 RUN MAT Manual graphing 5 6 1 5 6 4 TABLE Number table generation 5 7 1 5 7 16 DYNA Dynamic Graph 5 8 1 5 8 8 RECUR Recursion graphing or number table generation 5 9 1 5 9 10 5 1 Sample Graphs 5 2 Controlling What Appears on a Graph Screen 5 3 Drawing a Graph 5 4 Storing a Graph in Picture Memory 5 5 Drawing Two Graphs on the Same Screen 5 6 M...

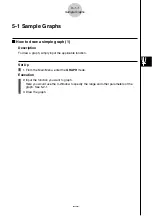
Page 172: ...aph 1 Description To draw a graph simply input the applicable function Set Up 1 From the Main Menu enter the GRAPH mode Execution 2 Input the function you want to graph Here you would use the V Window to specify the range and other parameters of the graph See 5 2 1 3 Draw the graph ...

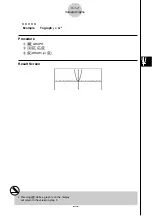
Page 173: ...20050401 5 1 2 Sample Graphs Example To graph y 3x2 Procedure 1 m GRAPH 2 dvxw 3 6 DRAW or w Result Screen Pressing A while a graph is on the display will return to the screen in step 2 ...

Page 174: ...ate expression polar coordinate expression parametric function X constant expression inequality 3 TYPE 1 Y rectangular coordinates 2 r polar coordinates 3 Parm parametric function 4 X c X constant function 5 CONV 1 Y 5 Y changes the function type 6 g 1 Y 4 Y inequality Repeat this step as many times as required to input all of the functions you want Next you should specify which of the functions a...

Page 175: ...401 5 1 4 Sample Graphs Example Input the functions shown below and draw their graphs Y1 2x2 3 r2 3sin2θ Procedure 1 m GRAPH 2 3 TYPE 1 Y cvx dw 3 TYPE 2 r dscvw 3 6 DRAW Result Screen Parametric Inequality ...

Page 176: ...1 From the Main Menu enter the CONICS mode Execution 2 Use the cursor fc keys to specify one of the function type as follows 3 Input values for the required variables 4 Graph the function Graph Type Function Parabola X A Y K 2 H X AY2 BY C Y A X H 2 K Y AX2 BX C Circle X H 2 Y K 2 R2 AX2 AY2 BX CY D 0 Ellipse X H 2 Y K 2 1 A2 B2 Hyperbola X H 2 Y K 2 1 A2 B2 Y K 2 X H 2 1 A2 B2 ...

Page 177: ...20050401 5 1 6 Sample Graphs Example Graph the circle X 1 2 Y 1 2 22 Procedure 1 m CONICS 2 ccccw 3 bwbwcw 4 6 DRAW Result Screen Parabola Ellipse Hyperbola ...

Page 178: ...nge and other parameters of the graph See 5 2 1 3 Select the line style 4 STYL 1 Normal initial default 2 Thick twice the thickness of Normal 3 Broken thick broken 4 Dot dotted 4 Draw the graph The line style selection is valid only when Connect is selected for Draw Type on the Setup screen 5 1 7 Sample Graphs The initial default line setting for an inequality Y Y is dot plot type You can change t...

Page 179: ...20050401 Example To graph y 3x2 Procedure 1 m GRAPH 2 3 TYPE 1 Y dvxw 3 f4 STYL 3 J 4 6 DRAW or w Result Screen Normal Thick Dotted 5 1 8 Sample Graphs ...

Page 180: ...ncrements Xdot Value that corresponds to one x axis dot Ymin Minimum y axis value Ymax Maximum y axis value Yscale Spacing of y axis increments Polar coordinate parameter Tθ min T θ minimum values Tθ max T θ maximum values Tθ ptch T θ pitch 3 Press c to move the highlighting and input an appropriate value for each parameter pressing w after each INIT TRIG STD V Window initial settings initial sett...

Page 181: ...ars the graph currently on the display and replaces it with the new axes only Changing the Xmin or Xmax value causes the Xdot value to be adjusted automatically Changing the Xdot value causes the Xmax value to be adjusted automatically A polar coordinate r or parametric graph will appear coarse if the settings you make in the V Window cause the Tθ ptch value to be too large relative to the differe...

Page 182: ...n angle unit Xmin 3π rad Xmax 3π rad Xscale π 2 rad Xdot π 21 rad Ymin 1 6 Ymax 1 6 Yscale 0 5 u To standardize the V Window The following are the standard V Window settings of this calculator Xmin 10 Xmax 10 Xscale 1 Xdot 0 15873015 Ymin 10 Ymax 10 Yscale 1 Tθ min 0 Tθ max 2π rad Tθ ptch 2π 100 rad In step 3 of the procedure under To initialize the V Window above press 3 STD to standardize V Wind...

Page 183: ... settings in V Window Memory 1 V Win1 u To recall V Window memory settings 1 From the Main Menu enter the GRAPH mode 2 Press 3 V WIN to display the V Window setting screen 3 Press 5 RCL to display the pop up window 4 Press a number key to specify the V Window memory number for the settings you want to recall and then press w Pressing bw recalls the settings in V Window Memory 1 V Win1 5 2 4 Contro...

Page 184: ...a function before graphing it Set Up 1 From the Main Menu enter the GRAPH mode 2 Make V Window settings Execution 3 Specify the function type and input the function The following is the syntax for function input Function Start Point End Point 4 Draw the graph 5 2 5 Controlling What Appears on a Graph Screen ...

Page 185: ...x 4 Use the following V Window settings Xmin 3 Xmax 5 Xscale 1 Ymin 10 Ymax 30 Yscale 5 Procedure 1 m GRAPH 2 3 V WIN dwfwbwc bawdawfwJ 3 3 TYPE 1 Y vx dv c c e w 4 6 DRAW Result Screen You can specify a range when graphing rectangular expressions polar expressions parametric functions and inequalities ...

Page 186: ...the graph to its original size following a zoom opera tion 6 g 2 SQR Graph correction V Window x axis values are corrected so they are identical to the y axis values 6 g 3 RND Coordinate rounding Rounds the coordinate values at the current pointer location 6 g 4 INTG Integer Each dot is given a width of 1 which makes coordinate values integers 6 g 5 PRE Previous V Window parameters are returned to...

Page 187: ...annot be on a straight line vertically or horizontally from each other Example Graph y x 5 x 4 x 3 and then perform a box zoom Use the following V Window settings Xmin 8 Xmax 8 Xscale 2 Ymin 4 Ymax 2 Yscale 1 Procedure 1 m GRAPH 3 V WIN iwiwcwc ewcwbwJ 3 TYPE 1 Y v f v e v d w 6 DRAW 2 2 ZOOM 1 BOX 3 d dw 4 d d f fw Result Screen ...

Page 188: ...ress 2 ZOOM 2 FACT to open a pop up window for specifying the x axis and y axis zoom factor Input the values you want and then press J 3 Press 2 ZOOM 3 IN to enlarge the graph or 2 ZOOM 4 OUT to reduce it The graph is enlarged or reduced centered on the current pointer location 4 Use the cursor keys to move the cursor to the point upon which you want the zoom operation to be centered and then pres...

Page 189: ...axis to see if they are tangent Y1 x 4 x 1 x 3 Y2 3x 22 Use the following V Window settings Xmin 8 Xmax 8 Xscale 1 Ymin 30 Ymax 30 Yscale 5 Procedure 1 m GRAPH 3 V WIN iwiwbwc dawdawfwJ 3 TYPE 1 Y v e v b v d w dv ccw 6 DRAW 2 2 ZOOM 2 FACT fwfwJ 3 2 ZOOM 3 IN 4 f f d dw Result Screen You can repeat factor zoom to enlarge or reduce a graph even further ...

Page 190: ... function type of the selected expression 2 Press the function key that corresponds to the graph type you want to specify k k k k k Storing Graph Functions u To store a rectangular coordinate function Y 2 Example To store the following expression in memory area Y1 y 2x2 5 3 TYPE 1 Y Specifies rectangular coordinate expression cvx f Inputs expression w Stores expression 1 Attempting to draw a graph...

Page 191: ...res x expression dcvw Inputs and stores y expression 1 A function cannot be stored into a memory area that already contains a function of a different type from the one you are trying to store Select a memory area that contains a function that is the same type as the one you are storing or delete the function in the memory area to which you are trying to store 2 You will not be able to store the ex...

Page 192: ...ression u To create a composite function Example To use relations in Y1 and Y2 to create composite functions for Y3 and Y4 Y1 X 1 Y2 X2 3 Assign Y1 Y2 to Y3 and Y2 Y1 to Y4 Y1 Y2 x2 3 1 x2 4 Y2 Y1 X 1 2 3 X 4 X 1 Input relations into Y3 and Y4 3 TYPE 1 Y J4 GRPH 1 Y b 1 Y c w J4 GRPH 1 Y c 1 Y b w A composite function can consist of up to five functions 1 A function cannot be stored into a memory ...

Page 193: ... 0 and 1 to variable A in Y AX2 1 and draw a graph for each value 3 TYPE 1 Y av A vx bw J4 GRPH 1 Y b av A b w J4 GRPH 1 Y b av A a w J4 GRPH 1 Y b av A b w ffff1 SEL 6 DRAW The above three screens are produced using the Trace function See 5 11 Function Analysis for more information 5 3 4 Drawing a Graph 20050901 ...

Page 194: ...ted below Note that the default variable used depends on the memory area type where you are storing the graph function Memory Area Type Default Variable Yn X rn θ Xtn T Ytn T fn X Example Y1 3 and Y1 X 3 are identical values You can also use Dynamic Graph for a look at how changes in coefficients alter the appearance of a graph See 5 8 Dynamic Graphing for more information ...

Page 195: ...eeeeeDd Changes contents w Stores new graph function u To change the line style of a graph function 1 On the Graph relation list screen use f and c to highlight the relation whose line style you want to change 2 Press 4 STYL 3 Select the line style Example To change the line style of y 2x2 3 which is stored in area Y1 to Broken 4 STYL 3 Selects Broken 5 3 6 Drawing a Graph ...

Page 196: ...a Y1 from y 2x2 3 to y 2x2 3 3 TYPE 5 CONV 3 Y Changes the function type to Y u To delete a function 1 While the Graph relation list is on the display press f or c to move the highlighting to the area that contains the function you want to delete 2 Press 2 DEL or D 3 Press 1 Yes to delete the function or 6 No to abort the procedure without deleting anything 5 3 7 Drawing a Graph 1 The function typ...

Page 197: ...x 5 Xscale 1 Ymin 5 Ymax 5 Yscale 1 Tθ min 0 Tθ max π Tθ ptch 2π 60 cf Select a memory area that contains a function for which you want to specify non draw 1 SEL Specifies non draw 6 DRAW or w Draws the graphs You can use the Setup screen settings to alter the appearance of the graph screen as shown below Grid On Axes On Label Off This setting causes dots to appear at the grid intersects on the di...

Page 198: ...o save the graph function and then press w Pressing bw stores the graph function to Graph Memory 1 G Mem1 There are 20 graph memories numbered G Mem1 to G Mem20 u To recall a graph function 1 Press 5 GMEM 2 RCL to display the pop up window 2 Press a number key to specify the Graph memory for the function you want to recall and then press w Pressing bw recalls the graph function in Graph Memory 1 G...

Page 199: ...t 20 u To recall a stored graph 1 After graphing in GRAPH mode press K1 PICT 2 RCL to display the pop up window 2 Press a number key to specify the Picture memory for the picture you want to recall and then press w Pressing bw recalls the picture function in Picture Memory 1 Pict 1 Recalling picture memory contents causes the currently displayed graph to be overwritten Use the sketch Cls function ...

Page 200: ... drawn from a function u u u u u Sub screen The graph on the sub screen is produced by copying or zooming the main screen graph You can even make different V Window settings for the sub screen and main screen Set Up 1 From the Main Menu enter the GRAPH mode 2 On the Setup screen select G G for Dual Screen 3 Make V Window settings for the main screen Press 6 RIGHT to display the sub graph settings ...

Page 201: ...n 2 Ymax 2 Yscale 1 Sub screen Xmin 4 Xmax 4 Xscale 1 Ymin 3 Ymax 3 Yscale 1 Procedure 1 m GRAPH 2 m SET UP cc1 G G J 3 3 V WIN cwcwa fwc cwcwbw 6 RIGHT ewewbwc dwdwbwJ 4 3 TYPE 1 Y v v b v b w 6 DRAW 5 K1 COPY Result Screen 5 5 2 Drawing Two Graphs on the Same Screen Pressing A while a graph is on the display will return to the screen in step 4 ...

Page 202: ...o display the sub graph settings screen Pressing 6 LEFT returns to the main screen setting screen Execution 4 Store the functions for the main screen and sub screen 5 Select the function of the graph that you want to eventually have in the sub screen 6 Draw the graph in the main screen 7 Swap the main screen and sub screen contents 8 Return to the function screen 9 Select the function of the next ...

Page 203: ...min 4 Xmax 4 Xscale 1 Ymin 5 Ymax 5 Yscale 1 Sub screen Xmin 2 Xmax 2 Xscale 0 5 Ymin 2 Ymax 2 Yscale 1 Procedure 1 m GRAPH 2 m SET UP cc1 G G J 3 3 V WIN ewewbwc fwfwbw 6 RIGHT cwcwa fwc cwcwbwJ 4 3 TYPE 1 Y v v b v b w cvx dw 5 ff1 SEL 6 6 DRAW 7 K2 SWAP 8 A 9 1 SEL 0 6 DRAW Result Screen 5 5 4 Drawing Two Graphs on the Same Screen ...

Page 204: ... it to the sub screen Set Up 1 From the Main Menu enter the GRAPH mode 2 On the Setup screen select G G for Dual Screen 3 Make V Window settings for the main screen Execution 4 Input the function and draw the graph in the main screen 5 Use Zoom to enlarge the graph and then move it to the sub screen 5 5 5 Drawing Two Graphs on the Same Screen ...

Page 205: ...arge it Use the following V Window settings Main Screen Xmin 2 Xmax 2 Xscale 0 5 Ymin 2 Ymax 2 Yscale 1 Procedure 1 m GRAPH 2 m SET UP cc1 G G J 3 3 V WIN cwcwa fwc cwcwbwJ 4 3 TYPE 1 Y v v b v b w 6 DRAW 5 2 ZOOM 1 BOX c ce ew f fd dw Result Screen 5 5 6 Drawing Two Graphs on the Same Screen ...

Page 206: ...aw graphs of the following built in scientific functions Rectangular Coordinate Graph sin x cos x tan x sin 1 x cos 1 x tan 1 x sinh x cosh x tanh x sinh 1 x cosh 1 x tanh 1 x x2 log x lnx 10x ex x 1 3 Polar Coordinate Graph sin θ cos θ tan θ sin 1 θ cos 1 θ tan 1 θ sinh θ cosh θ tanh θ sinh 1 θ cosh 1 θ tanh 1 θ θ θ2 log θ lnθ 10θ eθ θ 1 3 θ Input for x and θ variables is not required for a built...

Page 207: ... Graphing Example Graph y 2x2 3x 4 Use the following V Window settings Xmin 5 Xmax 5 Xscale 2 Ymin 10 Ymax 10 Yscale 5 Procedure 1 m RUN MAT 2 3 V WIN fwfwcwc bawbawfwJ 3 4 SKTCH 1 Cls w 5 GRPH 1 Y 4 cvx dv ew Result Screen ...

Page 208: ...aphing of functions produced by an integration calculation The calculation result is shown in the lower left corner of the display and the calculation range is cross plot type Set Up 1 From the Main Menu enter the RUN MAT mode 2 Make V Window settings Execution 3 Input graph commands for the integration graph 4 Input the function ...

Page 209: ...e Graph the integration x 2 x 1 x 3 dx Use the following V Window settings Xmin 4 Xmax 4 Xscale 1 Ymin 8 Ymax 12 Yscale 5 Procedure 1 m RUN MAT 2 3 V WIN ewewbwc iwbcwfwJ 3 4 SKTCH 1 Cls w 5 GRPH 5 G dx 4 v c v b v d c bw Result Screen 1 2 ...

Page 210: ...expres sion and overwrite the resulting graphs on the screen Set Up 1 From the Main Menu enter the GRAPH mode 2 On the Setup screen change the Dual Screen setting to Off 3 Make V Window settings Execution 4 Specify the function type and input the function The following is the syntax for function input Expression containing one variable variable value value value 5 Draw the graph ...

Page 211: ... av A d b b w 5 6 DRAW Result Screen The value of only one of the variables in the expression can change Any of the following cannot be used for the variable name X Y r θ T You cannot assign a variable to the variable inside the function When Simul Graph is turned on all of the graphs for the specified variable values are drawn simultaneously Overwrite can be used when graphing rectangular express...

Page 212: ...ant to graph to the clipboard 2 From the Main Menu enter the GRAPH mode 3 On the Setup screen change the Dual Screen setting to Off 4 Make V Window settings 5 Draw the graph Execution 6 Paste the expression Paste is supported only when Off is selected for the Dual Screen setting on the Setup screen Though there is no limit per se on the number of graphs you can draw by pasting a function the total...

Page 213: ...ste the previously copied function Y X from the clipboard Use the following V Window settings Xmin 5 Xmax 5 Xscale 2 Ymin 10 Ymax 10 Yscale 5 Procedure 1 m RUN MAT a Y v i CLIP ddd1 COPY 2 mGRAPH 3 m SET UP cc3 Off J 4 3 V WIN fwfwcwc bawbawfwJ 5 3 TYPE 1 Y cvx dv ew 6 DRAW 6 j PASTE Result Screen ...

Page 214: ...a numeric table Table range method With this method you specify the conditions for the change in value of the variable List With this method the data in the list you specify is substituted for the x variable to generate a number table u To generate a table using a table range Example To generate a table as the value of variable x changes from 3 to 3 in increments of 1 m TABLE 5 SET dwdwbw The nume...

Page 215: ...generate a table of values for the functions stored in memory areas Y1 and Y3 of the Table relation list Use f and c to move the highlighting to the function you want to select for table generation and press 1 SEL to select it The sign of selected functions is highlighted on the screen To deselect a function move the cursor to it and press 1 SEL again Press 6 TABL to generate a number table using ...

Page 216: ...cludes the derivative to be displayed whenever you generate a number table uSpecifying the function type You can specify a function as being one of three types 2 Rectangular coordinate Y Polar coordinate r Parametric Parm 1 Press 3 TYPE while the relation list is on the screen 2 Press the number key that corresponds to the function type you want to specify 5 7 3 Using Tables Locating the cursor at...

Page 217: ...he change eeeeeeDf w 6 TABL You can specify the graph line style when graphing a connect type graph G CON The line style specification also applies to the GRAPH mode The Function Link Feature automatically reflects any changes you make to functions in the GRAPH mode list and DYNA mode list u To delete a function 1 Use f and c to move the highlighting to the function you want to delete and then pre...

Page 218: ...dd row EDIT edit value of x variable G CON G PLT connected type draw plot type graph draw u To change variable values in a table Example To change the value in Column x Row 3 of the table generated on page 5 7 2 from 1 to 2 5 cc c fw When you change a variable value in Column x all values in the columns to the right are recalculated and displayed If you try to replace a value with an illegal opera...

Page 219: ...s uRow Operations u To delete a row Example To delete Row 2 of the table generated on page 5 7 2 c 3 ROW 1 DEL u To insert a row Example To insert a new row between Rows 1 and 2 in the table generated on page 5 7 2 c 3 ROW 2 INS ...

Page 220: ... Example To add a new row below Row 7 in the table generated on page 5 7 2 cccccc 3 ROW 3 ADD uDeleting a Table 1 Display the table and then press 2 DEL 2 Press 1 Yes to delete the table or 6 No to abort the operation without deleting anything ...

Page 221: ...f a numeric table column into a list Use d and e to move the cursor to the column you want to copy The cursor can be in any row u To copy a table to a list Example To copy the contents of Column x into List 1 K1 LMEM Input the number of the list you want to copy and then press w bw 5 7 8 Using Tables ...

Page 222: ...TABLE mode 2 Make V Window settings Execution 3 Store the functions 4 Specify the table range 5 Generate the table 6 Select the graph type and draw it 5 G CON line graph 1 6 G PLT plot type graph 1 Selecting 6 G PLT draws a 1 dot broken line plot type graph regardless of the currently selected line style page 5 3 6 5 7 9 Using Tables 1 After drawing the graph pressing 6 G T or A returns to the num...

Page 223: ... to 3 and an increment of 1 Y1 3x2 2 Y2 x2 Use the following V Window settings Xmin 0 Xmax 6 Xscale 1 Ymin 2 Ymax 10 Yscale 2 Procedure 1 m TABLE 2 3 V WIN awgwbwc cwbawcwJ 3 3 TYPE 1 Y dvx cw vxw 4 5 SET dwdwbwJ 5 6 TABL 6 5 G CON Result Screen 5 7 10 Using Tables You can use Trace Zoom or Sketch after drawing a graph ...

Page 224: ...table range when calculating scatter data from a function Set Up 1 From the Main Menu enter the TABLE mode Execution 2 Store the functions 3 Specify the table range 4 Select the functions for which you want to generate a table The sign of selected functions is highlighted on the screen 5 Generate the table 5 7 11 Using Tables ...

Page 225: ...1 3x2 2 Y2 x 4 Y3 x2 Procedure 1 m TABLE 2 3 TYPE 1 Y dvx cw v ew vxw 3 5 SET dwdwbwJ 4 ff1 SEL 5 6 TABL Result Screen 5 7 12 Using Tables You can generate number tables from rectangular coordinate polar coordinate and parametric functions You can include derivatives in generated number tables by specifying On for the Derivative item on the Setup screen ...

Page 226: ...he Main Menu enter the TABLE mode 2 Make V Window settings 3 On the Setup screen select T G for Dual Screen Execution 4 Input the function 5 Specify the table range 6 The number table is displayed in the sub screen on the right 7 Specify the graph type and draw the graph 5 G CON line graph 6 G PLT plot type graph 5 7 13 Using Tables The Setup screen s Dual Screen setting is applied in the TABLE mo...

Page 227: ...g V Window settings Xmin 0 Xmax 6 Xscale 1 Ymin 2 Ymax 10 Yscale 2 Procedure 1 m TABLE 2 3 V WIN awgwbwc cwbawcwJ 3 m SET UP cc1 T G J 4 3 TYPE 1 Y dvx cw 5 5 SET dwdwbwJ 6 6 TABL 7 5 G CON Result Screen 5 7 14 Using Tables You can make the number table active by pressing K1 CHNG or A After drawing a graph you can return to the number table screen by pressing 6 G T or A ...

Page 228: ...m and change its setting to T G Execution 3 Input the function of the graph and make the required table range settings 4 With the number table on the right side of the display draw the graph on the left side 5 G CON connect type graph 6 G PLT plot type graph 5 Press K2 GLINK to enter the Graph Table Linking mode 6 Now when you use c and f to move the highlighting among the cells in the table the p...

Page 229: ... and plot type graph Use a table range of 2 through 9 with an increment of 1 Use the following V Window settings Xmin 1 Xmax 10 Xscale 1 Ymin 1 Ymax 4 Yscale 1 Procedure 1 m TABLE 2 3 V WIN bwbawbwc bwewbwJ m SET UP cc1 T G J 3 3 TYPE 1 Y dlvw 5 SET cwjwbwJ 4 6 TABL 6 G PLT 5 K2 GLINK 6 c c f f Result Screen ...

Page 230: ...art value end value and increment 7 Specify the drawing speed 3 SPEED 1 Pause after each draw Stop Go 2 Half normal speed Slow 3 Normal speed Normal 4 Twice normal speed Fast 8 Draw the Dynamic Graph 5 8 1 Dynamic Graphing 1 The following are the seven built in function types Y AX B Y A X B 2 C Y AX2 BX C Y AX 3 BX2 CX D Y Asin BX C Y Acos BX C Y Atan BX C After you press 3 TYPE and select the fun...

Page 231: ...1 The Graph is drawn 10 times Use the following V Window settings Xmin 6 3 Xmax 6 3 Xscale 1 Ymin 3 1 Ymax 3 1 Yscale 1 initial defaults Procedure 1 m DYNA 2 3 V WIN 1 INIT J 3 m SET UP 2 Stop J 4 5 B IN c1 SEL 5 4 VAR cwbw bw 6 2 SET cwfwbwJ 7 3 SPEED 3 J 8 6 DYNA Result Screen 5 8 2 Dynamic Graphing 1 4 2 3 Repeats from 1 through 4 ...

Page 232: ...n Menu enter the DYNA mode 2 Make V Window settings Execution 3 On the Setup screen select On for Locus 4 Use the cursor keys to select the function type on the built in function type list 5 Input values for coefficients and specify which coefficient will be the dynamic variable 6 Specify the start value end value and increment 7 Specify Normal for the draw speed 8 Draw the Dynamic Graph 5 8 3 Dyn...

Page 233: ...gh 4 in increments of 1 The Graph is drawn 10 times Use the following V Window settings Xmin 6 3 Xmax 6 3 Xscale 1 Ymin 3 1 Ymax 3 1 Yscale 1 initial defaults Procedure 1 m DYNA 2 3 V WIN 1 INIT J 3 m SET UP c1 On J 4 5 B IN 1 SEL 5 4 VAR bwaw 6 2 SET bwewbwJ 7 3 SPEED 3 J 8 6 DYNA Result Screen Repeats from 1 through 4 1 4 2 3 ...

Page 234: ...ke V Window settings Execution 3 On the Setup screen specify Stop for Dynamic Type and Deg for Angle 4 Specify Parm parametric function as the function type and input a function that contains a dynamic variable 5 Specify the dynamic coefficient 6 Specify the start value end value and increment 7 Specify Normal for the draw speed 8 Start the Dynamic Graph operation 5 8 5 Dynamic Graphing ...

Page 235: ...ll thrown at an initial velocity of 20 meters per second at horizontal angles of 30 45 and 60 degrees Angle Deg Use the following V Window settings Xmin 1 Xmax 42 Xscale 5 Ymin 1 Ymax 16 Yscale 2 Tθmin 0 Tθmax 6 Tθ ptch 0 1 Procedure 1 m DYNA 2 3 V WIN bwecwfwc bwbgwcw awgwa bwJ 3 m SET UP 2 Stop cccccc1 Deg J 4 3 TYPE 3 Parm cacav A vw casav A v e jvxw 5 4 VAR 6 2 SET dawgawbfwJ 7 3 SPEED 3 J 8 6...

Page 236: ...Graph memory 2 Press the function key 1 to 4 that corresponds to the speed you want to change to k Graph Calculation DOT Switching Function Use this function to specify drawing of all the dots on the Dynamic Graph X axis or every other dot This setting is value for Dynamic Func Y graphic only 1 Press m SET UP to display the Setup screen 2 Press cc to select Y Draw Speed 3 Select the graphing metho...

Page 237: ...u To save data in Dynamic Graph memory 1 While a Dynamic Graph draw operation is being performed press A to change to the speed adjustment menu 2 Press 5 STO In response to the confirmation dialog that appears press 1 Yes to save the data u u u u u To recall data from Dynamic Graph memory 1 Display the Dynamic Graph relation list 2 Pressing 6 RCL recalls Dynamic Graph memory contents and draws the...

Page 238: ... recursion composed of an 2 an 1 an n Set Up 1 From the Main Menu enter the RECUR mode Execution 2 Specify the recursion type 3 TYPE 1 an general term of sequence an 2 an 1 linear two term recursion 3 an 2 linear three term recursion 3 Input the recursion formula 4 Specify the table range Specify a start point and end point for n If necessary specify a value for the initial term and a pointer star...

Page 239: ...rom 1 to 6 Procedure 1 m RECUR 2 3 TYPE 3 an 2 3 4 n an 3 an 1 2 an w 4 5 SET 2 a1 bwgwbwbwJ 5 6 TABL Result Screen 5 9 2 Graphing a Recursion Formula Pressing 1 FORM will return to the screen for storing recursion formulas The first two values correspond to a1 1 and a2 1 Specifying On for the Σ Display of the Setup screen causes the sum of each term to be included in the table ...

Page 240: ... formula type and input the formula 4 Specify the table range and start and ending values for n If necessary specify the initial term value and pointer start point 5 Select the line style for the graph 6 Display the recursion formula number table 7 Specify the graph type and draw the graph 5 G CON line graph 6 G PLT plot type graph Selecting 6 G PLT draws a 1 dot broken line plot type graph regard...

Page 241: ...h Use the following V Window settings Xmin 0 Xmax 6 Xscale 1 Ymin 15 Ymax 65 Yscale 5 Procedure 1 m RECUR 2 3 V WIN awgwbwc bfwgfwfwJ 3 3 TYPE 2 an 1 c2 an bw 4 5 SET 2 a1 bwgwbwJ 5 1 SEL S f2 J 6 6 TABL 7 5 G CON Result Screen 5 9 4 Graphing a Recursion Formula After drawing a graph you can use Trace Zoom and Sketch After drawing a graph you can return to the number table screen by pressing 6 G T...

Page 242: ...table range and start and ending values for n If necessary specify the initial term value and pointer start point 6 Select the line style for the graph 7 Display the recursion formula number table 8 Specify the graph type and draw the graph 5 G CON 1 an Line graph with ordinate an abscissa n 6 Σan Line graph with ordinate Σan abscissa n 6 G PLT 1 an Plot type graph with ordinate an abscissa n 6 Σa...

Page 243: ... 6 Use the table values to draw a plot line graph with ordinate Σan abscissa n Use the following V Window settings Xmin 0 Xmax 6 Xscale 1 Ymin 15 Ymax 65 Yscale 5 Procedure 1 m RECUR 2 m SET UP 1 On J 3 3 V WIN awgwbwc bfwgfwfwJ 4 3 TYPE 2 an 1 c2 an bw 5 5 SET 2 a1 bwgwbwJ 6 1 SEL S f2 J 7 6 TABL 8 6 G PLT 6 Σan Result Screen 5 9 6 Graphing a Recursion Formula ...

Page 244: ...ay the recursion formula number table 6 Draw the graph 7 Press w and the pointer appears at the start point you specified Press w several times If convergence exists lines that resemble a spider web are drawn on the display Failure of the web lines to appear indicates either divergence or that the graph is outside the boundaries of the display screen When this happens change to larger V Window val...

Page 245: ...Settings Table Range Start 0 End 6 a0 0 01 anStr 0 01 b0 0 11 bnStr 0 11 V Window Settings Xmin 0 Xmax 1 Xscale 1 Ymin 0 Ymax 1 Yscale 1 Procedure 1 m RECUR 2 3 V WIN awbwbwc awbwbwJ 3 3 TYPE 2 an 1 d2 an x d2 an w d3 bn a cw 4 5 SET 1 a0 awgwa abwa bbwc a abwa bbwJ 5 6 TABL 6 4 WEB 7 w w an is convergence cw w bn is divergence Result Screen 5 9 8 Graphing a Recursion Formula ...

Page 246: ...the Setup screen select T G for Dual Screen Execution 4 Specify the recursion formula type and input the formula 5 Specify the table range and start and ending values for n If necessary specify the initial term value and pointer start point 6 Select the line style for the graph 7 Display the recursion formula number table 8 Specify the graph type and draw the graph 5 G CON line graph 6 G PLT plot ...

Page 247: ...es to draw a line graph Use the following V Window settings Xmin 0 Xmax 6 Xscale 1 Ymin 15 Ymax 65 Yscale 5 Procedure 1 m RECUR 2 3 V WIN awgwbwc bfwgfwfwJ 3 m SET UP ccc1 T G J 4 3 TYPE 2 an 1 c2 an bw 5 5 SET 2 a1 bwgwbwJ 6 1 SEL S f2 J 7 6 TABL 8 5 G CON Result Screen You can make the number table active by pressing K1 CHNG or A After drawing a graph you can return to the number table screen by...

Page 248: ...n select one of four different line styles for drawing with the sketch function Set Up 1 From the Main Menu enter the GRAPH mode 2 Make V Window settings 3 On the Setup screen use the Sketch Line setting to specify the line style you want 1 Normal initial default 2 Thick twice the thickness of Normal 3 Broken thick broken 4 Dot dotted 4 Input the function of the graph 5 Draw the graph Execution 6 ...

Page 249: ...min 6 3 Xmax 6 3 Xscale 1 Ymin 3 1 Ymax 3 1 Yscale 1 initial defaults Procedure 1 m GRAPH 2 3 V WIN 1 INIT J 3 m SET UP cccccc1 J 4 3 TYPE 1 Y v v c v c w 5 6 DRAW 6 4 SKTCH 2 Tang 7 e ew 1 Result Screen 5 10 2 Changing the Appearance of a Graph 1 You can draw a tangent line in succession by moving the pointer and pressing w ...

Page 250: ...ext and a pointer appears in the center of the display 3 Use the cursor keys to move the pointer to the location where you want the text to be and input the text 5 10 3 Changing the Appearance of a Graph You can input any of the following characters as comment text A Z r θ space 0 9 EXP π Ans comma x2 log In x 10x ex 3 x 1 sin cos tan sin 1 cos 1 tan 1 i List Mat ...

Page 251: ...se the following V Window settings Xmin 5 Xmax 5 Xscale 1 Ymin 5 Ymax 5 Yscale 1 Procedure 1 m GRAPH 3 V WIN fwfwbwc fwfwbwJ 3 TYPE 1 Y v v c v c w 6 DRAW 2 4 SKTCH 6 g 6 g 2 Text 3 f f d d a Y v v c v c Result Screen 5 10 4 Changing the Appearance of a Graph ...

Page 252: ...6 g 1 PEN and a pointer appears in the center of the screen 3 Use the cursor keys to move the pointer to the point from which you want to start drawing and then press w 4 Use the cursor keys to move the pointer A line is drawn wherever you move the pointer To stop the line press w Repeat step 3 and 4 to draw other lines 5 10 5 Changing the Appearance of a Graph ...

Page 253: ...Use the following V Window settings Xmin 5 Xmax 5 Xscale 1 Ymin 5 Ymax 5 Yscale 1 Procedure 1 m GRAPH 3 V WIN fwfwbwc fwfwbwJ 3 TYPE 1 Y v v c v c w 6 DRAW 2 4 SKTCH 6 g 6 g 1 PEN 3 f f d dw 4 cd e e ef d dw Result Screen 5 10 6 Changing the Appearance of a Graph ...

Page 254: ...Pict 20 as the Background item When you do the contents of the corresponding memory area is used as the background of the graph screen Example 1 With the circle graph X2 Y2 1 as the background use Dynamic Graph to graph Y X2 A as variable A changes value from 1 to 1 in increments of 1 Recall the background graph X2 Y2 1 m SET UP ccccc 2 PICT bwJ When the graph for X2 Y2 1 is stored in Pict 1 ...

Page 255: ...20050401 5 10 8 Changing the Appearance of a Graph Draw the dynamic graph Y X2 1 Y X2 Y X2 1 See 5 8 Dynamic Graphing for details on using the Dynamic Graph feature ...

Page 256: ...n there are multiple graphs on the display press f and c to move between them along the x axis of the current pointer location 5 You can also move the pointer by pressing v to display the pop up window and then inputting coordinates The pop up window appears even when you input coordinates directly To exit a trace operation press 1 TRCE 1 The pointer is not visible on the graph when it is located ...

Page 257: ...0 Yscale 2 Procedure 1 m GRAPH 2 3 V WIN fwfwbwc bawbawcwJ 3 TYPE 1 Y vx dw 6 DRAW 3 1 TRCE 4 d d 5 bw Result Screen 5 11 2 Function Analysis The following shows how coordinates are displayed for each function type Polar Coordinate Graph Parametric Graph Inequality Graph The pointer will not move if you press the d and e keys during trace of an X c type graph ...

Page 258: ... the center of the graph The current coordinates and the derivative also appear on the display at this time 5 Use d and e to move the pointer along the graph to the point at which you want to display the derivative When there are multiple graphs on the display press f and c to move between them along the x axis of the current pointer location 6 You can also move the pointer by pressing v to displa...

Page 259: ... the function shown below Y1 x2 3 Use the following V Window settings Xmin 5 Xmax 5 Xscale 1 Ymin 10 Ymax 10 Yscale 2 Procedure 1 m GRAPH 2 m SET UP cccc1 On J 3 3 V WIN fwfwbwc bawbawcwJ 3 TYPE 1 Y vx dw 6 DRAW 4 1 TRCE 5 d d 6 bw Result Screen 5 11 4 Function Analysis ...

Page 260: ... screen specify GtoT for Dual Screen 3 Make V Window settings Execution 4 Save the function and draw the graph on the active left screen 5 Activate Trace When there are multiple graphs on the display press f and c to select the graph you want 6 Use d and e to move the pointer and press w to store coordinates into the number table Repeat this step to store as many values as you want 7 Press K1 CHNG...

Page 261: ...1 Y1 x2 3 Y2 x 2 Use the following V Window settings Xmin 5 Xmax 5 Xscale 1 Ymin 10 Ymax 10 Yscale 2 Procedure 1 m GRAPH 2 m SET UP cc2 GtoT J 3 3 V WIN fwfwbwc bawbawcwJ 4 3 TYPE 1 Y vx dw v cw 6 DRAW 5 1 TRCE 6 d dwe ew 7 K1 CHNG 8 K2 LMEM bw Result Screen 5 11 6 Function Analysis Instead of pressing K1 CHNG in step 7 you could press A to make the number table active ...

Page 262: ...he Main Menu enter the GRAPH mode 2 Draw the graph Execution 3 Press 2 ZOOM 6 g 3 RND This causes the V Window settings to be changed automatically in accordance with the Rnd value 4 Press 1 TRCE and then use the cursor keys to move the pointer along the graph The coordinates that now appear are rounded 5 11 7 Function Analysis ...

Page 263: ...ection for the two graphs produced by the functions shown below Y1 x2 3 Y2 x 2 Use the following V Window settings Xmin 5 Xmax 5 Xscale 1 Ymin 10 Ymax 10 Yscale 2 Procedure 1 m GRAPH 2 3 V WIN fwfwbwc bawbawcwJ 3 TYPE 1 Y vx dw v cw 6 DRAW 3 2 ZOOM 6 g 3 RND 4 1 TRCE d d Result Screen 5 11 8 Function Analysis ...

Page 264: ... graphs 6 g 1 Y CAL y coordinate for given x coordinate 6 g 2 X CAL x coordinate for given y coordinate 6 g 3 dx Integral value for a given range 4 When there are multiple graphs on the screen the selection cursor k is located at the lowest numbered graph Press f and c to move the cursor to the graph you want to select 5 Press w to select the graph where the cursor is located and display the value...

Page 265: ...SLV 1 ROOT 5 e e Result Screen 5 11 10 Function Analysis When analyzing a single graph results appear as soon as you select an analysis function in step 3 so step 4 is not necessary Root local maximum value local minimum value and y intercept can be calculated for rectangular coordinate graphs and inequality graphs only Graph analysis is not possible for the graph whose function is the format X co...

Page 266: ...ion cursor k appears at the lowest numbered graph 3 Press f and c to move the cursor to the graph you want to select 4 Press w to select the first graph which changes the shape of the cursor from k to 쏆 5 Press f and c to move the cursor to the second graph 6 Press w to calculate the point of intersection for the two graphs When an analysis produces multiple values press e to calculate the next va...

Page 267: ...Xscale 1 Ymin 5 Ymax 5 Yscale 1 Procedure 1 m GRAPH 3 V WIN fwfwbwc fwfwbwJ 3 TYPE 1 Y v bw vxw 6 DRAW 2 5 G SLV 5 ISCT 6 e Result Screen 5 11 12 Function Analysis In the case of two graphs the point of intersection is calculated immediately after you press 55 in step 2 You can calculate the point of intersection for rectangular coordinate graphs and inequality graphs only ...

Page 268: ...n you want to perform When there are multiple graphs the selection cursor k appears at the lowest numbered graph 5 G SLV 6 g 1 Y CAL y coordinate for given x 6 g 2 X CAL x coordinate for given y 3 Use fc to move the cursor k to the graph you want and then press w to select it 4 Input the given x coordinate value or y coordinate value Press w to calculate the corresponding y coordinate value or x c...

Page 269: ...w v v c v c w 6 DRAW 2 5 G SLV 6 g 1 Y CAL 2 5 G SLV 6 g 2 X CAL 3 cw 3 cw 4 a fw 4 c cw Result Screen 5 11 14 Function Analysis When there are multiple results for the above procedure press e to calculate the next value Pressing d returns to the previous value Step 3 of the above procedure is skipped when there is only one graph on the display The X CAL value cannot be obtained for a parametric f...

Page 270: ...u want and then press w You can also move the pointer by pressing v to display the pop up window and then inputting coordinates 5 Use e to move the upper limit pointer to the location you want You can also move the pointer by pressing v to display the pop up window and then inputting the upper limit and lower limit values for the integration range 6 Press w to calculate the integral value 5 11 15 ...

Page 271: ... 2 0 Y1 x x 2 x 2 Use the following V Window settings Xmin 6 3 Xmax 6 3 Xscale 1 Ymin 4 Ymax 4 Yscale 1 Procedure 1 m GRAPH 3 V WIN g dwg dwbwc ewewbwJ 3 TYPE 1 Y v v c v c w 6 DRAW 2 5 G SLV 6 g 3 dx 4 d d Lower limit x 2 w 5 e e Upper limit x 0 6 w Result Screen 5 11 16 Function Analysis ...

Page 272: ...onic section press 5 G SLV to display the following graph analysis menus u Parabolic Graph Analysis FOCS VTX LEN e focus vertex length of latus rectum eccentricity DIR SYM directrix axis of symmetry X IN Y IN x intercept y intercept u Circular Graph Analysis CNTR RADS center radius X IN Y IN x intercept y intercept u Elliptical Graph Analysis FOCS VTX CNTR e focus vertex center eccentricity X IN Y...

Page 273: ...X Calculates the vertex 5 G SLV 5 LEN Calculates the length of latus rectum When calculating two foci for an ellipse or hyperbolic graph press e to calculate the second focus Pressing d returns to the first focus When calculating two vertexes for a hyperbolic graph press e to calculate the second vertex Pressing d returns to the first vertex Pressing e when calculating the vertices of an ellipse w...

Page 274: ...he center and radius for the circle X 2 2 Y 1 2 22 Use the following V Window settings Xmin 6 3 Xmax 6 3 Xscale 1 Ymin 3 1 Ymax 3 1 Yscale 1 initial defaults m CONICS ccccw cw bwcw6 DRAW 5 G SLV 1 CNTR Calculates the center 5 G SLV 2 RADS Calculates the radius 5 11 19 Function Analysis ...

Page 275: ... 1 22 22 Use the following V Window settings Xmin 4 Xmax 8 Xscale 1 Ymin 5 Ymax 5 Yscale 1 m CONICS cccccccw cwcwdwbw6 DRAW 5 G SLV 2 X IN Calculates the x intercept 5 G SLV 3 Y IN Calculates the y intercept Press e to calculate the second set of x y intercepts Pressing d returns to the first set of intercepts 5 11 20 Function Analysis ...

Page 276: ...w the axis of symmetry and directrix for the parabola X 2 Y 1 2 1 Use the following V Window settings Xmin 6 3 Xmax 6 3 Xscale 1 Ymin 3 1 Ymax 3 1 Yscale 1 initial defaults mCONICS w cwbwbw6 DRAW 5 G SLV 2 SYM Draws the axis of symmetry 5 G SLV 3 DIR Draws the directrix 5 11 21 Function Analysis ...

Page 277: ... 1 42 22 Use the following V Window settings Xmin 3 Xmax 7 Xscale 1 Ymin 1 Ymax 5 Yscale 1 m CONICS ccccccw ewcwcwcw6 DRAW 5 G SLV 6 g 1 e Calculates eccentricity Certain V Window parameters can produce errors in values produced as graph analysis results The message Not Found appears on the display when graph analysis is unable to produce a result The following can result in inaccurate analysis re...

Page 278: ...ngle Variable Statistical Data 6 3 Calculating and Graphing Paired Variable Statistical Data 6 4 Performing Statistical Calculations 6 5 Tests 6 6 Confidence Interval 6 7 Distribution6 5 Distribution Important This chapter contains a number of graph screen shots In each case new data values were input in order to highlight the particular characteristics of the graph being drawn Note that when you ...

Page 279: ... of different regression calculations to analyze the data For information about using the statistical data lists see 3 List Function k Inputting Data into Lists Example To input the following two data groups 0 5 1 2 2 4 4 0 5 2 2 1 0 3 1 5 2 0 2 4 a fwb cw c ewewf cw e c bwa dw b fwcwc ew Once data is input you can use it for graphing and statistical calculations 6 1 1 Before Performing Statistica...

Page 280: ...or single variable data and List 1 and List 2 for paired variable data You can specify which statistical data list you want to use for x data and y data Frequency Normally each data item or data pair in the statistical data list is represented on a graph as a point When you are working with a large number of data items however this can cause problems because of the number of plot points on the gra...

Page 281: ...histogram med box graph normal distribution curve broken line graph X Med X 2 X 3 X 4 linear regression graph Med Med graph quadratic regression graph cubic regression graph quartic regression graph Log Exp Pwr Sin Lgst logarithmic regression graph exponential regression graph power regression graph sinusoidal regression graph logistic regression graph XList x axis data list LIST List 1 to 26 YLis...

Page 282: ...aph menu press J 6 1 4 Before Performing Statistical Calculations V Window parameters are normally set automatically for statistical graphing If you want to set V Window parameters manually you must change the Stat Wind item to Manual While the statistical data list is on the display perform the following procedure m SET UP 2 Man J Returns to previous menu Note that V Window parameters are set aut...

Page 283: ...aph k k k k k Normal Probability Plot NPP This plot compares the data accumulated ratio with a normal distribution accumulated ratio XList specifies the list where data is input and Mark Type is used to select from among the marks you want to plot Press A J or J QUIT to return to the statistical data list k k k k k Histogram Bar Graph Hist XList specifies the list where the data is input while Fre...

Page 284: ...of the box up to the minimum minX and maximum maxX of the data From the statistical data list press 1 GRPH to display the graph menu press 6 SET and then change the graph type of the graph you want to use GPH1 GPH2 GPH3 to med box graph To plot the data that falls outside the box first specify MedBox as the Graph Type Then on the same screen you use to specify the graph type turn the Outliers item...

Page 285: ...cified for Freq when frequency is not specified k Broken Line Graph Brkn Lines connect center points of a histogram bar XList specifies the list where the data is input while Freq specifies the list where the data frequency is input 1 is specified for Freq when frequency is not specified 6 2 3 Calculating and Graphing Single Variable Statistical Data w Draw The display screen appears as shown abov...

Page 286: ...the bottom of the screen The following describes the meaning of each of the parameters o mean Σx sum Σx2 sum of squares xσn population standard deviation xσn 1 sample standard deviation n number of data items minX minimum Q1 first quartile Med median Q3 third quartile maxX maximum Mod mode Mod n number of data mode items Mod F data mode frequency Press 6 DRAW to return to the original single varia...

Page 287: ...Line Graph Description The following procedure plots a scatter diagram and connects the dots to produce an xy line graph Set Up 1 From the Main Menu enter the STAT mode Execution 2 Input the data into a list 3 Specify Scat scatter diagram or xy xy line graph as the graph type and then execute the graph operation Press A J or J QUIT to return to the statistical data list ...

Page 288: ...n xy line graph 0 5 1 2 2 4 4 0 5 2 xList 2 1 0 3 1 5 2 0 2 4 yList Procedure 1 m STAT 2 a fwb cw c ewewf cw e c bwa dw b fwcwc ew 3 Scatter diagram 1 GRPH 6 SET c1 Scat J 1 GPH1 3 xy line graph 1 GRPH 6 SET c2 xy J 1 GPH1 Result Screen Scatter diagram xy line graph 6 3 2 Calculating and Graphing Paired Variable Statistical Data ...

Page 289: ...he results Set Up 1 From the Main Menu enter the STAT mode Execution 2 Input the data into a list and plot the scatter diagram 3 Select the regression type execute the calculation and display the regression parameters 4 Draw the regression graph 6 3 3 Calculating and Graphing Paired Variable Statistical Data You can perform trace on a regression graph You cannot perform trace scroll ...

Page 290: ...ata to display the regression parameters and then draw the corresponding regression graph 0 5 1 2 2 4 4 0 5 2 xList 2 1 0 3 1 5 2 0 2 4 yList Procedure 1 m STAT 2 a fwb cw c ewewf cw e c bwa dw b fwcwc ew 1 GRPH 6 SET c1 Scat J 1 GPH1 3 1 CALC 6 g 2 Log 4 6 DRAW Result Screen 6 3 4 Calculating and Graphing Paired Variable Statistical Data ...

Page 291: ...c regression calculation and graphing k k k k k Displaying Regression Calculation Results Whenever you perform a regression calculation the regression formula parameter such as a and b in the linear regression y ax b calculation results appear on the display You can use these to obtain statistical calculation results Regression parameters are calculated as soon as you press a function key to selec...

Page 292: ...e b regression constant term y intercept r correlation coefficient r2 coefficient of determination MSe mean square error k k k k k Med Med Graph When it is suspected that there are a number of extreme values a Med Med graph can be used in place of the least squares method This is similar to linear regression but it minimizes the effects of extreme values 1 CALC 3 Med 6 DRAW The following is the Me...

Page 293: ...first coefficient c regression constant term y intercept r2 coefficient of determination MSe mean square error Cubic regression Model formula y ax3 bx2 cx d a regression third coefficient b regression second coefficient c regression first coefficient d regression constant term y intercept r2 coefficient of determination MSe mean square error Quartic regression Model formula y ax4 bx3 cx2 dx e a re...

Page 294: ...rmination MSe mean square error k Exponential Regression Graph Exponential regression expresses y as a proportion of the exponential function of x The standard exponential regression formula is y a ebx so if we take the logarithms of both sides we get In y In a bx Next if we say Y In y and A In a the formula corresponds to linear regression formula Y A bx 1 CALC 6 g 3 Exp 6 DRAW The following is t...

Page 295: ...uare error k k k k k Sinusoidal Regression Graph Sinusoidal regression is best applied for cyclical data The following is the sinusoidal regression model formula y a sin bx c d While the statistical data list is on the display perform the following key operation 1 CALC 6 g 5 Sin 6 DRAW Make sure that the angle unit setting of the calculator is Rad radians when drawing a sinusoidal regression graph...

Page 296: ...g regression calculations While the statistical data list is on the display recall the Setup screen to specify a LIST List 1 through List 26 for Resid List Calculated residual data is stored in the specified list The vertical distance from the plots to the regression model will be stored in the list Plots that are higher than the regression model are positive while those that are lower are negativ...

Page 297: ...lation results to the GRAPH mode graph relation list and store and compare 1 While a regression calculation result is on the display see Displaying Regression Calculation Results on page 6 3 5 press 5 COPY This will display the GRAPH mode graph relation list 1 2 Use f and c to highlight the area to which you want to copy the regression formula of the displayed result 3 Press w to save the copied g...

Page 298: ... 1 4 After drawing the graphs you can select which graph formula to use when performing single variable statistic or regression calculations 1 CALC 2 X The text at the top of the screen indicates the currently selected graph StatGraph1 Graph 1 StatGraph2 Graph 2 StatGraph3 Graph 3 1 Press c The graph name at the top of the screen changes when you do 2 When the graph you want to use is selected pre...

Page 299: ...type of function graph you want Set Up 1 From the Main Menu enter the STAT mode Execution 2 Input the data into a list and draw the statistical graph 3 Display the Graph Function menu and input the function you want to overlay on the statistical graph 4 Graph the function 6 3 13 Calculating and Graphing Paired Variable Statistical Data ...

Page 300: ... GRPH 1 GPH1 3 2 DefG cIvw Register Y1 2In x 4 6 DRAW Result Screen 6 3 14 Calculating and Graphing Paired Variable Statistical Data You can also perform trace etc for drawn function graphs Graphs of types other than rectangular coordinate graphs cannot be drawn Pressing J while inputting a function returns the expression to what it was prior to input Pressing J QUIT clears the input expression an...

Page 301: ... located before you start a calculation Display the statistical data and then press 2 CALC 6 SET The following is the meaning for each item 1Var XList location of single variable statistic x values XList 1Var Freq location of single variable frequency values Frequency 2Var XList location of paired variable statistic x values XList 2Var YList location of paired variable statistic y values YList 2Va...

Page 302: ... see Displaying the Calculation Results of a Drawn Single Variable Graph page 6 2 4 k k k k k Paired Variable Statistical Calculations In the previous example under Displaying the Calculation Results of a Drawn Paired Variable Graph statistical calculation results were displayed after the graph was drawn These were numeric expressions of the characteristics of variables used in the graphic display...

Page 303: ... regression cubic regression quartic regression logarithmic regression exponential regression power regression sinusoidal regression logistic regression parameters Example To display single variable regression parameters 2 CALC 3 REG 1 X The meanings of the parameters that appear on this screen are the same as those for Linear Regression Graph to Logistic Regression Graph u u u u u Calculation of ...

Page 304: ...ic Regression MSe Σ 1 n 2 1 ae bxi C i 1 n yi 2 u u u u u Estimated Value Calculation for Regression Graphs The STAT mode also includes a Y CAL function that uses regression to calculate the estimated y value for a particular x value after graphing a paired variable statistical regression The following is the general procedure for using the Y CAL function 1 After drawing a regression graph press 5...

Page 305: ...ated coordinates are not within the display range The coordinates do not appear if Off is specified for the Coord item of the Setup screen The Y CAL function can also be used with a graph drawn by using DefG feature u u u u u Regression Formula Copy Function from a Regression Calculation Result Screen In addition to the normal regression formula copy function that lets you copy the regression calc...

Page 306: ...nter the STAT mode 2 Input data into the list and draw the linear regression graph 3 From the Main Menu enter the RUN MAT mode 4 Press the keys as follows ca value of xi K5 STAT 2 w The estimated value is displayed for xi 20 baaa value of yi 1 w The estimated value is displayed for yi 1000 6 4 6 Performing Statistical Calculations xi yi 10 1003 15 1005 20 1010 25 1011 30 1014 You cannot obtain est...

Page 307: ... P t Q t and R t and normalized variate t x are calculated using the following formulas Standard Normal Distribution P t Q t R t t t t 0 0 0 Example The following table shows the results of measurements of the height of 20 college students Determine what percentage of the students fall in the range 160 5 cm to 175 5 cm Also in what percentile does the 175 5 cm tall student fall Class no Height cm ...

Page 308: ...B to recall the probability calculation PROB menu 3 PROB 6 g 4 t bga f w Normalized variate t for 160 5cm Result 1 633855948 1 634 4 t bhf f w Normalized variate t for 175 5cm Result 0 4963343361 0 496 1 P a ejg 1 P b gde w Percentage of total Result 0 638921 63 9 of total 3 R a ejg w Percentile Result 0 30995 31 0 percentile 6 4 8 Performing Statistical Calculations 1 You can obtain the normalize...

Page 309: ...ty Distribution Graph Description You can draw a normal probability distribution graph using manual graphing with the RUN MAT mode Set Up 1 From the Main Menu enter the RUN MAT mode Execution 2 Input the commands to draw a rectangular coordinate graph 3 Input the probability value ...

Page 310: ...20050401 6 4 10 Performing Statistical Calculations Example To draw a normal probability P 0 5 graph Procedure 1 m RUN MAT 2 4 SKTCH 1 Cls w 5 GRPH 1 Y 3 K6 g 3 PROB 6 g 1 P a fw Result Screen ...

Page 311: ...the hypothesis for a single unknown population mean when the population standard deviation is unknown 2 Sample t Test compares the population means when the population standard deviations are unknown LinearReg t Test calculates the strength of the linear association of paired data χ2 Test tests hypothesis concerning the proportion of samples included in each of a number of independent groups Mainl...

Page 312: ...y and displays the pointer at the corresponding location in the graph unless the location is off the graph screen Two points are displayed in the case of a two tail test Use d and e to move the pointer Press J to clear the z score 2 P Displays p value Pressing 2 P displays the p value at the bottom of the display without displaying the pointer Press J to clear the p value u u u u u 1 Sample Z Test...

Page 313: ...e contents you want to use as data List 1 to 26 Freq frequency 1 or List 1 to 26 Save Res list for storage of calculation results None or List 1 to 26 Execute executes a calculation or draws a graph The following shows the meaning of parameter data specification items that are different from list data specification o mean of sample n size of sample positive integer After setting all the parameters...

Page 314: ...ore p p value o mean of sample xσn 1 sample standard deviation Displayed only for Data List setting n size of sample For details about graph screen function keys 1 Z and 2 P see Z Test Common Functions on page 6 5 2 Save Res does not save the µ condition in line 2 6 5 4 Tests ...

Page 315: ...the case of list data specification Data data type µ1 population mean value test conditions G µ2 specifies two tail test µ2 specifies one tail test where sample 1 is smaller than sample 2 µ2 specifies one tail test where sample 1 is greater than sample 2 σ1 population standard deviation of sample 1 σ1 0 σ2 population standard deviation of sample 2 σ2 0 List 1 list whose contents you want to use as...

Page 316: ... to perform the calculation or draw the graph 1 CALC Performs the calculation 6 DRAW Draws the graph Calculation Result Output Example µ1Gµ2 direction of test z z score p p value o1 mean of sample 1 o2 mean of sample 2 x1σn 1 standard deviation of sample 1 Displayed only for Data List setting x2σn 1 standard deviation of sample 2 Displayed only for Data List setting n1 size of sample 1 n2 size of ...

Page 317: ...value x 0 integer n size of sample positive integer Save Res list for storage of calculation results None or List 1 to 26 Execute executes a calculation or draws a graph After setting all the parameters use c to move the highlighting to Execute and then press one of the function keys shown below to perform the calculation or draw the graph 1 CALC Performs the calculation 6 DRAW Draws the graph Cal...

Page 318: ...est p2 specifies one tail test where sample 1 is smaller than sample 2 p2 specifies one tail test where sample 1 is greater than sample 2 x1 data value x1 0 integer of sample 1 n1 size positive integer of sample 1 x2 data value x2 0 integer of sample 2 n2 size positive integer of sample 2 Save Res list for storage of calculation results None or List 1 to 26 Execute executes a calculation or draws ...

Page 319: ...imated proportion of sample 1 p 2 estimated proportion of sample 2 p estimated sample proportion n1 size of sample 1 n2 size of sample 2 For details about graph screen function keys 1 Z and2 P see Z Test Common Functions on page 6 5 2 6 5 9 Tests Save Res does not save the p1 condition in line 2 ...

Page 320: ...is off the graph screen Two points are displayed in the case of a two tail test Use d and e to move the pointer Press J to clear the t score 2 P Displays p value Pressing 2 P displays the p value at the bottom of the display without displaying the pointer Press J to clear the p value 6 5 10 Tests The following V Window settings are used for drawing the graph Xmin 3 2 Xmax 3 2 Xscale 1 Ymin 0 1 Yma...

Page 321: ...ail test µ0 specifies lower one tail test µ0 specifies upper one tail test µ0 assumed population mean List list whose contents you want to use as data List 1 to 26 Freq frequency 1 or List 1 to 26 Save Res list for storage of calculation results None or List 1 to 26 Execute executes a calculation or draws a graph The following shows the meaning of parameter data specification items that are differ...

Page 322: ...ion of test t t score p p value o mean of sample xσn 1 sample standard deviation n size of sample For details about graph screen function keys 1 T and 2 P see t Test Common Functions on page 6 5 10 Save Res does not save the µ condition in line 2 6 5 12 Tests ...

Page 323: ... 1 2 σ n1 x2 n 1 2 σ n2 df 1 C2 n1 1 1 C 2 n2 1 C x1 n 1 2 σ n1 x2 n 1 2 σ n2 x1 n 1 2 σ n1 Perform the following key operations from the statistical data list 3 TEST 2 t 2 2 S 6 5 13 Tests o1 mean of sample 1 o2 mean of sample 2 x1σn 1 standard deviation of sample 1 x2σn 1 standard deviation of sample 2 n1 size of sample 1 n2 size of sample 2 xpσn 1 pooled sample standard deviation df degrees of ...

Page 324: ...ist 1 to 26 Pooled pooling On in effect or Off not in effect Save Res list for storage of calculation results None or List 1 to 26 Execute executes a calculation or draws a graph The following shows the meaning of parameter data specification items that are different from list data specification o1 mean of sample 1 x1σn 1 standard deviation x1σn 1 0 of sample 1 n1 size positive integer of sample 1...

Page 325: ...n 1 standard deviation of sample 1 x2σn 1 standard deviation of sample 2 xpσn 1 pooled sample standard deviation Displayed only when Pooled On setting n1 size of sample 1 n2 size of sample 2 For details about graph screen function keys 1 T and 2 P see t Test Common Functions on page 6 5 10 6 5 15 Tests Save Res does not save the µ1 condition in line 2 ...

Page 326: ...e following key operations from the statistical data list 3 TEST 2 t 3 REG The following shows the meaning of each item in the case of list data specification β ρ p value test conditions G 0 specifies two tail test 0 specifies lower one tail test 0 specifies upper one tail test XList list for x axis data List 1 to 26 YList list for y axis data List 1 to 26 Freq frequency 1 or List 1 to 26 Save Res...

Page 327: ...direction of test t t score p p value df degrees of freedom a constant term b coefficient s standard error r correlation coefficient r2 coefficient of determination Pressing 6 COPY while a calculation result is on the display copies the regression formula to the graph relation list When there is a list specified for the Resid List item on the Setup screen regression formula residual data is automa...

Page 328: ...the proportion of the sample included in each group The χ2 Test is applied to dichotomous variables variable with two possible values such as yes no Expected counts Fij Σxij i 1 k Σxij j 1 k ΣΣ i 1 j 1 xij χ2 ΣΣ Fij i 1 k xij Fij 2 j 1 Perform the following key operations from the statistical data list 3 TEST 3 CHI Next specify the matrix that contains the data The following shows the meaning of t...

Page 329: ...hen press one of the function keys shown below to perform the calculation or draw the graph 1 CALC Performs the calculation 6 DRAW Draws the graph Calculation Result Output Example χ2 χ2 value p p value df degrees of freedom You can use the following graph analysis functions after drawing a graph 1 CHI Displays χ2 value Pressing 1 CHI displays the χ2 value at the bottom of the display and displays...

Page 330: ...pecifies one tail test where sample 1 is greater than sample 2 List 1 list whose contents you want to use as data of sample 1 List 1 to 26 List 2 list whose contents you want to use as data of sample 2 List 1 to 26 Freq 1 frequency of sample 1 1 or List 1 to 26 Freq 2 frequency of sample 2 1 or List 1 to 26 Save Res list for storage of calculation results None or List 1 to 26 Execute executes a ca...

Page 331: ...1 mean of sample 1 Displayed only for Data List setting o2 mean of sample 2 Displayed only for Data List setting x1σn 1 standard deviation of sample 1 x2σn 1 standard deviation of sample 2 n1 size of sample 1 n2 size of sample 2 You can use the following graph analysis functions after drawing a graph 1 F Displays F value Pressing 1 F displays the F value at the bottom of the display and displays t...

Page 332: ... key operations from the statistical data list 3 TEST 5 ANOV The following is the meaning of each item in the case of list data specification How Many selects One Way ANOVA or Two Way ANOVA number of levels Factor A category list List 1 to 26 Dependnt list to be used for sample data List 1 to 26 Save Res first list for storage of calculation results None or List 1 to 22 1 Execute executes a calcul...

Page 333: ...ue Line 3 AB Factor A Factor B df value SS value MS value F value p value Line 3 does not appear when there is only one observation in each cell Line 4 ERR Error df value SS value MS value F F value p p value df degrees of freedom SS sum of squares MS mean squares With Two Way ANOVA you can draw Interaction Plot graphs The number of graphs depends on Factor B while the number of X axis data depend...

Page 334: ...a for each group as Dependent Define List 1 and List 2 the factor numbers for each data item in List 3 as Factor A and Factor B respectively Executing the test produces the following results Time differential A level of significance P 0 2458019517 The level of significance p 0 2458019517 is greater than the significance level 0 05 so the hypothesis is not rejected Temperature differential B level ...

Page 335: ...20050401 u u u u u Input Example u u u u u Results 6 5 25 Tests ...

Page 336: ... confidence level changes in accordance with the application 1 Sample Z Interval calculates the confidence interval for an unknown population mean when the population standard deviation is known 2 Sample Z Interval calculates the confidence interval for the difference between two population means when the population standard deviations of two samples are known 1 Prop Z Interval calculates the conf...

Page 337: ...the range of 0 C Level 1 for the C Level setting sets you value you input Inputting a value in the range of 1 C Level 100 sets a value equivalent to your input divided by 100 Inputting a value of 100 or greater or a negative value causes an error Ma ERROR 6 6 2 Confidence Interval ...

Page 338: ...ollowing key operations from the statistical data list 4 INTR 1 Z 1 1 S The following shows the meaning of each item in the case of list data specification Data data type C Level confidence level 0 C Level 1 σ population standard deviation σ 0 List list whose contents you want to use as sample data List 1 to 26 Freq sample frequency 1 or List 1 to 26 Save Res list for storage of calculation result...

Page 339: ...Interval 2 Sample Z Interval calculates the confidence interval for the difference between two population means when the population standard deviations of two samples are known The following is the confidence interval α is the level of significance The value 100 1 α is the confidence level Left o1 o2 Z α 2 Right o1 o2 Z α 2 n1 1 2 σ n2 2 2 σ n1 1 2 σ n2 2 2 σ o1 mean of sample 1 o2 mean of sample ...

Page 340: ...he following shows the meaning of parameter data specification items that are different from list data specification o1 mean of sample 1 n1 size positive integer of sample 1 o2 mean of sample 2 n2 size positive integer of sample 2 After setting all the parameters use c to move the highlighting to Execute and then press the function key shown below to perform the calculation 1 CALC Performs the cal...

Page 341: ...using parameter specification The following shows the meaning of each item C Level confidence level 0 C Level 1 x data 0 or positive integer n size of sample positive integer Save Res list for storage of calculation results None or List 1 to 26 Execute executes a calculation After setting all the parameters use c to move the highlighting to Execute and then press the function key shown below to pe...

Page 342: ...lowing key operations from the statistical data list 4 INTR 1 Z 4 2 P Data is specified using parameter specification The following shows the meaning of each item C Level confidence level 0 C Level 1 x1 data value x1 0 of sample 1 n1 size positive integer of sample 1 x2 data value x2 0 of sample 2 n2 size positive integer of sample 2 Save Res list for storage of calculation results None or List 1 ...

Page 343: ...ignificance The value 100 1 α is the confidence level Left o tn 1 α 2 Right o tn 1 α 2 x n 1 σ n x n 1 σ n Perform the following key operations from the statistical data list 4 INTR 2 t 1 1 S The following shows the meaning of each item in the case of list data specification Data data type C Level confidence level 0 C Level 1 List list whose contents you want to use as sample data List 1 to 26 Fre...

Page 344: ...ge o mean of sample xσn 1 sample standard deviation n size of sample u u u u u 2 Sample t Interval 2 Sample t Interval calculates the confidence interval for the difference between two population means when both population standard deviations are unknown The t interval is applied to t distribution The following confidence interval applies when pooling is in effect α is the level of significance Th...

Page 345: ...ach item in the case of list data specification Data data type C Level confidence level 0 C Level 1 List 1 list whose contents you want to use as data of sample 1 List 1 to 26 List 2 list whose contents you want to use as data of sample 2 List 1 to 26 Freq 1 frequency of sample 1 1 or List 1 to 26 Freq 2 frequency of sample 2 1 or List 1 to 26 Pooled pooling On in effect or Off not in effect Save ...

Page 346: ...ess the function key shown below to perform the calculation 1 CALC Performs the calculation Calculation Result Output Example Left confidence interval lower limit left edge Right confidence interval upper limit right edge df degrees of freedom o1 mean of sample 1 o2 mean of sample 2 x1σn 1 standard deviation of sample 1 x2σn 1 standard deviation of sample 2 xpσn 1 pooled sample standard deviation ...

Page 347: ...ion is used to estimate the proportion of the products will reach this value Normal probability density calculates the probability density of normal distribution from a specified x value Normal distribution probability calculates the probability of normal distribution data falling between two specific values Inverse cumulative normal distribution calculates a value that represents the location wit...

Page 348: ...you want for x and then press w This causes the x and p values to appear at the bottom of the display and moves the pointer to the corresponding point on the graph 3 Pressing v or a number key at this time causes the x value input dialog box to reappear so you can perform another estimated value calculation if you want 4 After you are finished press J to clear the coordinate values and the pointer...

Page 349: ...σ 0 µ mean Save Res list for storage of calculation results None or List 1 to 26 Execute executes a calculation or draws a graph Specifying σ 1 and µ 0 specifies standard normal distribution After setting all the parameters use c to move the highlighting to Execute and then press one of the function keys shown below to perform the calculation or draw the graph 1 CALC Performs the calculation 6 DRA...

Page 350: ...Ncd Data is specified using parameter specification The following shows the meaning of each item Lower lower boundary Upper upper boundary σ standard deviation σ 0 µ mean Save Res list for storage of calculation results None or List 1 to 26 Execute executes a calculation After setting all the parameters use c to move the highlighting to Execute and then press the function key shown below to perfor...

Page 351: ...ility and use this formula to obtain the integration interval Perform the following key operations from the statistical data list 5 DIST 1 NORM 3 InvN Data is specified using parameter specification The following shows the meaning of each item Tail probability value tail specification Left Right Central Area probability value 0 Area 1 σ standard deviation σ 0 µ mean Save Res list for storage of ca...

Page 352: ...n Calculation Result Output Examples x inverse cumulative normal distribution When Left is selected for Tail upper boundary of integration interval When Right is selected for Tail lower boundary of integration interval When Central is selected for Tail upper and lower boundaries of integration interval There is no graphing for inverse cumulative normal distribution 6 7 6 Distribution ...

Page 353: ...of calculation results None or List 1 to 26 Execute executes a calculation or draws a graph After setting all the parameters use c to move the highlighting to Execute and then press one of the function keys shown below to perform the calculation or draw the graph 1 CALC Performs the calculation 6 DRAW Draws the graph Calculation Result Output Example p Student t probability density Current V Windo...

Page 354: ... 2 t 2 tcd Data is specified using parameter specification The following shows the meaning of each item Lower lower boundary Upper upper boundary df degrees of freedom df 0 Save Res list for storage of calculation results None or List 1 to 26 Execute executes a calculation After setting all the parameters use c to move the highlighting to Execute and then press the function key shown below to perf...

Page 355: ...llowing key operations from the statistical data list 5 DIST 3 CHI 1 Cpd Data is specified using parameter specification The following shows the meaning of each item x data df degrees of freedom positive integer Save Res list for storage of calculation results None or List 1 to 26 Execute executes a calculation or draws a graph After setting all the parameters use c to move the highlighting to Exe...

Page 356: ...ty Current V Window settings are used for graph drawing when the Setup screen s Stat Wind setting is Manual The V Window settings below are set automatically when the Stat Wind setting is Auto Xmin 0 Xmax 11 5 Xscale 2 Ymin 0 1 Ymax 0 5 Yscale 0 1 6 7 10 Distribution ...

Page 357: ... Data is specified using parameter specification The following shows the meaning of each item Lower lower boundary Upper upper boundary df degrees of freedom positive integer Save Res list for storage of calculation results None or List 1 to 26 Execute executes a calculation After setting all the parameters use c to move the highlighting to Execute and then press the function key shown below to pe...

Page 358: ... 1 Fpd Data is specified using parameter specification The following shows the meaning of each item x data n df numerator degrees of freedom positive integer d df denominator degrees of freedom positive integer Save Res list for storage of calculation results None or List 1 to 26 Execute executes a calculation or draws a graph After setting all the parameters use c to move the highlighting to Exec...

Page 359: ...e p F probability density V Window settings for graph drawing are set automatically when the Setup screen s Stat Wind setting is Auto Current V Window settings are used for graph drawing when the Stat Wind setting is Manual 6 7 13 Distribution ...

Page 360: ...rameter specification The following shows the meaning of each item Lower lower boundary Upper upper boundary n df numerator degrees of freedom positive integer d df denominator degrees of freedom positive integer Save Res list for storage of calculation results None or List 1 to 26 Execute executes a calculation After setting all the parameters use c to move the highlighting to Execute and then pr...

Page 361: ...20050401 Calculation Result Output Example p F distribution probability 6 7 15 Distribution ...

Page 362: ...ata is specified using list specification Data data type List list whose contents you want to use as specified data List 1 to 26 Numtrial number of trials p success probability 0 p 1 Save Res list for storage of calculation results None or List 1 to 26 Execute executes a calculation The following shows the meaning of a parameter data specification item that is different from list data specificatio...

Page 363: ...rom the statistical data list 5 DIST 5 BINM 2 Bcd The following shows the meaning of each item when data is specified using list specification Data data type List list whose contents you want to use as specified data List 1 to 26 Numtrial number of trials p success probability 0 p 1 Save Res list for storage of calculation results None or List 1 to 26 Execute executes a calculation The following s...

Page 364: ...arameters use c to move the highlighting to Execute and then press the function key shown below to perform the calculation 1 CALC Performs the calculation Calculation Result Output Example p probability of success 6 7 18 Distribution ...

Page 365: ...ta data type List list whose contents you want to use as specified data List 1 to 26 µ mean µ 0 Save Res list for storage of calculation results None or List 1 to 26 Execute executes a calculation The following shows the meaning of a parameter data specification item that is different from list data specification x x 0 After setting all the parameters use c to move the highlighting to Execute and ...

Page 366: ...data type List list whose contents you want to use as specified data List 1 to 26 µ mean µ 0 Save Res list for storage of calculation results None or List 1 to 26 Execute executes a caluculation The following shows the meaning of a parameter data specification item that is different from list data specification x x 0 After setting all the parameters use c to move the highlighting to Execute and th...

Page 367: ...you want to use as specified data List 1 to 26 p success probability 0 p 1 Save Res list for storage of calculation results None or List 1 to 26 Execute executes a calculation The following shows the meaning of a parameter data specification item that is different from list data specification x positive integer x 1 After setting all the parameters use c to move the highlighting to Execute and then...

Page 368: ...ents you want to use as specified data List 1 to 26 p success probability 0 p 1 Save Res list for storage of calculation results None or List 1 to 26 Execute executes a calculation The following shows the meaning of a parameter data specification item that is different from list data specification x positive integer x 1 After setting all the parameters use c to move the highlighting to Execute and...

Page 369: ...ment appraisal Amortization Interest rate conversion annual percentage rate and effective interest rate Cost selling price margin Day date calculations 7 1 Before Performing Financial Calculations 7 2 Simple Interest 7 3 Compound Interest 7 4 Cash Flow Investment Appraisal 7 5 Amortization 7 6 Interest Rate Conversion 7 7 Cost Selling Price Margin 7 8 Day Date Calculations Chapter 7 ...

Page 370: ...u u u u Date Mode 365 360 Specifies calculation according to a 365 day 360 day year Note the following points regarding Setup screen settings whenever using the TVM mode Drawing a financial graph while the Label item is turned on displays the label CASH for the vertical axis deposits withdrawals and TIME for the horizontal axis frequency The number of display digits applied in the TVM mode is diff...

Page 371: ... in reverse sequence Zoom Scroll and Sketch cannot be used in the TVM mode Whether you should use a positive or a negative value for the present value PV or the purchase price PRC depends on the type of calculation you are trying to perform Note that graphs should be used only for reference purposes when viewing TVM mode calculation results Note that calculation results produced in this mode shoul...

Page 372: ...V principal plus interest SI SI SFV PV SI Press 1 SMPL from the Financial 1 screen to display the following input screen for simple interest 1 SMPL n number of interest periods days I annual interest rate PV principal After configuring the parameters use one of the function menus noted below to perform the corresponding calculation SI simple interest SFV simple future value An error Ma ERROR occur...

Page 373: ...ws graph After drawing a graph you can press 1 TRCE to turn on trace and read calculation results along the graph Each press of e while trace is turned on cycles the displayed value in the sequence present value PV simple interest SI simple future value SFV Pressing d cycles in the reverse direction Press J to return to the parameter input screen ...

Page 374: ... n log log 1 i 1 i S PMT PVi 1 i S PMT FVi i 1 i n 1 i S 1 i n 1 α 1 i n 1 β F i Formula I 1 i S n 1 i n 1 S nFV 1 i n 1 i i PMT 1 i S 1 1 i n F i S 1 1 i n u u u u u Formula II I 0 PV PMT n FV 0 Here PV PMT n FV PV present value FV future value PMT payment n number of compound periods I annual interest rate i is calculated using Newton s Method S 0 assumed for end of term S 1 assumed for beginnin...

Page 375: ...is required for installment savings accounts loan repayments etc P Y installment periods per year C Y compounding periods per year When calculating n PV PMT FV The following calculation is performed after conversion from the nominal interest rate to the effective interest rate and the result is used for all subsequent calculations i I 100 When calculating I After I is obtained the following calcul...

Page 376: ... of savings P Y installment periods per year C Y compounding periods per year Important Inputting Values A period n is expressed as a positive value Either the present value PV or future value FV is positive while the other PV or FV is negative Precision This calculator performs interest calculations using Newton s Method which produces approximate values whose precision can be affected by various...

Page 377: ...t Savings deposit FV future value Loan unpaid balance Savings principal plus interest AMT amortization screen An error Ma ERROR occurs if parameters are not configured correctly Use the following function menus to maneuver between calculation result screens REPT parameter input screen AMT amortization screen GRPH draws graph After drawing a graph you can press 1 TRCE to turn on trace and read calc...

Page 378: ...CF4 CF5 CF6 CF7 With this graph the initial investment amount is represented by CF0 The cash flow one year later is shown by CF1 two years later by CF2 and so on Investment appraisal can be used to clearly determine whether an investment is realizing profits that were originally targeted u NPV NPV CF0 1 i CF1 1 i 2 CF2 1 i 3 CF3 1 i n CFn i 100 I n natural number up to 254 u NFV NFV NPV 1 i n u IR...

Page 379: ...s 5 LIST and input data into a list After configuring the parameters use one of the function menus noted below to perform the corresponding calculation NPV net present value IRR internal rate of return PBP payback period NFV net future value LIST inputs data into a list LIST specifies a list for data input An error Ma ERROR occurs if parameters are not configured correctly 7 4 2 Cash Flow Investme...

Page 380: ... calculation result screens REPT parameter input screen GRPH draws graph After drawing a graph you can press 1 TRCE to turn on trace and read calculation results along the graph Press J to return to the parameter input screen 7 4 3 Cash Flow Investment Appraisal ...

Page 381: ... a interest portion of installment PM1 INT b principal portion of installment PM1 PRN c balance of principal after installment PM2 BAL d total principal from installment PM1 to payment of installment PM2 ΣPRN e total interest from installment PM1 to payment of installment PM2 ΣINT a b one repayment PMT 7 5 1 Amortization c a b 1 payment Number of Payments 1 PM1 PM2 Last 1 payment Number of Payment...

Page 382: ... different from the number of compound interest calculation periods I I 1 1 C Y P Y 100 C Y 100 The following calculation is performed after conversion from the nominal interest rate to the effective interest rate and the result is used for all subsequent calculations i I 100 Press 4 AMT from the Financial 1 screen to display the following input screen for amortization 4 AMT PM1 first installment ...

Page 383: ...id from installment PM1 to installment PM2 CMPD compound interest screen An error Ma ERROR occurs if parameters are not configured correctly Use the following function menus to maneuver between calculation result screens REPT parameter input screen CMPD compound interest screen GRPH draws graph After drawing a graph you can press 1 TRCE to turn on trace and read calculation results along the graph...

Page 384: ...compoundings I interest rate After configuring the parameters use one of the function menus noted below to perform the corresponding calculation EFF converts annual percentage rate to effective interest rate APR converts effective interest rate to annual percent rate An error Ma ERROR occurs if parameters are not configured correctly Use the following function menu to maneuver between calculation ...

Page 385: ...nput screen 6 g 1 COST Cst cost Sel selling price Mrg margin After configuring the parameters use one of the function menus noted below to perform the corresponding calculation COST cost SEL selling price MRG margin An error Ma ERROR occurs if parameters are not configured correctly Use the following function menu to maneuver between calculation result screens REPT parameter input screen CST cost ...

Page 386: ...ressing a number key to input the month causes an input screen like the one shown below to appear on the display 7 8 1 Day Date Calculations The Setup screen can be used to specify either a 365 day or 360 day year for financial calculations Day date calculations are also performed in accordance with the current setting for number of days in the year but the following calculations cannot be perform...

Page 387: ...R occurs if parameters are not configured correctly Use the following function menu to maneuver between calculation result screens REPT parameter input screen 360 day Date Mode Calculations The following describes how calculations are processed when 360 is specified for the Date Mode item in the Setup screen If d1 is day 31 of a month d1 is treated as day 30 of that month is used If d2 is day 31 o...

Page 388: ...nd Reference 8 6 Using Calculator Functions in Programs 8 7 PRGM Mode Command List 8 8 Program Library Chapter This unit comes with approximately 64 Kbytes of memory You can check how much memory has been used and how much remains by entering the MEMORY mode from the Main Menu and then pressing 1 MAIN See 12 7 MEMORY Mode for details 8 ...

Page 389: ...here are no programs stored in memory when you enter the PRGM mode the message No Programs appears on the display and only the NEW item 3 is shown in the function menu The values to the right of the program list indicate the number of bytes used by each program A file name can be up to eight characters long The following are the characters you can use in a file name A through Z r θ spaces 0 throug...

Page 390: ...S 2 3 A2 V A3 3 1 Press 3 NEW and the cursor changes form to indicate alpha character input 2 The following shows how the calculation of the surface area and volume of a regular octahedron would be calculated using a manual calculation Surface Area S c x d value of A xw Volume V x c d value of A Mdw 3 Pressing w while the final result of a program is on the display changes to the program list You ...

Page 391: ...special symbols and accented characters Pressing J PRGM displays the following PRGM PROGRAM menu COM program command menu CTL program control command menu JUMP jump command menu input output command CLR DISP clear display command menu REL conditional jump relational operator menu I O I O control transfer command menu separator for expressions and commands See 8 5 Command Reference for full details...

Page 392: ...ays the following PRGM PROGRAM menu Prog program recall JUMP REL logical operator menu separator for expressions and commands Pressing m SET UP displays the mode command menu shown below Dec Hex Bin Oct EXE EDIT program execute edit NEW new program DEL DEL A specific program all program delete SRC REN file name search change 8 2 2 PRGM Mode Function Keys 1 Programs input after pressing 2 BASE are ...

Page 393: ...whenever something illegal occurs during program execution When such a message appears press J to display the place in the program where the error was caused The cursor will be flashing at the location of the problem Check the Error Message Table page α 1 1 for steps you should take to correct the situation Note that pressing J does not display the location of the error if the program is password ...

Page 394: ...face area S and volume V of a regular tetrahedron for which the length of one side A is known Use the following key operations when inputting the program Length of One Side A J PRGM 4 aav A 6 g 5 Surface Area S x d av A x6 g 5 Volume V x c bc av A Md Compare this with the program for calculating the surface area and volume of a regular octahedron Length of One Side A J PRGM 4 aav A 6 g 5 Surface A...

Page 395: ... Program Contents Now edit OCTA to produce the TETRA program 1 Edit the program name 6 g 2 REN ATETRAw 2 Edit the program contents 2 EDIT eeeeeeDD cDbc J 3 Try running the program 1 EXE or w hw Value of A w w wbaw w w wbfw w ...

Page 396: ... specify cannot be found in the program 2 If there are no more instances of the data you specified the search operation ends You cannot specify the newline symbol _ or display command for the search data Once the contents of the program are on the screen you can use the cursor keys to move the cursor to another location before searching for the next instance of the data Only the part of the progra...

Page 397: ...CTA 1 While the program list is on the display press 6 g 1 SRC and input the initial characters of the file you want to find 6 g 1 SRC OCT 2 Press w to search The name that starts with the characters you input highlights If there is no program whose file name starts with the characters you input the message Not Found appears on the display If this happens press J to clear the error message ...

Page 398: ... a Program u To delete a specific program 1 While the program list is on the display use f and c to move the highlighting to the name of the program you want to delete 2 Press 4 DEL 3 Press 1 Yes to delete the selected program or 6 No to abort the operation without deleting anything If the modifications you make result in a file name that is identical to the name of a program already stored in mem...

Page 399: ...7 MEMORY Mode for details k k k k k Registering a password When inputting a program you can protect it with a password that limits access to the program contents to those who know the password You do not need to input the password to run a program Example To create a program file under the name AREA and protect it with the password CASIO 1 While the program list is on the display press 3 NEW and i...

Page 400: ...e file named AREA which is protected by the password CASIO 1 In the program list use f and c to move the highlighting to the name of the program you want to recall 2 Press 2 EDIT 3 Input the password and press w to recall the program Pressing w without inputting a password while saving a new program causes the file to be saved without a password Pressing w without inputting a password registers th...

Page 401: ...n DrawRΣ Plt 8 5 14 DrawStat 8 5 14 DrawWeb 8 5 14 Dsz 8 5 9 For To Step Next 8 5 4 Getkey 8 5 15 Goto Lbl 8 5 10 If Then Else IfEnd 8 5 4 Isz 8 5 11 Locate 8 5 16 OpenComport38k CloseComport38k 8 5 17 Prog 8 5 7 RclCapt 8 5 18 Receive Send 8 5 17 Receive38k Send38k 8 5 17 Return 8 5 8 Stop 8 5 8 While WhileEnd 8 5 6 Input Command 8 5 2 Output Command 8 5 3 Multi statement Command 8 5 3 _ Carriage...

Page 402: ...etc Alpha Characters Alpha characters indicate literal strings such as AB k k k k k Basic Operation Commands Input Command Function Prompts for input of values for assignment to variables during program execution Syntax variable name prompt variable name Example A Description This command momentarily interrupts program execution and prompts for input of a value or expression for assignment to a va...

Page 403: ...atement command are executed non stop The multi statement command can be used to link two calculation expressions or two commands You can also use a carriage return indicated by _ in place of the multi statement command _ _ _ _ _ Carriage Return Function Connects two statements for sequential execution without stopping Description Operation of the carriage return is identical to that of the multi ...

Page 404: ... the condition is false execution jumps to the Else statement and then continues with the statement following IfEnd For To Step Next Function This command repeats everything between the For statement and the Next statement The starting value is assigned to the control variable with the first execution and the value of the control variable is changed according to the step value with each execution ...

Page 405: ...nted with each execution Do LpWhile Function This command repeats specific commands as long as its condition is true non zero Syntax Parameters expression Description This command repeats the commands contained in the loop as long as its condition is true non zero When the condition becomes false 0 execution proceeds from the statement following the LpWhile statement Since the condition comes afte...

Page 406: ...eEnd statement Since the condition comes after the While statement the condition is tested checked before the commands inside the loop are executed k k k k k Program Control Commands CTL Break Function This command breaks execution of a loop and continues from the next command following the loop Syntax Break Description This command breaks execution of a loop and continues from the next command fo...

Page 407: ... same main routine or it can be called up by any number of main routines Main Routine Subroutines D C E I J Prog E Prog I Prog J A Prog D Prog C Level 1 Level 2 Level 3 Level 4 Calling up a subroutine causes it to be executed from the beginning After execution of the subroutine is complete execution returns to the main routine continuing from the state ment following the Prog command A Goto Lbl co...

Page 408: ... program to stop Execution of the Return command within a subroutine terminates the subroutine and returns to the program from which the subroutine was jumped to Stop Function This command terminates execution of a program Syntax Stop Description This command terminates program execution Execution of this command inside of a loop terminates program execution without an error being generated ...

Page 409: ... θ Example Dsz B Decrements the value assigned to variable B by 1 Description This command decrements the value of a control variable by 1 and then tests checks it If the current value is non zero execution continues with the next statement If the current value is zero execution jumps to the statement following the multi statement command display command or carriage return _ Variable Value 0 _ Dsz...

Page 410: ...escribed above and Lbl n where n is the parameter referenced by Goto n This command causes program execution to jump to the Lbl statement whose n parameter matches that specified by the Goto statement This command can be used to loop back to the beginning of a program or to jump to any location within the program This command can be used in combination with conditional jumps and count jumps If the...

Page 411: ...conditional jump The jump is executed whenever the conditions are false Syntax Parameters left side right side variable A to Z r θ numeric constant variable expression such as A 2 relational operator page 8 5 18 Description The conditional jump compares the contents of two variables or the results of two expressions and a decision is made whether or not to execute the jump based on the results of ...

Page 412: ...e 1 to 26 Ans Description This command deletes the data in the list specified by list name All list data is deleted if nothing is specified for list name ClrMat Function This command deletes matrix data Syntax ClrMat matrix name ClrMat Parameters matrix name A to Z Ans Description This command deletes the data in the matrix specified by matrix name All matrix data is deleted if nothing is specifie...

Page 413: ...ction This command uses values in a generated table to graph a function Description This command draws a function graph in accordance with current conditions DrawFTG Con produces a connect type graph while DrawFTG Plt produces a plot type graph DrawGraph No parameters Function This command draws a graph Description This command draws a graph in accordance with current conditions DrawR Con DrawR Pl...

Page 414: ...hile DrawRΣ Plt produces a plot type graph DrawStat Function This draws a statistical graph Syntax See Using Statistical Calculations and Graphs in a Program on page 8 6 9 Description This command draws a statistical graph in accordance with current statistical graph conditions DrawWeb Function This command graphs convergence divergence of a recursion expression WEB graph Syntax DrawWeb recursion ...

Page 415: ...key Description This command returns the code that corresponds to the last key pressed A value of zero is returned if no key was pressed previous to executing this command This command can be used inside of a loop 78 68 58 48 77 67 57 47 64 74 54 44 63 73 53 43 33 62 72 52 42 32 61 71 51 41 31 76 66 56 46 75 65 55 45 36 35 26 25 79 69 59 49 39 29 28 38 27 37 ...

Page 416: ...er from 1 to 21 value and numeric expression string character string Description This command displays values including variable contents or text at a specific location on the text screen If there is a calculation input that calculation result is displayed The line is designated by a value from 1 to 7 while the column is designated by a value from 1 to 21 1 1 21 1 1 7 21 7 Example Cls_ Locate 7 1 ...

Page 417: ...ues individual values cannot be specified OpenComport38k CloseComport38k Function Opens and closes the 3 pin COM port serial Description See the Receive38k Send38k command below Receive38k Send38k Function Executes data send and receive at a data rate of 38 kbps Syntax Send38k expression Receive38k variable name list name Description The OpenComport38k command must be executed before this command ...

Page 418: ... conditional jump command Syntax Parameters left side right side variable A to Z r θ numeric constant variable expression such as A 2 relational operator k Other RclCapt Function Displayed the contents specified by the capture memory number Syntax RclCapt capture memory number capture memory number 1 to 20 left side relational operator right side ...

Page 419: ...e The screen scrolls automatically if the text exceeds 21 characters You can specify up to 255 bytes of text for a comment k Using Matrix Row Operations in a Program These commands let you manipulate the rows of a matrix in a program For this program enter the RUN MAT mode and then use the Matrix Editor to input the matrix and then enter the PRGM mode to input the program u To swap the contents of...

Page 420: ...ate a scalar multiplication and add the results to another row Row Example 3 To calculate the product of Row 2 of the matrix in Example 1 and the scalar 4 then add the result to row 3 The following is the syntax to use for this program Row 4 A 2 3_ Mat A Executing this program produces the following result 8 6 2 Using Calculator Functions in Programs Row Matrix name Multiplier Matrix name Multipli...

Page 421: ... following shows various types of syntax you need to use when programming with graph functions View Window View Window 5 5 1 5 5 1_ Graph function input Y Type_ Specifies graph type X2 3 Y1_ Graph draw operation DrawGraph_ Example Program 1 ClrGraph_ 1 J612J 2 View Window 10 10 2 120 150 50_ 2 31J 3 Y Type_ 3 4431 X 4 X 3 24X2 4X 80 Y1_ 4 J41JJ 4 5 G SelOn 1_ 5 4411J 6 BrokenThickG 1_ 6 43 7 DrawG...

Page 422: ... PxlOn line number column number PxlOff line number column number PxlChg line number column number PxlTest line number column number Text line number column number text Text line number column number expression SketchThick Sketch or Graph statement SketchBroken Sketch or Graph statement SketchDot Sketch or Graph statement SketchNormal Sketch or Graph statement Tangent function X coordinate Normal ...

Page 423: ...s how to specify the Dynamic Graph range inside a program Dynamic Graph range 1 D Start_ 5 D End_ 1 D pitch_ Example Program ClrGraph_ View Window 5 5 1 5 5 1_ Y Type_ AX 1 Y1_ 1 J41JJ 1 2 D SelOn 1_ 2 451 3 D Var A_ 3 3 1 4 D Start_ 4 J51 5 5 D End_ 5 2 1 6 D pitch_ 6 3 7 DrawDyna 7 J623 Executing this program produces the result shown here 8 6 5 Using Calculator Functions in Programs ...

Page 424: ...range setting 1 F Start_ 5 F End_ 1 F pitch_ Numeric table generation DispF Tbl_ Graph draw operation Connect type DrawFTG Con_ Plot type DrawFTG Plt_ Example Program ClrGraph_ ClrText_ View Window 0 6 1 20 106 10_ Y Type_ 3X2 2 Y1_ 1 T SelOn 1_ 1 4611 0 2 F Start_ 2 J611 6 3 F End_ 3 2 1 4 F pitch_ 4 3 5 DispF Tbl 5 J6241 6 DrawFTG Con 6 J6242 Executing this program produces the results shown her...

Page 425: ...e when programming with Recursion Table Graph functions Recursion formula input an 1 Type_ Specifies recursion type 3an 2 an 1_ 4bn 6 bn 1_ Table range setting 1 R Start_ 5 R End_ 1 a0_ 2 b0_ 1 an Start_ 3 bn Start_ Numeric table generation DispR Tbl_ Graph draw operation Connect type DrawR Con_ DrawRΣ Con_ Plot type DrawR Plt_ DrawRΣ Plt_ Statistical convergence divergence graph WEB graph DrawWeb...

Page 426: ...ts shown here Numeric Table Recursion graph k k k k k Using List Sort Functions in a Program These functions let you sort data in lists into ascending or descending order Ascending order 1 2 SortA List 1 List 2 List 3 Lists to be sorted up to six can be specified 1 431 2 K11 Descending order 3 SortD List 1 List 2 List 3 Lists to be sorted up to six can be specified 3 432 4 5 6 1 46232J 2 42 3 3 4 ...

Page 427: ...an be omitted k k k k k Using Statistical Calculations and Graphs in a Program Including statistical calculations and graphing operations in a program lets you calculate and graph statistical data u To set conditions and draw a statistical graph Following StatGraph you must specify the following graph conditions Graph draw non draw status DrawOn DrawOff Graph Type x axis data location list name y ...

Page 428: ...n be used for the following types of graphs by simply replacing Hist in the above specification with the applicable graph type Histogram Hist Median Box MedBox 1 Normal Distribution N Dist Broken Line Broken The following is a typical graph condition specification for a regression graph S Gph1 DrawOn Linear List 1 List 2 List 3 _ The same format can be used for the following types of graphs by sim...

Page 429: ...ist 1 List 2 _ Example Program ClrGraph_ 1 S Wind Auto_ 1 2 3 List 1_ 1 2 3 List 2_ 2 3 4 5 S Gph1 DrawOn Scatter List 1 List 2 1 Square _ 6 DrawStat Executing this program produces the scatter diagram shown here k Performing Statistical Calculations Single variable statistical calculation 1 1 Variable List 1 List 2 Frequency data Frequency x axis data XList 1 4161 8 6 11 Using Calculator Function...

Page 430: ...ing can be specified as the calculation type LinearReg linear regression Med MedLine Med Med calculation QuadReg quadratic regression CubicReg cubic regression QuartReg quartic regression LogReg logarithmic regression ExpReg exponential regression PowerReg power regression 8 6 12 Using Calculator Functions in Programs Sinusoidal regression statistical calculation SinReg List 1 List 2 Logistic regr...

Page 431: ...d Cubic Quart Log Exp Power Sinusoidal NPPlot Logistic List_ Square Cross Dot 1 Variable_ 2 Variable_ LinearReg_ Med MedLine_ QuadReg_ CubicReg_ QuartReg_ LogReg_ ExpReg_ PowerReg_ SinReg_ LogisticReg_ Swap_ Row_ Row _ Row _ SortA SortD G_SelOn_ G_SelOff_ Y Type r Type ParamType X cType Y Type Y Type Y Type Y Type NormalG_ ThickG_ BrokenThickG_ DotG_ StoGMEM_ RclGMEM_ D_SelOn_ D_SelOff_ D_Var_ Y T...

Page 432: ...L S WIN LIST LOCS T VAR Σ DSP RESID CPLX FRAC Y SPD Level2 Deg Rad Gra On Off On Off On Off On Off Fix Sci Norm ENG Con Plot On Off None Pict On Off On Off Auto Man File On Off Rang List On Off None List Real a bi r d c ab c Norm High Level3 On Off Eng Command Deg Rad Gra CoordOn CoordOff GridOn GridOff AxesOn AxesOff LabelOn LabelOff Fix_ Sci_ Norm_ EngOn EngOff Eng S L Normal S L Thick S L Broke...

Page 433: ... Level 1 ZOOM V WIN SKTCH Level2 Fact Auto V Win Sto Rcl Cls Tang Norm Inv GRPH PLOT LINE Crcl Vert Hztl Text PIXL Test STYL Level3 Y r Parm X c G dx Y Y Y Y Plot Pl On Pl Off Pl Chg Line F Line On Off Chg Command Factor_ ZoomAuto ViewWindow_ StoV Win_ RclV Win_ Cls Tangent_ Normal_ Inverse_ Graph_Y Graph_r Graph X Y Graph_X Graph_ Graph_Y Graph_Y Graph_Y Graph_Y Plot_ PlotOn_ PlotOff_ PlotChg_ Li...

Page 434: ...mber A and divides it by B 2 3 5 7 to find the prime factors of A If a division operation does not produce a remainder the result of the operation is assigned to A The above procedure is repeated until B A Example 440730 2 3 3 5 59 83 Program Name Prime Factorization 8 8 Program Library Be sure to check how many bytes of unused memory are remaining before attempting to perform any programming ...

Page 435: ...20050401 8 8 2 Program Library egcw w ww w ...

Page 436: ...ometric sequence based on the differences and ratios of the terms Purpose This program determines whether a specific sequence is an arithmetic sequence or geometric sequence Example 1 5 10 15 Arithmetic sequence Example 2 5 10 20 Geometric sequence Program Name Arithmetic Geometric Sequence Differentiation 8 8 3 Program Library ...

Page 437: ...20050401 8 8 4 Program Library Example 1 Example 2 fw baw bf w fw baw ca w ...

Page 438: ...pitch step size of X Y1 Coordinate values of upper half of ellipse Y2 Coordinate values of lower half of ellipse Y3 Distances between right focus and loci Y4 Distances between left focus and loci Y5 Sum of Y3 and Y4 Next the program plots the foci and values in Y1 and Y2 Purpose This program shows that the sums of the distances between the loci and two foci of an ellipse are equal Program Name Ell...

Page 439: ...20050401 8 8 6 Program Library wba wb w w d ...

Page 440: ...e defined by an input vertex and then rotates it to a specified angle around the vertex Purpose This program demonstrates coordinate transformation using a matrix Important Deg must be set as the angle unit for this program Program Name Rotation 8 8 7 Program Library ...

Page 441: ...20050401 8 8 8 Program Library dw fcde wfcde wfcde fcde w daw w 20070101 ...

Page 442: ...dinates for angles A B and C Purpose This program calculates the interior angles and surface area of a triangle defined by coordinates for angles A B and C Important Inputting the same coordinates for any two angles A B C causes an error Program Name Interior Angles and Surface Area of a Triangle 8 8 9 Program Library ...

Page 443: ...20050401 8 8 10 Program Library b awaw bwaw aw x d w ...

Page 444: ...e along anywhere spreadsheet capabilities 9 1 Spreadsheet Overview 9 2 File Operations and Re calculation 9 3 Basic Spreadsheet Screen Operations 9 4 Inputting and Editing Cell Data 9 5 S SHT Mode Commands 9 6 Statistical Graphs 9 7 Using the CALC Function 9 8 Using Memory in the S SHT Mode ...

Page 445: ...t consists of a cells and their contents as shown below 9 1 1 Spreadsheet Overview Each cell can contain a value expression text or a formula Formulas can contain a reference to a specific cell or a range of cells Each cell has a unique name consisting of its column letter and row number The name of the cell where the cell cursor is located in the above example is A1 File name Shows as many charac...

Page 446: ... cleared COPY 2 COPY specifies you want to copy the currently selected cell s This causes the 1 function key function to change to PASTE so you can move the cell cursor to another location and press 1 PASTE to paste the cells you copied Performing the paste operation does not affect the original cells CELL recalls the contents of the currently selected cell one only for editing JUMP displays a JUM...

Page 447: ...the right leftwards ALL deletes the contents of all of the cells in the currently displayed spreadsheet INS displays the INS submenu ROW inserts the same number of rows as the currently selected rows above the selected rows COL inserts the same number of columns as the currently selected columns to the right of the selected columns CLR clears the contents of the currently selected cell s GRPH disp...

Page 448: ...o the spreadsheet uData Input Function Menu GRAB enters the Grab mode for inputting sell references For details see To reference a particular cell page 9 4 6 inputs the absolute reference command into a cell inputs the cell range command into a cell If inputs the CellIf S SHT mode command CEL displays a submenu for inputting the following S SHT mode commands CellMin CellMax CellMean CellMedian Cel...

Page 449: ...sheet k k k k k Spreadsheet File Operations u To create a new file 1 In the S SHT mode press 1 FILE 1 NEW This displays a dialog box for inputting a file name 2 Enter up to eight characters for the Spreadsheet file name and then press w This will display a blank spreadsheet If the file name you enter in step 2 is the name of a spreadsheet file already stored in memory the calculator will open that...

Page 450: ...s 1 FILE 2 OPEN This will display a list of existing spreadsheet files 2 Use f and c to highlight the name of the file you want to delete 3 Press 1 DEL 4 In response to the confirmation message that appears press 1 Yes to delete the file or 6 No to cancel the delete operation without doing anything 5 To return to the spreadsheet from the file list press J If you delete the currently open file the ...

Page 451: ...splay the updated results in the applicable cells If a file already exists with the same file name you input in step 2 a message will appear asking if you want to replace the existing file with the new one Press 1 Yes to replace the existing file with the new one or 6 No to return to the spreadsheet without saving Using Auto Calc When On is selected for the Auto Calc setting on the Setup screen pa...

Page 452: ...cursor the edit box the line above the function menu at the bottom of the spreadsheet screen shows the contents value formula etc of that cell While multiple cells are selected with the cell cursor the edit box shows the range of selected cells For details about selecting cells see Selecting Cells page 9 3 2 k k k k k Moving the Cell Cursor You can move the cell cursor with the cursor key or by us...

Page 453: ... line when you press the w to finalize input into a spreadsheet cell You can use the Move setting on the Setup screen to change this to rightward movement if you want For details see 1 7 Using the Setup Screen k k k k k Selecting Cells Before performing any operation in a cell you must first select it You can select a single cell a range of cells all the cells in a row or column or all of the cell...

Page 454: ...ted in any cell of Line 1 press the f key This will select the entire column where the cell cursor is located If the cell cursor is located at cell A1 for example pressing f will select all of column 1 A1 to A999 The edit box will show A1 A999 u To select all of the cells in a spreadsheet Perform either of the following two operations While all of the cells of Column A are selected press d While a...

Page 455: ...e end cell of the range you want to select Selected cells are highlighted To cancel cell selection press J If you do the cell cursor will be located at the end cell of the range you selected 9 3 4 Basic Spreadsheet Screen Operations Pressing i CLIP while an entire line is selected that line will be the selection range start point You can use the f and c cursor keys to select additional lines Press...

Page 456: ...se depends on whether you want to input new data or edit the cell s existing data When you want to do this Use this method Replace the cell s current contents with Select the cell and then start inputting your new input Retain the cell s current contents to edit or Select the cell and then press 2 EDIT add to it 3 CELL Next edit the cell contents as desired 9 4 1 Inputting and Editing Cell Data No...

Page 457: ...r keys Input cursor 3 After everything is the way you want press w Pressing w will cause the cell cursor to move to the next cell You can specify movement to the next line or to the next column using the Move setting on the Setup screen page 1 7 5 If Auto Calc is turned on page 1 7 5 all of the formulas in the spreadsheet will be re calculated when you press w To cancel data input press J This wil...

Page 458: ...diting them k k k k k Inputting a Formula A formula is an expression that the S SHT mode calculates and evaluates when you input it when data related to the formula is changed etc A formula always starts with an equal sign and can contain any one of the following Values Mathematical expressions Cell references Calculator built in function commands page 2 4 1 S SHT mode commands page 9 5 1 If Auto ...

Page 459: ... cell referencing For more information about cell referencing see page 9 4 5 u To input formulas 1 Move the cell cursor to cell A1 and then input gaw 2 Move the cell cursor to cell B1 and then input the following sav A bw Pressing w will cause the cell cursor to move to cell B2 3 Perform the following procedures to input the formulas for cells B2 through B4 cav A bw tav A bw al B b al B cw 4 Move ...

Page 460: ... cell up from cell D12 Be sure to remember that relative cell references always change dynamically in this way whenever you move them using copy and paste Important When you copy a relative cell reference from the edit box it is copied to the clipboard as text and pasted as is without changing If A1 is in cell C2 and you copy A1 from the edit box and paste it into cell D12 for example D12 will als...

Page 461: ...asier to move the cursor around the spreadsheet To move the cell cursor to here Press this key A specific cell 2 GO Line 1 of current column 3 TOP Column A of current line 4 TOP Bottom line of current column 5 BOT Column Z of current line 6 BOT 3 Press f to move the cell cursor to cell A1 4 Press 1 SET This inputs the reference to cell A1 Instead of using the GRAB command 1 GRAB in step 2 you coul...

Page 462: ... in cell A4 This procedure assumes that cells A6 through B7 already contain the values shown below u To reference a range of cells 1 Move the cell cursor to cell A4 and then input 2 Perform the following key operation to input the sum command 5 CEL 5 Sum CellSum is a S SHT mode command See 9 5 S SHT Mode Commands for more information 3 Press J1 GRAB This enters the Grab mode 4 Use the cursor keys ...

Page 463: ...ut the cell range A6 B7 8 Press w to store the formula Instead of using the CLIP command i CLIP in step 5 to select a range of cells you could also use the GRAB command and the command To use this method perform the following steps in place of steps 3 through 7 in the above procedure 3 Press 1 GRAB to enter the Grab mode 4 Move the cell cursor to the first cell of the range A6 and then press 1 SET...

Page 464: ...dit mode function menu See Absolute Cell References page 9 4 5 for more information u To input the absolute reference symbol Example To input A 1 into cell C1 1 Move the cell cursor to cell C1 and then input 2 Press 2 3 Press 1 GRAB to enter the Grab mode and move the cell cursor to cell A1 4 Press 1 SET 5 Press the d key to move the cursor to the left of 1 6 Press 2 7 To register the formula pres...

Page 465: ...ROR will occur if an expression uses an incomplete or illegal syntax or if its result is a list or matrix The following table shows various types of constants and the results they display Constant Displayed Result 2005 2005 7 3 10 sin 30 0 5 sin X 1 1 1 5 AX 1 2 60 dim 1 2 3 3 1 0 0 1 0 1 sin Syntax ERROR 1 2 3 Syntax ERROR 1 When 30 is assigned to variable X and 2 is assigned to variable A 2 A ch...

Page 466: ...c sequence in a spreadsheet Example To generate a numeric sequence starting from cell A1 using the following parameters Function f x X2 Variable X Starting Value 1 Ending Value 15 Increment 7 1 Move the cell cursor to the cell from which you want the generated sequence to be input 2 Press 2 EDIT 5 SEQ This will display a dialog box like the one shown to the right This is the cell you selected in s...

Page 467: ...8 15 Use the f and c cursor keys to move between items and input the required data for each one The following shows how the screen should appear after your input the data required for this example 4 After inputting data for all the items press 6 EXE or the w key This will cause the values of the generated sequence to be input into the spreadsheet starting from the cell you selected in step 1 End I...

Page 468: ...his means the formula is A1 1 in cell A2 A2 1 in cell A3 etc In this example it is assumed that 1 is already input into cell A1 and 2 is input into cell B1 1 Select the range of cells from A2 through B3 See To select a range of cells page 9 3 4 for more information 2 Press 2 EDIT 6 g 1 FILL This displays the Fill dialog box This is the range of cells you selected in step 1 3 While the Formula line...

Page 469: ...ified range of cells The A1 cell reference is a relative reference The following shows the formulas that are actually input into each cell 9 4 14 Inputting and Editing Cell Data A B 2 A1 1 B1 1 3 A2 1 B2 1 If any cell within the range of selected cells already contains data the new fill data will replace the existing data ...

Page 470: ...ditions When cells within the cut area are referencing cells that are outside the cut area When cells within the cut area are referencing cells that are also within the cut area When a cell within the cut area is referencing a cell that is outside the cut area In this case all cell references are treated as absolute cell references no matter what type they actually are absolute or relative Example...

Page 471: ...area B1 C1 the B 1 reference changes to B 2 like a relative cell reference when pasted into cell C2 even though it is an absolute cell reference u To cut and paste spreadsheet data 1 Select the cell s you want to cut See To select a single cell page 9 3 2 and To select a range of cells page 9 3 4 for more information 2 Press 2 EDIT 1 CUT This selects the data and enters the paste mode which causes...

Page 472: ...ferent locations u To copy and paste spreadsheet data 1 Select the cell s you want to copy See To select a single cell page 9 3 2 and To select a range of cells page 9 3 4 for more information 2 Press 2 EDIT 2 COPY This selects the data and enters the paste mode which causes the 1 function key menu to change to PASTE You can exit the paste mode at any time during the following steps by pressing J ...

Page 473: ... replaced by the pasted data If a copy and paste operation causes a relative cell reference to become an illegal reference the illegal reference will be replaced by in the cell where it is pasted Let s say for example that you copy the contents of cell A3 A1 A2 and paste it in cell B2 When the A1 relative cell reference in A3 which effectively means two cells up is pasted into cell B2 it becomes a...

Page 474: ...dual cell or an entire line or column of cells You can also insert a line or column of blank cells when you need to u To delete an entire line or column of cells 1 Select one or more cells inside the line s or column s you want to delete 9 4 19 Inputting and Editing Cell Data Data sorting is supported only for a single line or a single column of data Attempting to perform a sort operation when mul...

Page 475: ... the right leftwards 2 COL To exit the DEL submenu without deleting anything press J instead of a function key u To delete the contents of all the cells in a spreadsheet 1 Press 3 DEL 3 ALL 2 In response to the confirmation message that appears press 1 Yes to delete the data or 6 No to cancel the delete operation without deleting anything After deleting all data the blank spreadsheet screen will a...

Page 476: ... the currently selected rows above the selected rows 1 ROW Insert the same number of columns as the currently selected columns above the selected columns 2 COL To exit the INS submenu without inserting anything press J instead of a function key A Range ERROR occurs if a line or column insert operation causes the current cells to exceed the range of A1 Z999 k k k k k Clearing Cell Contents Perform ...

Page 477: ...ou want to input To input this command Press this key For details CellIf Condition 4 If Page 9 5 2 CellMin Minimum of Cells 5 CEL 1 Min Page 9 5 2 CellMax Maximum of Cells 5 CEL 2 Max Page 9 5 3 CellMean Mean of Cells 5 CEL 3 Mean Page 9 5 3 CellMedian Median of Cells 5 CEL 4 Med Page 9 5 3 CellSum Sum of Cells 5 CEL 5 Sum Page 9 5 4 CellProd Product of Cells 5 CEL 6 Prod Page 9 5 4 4 Input the ot...

Page 478: ... Syntax CellIf equation expression 1 expression 2 CellIf inequality expression 1 expression 2 Example If the value in cell A1 is greater than the value in cell B1 input the value of cell A1 into cell A2 Otherwise input the value of cell B1 into cell A2 u u u u u CellMin Function Returns the lowest value contained in the range of specified cells Syntax CellMin start cell end cell Example To determi...

Page 479: ...he range of specified cells Syntax CellMean start cell end cell Example To determine the mean of the values in the block whose upper left corner is located at A3 and whose lower right corner is located at C5 and input the result in cell A1 u u u u u CellMedian Function Returns the median of the values contained in the range of specified cells Syntax CellMedian start cell end cell Example To determ...

Page 480: ... block whose upper left corner is located at A3 and whose lower right corner is located at C5 and input the result in cell A1 u u u u u CellProd Function Returns the product of the values contained in the range of specified cells Syntax CellProd start cell end cell Example To determine the product of the values in cells B3 through B5 and input the result in cell A1 9 5 4 S SHT Mode Commands ...

Page 481: ...e STAT mode function menu Some of the functions on the menu that appears when you press 6 SET here are different from those that appear when you press 6 SET in the STAT mode For details about the differences see Configuring Graph Parameter Settings on page 9 6 2 Draws a graph in accordance with StatGraph1 settings see 6 SET below Draws a graph in accordance with StatGraph2 settings see 6 SET below...

Page 482: ...The following describes the Spreadsheet graph settings you can configure on the graph settings screen u XCellRange range x axis data cells Cell the specified cell range data corresponds to x axis data u YCellRange range y axis data cells Cell the specified cell range data corresponds to y axis data u Frequency number of times a value occurs 1 specifies 1 as the frequency of the values in the cell ...

Page 483: ...a spreadsheet Here we will input the above data into the cell range A1 B5 2 Select the cell ranges you want to graph Here we will select the range A1 B5 3 Press 6 g 1 GRPH to display the GRPH submenu 4 Press 6 SET This displays the StatGraph1 settings screen The first column of cells you selected in step 2 will be displayed for XCellRange while the second column will be displayed for YCellRange Yo...

Page 484: ...ulating and Graphing Single Variable Statistical Data and 6 3 Calculating and Graphing Paired Variable Statistical Data For information about configuring the Frequency setting see Configuring the Frequency Setting page 9 6 6 6 After all of the settings are the way you want press J to exit the graph settings screen 7 Press 1 GPH1 This will draw a graph in accordance with the StatGraph1 settings ...

Page 485: ... change the XCellRange and YCellRange settings manually 1 Press 6 SET on the GRPH submenu to display the graph settings screen 2 Use the f and c cursor keys to move the highlighting to XCellRange 3 Press 1 CELL or simply input something Pressing 1 CELL will display the current XCellRange setting A3 A5 in this example with an input cursor so you can edit it If you simply input something the current...

Page 486: ...equency value for each data item which will reduce the number of plots of very frequent data items and make the graph easier to read u To specify the frequency of each data item 1 Input the frequency values on the spreadsheet For this example input the frequency values for the example data on page 9 6 3 Frequency column C 2 Press 6 SET on the GRPH submenu to display the graph settings screen 3 Use...

Page 487: ...C in the STAT mode List Editor The following explains each function and where you need to go to find out more for them Key Description Go here for more details 1 1VAR 2 2VAR 3 REG 6 SET The functions of function menu keys 1 through 3 are basically the same as the STAT mode function menu The settings you can configure with 6 SET are different from those in the STAT mode Press to perform single vari...

Page 488: ...le statistical calculations u 1Var Freq value frequency 1 specifies 1 as the frequency of the values in the cell range specified 1Var XCell Cell range of cells that specify the frequency for each cell specified by 1Var XCell u 2Var XCell x variable cell range for paired variable statistical calculations Cell specifies the cell range of x variable values for paired variable statistical calculations...

Page 489: ... Press 6 SET to display the statistical calculation settings screen The first column of cells you selected in step 2 will be displayed for 1Var XCell while the second column will be displayed for 2Var YCell You can change the cell ranges manually using the same procedures as those for the graphing cell range settings See To change the XCellRange and YCellRange settings manually page 9 6 5 for more...

Page 490: ...about the meaning of each of the values on the result screen see Displaying the Calculation Results of a Drawn Paired Variable Graph on page 6 3 11 10 Press J3 REG 1 X This will display the linear regression coefficients for the original data For information about the meaning of each of the coefficient values on this screen see Linear Regression Graph on page 6 3 6 11 Press J to return to the spre...

Page 491: ...of a cell to a variable 1 Move the cell cursor to the cell whose data you want to assign to a variable 2 Press 6 g 3 STO 1 VAR The Cell setting will show the name of the cell you selected in step 1 3 Press c to move the highlighting to Var Name 4 Input the variable name A to Z r or θ and then press w 5 Press 6 EXE or the w key to assign the data to the variable If the variable you select already h...

Page 492: ...highlighting to List 1 26 4 Enter a list number in the range of 1 to 26 and then press w 5 Press 6 EXE or the w key to save the data in the List Memory If the List Memory you select already has data assigned to it the new data will replace the existing data k k k k k Saving Spreadsheet Data to File Memory You can use the following procedure to select a range of cells and save their data to File Me...

Page 493: ...adsheet Data to Mat Memory You can use the following procedure to save the contents of a range of cells to Mat Memory A to Z u To save the contents of a range of cells to Mat Memory 1 Select the range of cells whose data you want to save in Mat Memory 2 Press 6 g 3 STO 4 MAT The Cell Range setting will show the range of cells you selected in step 1 3 Press c to move the highlighting to Mat Name 4 ...

Page 494: ... section to select a List Memory List 1 through List 26 and input it into a spreadsheet The data is input into the spreadsheet either line wise or column wise depending on the current Move setting on the Setup screen Note The initial default Move setting is line wise top to bottom data input If you want to perform column wise left to right input change the Move setting For details see 1 7 Using th...

Page 495: ...er left cell of the range where you want the recalled data to be input 2 Press 6 g 4 RCL 3 MAT to display a data recall screen like the one shown below The 1st Cell setting will show the name of the cell you selected in step 1 3 Input the name A to Z of the Mat Memory whose data you want to recall and then press w 4 Press 6 EXE or the w key to recall the data u To use a variable in a spreadsheet Y...

Page 496: ...xpressions graphs and tables eActivities also provide the student the means to explore problems document their learning and problem solving by entering notes and share their learning by saving their work to a file 10 1 eActivity Overview 10 2 Working with eActivity Files 10 3 Inputting and Editing eActivity File Data 10 4 Using Matrix Editor and List Editor 10 5 eActivity File Memory Usage Screen ...

Page 497: ...on menu OPEN opens the eActivity file or folder that is currently selected on the file list NEW creates a new eActivity file DEL deletes the eActivity file that is currently selected on the file list SRC starts a file search operation 10 1 1 eActivity Overview When there are no files stored in the e ACT mode When there are files stored in the e ACT mode When there are no eActivity files only the 2...

Page 498: ... in the example shows what is currently on the display while the lighter line shows the part of the eActivity that is not displayed You can view all of the parts of the eActivity by scrolling the screen contents upwards and downwards You can use the workspace screen in insert text formulas application data strips and other data into an eActivity 10 1 2 eActivity Overview The content of the workspa...

Page 499: ...ial symbols and accented characters A a toggles between upper case and lower case input This function is available only during alpha input page 1 1 3 JUMP displays the JUMP submenu TOP moves the cursor to the top of the file BTM moves the cursor to the bottom of the file DEL L deletes the line that is currently selected or where the cursor is located INS displays an insert submenu for inserting a ...

Page 500: ... of matrices and mathematical functions For more information see Using the MATH Menu page 1 3 10 INS Same as INS under Text Line Function Menu page 10 1 3 JUMP Same as JUMP under Text Line Function Menu page 10 1 3 DEL L deletes the line that is currently selected or where the cursor is located Note that deleting a math line deletes both the input expression and the result MAT displays the Matrix ...

Page 501: ...u page 10 1 3 JUMP Same as JUMP under Text Line Function Menu page 10 1 3 DEL L deletes the strip that is currently selected or where the cursor is located MAT displays the Matrix Editor page 2 8 2 LIST displays the List Editor page 6 1 1 k k k k k Basic eActivity File Operations This section provides an overview of the following eActivity operations Creating a new eActivity file Inputting text nu...

Page 502: ...input the text shown below Note that a text line does not perform auto word wrapping so you need to insert carriage returns manually where you want them by pressing w 2 After inputting all of the text you want press w This will cause the cursor to move from the end of the text to the beginning of the next line 4 Use math lines to enter the expression 2x2 x 3 0 and solve it For this example we will...

Page 503: ...ve the cursor to the beginning of the next line 5 Press J twice to close the option OPTN menu 5 Now to draw a graph insert a Graph strip into the eActivity 1 Press 2 STRP This will display a dialog box with a list of insertable strips 2 On the list select Graph and then press w This will insert a Graph strip ready for you to input a title 3 Type a title for the list Graph draw for this example and...

Page 504: ...d as a solution because we specified a lower limit of 0 The graph drawn here is stored in the strip we created in step 5 5 To return to the eActivity workspace screen press a 7 Use G SLV to extract the roots on the graph screen 1 Select the Graph strip we created in step 5 and then press w This will display the graph screen and draw the graph we drew in step 6 2 Use G SLV to extract the roots of y...

Page 505: ... the J key to display the file list Then perform step 1 10 2 1 Working with eActivity Files Folder name You do not need to open a folder if you want to create the new file in the Storage Memory root directory For information about creating a new folder see Creating a Folder in Storage Memory page 12 7 5 2 Press 2 NEW This displays a dialog box for inputting a file name 3 Enter up to eight characte...

Page 506: ...o delete is in a folder use f and c to highlight the folder and then press 1 OPEN or w 2 Use f and c to highlight the file you want to delete and then press 3 DEL 3 In response to the confirmation message that appears press 1 Yes to delete the file or 6 No to cancel the delete operation without doing anything 10 2 2 Working with eActivity Files 1 If a memory error occurs in step 2 delete capture m...

Page 507: ...hat file name characters are searched from left to right This means that if you enter IT here names such as ITXX ITABC and IT123 will be hits but names like XXIT and ABITC will not be hits 3 Press w If a file name that corresponds to the text you input in step 2 is found the name will appear highlighted on the file list The message Not Found will appear if a match cannot be found Press the J key t...

Page 508: ... When you input a mathematical expression the result appears right justified in the next line You can perform the same operations as the ones you use in the RUN MAT mode while Math is selected as the Input Mode Stop line A stop line can be used to stop calculation at a particular point Strip A strip can be used to embed data from Graph Conics Graph Spreadsheet and other applications into an eActiv...

Page 509: ...y workspace screen To jump to the top of the screen press 6 g 1 JUMP 1 TOP To jump to the bottom of the screen press 6 g 1 JUMP 2 BTM k k k k k Using a Text Line A text line can be used to input characters numbers and expressions as non executable text u To input into a text line 1 On the eActivity workspace screen change the line where the cursor is currently located into a text line or insert a ...

Page 510: ... below to change it to a text line 2 Press 3 CALC to change the math line to a text line You cannot use the above procedure to change to a text line while a strip is selected In this case you need to perform the procedure under To insert a text line or move the cursor to a line that is not a strip u To insert a text line To insert a text line while the cursor is Perform this key operation located ...

Page 511: ...e A key k Using Math Lines A math line lets you input a calculation into an eActivity file and then perform the same calculations you use in the RUN MAT mode while Math is selected as the Input Mode Math lines always have two parts an input expression and a result eActivity calculations are different from RUN MAT mode calculations as described below When you input a mathematical expression into an...

Page 512: ...th line 1 On the eActivity workspace screen check the menu of the 3 function key If the 3 key menu is CALC it means that the current line is already a math line In this case you can input an expression in the line without performing step 2 below If the 3 key menu is TEXT it means that the current line is a text line Perform step 2 below to change it to a math line 2 Press 3 TEXT to change the text...

Page 513: ...y math line of an eActivity that contains more than one math line pressing w will cause all of the math lines to be recalculated Recalculation can take some time if there is a large number of math lines or if the math lines include complex calculations To avoid having to wait for all the expressions to be recalculated each time you make a change you can insert a stop line below the math line s you...

Page 514: ...splays the result in line 4 1 In this example substituting any value in line 1 and pressing w will produce a result of 1 If we wanted to test various values for θ without recalculating all of the math lines underneath it we could insert a stop line at the location shown above Then each time we change the value of θ and press w the calculator will re calculate sinθ 2 cosθ 2 and then stop B These ma...

Page 515: ...le whenever you call up the application from there or even if you switch the strip to another application 10 3 8 Inputting and Editing eActivity File Data Though the applicable application screen fills the display when you call up an application from a strip eActivity continues running in the background It is important to keep in mind that any operation you perform within the application is an eAc...

Page 516: ...LE mode Table Editor screen Table Editor Table relation list CONICS mode Conics Graph screen Conics Graph CONICS mode Conics Editor screen Conics Editor STAT mode Stat Graph screen Stat Graph STAT mode List Editor screen List Editor EQUA mode Solver screen Solver RECUR mode Recur Editor screen Recur Editor Notes screen 2 Notes RUN MAT mode Matrix Editor screen Matrix Editor EQUA mode Simul Equatio...

Page 517: ...ated 5 Press d or e to display the text input cursor and then enter up to 16 characters for the strip title The text cursor will also appear if you start to input text without pressing d or e first 6 Press w to assign the title to the strip 10 3 10 Inputting and Editing eActivity File Data Pressing the w key while a strip is highlighted selected as shown in steps 4 and 6 above will display the app...

Page 518: ... 2 Input the new title Press d or e to display the text input cursor and then edit the current title If you press a character key without pressing the d or e key first the current title will be cleared and the character will be input 3 After making sure the title is the way you want press w Pressing J will cancel title input without changing the current title ...

Page 519: ... as those you can normally perform while the application is running For details about using each application see the section of this User s Guide that explains that application s mode Also see Practical Strip Examples page 10 3 13 for more information u To toggle between the eActivity workspace screen and the application screen called up from a strip Press a This will toggle between the two screen...

Page 520: ...graph the function y x2 Things to remember Though the graph screen is called up from the Graph strip you need to switch to the Graph Editor screen to input the function u To create a Graph strip 1 On the eActivity workspace screen press 2 STRP select Graph from the strip list that appears and then press w This will insert a Graph strip 2 Input the strip title and then press w Here we will input Gr...

Page 521: ...ss 6 DRAW to graph the function This will display the graph screen with a graph of the function you input on the Graph Editor screen 7 To return to the eActivity workspace screen press a 8 Press w again to call up the graph screen This will re graph the function you input in step 5 10 3 14 Inputting and Editing eActivity File Data You can also paste a previously copied function from the clipboard ...

Page 522: ...workspace screen press 2 STRP select Table Editor from the strip list that appears and then press w This will insert a Table Editor strip 2 Input the strip title and then press w Here we will input Table create 3 Press w to call up the Table Editor screen This will display a blank Table Editor screen 4 Input the function you want to use to generate the table Y1 X2 in this example 5 Press m SET UP ...

Page 523: ...viously copied function from the clipboard into a graph screen called up from a Graph strip If you do however the pasted data will not be reflected in the function stored in the memory of the Graph strip Use copy and paste when you need a quick temporary look at the graph produced by a function 10 3 16 Inputting and Editing eActivity File Data After returning to the eActivity workspace screen in s...

Page 524: ...it to the clipboard See To specify the copy range page 1 3 5 for details about how to copy text to the clipboard 5 Use the f and c cursor keys to move the highlighting to the Graph strip and then press w This will graph the function currently stored in Graph draw strip memory 6 Press j PASTE This will graph the function that is on the clipboard Y X2 1 7 To return to the eActivity workspace screen ...

Page 525: ...e used for text lines See Notes Screen Function Menu below for more information u Copy and paste text Use i CLIP to copy text and j PASTE to paste it For more information see Using the Clipboard for Copy and Paste page 1 3 5 u Notes Screen Function Menu The following describes the function menu of the Notes screen JUMP displays a JUMP menu that you can use to jump to the top 1 TOP or the bottom 2 ...

Page 526: ...th the expression line and the result line u To delete a line or strip 1 Use the f and c cursor keys to move the highlighting to the strip you want to delete 2 Press 6 g 2 DEL L 3 In response to the confirmation message that appears press 1 Yes to delete the line or strip or 6 No to cancel the delete operation without doing anything 10 3 19 Inputting and Editing eActivity File Data ...

Page 527: ...ight characters for the eActivity file name and then press w 10 3 20 Inputting and Editing eActivity File Data If you press J to quit eActivity while there are unsaved edits on the screen a message will appear asking you if you want to save first When this message appears you can any one of the following Press 1 Yes key to save your edits and replace the previously saved version of the file Press ...

Page 528: ...orm one of the following operations on the eActivity workspace screen To call up Matrix Editor while the cursor Perform this key operation is located here In a text line 6 g 6 g 1 MAT In a math line 6 g 3 MAT In a strip 6 g 3 MAT u To return to the eActivity workspace screen from Matrix Editor Press J u To use Matrix Editor Matrix Editor operations are identical to those you perform when you call ...

Page 529: ...s key operation located here In a text line 6 g 6 g 2 LIST In a math line 6 g 4 LIST In a strip 6 g 4 LIST u To return to the eActivity workspace screen from List Editor Press J u To use List Editor List Editor operations are identical to those you perform when you call it up from the STAT mode See 3 List Function and Inputting Data into Lists page 6 1 1 for information about inputting data to Lis...

Page 530: ...to the right which shows the current size of the eActivity file Total Data Size and how much main memory is available for storage of additional data Free Bytes 2 To exit the memory usage screen press J The maximum allowable size for a single eActivity file is approximately 30 000 bytes The actual maximum size depends on capture memory and clipboard use The actual maximum file size may be less than...

Page 531: ...s The system settings menu lets you do the following Make contrast settings Make Auto Power Off settings Specify the system language View the operating system and application versions Reset the calculator 11 1 Using the System Settings Menu 11 2 System Settings 11 3 Version List 11 4 Reset Chapter 11 20060601 ...

Page 532: ...1 Using the System Settings Menu From the Main Menu enter the SYSTEM mode and display the following menu items 1 display contrast adjustment 2 APO Auto Power Off time setting 3 LANG system language 4 VER version 5 RSET system reset operations 20060601 ...

Page 533: ...ing J or J QUIT returns to the initial SYSTEM mode screen You can adjust contrast while any screen is on the display by pressing and then e or d To exit contrast adjustment press again k k k k k APO Settings You can specify either six minutes or 60 minutes as the Auto Power Off trigger time The initial default setting is six minutes While the initial SYSTEM mode screen is displayed press 2 APO to ...

Page 534: ...rs using the language you selected Check the contents and then press J Press J or J QUIT to return to the initial SYSTEM mode screen u u u u u To select the Menu Language 1 From the initial SYSTEM mode screen press 3 LANG to display the Message Language selection screen 2 Press 6 MENU 3 Use the f and c cursor keys to select the language you want and then press 1 SEL 4 The pop up window appears usi...

Page 535: ...ation 1 On the initial SYSTEM mode screen press 4 VER to display the Version List 2 Use f and c to scroll the screen The contents of the list are shown below Operating system version Add in application names and versions 1 Message languages and versions Menu languages and versions User name Press J or J QUIT to return to the initial SYSTEM mode screen 1 Only installed add ins are displayed 2006060...

Page 536: ...lay the user name input screen 2 Input up to eight characters for the user name you want 3 After inputting the name press w to register it and return to the Version list If you want to cancel user name input and return to the Version list without registering a name press J 11 3 2 Version List 20060601 ...

Page 537: ...6 g on the above screen displays the Reset Screen 2 shown below 1 M S main memory data and storage memory data clear 2 ALL all memory clear The following table shows the functions of the function keys You can use the function keys to delete the specific data you want Function Key Functions 11 4 1 Reset Initialize Setup Information Delete Main Memory Data Delete Add in Applications Delete Storage M...

Page 538: ...ears press 1 Yes to perform the reset operation you specified or 6 No to cancel 4 A message appears to let you know when the reset operation is complete For all memory clear Press J to restart the calculator and return to the Main Menu Other Press J to clear the message Screen produced when 2 MAIN is pressed in step 2 Screen produced when 2 MAIN is pressed in step 2 ...

Page 539: ...t is equipped as a standard accessory You can use the USB cable that comes with the calculator to connect it to a computer to exchange images and other data 12 1 Connecting Two Units 12 2 Connecting the Unit to a Personal Computer 12 3 Performing a Data Communication Operation 12 4 Data Communications Precautions 12 5 Image Transfer 12 6 Add ins 12 7 MEMORY Mode Chapter 12 ...

Page 540: ...two units 1 Check to make sure that the power of both units is off 2 Connect the two units using the cable 3 Perform the following steps on both units to specify 3PIN as the cable type 1 From the Main Menu enter the LINK mode 2 Press 4 CABL This displays the cable type selection screen 3 Press 2 3PIN Cable Models that are supported for this configura tion are shown below fx 9860G AU fx 9860G SD fx...

Page 541: ...is off 2 Connect the USB cable to your computer 3 Connect the other end of the USB cable to the calculator 4 Turn on the power of the unit followed by the personal computer 5 Perform the following procedure on the calculator to specify USB as the cable type 1 From the Main Menu enter the LINK mode 2 Press 4 CABL This displays the cable type selection screen 3 Press 1 USB 12 2 1 Connecting the Unit...

Page 542: ... cable type selection screen WAKE displays the wakeup setting screen CAPT displays the image transfer setting screen Communication parameters are fixed at the following settings 3 pin serial port Speed BPS 9600 bps max Connected with CFX 9850 series 115200 bps max Connected with another fx 9860G AU fx 9860G SD fx 9860G Parity PARITY NONE USB port Communication speed is in accordance with USB stand...

Page 543: ...u is displayed The calculator enters a data receive standby mode and waits for data to arrive Actual data receive starts as soon as data is sent from the sending unit Sending unit To set up the calculator to send data press 1 TRAN while the data communication main menu is displayed This displays the send data type selection screen MAIN main memory data SMEM storage memory data 12 3 2 Performing a ...

Page 544: ...ove the cursor to the data item you want to select and press 1 SEL to select it Currently selected data items are marked with Pressing 6 TRAN sends all the selected data items To deselect a data item move the cursor to it and press 1 SEL again Only items that contain data appear on the data item selection screen If there are too many data items to fit on a single screen the list scrolls when you m...

Page 545: ...upt a data operation at any time by pressing A The following shows what the displays of the sending and receiving units look like after the data communication operation is complete Sending Unit Receiving Unit Press J to return to the data communication main menu 12 3 4 Performing a Data Communication Operation Add in applications add in languages and add in menus are stored in the receiver s stora...

Page 546: ...n two calculators 3PIN selected as the cable type the receiver enters the receive mode automatically after it wakes up When communication is with a computer USB selected as the cable type connecting the USB cable to a computer and then to the calculator while the calculator is turned off will cause the calculator to turn on and enter the receive mode 1 On the receiver s data communication main men...

Page 547: ...us V Window contents zoom factors G MEM Graph memory group G MEM n Graph memory 1 to 20 contents Yes V WIN V Window memory group V WIN n V Window memory contents No PICTURE Picture memory group PICT n Picture graph memory 1 to 20 data No DYNA MEM Dynamic Graph functions Yes EQUATION Equation calculation coefficient values No ALPHA MEM Alpha memory contents No F MEM Function memory group F MEM n Fu...

Page 548: ...communications are interrupted by the J key operation or an error any data successfully received up to the interruption will be in the memory of the receiving unit An error occurs if the receiving unit memory becomes full during data communications When this happens press J to clear the error and delete unneeded data from the receiving unit to make room for the new data and then try again 12 4 2 D...

Page 549: ...ix List G Mem Pict and F Mem data items only More than 255 cells of List data CFX 9850 supports up to 255 List cells only Any List data that contains a complex number CFX 9850 does not support complex number input Attempting to send any of the following types of data to a CFX 9850 will not cause an error but the data will not be stored in CFX 9850 memory Table setting data Recursion data Financial...

Page 550: ...Press 2 PC This turns on manual image transfer and returns to the data communication main menu 4 On the calculator display the screen you want to transfer 5 Use FA 124 to perform the transfer operation 6 On the calculator press h CAPTURE 7 The screen data is sent to the computer 12 5 1 Image Transfer Selecting PC turns on manual image transfer automatically disables screen capture The following ty...

Page 551: ... auto image transfer and returns of the data communication main menu 4 Display the image you want to send 5 The displayed image is sent automatically to the OHP unit 6 To continue with auto image transfer return to step 4 7 To stop auto image transfer press 6 CAPT 1 Mem on the data communication main menu See the User s Guide that comes with the OHP unit for information about connecting the OHP un...

Page 552: ...Wakeup and Capture settings as shown below 2 Use the USB cable that comes with the calculator to connect to the projector or YP 100 unit u Precautions when Connecting Be sure to configure the calculator s Wakeup and Capture settings before connecting An hourglass figure may remain projected on the screen after you connect the calculator to a projector or YP 100 If this happens performing some oper...

Page 553: ...s icon appears in the Main Menu and you can run it just as you would a built in application u u u u u Built in Application Upgrades These are upgrades for the applications that are pre programmed in the calculator s ROM u u u u u On screen Message Language Data This data is required to display on screen messages in other languages Installing this data causes all on screen messages to appear in the...

Page 554: ... flash memory so data is safe even when power is interrupted Normally you would use the storage memory for data you need to store securely for long periods and load it into the main memory only when you need it Use the MEMORY mode to transfer data between the main memory and storage memory and to perform other memory management operations From the Main Menu select the MEMORY icon to enter the MEMO...

Page 555: ...umber of bytes used by each type of data Line 7 shows how many bytes of memory are currently unused in the currently selected memory main or storage The first time you store data to the storage memory the calculator will reserve a management memory area automatically which will reduce the Free value by 65535 bytes On the main memory screen indicates a data group On the storage memory screen indica...

Page 556: ...ha letter variables MATRIX Matrix group MAT n n A to Z and Ans Matrix LISTFILE List file group LIST n n 1 to 26 and Ans List memory contents LIST FILE n n 1 to 6 List File STAT Stat result data Y DATA Graph expression G MEM Graph memory group G MEM n n 1 to 20 Graph memory V WIN V Window memory group V WIN n n 1 to 6 V Window memory PICTURE Picture memory group PICT n n 1 to 20 Picture memory DYNA...

Page 557: ...pboard replay history etc which is not included in the above Storage Memory 1 Data Name Contents Data items listed in the Main Memory table that has g1m file names been copied to storage memory The names of these files have the extension g1m eActivity data names eActivity data stored in storage memory Add in software names Add in applications add in languages and add in Applications languages menu...

Page 558: ...creen 2 Input up to eight characters for the name you want to give to the folder Only the following characters are supported A through Z 0 through 9 Inputting any invalid character will cause an Invalid Name error An Invalid Name also occurs if the name you input is already being used by an existing file To cancel folder creation press J 3 Press w to create the folder and return to the storage mem...

Page 559: ...d Name error An Invalid Name also occurs if the name you input is already being used by an existing file To cancel folder creation press J 4 Press w to rename the folder and return to the storage memory information screen k Selecting Data You can use the following procedures to select data for copy and deletion Press 1 SEL to select the currently highlighted item which is indicated by the black se...

Page 560: ...ual items inside of a data group or folder the black selection pointer appears next to each item while a white selection pointer g appears next to the group or folder name The current data selection is maintained when any of the following operations is performed Save load execution Search execution Returning to the MEMORY mode initial screen deselects all currently selected items 12 7 7 MEMORY Mod...

Page 561: ...memory data information screen select the data you want to copy 2 Press 2 COPY This displays the folder selection screen 3 Select the folder to which you want to copy the data This displays the file name input screen 4 Input the file name you want to give to the file To cancel the copy operation press J 5 Press w This copies the data 6 The message Complete appears when the copy operation is comple...

Page 562: ...t enough memory available A Too Many Data error occurs when the number of data items is too great A Fragmentation ERROR occurs when there is enough free memory available but a garbage collection operation is required If a Fragmentation ERROR occurs perform the optimization procedure page 12 7 17 Overwrite check The calculator checks to see if there is any existing data at the copy destination with...

Page 563: ... check is performed for data of the same type only If different types of data have the same name the copy operation is performed without regard to the data with the same name Overwrite check applies only to the destination of the copy operation Type mismatch error check eActivity data add in applications add in languages add in menus and backup data cannot be copied to main memory Attempting to do...

Page 564: ...u want to delete You can select multiple files if you want 3 Press 6 DEL Press 1 Yes to delete the file Press 6 No to cancel the delete operation u To delete a storage memory file 1 On the initial MEMORY mode screen press 2 SMEM This displays a list of files that are in the storage memory 2 Select the file s you want to delete You can select multiple files if you want 3 Press 6 DEL Press 1 Yes to ...

Page 565: ...y whose names begin with the letter R 1 On the initial MEMORY mode screen press 1 MAIN This displays a list of files that are in the main memory 2 Press 3 SRC Input the letter R for the keyword The first file name that begins with the letter R appears highlighted on display 12 7 12 MEMORY Mode 1 You can input up to eight characters for the keyword The message Not Found appears if there are no file...

Page 566: ... S 1 On the initial MEMORY mode screen press 2 SMEM This displays a list of files that are in the storage memory 2 Press 3 SRC Input the letter S for the keyword The first file name that begins with the letter S appears highlighted on display 12 7 13 MEMORY Mode The message Not Found appears if there are no file names that match your keyword ...

Page 567: ... backed up data to the main memory when necessary u To back up main memory data 1 On the initial MEMORY mode screen press 4 BKUP 2 Press 1 SAVE This displays a folder selection screen 3 Use f and c to select the folder where you want to save the data 4 Press w to start the backup 12 7 14 MEMORY Mode Backup data is saved in a file named BACKUP g1m ...

Page 568: ... to cancel the backup operation A Memory Full occurs when there is not enough space available in the storage memory to complete the backup operation u To restore backup data to the main memory 1 On the initial MEMORY mode screen press 4 BKUP On the screen that appears you can confirm whether or not there is backup data in the storage memory 2 Press 2 LOAD This displays the folder selection screen ...

Page 569: ...ep 1 4 Press w 1 A message appears to confirm whether or not you really want to restore the backed up data Press 1 Yes to restore the data and delete any data currently in the area Press 6 No to cancel the data backup operation The message Complete appears when the restore operation is finished Press J to return to the screen displayed in step 1 ...

Page 570: ...e which rearranges the data in the storage memory and makes memory usage more economical u To optimize the storage memory 1 On the initial MEMORY mode screen press 5 OPT to optimize the storage memory The message Complete appears when the optimize operation is complete Press J to return to the initial MEMORY mode screen In some cases the amount of free memory capacity may be unchanged when you che...

Page 571: ...20050401 Appendix 1 Error Message Table 2 Input Ranges 3 Specifications 4 Key Index 5 P Button In case of hang up 6 Power Supply α ...

Page 572: ...esting ERROR Stack ERROR Countermeasure Press J to display the error and make necessary correc tions Check input values and make corrections to ensure that values are within allowable limits 1 Correctly input a Lbl n to corres pond to the Goto n or delete the Goto n if not required 2 Store a program in program area Prog file name or delete the Prog file name if not required Ensure that Prog file n...

Page 573: ...roduces a complex number when Real is specified for the Complex Mode setting on the Setup screen even though the argument is a real number List containing complex number used in a calculation or operation for which complex number data is invalid A Solve calculation could not obtain a solution within the specified range Keep the number of memories you use within the currently specified number of me...

Page 574: ...r some reason while updating the operating system The number of data items is too large Memory must be optimized before any more data can be stored The file name you input includes invalid characters Specify a variable for the graph function Input a Solve equation that includes a variable Check to make sure there is nothing wrong with the cable connection and that parameters are configured correct...

Page 575: ... Countermeasure Invalid Type Storage Memory Full Data ERROR An illegal data type is specified The storage memory is full A data error occurred Specify valid data Delete unneeded data Check to make sure you are writing correct type of data and try again ...

Page 576: ... accuracy deteriorates Complex numbers can be used as arguments Complex numbers can be used as arguments Complex numbers can be used as arguments Complex numbers can be used as arguments DEG x 9 109 RAD x 5 107 πrad GRA x 1 1010 grad x 1 x 1 10100 x 230 9516564 x 1 10100 x 1 10100 1 x 1 10100 x 1 1 10 99 x 1 10100 1 10100 x 100 1 10100 x 230 2585092 0 x 1 10100 x 1 1050 x 1 10100 x 0 x 1 10100 0 x...

Page 577: ...thin 10 digits includes division marks For a single calculation calculation error is 1 at the 10th digit In the case of exponential display calculation error is 1 at the last significant digit Errors are cumulative in the case of consecutive calculations which can also cause them to become large This is also true of internal consecutive calculations that are performed in the case of xy x y x 3 x n...

Page 578: ...range Values fall within following ranges after conversion DEC 2147483648 x 2147483647 BIN 1000000000000000 x 1111111111111111 negative 0 x 111111111111111 0 positive OCT 20000000000 x 37777777777 negative 0 x 17777777777 0 positive HEX 80000000 x FFFFFFFF negative 0 x 7FFFFFFF 0 positive ...

Page 579: ...er consumption 0 7 W Approximate battery life Main LR03 AM4 300 hours continuous display of main menu 220 hours continuous operation 5 minutes calculation 55 minutes display 1 year unused with power off Any of the following can shorten battery life Sequential program calculation execution Certain battery types Back up 5 years Auto power off Power is automatically turned off approximately six minut...

Page 580: ...0 fx 7400 series Send Receive commands 38400 bits second Send38k Receive38k commands 115200 bits second Parity EVEN Bit length 8 bits Stop bit Send 1 bit Receive 1 bit Includes parity None 1 bit X ON X OFF Control None 9600 38400 bits second Parity None Bit length 8 bits Stop bit Send 3 bits Receive 2 bits Includes parity None 1 bit X ON X OFF Control None USB port In accordance with USB 1 1 stand...

Page 581: ...te square A LOCK a Allows entry of alphanumeric characters shown in red Locks entry of alpha numeric characters Press before entering value to calculate square root r x Displays the variable data menu Displays program command menu Enters character r θ M Press between two values to make second value exponent of first Press between entering Linear Input Mode values for X Y to show xth root of y Ente...

Page 582: ... F G Linear input mode Press between entering fraction values Math input mode Enters an improper fraction in natural input format Converts fraction to decimal Inputs a mixed fraction Enabled only for the Math input mode Enters letter G Enters letter H I Enters open parenthesis in formula Press before entering value to calculate cube root Enters letter I x 1 J Enters close parenthesis in formula Pr...

Page 583: ...se curly bracket Inputs List command Inputs Mat command Enters letter T U List Mat b Enters number 1 Enters letter U V c Enters number 2 Enters letter V W d Enters number 3 Enters letter W X Addition function Specifies positive value Enters open bracket Enters letter X Y Subtraction function Specifies negative value Enters close bracket Inputs imaginary number unit Enters letter Y i Z a Enters num...

Page 584: ...ed the data currently stored in memory be sure to write it down somewhere before performing the P button operation Pressing the P button while a calculation operation is being performed while the calculator is performing a calculation internally deletes all data in memory You can also reset the calculator using front panel key operations see 11 4 Reset Use the P button to reset only while the fron...

Page 585: ...emory contents You will not be able to turn power back on until you replace batteries Be sure to replace the main batteries at least once every one year no matter how much you use the calculator during that time The batteries that come with this calculator discharge slightly during shipment and storage Because of this they may require replacement sooner than the normal expected battery life Warnin...

Page 586: ... avoid letting the battery fluid come into direct contact with your skin Keep batteries out of the reach of small children If swallowed consult with a physician immediately uTo replace the main power supply batteries Never remove the main power supply and the memory back up batteries from the calcula tor at the same time Never turn on the calculator while the main power supply batteries are remove...

Page 587: ...es 5 Load a new set of four batteries making sure that their positive and negative ends are facing in the proper directions 6 Replace the back cover 7 Turn the calculator front side up and slide off its case Next press o to turn on power α 6 3 Power Supply Power supplied by memory back up battery while the main power supply batteries are removed for replacement retains memory contents Do not leave...

Page 588: ... be deleted 1 Press o OFF to turn off the calculator Warning Be sure to turn the calculator off before replacing battery Replacing battery with power on will cause data in memory to be deleted 2 Making sure that you do not accidently press the o key slide the case onto the calculator and then turn it over 3 Remove the back cover from the calculator by 1 pulling with your finger at the point marked...

Page 589: ... the screw Next replace the back cover 8 Turn the calculator front side up and slide off its case Next press o to turn on power k About the Auto Power Off Function Calculator power turns off automatically if you do not perform any operation within the Auto Power Off trigger time you specify You can specify either six minutes or 60 minutes as the trigger time see APO Settings on page 11 2 1 To rest...

Page 590: ...CASIO COMPUTER CO LTD 6 2 Hon machi 1 chome Shibuya ku Tokyo 151 8543 Japan SA0701 E ...

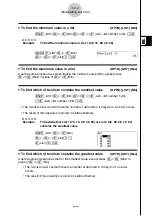
Reviews: