background image

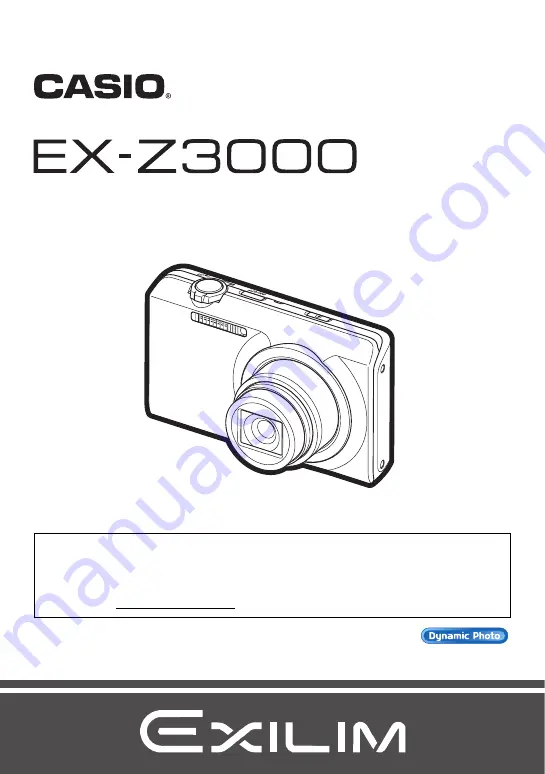
Digital Camera

E

User’s Guide

To go to “Getting the Most Out of Dynamic Photo” click here!

Thank you for purchasing this CASIO product.

• Before using it, be sure to read the precautions contained in this User’s Guide.
• Keep the User’s Guide in a safe place for future reference.
• For the most up-to-date information about this product, visit the official EXILIM 

Website at http://www.exilim.com/

Summary of Contents for Exilim EX-Z3000

Page 1: ...nk you for purchasing this CASIO product Before using it be sure to read the precautions contained in this User s Guide Keep the User s Guide in a safe place for future reference For the most up to da...

Page 2: ...ntact your original retailer Unpacking Digital camera Rechargeable lithium ion battery NP 110 USB AC adaptor AD C53U Power cord Strap USB cable AV cable CD ROM Basic Reference The shape of the power c...

Page 3: ...claims by third parties arising out of the use of Photo Transport Dynamic Photo Manager Virtual Painter 5 LE for CASIO or YouTube Uploader for CASIO CASIO COMPUTER CO LTD shall not be held liable for...

Page 4: ...ng Power On and Off 25 Holding the Camera Correctly 27 To Shoot a Snapshot 28 Selecting an Auto Recording Mode 28 To shoot a snapshot 29 Viewing Snapshots 32 Deleting Snapshots and Movies 33 To delete...

Page 5: ...d Subject Movement Anti Shake 61 Turning on Image Review Review 61 Viewing Snapshots and Movies 62 Viewing Snapshots 62 Viewing a Movie 62 Editing a Movie on the Camera Movie Editing 64 Viewing a Pano...

Page 6: ...osh 97 Playing a Movie 98 Viewing User Documentation PDF Files 99 User Registration 99 Using an Eye Fi Wireless SD Memory Card to Transfer Images Eye Fi 99 Files and Folders 101 Memory Card Data 101 O...

Page 7: ...Using the Camera in another Country 121 Using a Memory Card 121 To replace the memory card 121 Computer System Requirements for Bundled Software For Windows 123 Reset Initial Default Settings 124 When...

Page 8: ...0 5Lens 6Microphone page 48 7 p PLAY button pages 25 32 8Back lamp pages 17 19 25 29 42 9 ON OFF Power pages 16 21 25 bkConnector cover bl USB AV port pages 17 18 68 85 96 bmStrap hole page 2 bnMonito...

Page 9: ...42 5Snapshot image size page 53 6Movie quality pages 47 54 7Digital zoom Single SR Zoom page 45 8Remaining snapshot memory capacity page 133 9Remaining movie memory capacity pages 47 133 bk b Movie i...

Page 10: ...106 9REC mode icon page 26 bkInformation icon page 110 blDelete icon page 33 bmSlideshow icon page 66 bnMenu icon page 70 1Tab page 25 2Protect indicator page 71 3Folder name file name page 101 4Movie...

Page 11: ...a Delete A digital camera stores images on a memory card so you can record and delete images a countless number of times Play Record You can use the images you record in a variety of different ways St...

Page 12: ...ns Premium Auto Select Premium Auto recording and the camera automatically determines whether you are shooting a subject or scenery and other conditions Premium Auto delivers higher image quality than...

Page 13: ...ttings Touch and hold Holding your finger against the screen Touch and hold the screen to scroll images at high speed or to perform continual frame by frame playback of a movie Drag Holding your finge...

Page 14: ...rd object to perform screen operations Doing so can damage the screen The touch panel is pressure sensitive Make sure you touch the panel with sufficient pressure when operating it NOTE Applying a com...

Page 15: ...indicated by the arrows in the illustration 2 Load the battery With the EXILIM logo on the battery facing downwards in the direction of the lens hold the stopper next to the battery in the direction...

Page 16: ...USB AC adaptor 1 Turn off the camera Check to make sure that the camera s monitor screen is blank If it isn t press ON OFF Power to turn off the camera 2 After connecting the supplied USB cable to the...

Page 17: ...for a very long time charging may be terminated automatically and the back lamp may start flashing red after only about 45 minutes In either case disconnect the USB cable from the camera and then reco...

Page 18: ...ss ON OFF Power to turn off the camera 2 With your computer turned on connect the camera to it The camera s back lamp will light red After a short while the camera will turn on automatically and the b...

Page 19: ...is recommended Note that even while the connector is fully inserted you still will be able to see the metal part of the connector as shown in the illustration Back Lamp Operation 3 After charging is...

Page 20: ...is not loaded in the camera Because of this it is recommended that you charge the battery immediately before you need to use it Charging the camera s battery may cause interference with TV and radio...

Page 21: ...ntended for the Japanese market To change the display language from Japanese in this case use the procedure under Specifying the Display Language Language page 107 Note that a version of this manual i...

Page 22: ...hange this setting later if you want See page 28 for details NOTE Each country controls its local time offset and the use of summer time and so they are subject to change Removing the battery from the...

Page 23: ...above types of memory card The above are supported memory card types as of March 2011 Noted memory card capacities are standard values Use only SD cards that are compliant with the SD Card Association...

Page 24: ...remove the battery and contact your retailer or nearest CASIO authorized service center You need to format a new memory card before using it for the first time 1 Load a memory card page 23 2 Turn on t...

Page 25: ...new Eye Fi card to use it for the first time copy the Eye Fi Manager install files to your computer Do this before formatting the card Before formatting an Eye Fi card be sure to back up any data on...

Page 26: ...you do not perform any operation for about three minutes in the REC mode or for about five minutes in the PLAY mode Auto Power Off is disabled under any of the following conditions While the camera i...

Page 27: ...hich slows down the shutter speed NOTE Take care that your fingers and the strap do not cover any of the areas indicated in the illustration To protect against accidentally dropping the camera attach...

Page 28: ...h the tab to display it 3 Touch Auto or Premium Auto to select the auto recording mode you want To Shoot a Snapshot Selecting an Auto Recording Mode Auto This is the standard Auto recording mode It pr...

Page 29: ...e camera will beep the back lamp will light green and the focus frame will turn green When you half press the shutter button the camera automatically adjusts exposure and focuses on the subject it is...

Page 30: ...tc Re point the camera at the subject and try to focus again Shooting with Auto Focus lock page 59 is the name of a technique you can use when you want to shoot an image in which the subject to be foc...

Page 31: ...le the face detection feature detects the faces of up to ten individuals and adjusts focus and brightness accordingly Shooting with Premium Auto can cause vibration and noise to occur due to lens oper...

Page 32: ...so can clear the information to view only the snapshot page 110 You can zoom the screen image by sliding the zoom controller towards z or by touching the monitor screen page 67 If you are recording a...

Page 33: ...ode touch or to display the file you want to delete 2 Touch t If t is not displayed on the screen touch the tab to display it 3 Touch 1 File This will delete the selected image 1 Enter the PLAY mode 2...

Page 34: ...accordance with the currently selected recording mode page 36 Shooting Indoors under Fluorescent Lighting Minute flickering of fluorescent lighting can affect the brightness or color of an image Any...

Page 35: ...ng the left side of the screen touch the tab to display them 1 Press ON OFF Power to turn on the camera and enter the REC mode If the camera is in the PLAY mode touch g REC to enter the REC mode 1Tab...

Page 36: ...ecording delivers higher image quality than standard Auto recording mode page 28 BEST SHOT With BEST SHOT simply select the sample scene that resembles the type of shot you want and the camera automat...

Page 37: ...e recording process takes some time to complete after the message appears Image shooting is disabled while the message is displayed When using this feature image size is fixed at 3M 2048x1536 pixels N...

Page 38: ...mplete after the message appears Image shooting is disabled while the message is displayed When using this feature image size is fixed at 3M 2048x1536 pixels NOTE Use of a tripod is recommended when s...

Page 39: ...h is dramatically greater than the physical capabilities of the lens The final panorama image can be one of the two sizes shown below Slide Direction is Right or Left Maximum 5120x720 pixels Slide Dir...

Page 40: ...direction indicated by the arrow on the screen until the slide cursor reaches the other end of its movement range i e all the way to the right when moving the camera to the right The camera will star...

Page 41: ...de Panorama image is created by joining multiple images together there may be some roughness at the point where two images are joined Shooting under a flickering light source such as fluorescent light...

Page 42: ...s not fire Flash On Flash always fires This setting can be used to brighten a subject that normally comes out dark due to daylight or backlight daylight synchro flash Red Eye Flash fires automatically...

Page 43: ...use abnormal image colors Select Flash Off for the flash setting when shooting in areas where flash photograph is prohibited Red eye Reduction Using the flash to shoot at night or in a dimly lit room...

Page 44: ...protect against image blur due to camera movement when shooting with telephoto Performing a zoom operation changes the lens aperture Shooting with Zoom Optical zoom Changes the lens focal distance HD...

Page 45: ...zoom Not displayed HD Zoom Not displayed Single SR Zoom Digital zoom Range where image deterioration is suppressed optical zoom HD Zoom Single SR Zoom 1X 32 0X to 127 5X Zoom pointer Indicates current...

Page 46: ...ards and downwards until you find Single SR Zoom 3 Touch Single SR Zoom 4 Touch On NOTE Single SR Zoom is effective when you want to capture delicate textures Single SR Zoom does not work during movie...

Page 47: ...een touch MENU or press the shutter button 5 Touch b Movie This will start recording Monaural audio is also recorded during movie recording Touching o while recording is in progress will cause the rem...

Page 48: ...far away from what you are trying to record Shooting a very bright subject can cause a vertical band or a pink cast on the monitor screen image This does not indicate malfunction Shooting a movie usin...

Page 49: ...utton if you are shooting a snapshot or touch b Movie if you are shooting a movie BEST SHOT Precautions BEST SHOT scene images were not shot using this camera Images shot using a BEST SHOT scene may n...

Page 50: ...nd downwards until you find the item whose setting you want to change 3 Touch the item 4 Configure the setting of the item in accordance with the screen contents To cancel and exit the menu touch MENU...

Page 51: ...cus point s and focus automatically Procedure Enter the REC Mode MENU Single SR Quality Super resolution technology is used to categorize an image into three parts an outline part a fine pattern part...

Page 52: ...lashes while the Self timer countdown is in progress You can interrupt an ongoing Self timer countdown by pressing the shutter button NOTE The Self timer cannot be used together with Slide Panorama Zo...

Page 53: ...ots called pixels The more pixels there are in an image the more detail there will be However you generally can do with fewer pixels when printing an image L size through a print service attaching an...

Page 54: ...e image size see page 47 For information about resizing existing snapshots see page 74 Procedure Enter the REC Mode MENU Movie Quality See page 47 for details 16M 4608x3456 size image Approximately 16...

Page 55: ...value The exposure compensation value you set remains in effect until you change it or turn off the camera which causes it to revert to 0 0 NOTE When shooting under very dark or very bright conditions...

Page 56: ...is happens select the white balance setting that matches your shooting conditions Daylight Overcast etc 2 Touch OK Adjusting White Balance White Balance Auto WB Configures the camera to adjust white b...

Page 57: ...ode MENU Lighting You can use this setting to optimize the balance between bright areas and dark areas when shooting images Specifying ISO Sensitivity ISO AUTO Adjusts sensitivity automatically accord...

Page 58: ...images NOTE Zoom is fixed while Super Macro is selected so no zoom operation is performed when you slide the zoom controller Selecting a Focus Mode Focus Settings Type of Shot Focus Mode Approximate F...

Page 59: ...r about three seconds NOTE An Auto Macro feature detects how far the subject is from the lens and automatically selects either Macro Focus or Auto Focus accordingly Use of the flash together with Macr...

Page 60: ...ou half press the shutter button Before you half press the shutter button the camera focuses at the center of the screen Shooting with Continuous AF can cause vibration and noise to occur due to lens...

Page 61: ...e preview image that is displayed immediately after you shoot a snapshot Shooting while On is selected can cause an image to appear somewhat coarser than normal and can cause slight deterioration of i...

Page 62: ...ed on the screen touch the tab to display it 2 Touch or or drag left or right across the screen image to scroll through the movies until the one you want is displayed To scroll at high speed touch and...

Page 63: ...t reverse operation To return to normal playback speed touch 6 Stop playback During playback touch Volume adjustment During playback touch n and then drag the volume bar to the desired level Volume ca...

Page 64: ...n you edit a movie only the result is saved The original movie is not retained An editing operation cannot be undone NOTE A movie that is shorter than five seconds cannot be edited Editing of movies r...

Page 65: ...he panorama Panorama playback causes the image to scroll left right up or down Playback Controls The following functions cannot be performed on a panorama image Dynamic Photo Movie Converter Movie Edi...

Page 66: ...may be longer in the case of an image that was not recorded with this camera To return to normal single image display touch the monitor screen The image menu shows multiple images on a single screen...

Page 67: ...wards z Dragging an enlarged screen image will change the part of the image that is displayed Squeezing your thumb and forefinger page 14 on the displayed image will reduce it in size When monitor scr...

Page 68: ...ct its video input mode If the TV has more than one video input select the one where the camera is connected 3 Press p PLAY to turn on the camera This will cause an image to appear on the TV screen Yo...

Page 69: ...es to a DVD Recorder or Video Deck Use one of the following methods to connect the camera to the recording device using the camera s bundled AV cable DVD recorder or video deck Connect to the VIDEO IN...

Page 70: ...Menu contents are different in the REC mode and PLAY mode 2 Touch the item whose setting you want to change 3 Configure the setting of the item in accordance with the screen contents To cancel and ex...

Page 71: ...n page 109 Protecting a File Against Deletion Protect All Files On Protects all files All Files Off Unprotects all files Select Protects and unprotects specific files 1Touch or or drag upwards or down...

Page 72: ...hile using the flash NOTE The original snapshot is retained in memory and not deleted Red eye correction may not be possible in the case of small faces or profiles Red eye correction may not produce t...

Page 73: ...r thumb and forefinger and then spread them apart To reduce the size of the image touch the screen with your thumb and forefinger and then squeeze them together You also can use the zoom controller to...

Page 74: ...tio of 4 3 with both sides cut off The recording date of the resized version of the snapshot will be the same as the recording date of the original snapshot Procedure Enter the PLAY Mode MENU Rotation...

Page 75: ...75 Other Playback Functions PLAY Procedure Enter the PLAY Mode MENU DPOF Printing See page 80 for details Selecting Images for Printing DPOF Printing...

Page 76: ...n the screen touch the tab to display it 3 Touch Dynamic Photo 4 Touch or or drag left or right to select the background image and then touch OK Only an image that satisfies the following conditions c...

Page 77: ...ame length as the original movie 7 Touch OK 8 Use the zoom controller to adjust the size of the subject and drag the subject to change its location on the screen 9 After the subject s size and positio...

Page 78: ...image background and a moving subject is stored as a series of 20 still images You can use the following procedure to convert the 20 images that make up a Dynamic Photo to a movie 1 Enter the PLAY mod...

Page 79: ...you want to print to a professional print service and have them printed Printing on a Home Printer Printing Images on a Printer with Memory Card Slot You can use a printer equipped with a memory card...

Page 80: ...Settings Individually for Each Image Procedure MENU Setup DPOF Printing Select images 1 Touch or or drag left or right to display the image you want to print 2 Touch the number of copies value 3 Touch...

Page 81: ...F settings are not cleared automatically after printing is complete The next DPOF print operation you execute will be performed using the last DPOF settings you configured for the images To clear DPOF...

Page 82: ...your printer manufacturer for information about models that support Exif Print printer upgrades etc Configuring camera settings Configure DPOF settings page 80 You can turn date stamping on and off e...

Page 83: ...ages you also can transfer screen shot images from your computer to the camera Photo Transport page 90 Play back and edit movies You can play back movies pages 88 98 To edit movies use commercially av...

Page 84: ...P3 Installation not required Windows Media Player which is already installed on most computers can be used for playback 88 Edit movies Windows 7 Windows Vista Windows XP SP3 Use commercial software as...

Page 85: ...le card reader to access image files directly from the camera s memory card For details see the user documentation that comes with your computer To connect the camera to your computer and save files 1...

Page 86: ...or built in memory if there is no card as a removable disk 5 Right click the DCIM folder 6 On the shortcut menu that appears click Copy 7 Windows 7 Windows Vista users Click Start and then Documents...

Page 87: ...its original unrotated orientation IMPORTANT Never unplug the USB cable or operate the camera while viewing or storing images Doing so can cause data to become corrupted Never use your computer to mod...

Page 88: ...k of your computer before trying to play it Proper movie playback may not be possible for data accessed over a network from a memory card etc Proper movie playback may not be possible on some computer...

Page 89: ...ing neighboring copyrights unless you yourself own the copyright or you have obtained the permission of the applicable copyright holder s The maximum file size for each upload is 2048MB or a recording...

Page 90: ...camera will turn on automatically and battery charging will start page 18 2 On your computer click the following Start All Programs CASIO Photo Transport This starts up Photo Transport 3 Drag the file...

Page 91: ...ture and then hold down the mouse button Keeping the mouse button depressed drag the pointer down to the lower right corner of the area and then release the mouse button 6 Follow the instructions that...

Page 92: ...se from among water color oil color pencil or pastel effects that produce images that looked like they were done by a true virtual artist Assistance Umemura Taka Software Design Inc To install Virtual...

Page 93: ...olbar click Paint or the canvas icon to transform the image For details about this operation click the Virtual Painter Help button IMPORTANT Virtual Painter 5 LE for CASIO supports transformation of J...

Page 94: ...ick Digital Camera IMPORTANT You must have Adobe Reader or Adobe Acrobat Reader installed on your computer in order to view the contents of a PDF file If you do not already have Adobe Reader or Adobe...

Page 95: ...ble card reader to access image files directly from the camera s memory card For details see the user documentation that comes with your computer Using the Camera with a Macintosh When you want to do...

Page 96: ...nnector correctly with the port Your computer may not be able to recognize the camera if you connect via a USB hub Always connect directly to the computer s USB port The first time you connect the cam...

Page 97: ...oing so can cause data to become corrupted If you are running Mac OS X you can manage snapshots using iPhoto which comes bundled with some Macintosh products If you are running Mac OS 9 you will need...

Page 98: ...playback of movies Movie Playback Precautions Proper movie playback may not be possible on some Macintosh models If you experience problems try the following Change the movie image quality setting to...

Page 99: ...r Shooting with an Eye Fi wireless SD memory card loaded in the camera makes it possible to transfer image data automatically to a computer via wireless LAN 1 Configure LAN access point transfer desti...

Page 100: ...ed while image data transfer is in progress A confirmation message will appear on the monitor screen if you try to turn off the camera while image data transfer is in progress Follow the instructions...

Page 101: ...th the Design Rule for Camera File System DCF About DCF The following operations are supported for DCF compliant images Note however that CASIO makes no performance guarantees concerning these operati...

Page 102: ...u copy them to your computer If you later decided to return a DCIM folder to the camera however be sure to change its name back to DCIM The camera is designed to recognize only a root file with the na...

Page 103: ...tion about menu operations see page 50 Adjusting Monitor Screen Brightness Screen Auto With this setting the camera detects available light levels and automatically adjusts the brightness of the monit...

Page 104: ...using some printing application Stamping is performed in accordance with the date and time settings page 106 and the display style settings page 107 Configuring Camera Sound Settings Sounds Startup T...

Page 105: ...lect the On setting Summer time is used in some geographical areas to advance the current time setting by one hour during the summer months 3 Drag upwards and downwards until you find the area of the...

Page 106: ...uch 8 or 2 to change the currently selected value You can specify a date from 2001 to 2049 Be sure to select your Home City page 105 before setting the time and date If you set the time and date while...

Page 107: ...play language you want 1 On the menu screen touch Setup 2 Touch Language 3 Drag upwards and downwards until you find the language you want and then touch to select it Camera models sold in certain geo...

Page 108: ...ither NTSC or PAL as the video output system You can also specify an aspect ratio of 4 3 or 16 9 Select the aspect ratio 4 3 or 16 9 that matches the type of TV you plan to use Images will not display...

Page 109: ...built in memory or a memory card will delete all protected images stored there Check the battery level before starting a format operation and make sure it is not too low Formatting may not be performe...

Page 110: ...ode and PLAY mode If DISP is not displayed on the screen touch the tab to display it Display information cannot be changed during movie recording Selecting Display Information DISP Off No information...

Page 111: ...re the flash too close to the eyes of the subject Doing so creates the risk of loss of eyesight Monitor Screen Should the monitor screen ever become cracked never touch any of the liquid inside the mo...

Page 112: ...r snowing near the ocean or other body of water or in a bathroom 1 Turn off the camera 2 Remove the battery from the camera 3 Contact your dealer or nearest CASIO authorized service center Dropping an...

Page 113: ...an result in corruption or loss of data in camera memory Rechargeable Battery Use only the USB AC adaptor AD C53U or the specified device to charge the battery Attempting to charge the battery by an u...

Page 114: ...a battery is to be used by young children make sure that a responsible adult makes them aware of the precautions and proper handling instructions and make sure that they handle the battery correctly S...

Page 115: ...Near an air conditioner or in other areas subjected to extreme temperature or humidity Inside of a motor vehicle on a hot day or in an area subjected to strong vibration Condensation Sudden and extrem...

Page 116: ...es the risk of fire 0 Never plug the power cord into an outlet whose voltage rating is different from that marked on the power cord Doing so creates the risk of fire malfunction and electric shock 0 T...

Page 117: ...ld liable for use of this product in any way that infringes on the copyrights of others or that violates copyright laws Note that trademark and registered trademark are not use within the text of this...

Page 118: ...RNELv4 is a registered trademark of eSOL Co Ltd in Japan This product contains the software of FotoNation Inc FotoNation is a registered trademark of FotoNation Inc FaceTracker is a trademark of FotoN...

Page 119: ...n about six hours a safety timer will terminate it automatically even if the battery is not fully charged If the battery has not been used for a very long time charging may terminate automatically aft...

Page 120: ...ear or remove the battery outer label If a battery provides only very limited operation following a full charge it probably means the battery has reached the end of its service life Replace the batter...

Page 121: ...the rest of the way and then insert another one Never remove a card from the camera while the back lamp is flashing green Doing so can cause the image save operation to fail and even damage the memor...

Page 122: ...per second is recommended Discarding or Transferring Ownership of a Memory Card or the Camera The format and delete functions of the camera do not actually delete files from the memory card The origin...

Page 123: ...on see the Read me files on the CASIO Digital Camera Software CD ROM that comes bundled with the camera Computer System Requirements for Bundled Software For Windows Operating System Windows 7 Windows...

Page 124: ...hing from Auto to Premium Auto page 28 will make some menu items unavailable REC Menu PLAY Menu Reset Initial Default Settings Touch Shutter On Single SR Quality Off Single SR Zoom On Self timer Off I...

Page 125: ...x Setup Menu Screen Auto Eye Fi On Sounds Startup On Half Shutter On Shutter On Operation On Operation 3 Playback 3 Timestamp Off World Time Adjust Date Style Language Calibrate TP Video Out Format Re...

Page 126: ...ying to use it again Power will not turn off Nothing happens when a button is pressed Remove the battery from the camera and then reload it Image Recording Image is not recorded when the shutter butto...

Page 127: ...using Manual Focus and have not focused the image Focus the image page 59 2 You may be using Macro for scenery or portraits Use Auto Focus for scenery and portrait shots page 58 There is a vertical li...

Page 128: ...V shift to the side page 55 Night shots come out bad Use the Night Scene BEST SHOT scene page 49 when shooting at night Subjects are too dark when shooting images in a seashore or ski area Sunlight re...

Page 129: ...another camera File Deletion A file cannot be deleted The file may be protected Unprotect the file page 71 Other The wrong date and time are displayed or the wrong date and time are being stored alon...

Page 130: ...page 21 Do not remove the battery from the camera for at least 24 hours after configuring time and date settings After that the settings will not be reset if you remove the battery If the time and dat...

Page 131: ...uld not be saved because battery is low Battery power is low so an image file could not be saved Folder cannot be created You are trying to record a file while there are already 9999 files stored in t...

Page 132: ...CASIO authorized service center The card is locked The LOCK switch of the SD SDHC or SDXC memory card loaded in the camera is in the locked position You cannot store images to or delete images from a...

Page 133: ...ages as a percentage of 1GB Each movie can be up to 29 minutes long Movie recording stops automatically after 29 minutes of recording Number of Snapshots Movie Recording Time Image Size Pixels Approxi...

Page 134: ...m equivalent to 25 to 200 mm in 35 mm format Ten lenses in eight groups including aspherical lens Zoom 8 0X Optical zoom 12 0X in combination with Single SR Zoom 4 0X Digital zoom Up to 127 5X when HD...

Page 135: ...ity Auto Normal 0 4 m to 3 9 m 1 3 to 12 8 Wide Angle 0 8 m to 2 2 m 2 6 to 7 2 Telephoto Range is affected by optical zoom Flash Charging Time Approximately 4 seconds maximum Recording Snapshots Auto...

Page 136: ...re shot 2 Approximate playback time Standard temperature 23 C 73 F one image scroll approximately every 10 seconds 3 Approximate time using a 16GB SDHC memory card for a repeated cycle of 10 minutes r...

Page 137: ...age 3 7 V Rated Capacitance 1200 mAh Operating Temperature Requirements 0 to 40 C 32 to 104 F Dimensions 37 5 W x 44 9 H x 7 0 D mm 1 48 W x 1 77 H x 0 28 D excluding projections Weight Approximately...

Page 138: ...CASIO COMPUTER CO LTD 6 2 Hon machi 1 chome Shibuya ku Tokyo 151 8543 Japan MA1105 B M29...

Page 139: ...re in English However the camera allows you to select another display language if you want http dp exilim com Getting the Most Out of Dynamic Photo Contents Dynamic Photo A totally new way to enjoy di...

Page 140: ...aging You can create a Dynamic Photo image by inserting a built in moving subject into a background image snapshot or movie Before performing the following steps you should record the background image...

Page 141: ...r touch f PLAY to enter the PLAY mode 2 Touch MENU and then Dynamic Photo If MENU is not displayed on the screen touch the tab to display it 3 Touch or or drag left or right to select the background i...

Page 142: ...ill be a maximum of 20 seconds long Everything before and after the insertion is cut off If the movie you are inserting into original movie is shorter than 20 seconds the resulting movie will be the s...

Page 143: ...apshot will save a Dynamic Photo that consists of 20 still images of 2M size or smaller Inserting a built in subject into a movie will save the Dynamic Photo as a movie file Performing a delete or for...

Page 144: ...A Dynamic Photo with a still image background and a moving subject is stored as a series of 20 still images You can use the following procedure to convert the 20 images that make up a Dynamic Photo to...

Page 145: ...ncluded in presentation data for an impression that really lasts http dynamicstudio jp Using the CASIO EXILIM Dynamic Photo feature to create a Dynamic Photo image with a moving subject produces a CS...

Reviews: