background image

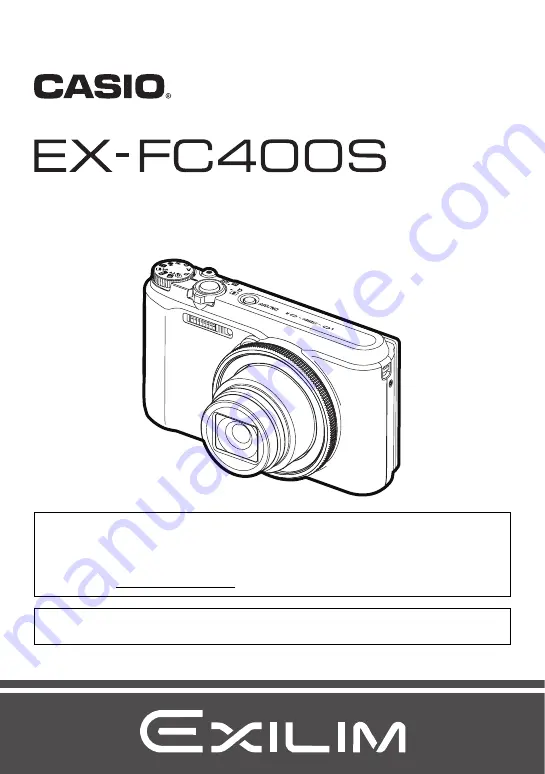
Digital Camera

EN

User’s Guide

Thank you for purchasing this CASIO product.

• Before using it, be sure to read the precautions contained in this User’s Guide.
• Keep the User’s Guide in a safe place for future reference.
• For the most up-to-date information about this product, visit the official EXILIM 

Website at http://www.exilim.com/

This camera includes a BEST SHOT scene for analyzing golf swings. For details about using the golf swing 
analysis BEST SHOT scene, see the “Using the Camera to Record and Analyze a Golf Swing” (page 150).

Summary of Contents for Exilim EX-FC400S

Page 1: ...e User s Guide in a safe place for future reference For the most up to date information about this product visit the official EXILIM Website at http www exilim com This camera includes a BEST SHOT sce...

Page 2: ...amera check to make sure that all accessories shown below are included If anything is missing contact your original retailer Accessories Rechargeable lithium ion battery NP 130A USB AC adaptor AD C54U...

Page 3: ...e directions indicated by the illustration to adjust the length Attaching the Neck Strap to the Camera 1 Undo the strap from the buckle and remove the strap loop A 3 Pass the end of the strap through...

Page 4: ...use or malfunction of this product CASIO COMPUTER CO LTD shall not be held liable for any damages or lost profits caused by loss of memory contents due to malfunction repair or any other reason Note...

Page 5: ...0 To format initialize a new memory card 31 Turning the Camera On and Off 32 Holding the Camera Correctly 33 To shoot a snapshot 34 Selecting an Auto Recording Mode 34 To shoot a snapshot 35 Viewing S...

Page 6: ...Movie for YouTube For YouTube 80 Shooting a Snapshot while Shooting a Movie Snapshot In Movie 81 Using BEST SHOT 83 To shoot with BEST SHOT 83 Creating and Using Your Own Setups CUSTOM SHOT 85 Shootin...

Page 7: ...the Effects of Camera and Subject Movement Anti Shake 115 Optimizing Image Brightness Lighting 117 Shooting with Continuous Auto Focus Continuous AF 117 Shooting with Face Detection Face Detection 11...

Page 8: ...Lines 137 Playing a Slideshow on the Camera Slideshow 137 Transferring Music from Your Computer to Camera Memory 139 Creating a Snapshot of Movie Frames MOTION PRINT 140 Editing a Movie on the Camera...

Page 9: ...uidelines into a Previously Recorded Movie Burn Lines 168 Displaying Two Movies Side by Side Dual Screen Play 169 Printing 173 Printing Snapshots 173 Connecting Directly to a PictBridge Compatible Pri...

Page 10: ...0 Disabling File Deletion Delete Key 200 Configuring World Time Settings World Time 201 Setting the Camera s Clock Adjust 202 Specifying the Date Style Date Style 202 Specifying the Display Language L...

Page 11: ...ion ring pages 45 132 9Lens bkMicrophones page 72 bl RING button pages 45 132 bm 0 Movie button page 71 bnBack lamp pages 24 26 32 35 55 boTerminal cover bp USB AV port pages 23 25 bq HDMI OUT HDMI ou...

Page 12: ...to perform operations Depending on the function certain operations cannot be performed using the control dial cp cn cq co Bottom cnBattery memory card slots pages 21 30 coBattery cover cpTripod hole...

Page 13: ...is not correct for some reason 1Self timer mode page 46 2Face Detection page 118 3Recording mode page 34 4Image deterioration indicator Zoom SR indicator page 61 5Remaining movie memory capacity page...

Page 14: ...time page 71 5Remaining movie memory capacity page 71 6Movie recording in progress page 71 7Movie quality FHD STD movie pages 71 74 Recording speed high speed movie page 74 8Remaining snapshot memory...

Page 15: ...mode REC mode PLAY mode 1Number of images in the group page 128 2CS group icon page 128 1No audio data available 2Movie recording time page 126 3Recording mode Movie quality speed pages 71 74 74 4YouT...

Page 16: ...s it easy to compose self portraits and to shoot from low angles Handsfree Self portraits You can control operation of the self timer from a distance by waving your hand which makes it easier to shoot...

Page 17: ...recording and the camera automatically determines whether you are shooting a subject or scenery and other conditions Premium Auto Pro delivers higher image quality than standard Auto High Speed Movie...

Page 18: ...portraits Low angle shots You can position the monitor screen so it faces in the same direction as the lens for easy composition of self portraits You can also use a stand on the back of the camera t...

Page 19: ...automatically whenever the monitor screen is tilted See page 200 for information about configuring the camera so it does not turn on when the monitor screen is tilted upwards When returning the monito...

Page 20: ...creen to Its Normal Position 1 Holding the monitor screen at point A rotate the screen downwards to the back of the camera 2 Push the monitor screen downwards with your finger at point B to slide the...

Page 21: ...in this case can cause the camera to become unstable and fall over Even when using the stand to adjust the vertical angle of the camera while shooting with landscape horizontal orientation take care...

Page 22: ...opper next to the battery in the direction indicated by the arrow as you slide the battery into the camera Press the battery in until the stopper secures it in place 3 Close the battery cover To repla...

Page 23: ...while it is loaded in the camera While the camera is turned off connect in the sequence shown below Charging time Approximately 240 minutes When disconnecting the USB AC adaptor from the camera be sur...

Page 24: ...e camera and then reconnect it to resume charging Make sure that you insert the cable connector into the USB port until you feel it click securely into place Failure to insert the connector fully can...

Page 25: ...SB cable to restart charging To complete charging faster use of the included USB AC adaptor is recommended If the battery has not been used for a very long time charging may terminate automatically an...

Page 26: ...ase of a commercially available computer certain USB port specifications may make it impossible to charge via the USB cable A battery that is still warm immediately after normal use may not charge ful...

Page 27: ...use the flash select Flash Off for the flash setting page 55 Enable the Auto Power Off and the Sleep features to protect against wasting battery power when you forget to turn off the camera pages 199...

Page 28: ...g 5 After setting the date and time use 4 and 6 to select Apply and then press SET NOTE Each country controls its local time offset and the use of summer time and so they are subject to change Removin...

Page 29: ...XC memory cards from 32GB up to 2TB Note that the ability to use any particular card with this camera even if it satisfies the above capacity and type requirements is not guaranteed This camera suppor...

Page 30: ...e it into the card slot all the way in until you hear it click securely into place 3 Close the battery cover IMPORTANT Never insert anything besides a supported memory card page 29 into the memory car...

Page 31: ...ice any other abnormality re format the card Be sure to use the camera to format a memory card Formatting a card on a computer will result in a non SD standard format which can greatly slow down proce...

Page 32: ...the lens as it extends Holding the lens with your hand so it cannot extend creates the risk of malfunction About 10 seconds after you press p PLAY to enter the PLAY mode the lens will retract into the...

Page 33: ...To keep the camera from falling be sure to keep the strap around your neck wrapped around your wrist or hanging from your shoulder Never swing the camera around by its strap The supplied strap is int...

Page 34: ...ting REC Screen Icon Display Description Program Auto This is the standard Auto recording mode Premium Auto Pro With Premium Auto Pro recording the camera automatically determines whether you are shoo...

Page 35: ...ton the camera automatically adjusts exposure and focuses on the subject it is currently pointed at Mastering how much pressure is required for a half press and a full press of the shutter button is a...

Page 36: ...cused on is not within the focus frame in the center of the screen To track the movement of a moving subject Half press the shutter button to follow and focus automatically on a moving subject See O T...

Page 37: ...o lens operation This does not indicate malfunction When Shooting with Premium Auto Pro the message Processing Premium Auto may appear on the monitor screen If you feel the camera is taking too long t...

Page 38: ...played snapshot also is included page 14 You also can clear the information to view only the snapshot page 15 You can zoom in on the image by rotating the zoom controller towards z page 133 If you are...

Page 39: ...o exit the delete operation press MENU If a CS group page 128 is displayed when you perform the above procedure all of the images in the currently displayed CS group will be deleted To delete specific...

Page 40: ...ecorded at the quality set for the image quality setting page 111 Shooting Indoors under Fluorescent Lighting Minute flickering of fluorescent lighting can affect the brightness or color of an image O...

Page 41: ...Blinds or other subject with a repeating horizontal pattern Multiple subjects at varying distances from the camera Subject in a dark location Subject that is too far away for light from the AF assist...

Page 42: ...SHOT Simply select one of a collection of built in sample scenes and the camera sets up automatically for beautiful images every time page 83 ART SHOT A variety of artistic effects help to make even c...

Page 43: ...etting and then press 4 4 Use 8 and 2 to select S Shutter Speed and then press SET 5 Use 8 and 2 to change the shutter speed setting and then press SET S S Shutter Speed AE mode In this mode you selec...

Page 44: ...also can use on screen menus to configure settings other than those listed above page 105 Using the Control Panel The Control Panel can be used to configure camera settings 1 In the REC mode press SET...

Page 45: ...se 8 2 4 and 6 to select the function you want to assign and then press SET You can also use the function ring to select functions To use functions assigned to the function ring 1 Rotate the function...

Page 46: ...e Self timer Self timer Setting REC Screen Icon Display Description 10 sec 10 second Self timer 2 sec 2 second Self timer When shooting under conditions that slow down the shutter speed you can use th...

Page 47: ...blue cast that results when shooting outdoors when it is cloudy and the green cast that results when shooting under fluorescent lighting 1 In the REC mode press SET 2 Use 8 and 2 to select the White B...

Page 48: ...te balance setting that matches your shooting conditions Daylight Overcast etc Tungsten For shooting under light bulb lighting Manual WB For configuring the camera manually to suit a particular light...

Page 49: ...the position where it was when recording started To focus an image half press the shutter button for Auto Focus or focus manually before you press 0 Movie to start recording Selecting a Focus Mode Fo...

Page 50: ...age 107 is set to MF Manual Focus you can use the function ring or control dial for focusing NOTE An Auto Macro feature detects how far the subject is from the lens and automatically selects either Ma...

Page 51: ...shutter button 2 Keeping the shutter button half pressed which maintains the focus setting move the camera to compose the image When O Tracking is selected as the Auto Focus area the focus frame will...

Page 52: ...after it is shot You will not be able to perform any key operation while image recording is in progress In the S Shutter Speed AE mode ISO sensitivity always operates according to its Auto setting In...

Page 53: ...ess SET 3 Use 8 and 2 to select the Make up Level setting you want and then press SET You can select a make up level within the range of 0 Off to 12 Max You can also perform this operation using the f...

Page 54: ...e compensation value you set remains in effect until you change it or turn off the camera which causes it to revert to 0 0 NOTE When shooting under very dark or very bright conditions you may not be a...

Page 55: ...h a soft dry cloth Using Flash Flash Setting REC Screen Icon Display Description Auto Flash None Flash fires automatically in accordance with exposure amount of light and brightness conditions Flash O...

Page 56: ...he flash setting when shooting in areas where flash photography is prohibited The flash Auto Flash and Red Eye Reduction flash modes are not supported while A S or M is selected for the recording mode...

Page 57: ...e image into sections and measures the light in each section for a balanced exposure reading This type of metering provides error free exposure settings for a wide range of shooting conditions Center...

Page 58: ...tting out a portion of the original image and enlarging it without deterioration of image quality Single SR Zoom Applies super resolution technology to suppress image deterioration page 62 Multi SR Zo...

Page 59: ...shooting with the following feature The zoom setting is fixed at full wide angle Slide Panorama Wide Shot All In Focus Macro Zooming with the Function Ring Step Zoom Assigning the Step Zoom function...

Page 60: ...tor screen based on the zoom mode Monitor Screen Information when Zooming Zoom mode REC Screen Icon Display Optical zoom None HD Zoom None Single SR Zoom White Multi SR Zoom Black Digital zoom Focusin...

Page 61: ...ge deterioration can be suppressed Total maximum zoom factor In combination with digital zoom Zoom SR Off HD Zoom Multi SR Zoom Zoom SR Single 16M 12 5X 12 5X 25 0X 50 0X 3 2 12 5X 12 5X 25 0X 50 0X 1...

Page 62: ...is effective see page 61 The procedure below shows how to configure Single SR Zoom settings For information about Multi SR Zoom see page 63 1 In the REC mode press MENU 2 Press 4 use 8 and 2 to selec...

Page 63: ...be selected for ISO page 51 With the Handsfree Mode the camera automatically triggers a self timer countdown whenever it detects movement in the vicinity of an icon on the monitor screen This means y...

Page 64: ...rientation of the monitor screen or turning the camera upside down The Handsfree Mode may not operate properly when there is little difference between the subject and the background of the icon or whe...

Page 65: ...dsfree Setting Description Motion Shutter Specifies the camera operation that enters the Handsfree Mode Always The camera always remains in the Handsfree Mode regardless of whether or not the monitor...

Page 66: ...ggles the selection between the start self timer icon and the preview icon 5 Use 8 2 4 and 6 to reposition the currently selected icon 6 Press RING to select the other icon if you want and reposition...

Page 67: ...maging Toy Camera Darkens the periphery and changes hues for a toy camera effect Soft Focus Blurs overall focus for a mysteriously soft effect Light Tone Weakens contrast to create an elegantly subdue...

Page 68: ...re about a scene select it with the boundary on the scene menu and then rotate the zoom controller in either direction To return to the scene menu rotate the zoom controller again To scroll between sc...

Page 69: ...sity of the art effect is fixed in accordance with movie settings You can configure the camera to save two images when shooting with HDR Art one image with HDR Art effects applied in accordance with t...

Page 70: ...ffer will be deleted 3 Press the shutter button all the way down to record This will record three images one of the action before the shutter button is fully pressed plus two real time images Pressing...

Page 71: ...then press SET Recording is performed with an aspect ratio of 4 3 an image size of 640x480 pixels and a frame rate of 30 frames per second STD Movie Image size setting cannot be changed The shooting...

Page 72: ...the effects of camera movement during FHD and STD movie recording Note that Anti Shake cannot be used with HDR Art Movie and that Anti Shake does not prevent image blur due to subject movement Your c...

Page 73: ...ens the Y will turn yellow on the monitor screen NOTE Zoom operations are supported during movie recording page 58 Zoom is disabled during high speed movie recording To use zoom for high speed movie r...

Page 74: ...press SET 6 Record the movie the same way as you would a normal movie page 71 Press 0 Movie to start and stop recording This camera supports recording of high speed movies at a maximum speed of 1000 f...

Page 75: ...Continuous AF is operational when recording at 30 fps with HS30 120 or HS30 240 However focus becomes fixed whenever you switch to 120 fps or 240 fps When HS30 120 or HS30 240 is selected as the frame...

Page 76: ...in the image This does not indicate malfunction of the camera Monitor screen content switching is disabled during high speed movie recording Prerecord Movie maintains a pre recording of approximately...

Page 77: ...t a Prerecord Movie 1 After using the above procedure to set up the camera for Prerecord Movie point the camera at the subject 2 When you are ready to record press 0 Movie This will save the approxima...

Page 78: ...is recommended To prevent loss of power while shooting use a fully charged battery Make sure the memory card you are using has sufficient unused space before shooting with this function Focus is fixe...

Page 79: ...back on However the following operations will not turn the monitor screen back on Pressing ON OFF Power Pressing the shutter button all the way Rotating the mode dial The following functions cannot b...

Page 80: ...YouTube movie site which is operated by YouTube LLC For YouTube can be used when shooting a standard STD movie a high definition FHD movie or a high speed HS movie 1 Align the mode dial with BEST SHO...

Page 81: ...Shot mode you can shoot snapshots one by one In the CS mode holding down the shutter button will record up to seven consecutive images at a speed of approximately 10 images per second fps You can sho...

Page 82: ...napshot In Movie cannot be focused individually The focus will be the same as the movie being recorded The field of view of a snapshot shot while FHD movie recording is in progress will be wider than...

Page 83: ...sure and shutter speed settings Some Sample Scenes 1 Align the mode dial with BEST SHOT 2 Press SET 3 Use 8 and 2 to select and then press SET This will display a menu of BEST SHOT scenes 4 Use 8 2 4...

Page 84: ...ions Sample images shown on BEST SHOT scene screens were not shot with this camera There are provided to illustrate the effects and merits of each scene Images shot using a BEST SHOT scene may not pro...

Page 85: ...ong with a scene number NOTE A movie setup cannot be registered as a CUSTOM SHOT scene You can check the settings of the currently selected CUSTOM SHOT scene by displaying the camera s setting menus a...

Page 86: ...e select Brightening page 83 2 Press the shutter button to shoot NOTE The settings in the table below are fixed while shooting with this scene If you select I Multi or O Tracking for this setting in a...

Page 87: ...or some reason 1 In the BEST SHOT Mode select HS Anti Shake page 83 2 When you are ready to shoot press the shutter button NOTE With this BEST SHOT scene the flash setting automatically becomes Flash...

Page 88: ...screen when composing the image NOTE When shooting with this function the ISO page 51 becomes Auto fixed If camera movement occurs when shooting with this function the anti shake process will result...

Page 89: ...ct the HDR Level setting you want and then press SET The HDR Level can be set to Level 1 Level 2 or Level 3 4 Press the shutter button to shoot NOTE HDR works best when shooting with the camera mounte...

Page 90: ...ould be as far away as possible from the subject The required distances depend on the zoom factor being used NOTE With this function the flash setting automatically becomes Flash Off Shooting with thi...

Page 91: ...ot NOTE When shooting with this function zoom is fixed at wide angle When shooting with this function the flash setting automatically becomes Flash Off Shooting with this function automatically sets A...

Page 92: ...on to shoot up to 30 images at high speed NOTE Zoom is disabled during continuous shutter operations The following image sizes cannot be selected while shooting with Auto Focus CS 3 2 16 9 If select A...

Page 93: ...n and then press SET 4 Use 8 and 2 to select the continuous shutter CS speed you want and then press 4 Use a higher High Speed CS fps setting when shooting a fast moving subject 5 Use 8 and 2 to selec...

Page 94: ...then press 4 Use a higher High Speed CS fps setting when shooting a fast moving subject 5 Use 8 and 2 to select the Maximum CS Shots Control Panel option and then press SET 6 Use 8 and 2 to select th...

Page 95: ...ng is complete When using a continuous shutter mode keep the camera still until shooting is finished Zoom is disabled during continuous shutter operations When shooting with this function the snapshot...

Page 96: ...es are blurred in all of the images that are shot they will be blurred in the final image as well The following conditions may make it impossible for the camera to determine if the subject is blinking...

Page 97: ...horizontal image up to approximately 360 degrees and a vertical image up to approximately 180 degrees If you shoot a horizontal Slide Panorama image that is less than 360 degrees the image size will b...

Page 98: ...o close to the main subject Moving subject Dark surroundings Slide Panorama may stop part way through in the following cases Subject or camera movement Camera movement that is too fast or too slow Sho...

Page 99: ...he Wide Level Control Panel option and then press SET 3 Use 8 and 2 to select the width setting angle of view you want and then press SET There are two settings available 18 mm and 14 mm 14 mm shoots...

Page 100: ...in an arc centered on your body When sliding the camera horizontally do not allow your body to move left or right A vertical line running through your body should serve as the axis When sliding the c...

Page 101: ...oundings Any of the following can cause Wide Shot operation to stop part way through Subject or camera movement Camera movement that is too fast or too slow Camera movement outside of the required rou...

Page 102: ...pshot This will cause a pan focus distance value PF o om to appear in the upper left corner of the display Everything from this distance and further will be in focus NOTE The focus frame will not appe...

Page 103: ...ect Raw Image page 83 2 Press the shutter button to shoot NOTE The image size is fixed at 16M when shooting with this function The following functions cannot be used with this function Single SR Zoom...

Page 104: ...the shutter button to shoot NOTE For details about connecting to the camera and precautions when connecting see page 134 If you want to change the digital video signal format first unplug the HDMI ca...

Page 105: ...tem you want and then press 6 Operating the zoom controller displays the next page of menu items 4 Use 8 and 2 to change the setting of the selected menu item 5 After the setting is the way you want p...

Page 106: ...rocedure Enter the REC Mode MENU r REC MENU Tab Handsfree See page 65 for details Procedure Enter the REC Mode MENU r REC MENU Tab Motion Position See page 66 for details Changing to Left handed Golfe...

Page 107: ...order to directly adjust focus with the control dial Face Detection Off Make up Level 0 Off Focus Mode MF Manual Focus NOTE Depending on the recording mode some functions may not be assignable to the...

Page 108: ...EC Mode MENU r REC MENU Tab Double HDR Art See page 69 for details Assigning Functions to the 4 and 6 Keys L R Key Setting 4 6 key operation Motion Position Changing the Motion Detection Area page 66...

Page 109: ...atio an HDTV screen You should regard the print paper sizes suggested here as guidelines only 200 dpi print resolution To select the snapshot image size Image Size Image Size Pixels REC Screen Icon Di...

Page 110: ...space For information about image size image quality and number of images that can be stored see page 229 For information about movie image size see page 111 For information about resizing existing sn...

Page 111: ...Snapshot Image Quality Image Quality Setting REC Screen Icon Display Description Fine Gives image quality priority Normal Normal Movie Image Quality Settings Movie Quality Settings Quality pixels REC...

Page 112: ...ed with this mode depends on the frame rate recording speed page 74 HS480 40 0 Megabits second 480 frames second HS240 40 0 Megabits second 240 frames second HS120 40 0 Megabits second 120 frames seco...

Page 113: ...5600 The ISO High Limit setting cannot be configured while any one of the recording mode below is in use Premium Auto Pro M mode some BEST SHOT scenes The ISO 3200 setting cannot be selected while the...

Page 114: ...ocus point on the screen and focuses there intelligent AF Face detection page 118 operates automatically U Spot This mode takes readings of a small area in the center of the image This setting works w...

Page 115: ...i Shake You can turn on the camera s Anti Shake feature to reduce image blur due to subject movement or camera movement when shooting a moving subject using telephoto when shooting a fast moving subje...

Page 116: ...hutter button These values will appear in the display of the image immediately after it is shot Shooting with Anti Shake enabled can cause an image to appear somewhat coarser than normal and can cause...

Page 117: ...the shutter button Before you half press the shutter button the camera focuses at the center of the screen If Face Detection is turned on when you half press the shutter button focusing is performed i...

Page 118: ...the focus mode when shooting with face detection Detection of the following types of faces is not supported A face that is obstructed by hair sunglasses a hat etc or a face in dark shade A profile or...

Page 119: ...cenes Procedure Enter the REC Mode MENU r REC MENU Tab Wind Noise Cut Select On to reduce wind noise during movie recording Note however that this will also cause the sound quality to change Procedure...

Page 120: ...ode MENU r REC MENU Tab Focus For details see the Control Panel procedure on page 49 Procedure Enter the REC Mode MENU r REC MENU Tab Self timer For details see the Control Panel procedure on page 46...

Page 121: ...five sharpness settings from 2 sharpest to 2 least sharp Procedure Enter the REC Mode MENU r REC MENU Tab Saturation You can specify one of five saturation settings from 2 most saturated to 2 least s...

Page 122: ...se the message Busy Please wait to appear after you press the shutter button Shooting another image is disabled while this message is displayed Wait a while until the process being performed is comple...

Page 123: ...movie shooting range on the monitor screen during recording Using Icon Help Icon Help Changing the Monitor Screen when Recording Shooting Info Grid Selecting On for this setting displays grid lines on...

Page 124: ...e optimum exposure The recorded image may be over exposed or under exposed even though its histogram is centered Due to the limitations of exposure compensation you may not be able to achieve an optim...

Page 125: ...e memory is disabled will be reset to its initial default any time the camera is turned off 1 Remembered for each REC mode 2 Optical zoom setting only Configuring Power On Default Settings Memory Sett...

Page 126: ...peration using the function ring To return to normal playback speed press 2 Play pause SET 1 frame forward back 4 6 Playback paused Holding down either button scrolls continuously You can also perform...

Page 127: ...d on a panorama image MOTION PRINT Movie Editing Trimming Resize Lighting White Balance Brightness Rotation Zoom Rotate the zoom controller in the direction of z You can use 8 2 4 and 6 to scroll the...

Page 128: ...re to play back the images in a particular CS group 1 Press p PLAY and then use 4 and 6 to display the CS group whose images you want to view 2 Press SET to start playback Viewing Continuous Shutter I...

Page 129: ...operation press MENU 4 6 During playback changes the playback direction and playback speed While playback is paused scrolls forward or back Forward and back scrolling can also be performed using the...

Page 130: ...s image and move the blue boundary to the next image You can enlarge the selected image before deleting it by rotating the zoom controller towards z 5 Repeat step 4 to select other files if you want A...

Page 131: ...s SET 5 Use 4 and 6 to display the CS group you want to divide up 6 Use 8 and 2 to select Divide and then press SET To divide up other CS group files repeat steps 5 and 6 Dividing Up All CS Groups IMP...

Page 132: ...r of these functions perform the above procedure to copy the image first White Balance Brightness Trimming Rotation Resize You can rotate the function ring to scroll images at high speed or by recordi...

Page 133: ...ou can then use 4 and 6 to scroll between images using the same zoom factor Pressing SET again will unlock the zoom factor and allow you to use 8 2 4 and 6 to move around the currently displayed image...

Page 134: ...input select the one where the camera is connected 3 Turn on the camera and press p PLAY This will cause an image to appear on the TV screen without anything appearing on the camera s monitor screen...

Page 135: ...mage will be shown on the monitor screen but not the TV screen Image recording can be performed in either case Use a commercially available HDMI cable to connect the camera to the TV For information a...

Page 136: ...eo Audio is initially output by the camera at maximum volume When you first start displaying images set the TV volume control at a relatively low level and then adjust it as required Selecting the HDM...

Page 137: ...For information about menu operations see page 105 Displaying Two Movies Side by side Dual Screen Play Burning Guidelines into a Previously Recorded Movie Burn Lines Playing a Slideshow on the Camera...

Page 138: ...y from beginning to end When the slideshow reaches a movie file while MAX is selected only the first frame of the movie will be displayed Effect Select the effect you want Pattern 1 to 5 Plays backgro...

Page 139: ...following operations to open the memory card or built in memory This will cause the camera to be recognized by your computer as a Removable Disk Drive Windows 1Windows 8 Desktop Explorer Windows 7 Wi...

Page 140: ...the following procedures to edit out a specific part of a movie 1 Use 8 and 2 to select the editing method you want to use and then press SET 2 Use the following operations to select the frame point f...

Page 141: ...not supported You will not be able to edit a movie if the amount of remaining memory capacity is less than the size of the movie file you want to edit If there is not enough memory available delete f...

Page 142: ...NU will be displayed 2 Use 8 and 2 to select Create and then press SET This will create a new movie that is a combination of movie that was displayed when you pressed MENU and the movie you selected i...

Page 143: ...he white balance setting to select a light source type for a recorded image which will affect the colors of the image NOTE You also can adjust the white balance when recording images page 47 The origi...

Page 144: ...Y MENU p PLAY MENU Tab Protect Adjusting the Brightness of an Existing Snapshot Brightness Selecting Images for Printing DPOF Printing Protecting a File Against Deletion Protect Select File Protects s...

Page 145: ...oller To unprotect a file select an protected image and then press SET 5 After you are finished press MENU to exit this operation IMPORTANT Note that even if a file is protected it will be deleted if...

Page 146: ...Rotation 1 Use 8 and 2 to select Rotation and then press SET Each press of SET will rotate the displayed image 90 degrees left 2 When the displayed image is at the orientation you want press MENU NOT...

Page 147: ...Snapshot Screen MENU p PLAY MENU Tab Trimming You can crop a snapshot to trim parts you do not need and save the result in a separate file The original snapshot is also retained Use the zoom controll...

Page 148: ...iles Copy Built in Card Copies all files from built in camera memory to a memory card This option copies all the files in built in camera memory It cannot be used to copy a single file Card Built in C...

Page 149: ...nother camera The recording date of the converted image will be the same as the recording date of the original CS group When converting a CS group whose images have been rotated by the Rotation featur...

Page 150: ...f Swing Using the Camera to Record and Analyze a Golf Swing This guide explains how to use the BEST SHOT golf swing scenes to record a golf swing and then analyze its movements From the behind From th...

Page 151: ...nnection is not supported Use the procedures in this section to record a High Speed Movie of a person s golf swing from behind You can also use the Handsfree Mode to trigger recording from a distance...

Page 152: ...ree setting to Always or 180 only Note that the camera also will not enter the Handsfree Mode if the self timer is operating Make sure the self timer setting is Off when you want to use the Handsfree...

Page 153: ...n you want to check your swing immediately after recording it To self shoot from behind with the self timer 1 Press SET 2 Use 8 and 2 to select the Self timer Control Panel option and then press SET 3...

Page 154: ...t the golfer s body aligned with the guide that appears on the camera monitor screen 2 Press 0 Movie This starts movie recording The camera will focus the image automatically before shooting starts bu...

Page 155: ...e with shooting conditions 2 Configure the camera settings below Lefty page 162 Off when shooting a right handed golfer On when shooting a left handed golfer Shooting Info Grid setting page 123 On 3 P...

Page 156: ...general guidelines 3 Press 0 Movie This will cause the REC standby icon to change to the start self timer icon and put the camera into movie standby 4 Move a golf club or something else near the star...

Page 157: ...own of the duration you selected in step 3 above The camera will start shooting the movie when the countdown reaches zero Recording will stop automatically after five seconds The front lamp flashes wh...

Page 158: ...On 3 Perform the operation required for the type of image you want to shoot Self shooting with the Handsfree Mode page 158 Self shooting with the Self timer page 159 To shoot normally page 160 To rec...

Page 159: ...may become poor when the background is close to the same color as the subject your golf club or when the subject is too far away from the camera The camera will focus the image automatically before s...

Page 160: ...ing self timer countdown by pressing SET The camera will focus the image automatically before shooting starts but the focus setting will remain fixed while recording is in progress To stop movie recor...

Page 161: ...um CS Shots and Prerecord CS Shots settings which you can configure using the Control Panel are automatically set to the initial default settings shown above 2 Half press the shutter button This will...

Page 162: ...a movies of a left handed golfer 1 In the REC mode press MENU 2 Press 4 use 8 and 2 to select the r REC MENU tab and then press 6 3 Use 8 and 2 to select Lefty and then press 6 4 Use 8 and 2 to select...

Page 163: ...P to display diagonal lines This displays angle of inclination values to appear on the monitor screen 4 Press RING 5 Use 8 2 4 and 6 to align the reference point the point where the red line and the b...

Page 164: ...d the green line intersect with the golfer s hip Next rotate the control dial to change the angle of the green line so it runs from the hip to the shoulder You can also change the angle of the green l...

Page 165: ...l speed 3 Press 8 DISP to display parallel lines 4 Press RING 5 Use 8 2 4 and 6 to move the intersection of the blue right vertical and red top horizontal lines so the blue line is just outside the le...

Page 166: ...SET to start playback and then press SET again to pause playback 3 Press 8 DISP to enter the impact display mode This displays angle of inclination values to appear on the monitor screen 4 Press RING...

Page 167: ...ination yellow part and the green angle value to change accordingly 8 Press RING This starts playback so you can check the path of the club head during impact You can create a new movie file with the...

Page 168: ...as a new movie Line burning takes some time to complete Wait until the message Busy Please wait disappears from the monitor screen Pressing MENU while the message is displayed will stop the line burn...

Page 169: ...Use 8 and 2 to select Dual Screen Play and the press SET This displays the Dual Screen Play List 4 Use 8 and 2 to select a No data pair and then press 0 Movie Selecting existing Dual Screen Play data...

Page 170: ...ages of the movies selected for that data will have a check mark in the lower left hand corner To delete data from the Dual Screen Play List move the blue boundary to each of the currently selected mo...

Page 171: ...however that not all operations can be guaranteed even if an Ultra High Speed Type memory card is used The maximum Dual Screen Play duration at normal speed is five seconds The following functions are...

Page 172: ...to the new movie you want to select and then press SET to select its check box 3 Press MENU This will display a screen for specifying the sync point of the newly selected movie Reselect Point Changes...

Page 173: ...ssional Print Service You can take a memory card that contains the images you want to print to a professional print service and have them printed Printing on a Home Printer Printing Images on a Printe...

Page 174: ...documentation that comes with the printer for information about requirements before plugging into or unplugging from the printer To print 1 Turn on the printer and load paper 2 Turn on the camera Thi...

Page 175: ...and disconnect the USB cable from the printer and camera Digital Print Order Format DPOF DPOF is a standard that allows you to include image type number of copy and time stamp on off information on th...

Page 176: ...ess 0 Movie so On is shown for date stamping Repeat steps 1 and 2 to configure settings for other images if you want 3 Press SET Configuring the Same DPOF Settings for All the Images Procedure p PLAY...

Page 177: ...image If you want to include the date in the images press 0 Movie so On is shown for date stamping Repeat steps 4 and 5 to configure settings for other images if you want 6 Press SET To configure the...

Page 178: ...following three methods to include the recording date in the printout of an image Configuring camera settings Configure DPOF settings page 175 You can turn date stamping on and off each time you print...

Page 179: ...g on a printer that supports PRINT Image Matching III makes it possible to use information about shooting conditions that is recorded with the image and produce exactly the type of image you want PRIN...

Page 180: ...es and view them manually USB connection pages 181 185 Transfer images to a computer automatically over a wireless LAN for viewing Eye Fi page 188 Play back and edit movies You can play back movies pa...

Page 181: ...tware See page Save images to a computer and view them there manually Windows 8 Windows 7 Windows Vista Windows XP SP3 Installation not required 181 Play movies Windows 8 Windows 7 Windows Media Playe...

Page 182: ...s Click Desktop and then Explorer Windows 7 Windows Vista users Click Start and then Computer Windows XP users Click Start and then My Computer 7 Double click Removable Disk Your computer recognizes t...

Page 183: ...uter 12 After you finish copying images disconnect the camera from the computer After confirming that the back lamp is not flashing red disconnect the USB cable To view images you copied to your compu...

Page 184: ...settings and other installed software may interfere with proper playback of movies Movie Playback Precautions Be sure to move the movie data to the hard disk of your computer before trying to play it...

Page 185: ...o this Operating System Version Required Software See page Save images to your Macintosh and view them there manually OS X Installation not required 185 Save images to your Macintosh automatically Man...

Page 186: ...tosh recognizes the memory card loaded in the camera or the camera s built in memory if it does not have a memory card loaded as a drive The appearance of the drive icon depends on the Mac OS version...

Page 187: ...S image on a computer You can use QuickTime which comes bundled with your operating system to play back movies on a Macintosh To play back a movie first copy it to your Macintosh and then double click...

Page 188: ...back may not be possible for data accessed over a network from a memory card etc Shooting with an Eye Fi wireless SD memory card loaded in the camera makes it possible to transfer image data automatic...

Page 189: ...while image data transfer is in progress A confirmation message will appear on the monitor screen if you try to turn off the camera while image data transfer is in progress Follow the instructions in...

Page 190: ...t come with the card If the FlashAir card s Start automatically at boot setting is selected a wireless LAN connection will be established automatically whenever the camera is turned on If you want to...

Page 191: ...Sleep function page 199 and Auto Power Off function page 199 are disabled A confirmation message appears on the monitor screen if you try to turn it off If this happens follow the instructions in the...

Page 192: ...lders and files allowed depends on the image size and quality and capacity of the memory card being used for storage Files and Folders Name and Maximum Number Allowed Example File Each folder can cont...

Page 193: ...camera and view them Memory Folder Structure DCIM Folder Recording Folder Image File Movie File Recording Folder Recording Folder DPOF File Folder DPOF File Scene folder for snapshots registered with...

Page 194: ...s contents A good way to keep track of multiple DCIM folders it to change their names to dates or something similar after you copy them to your computer If you later decided to return a DCIM folder to...

Page 195: ...ded when using the ECO Mode NOTE You can achieve even greater power savings by using the ECO Mode in combination with Auto Power Off page 199 and Sleep page 199 Procedure MENU SETTING Tab Screen Turni...

Page 196: ...will be established automatically whenever the camera is turned on Procedure MENU SETTING Tab Sounds Setting a volume level of 0 mutes output Turning off Eye Fi Card Communication Eye Fi Configuring F...

Page 197: ...it cannot be edited or deleted Example July 10 2015 1 25 p m Even if you do not stamp the date and or time with Timestamp you can do so later using the DPOF function or some printing application page...

Page 198: ...ntinue Tells the camera to remember the last used file number A new file will be named using the next sequential number even if files are deleted or if a blank memory card is loaded If a memory card i...

Page 199: ...ther device During movie recording and playback When both sleep and Auto Power Off are turned on Auto Power Off takes priority Procedure MENU SETTING Tab Auto Power Off Auto Power Off turns off the ca...

Page 200: ...deletion is disabled Disabled selected for Delete Key for some images Specifying the Operation when the Monitor Screen is Tilted Screen Tilt Power On Turns on the camera whenever the monitor screen is...

Page 201: ...press 6 To change the Destination setting to summer time use 8 and 2 to select DST and then select On Summer time is used in some geographical areas to advance the current time setting by one hour du...

Page 202: ...e sure to select your Home City page 201 before setting the time and date If you set the time and date while the wrong city is selected for your Home City the times and dates of all of the World Time...

Page 203: ...lect the USB communication protocol which is used when exchanging data with a computer printer or other external device Specifying the Display Language Language Configuring USB Protocol Settings USB M...

Page 204: ...em of the TV or other video equipment Images cannot be displayed correctly on a TV or video equipment that is not NTSC or PAL Procedure MENU SETTING Tab HDMI Output See page 136 for details Procedure...

Page 205: ...will cause all images to be deleted even if file deletion is disabled Disabled selected for Delete Key page 200 for some images Check the battery level before starting a format operation and make sur...

Page 206: ...mbol are specifically prohibited The example at left indicates that disassembly is prohibited The black dot 0 means that the indicated action must be performed Indications within this symbol are actio...

Page 207: ...ter sticker from the battery Should you ever notice leakage strange odor heat generation discoloration deformation or any other abnormal condition while using charging or storing a battery immediately...

Page 208: ...itting functions in areas where there is the chance of flammable or explosive gas being present Such conditions create the risk of fire and explosion Never fire the flash or use light emitting functio...

Page 209: ...of water or in a bathroom 1 Turn off the camera 2 If you are using the USB AC adapter to power the camera unplug the power plug from the wall outlet Also remove the battery from the camera taking car...

Page 210: ...ep memory cards out of the reach of infants and young children If a memory card is ever swallowed accidentally contact a physician immediately Precaution when Camera is On Do not touch the camera for...

Page 211: ...ized service center Continued charging creates the risk of battery overheating fire and explosion Be sure to read the user documentation that comes with the camera and special charger unit before usin...

Page 212: ...ackup copies of important data in camera memory by transferring it to a computer or other storage device Note that data can be deleted in the case of camera malfunction repair etc Memory Protection Wh...

Page 213: ...acket around by the strap Keep the jacket out of the reach of small children The jacket strap can become wound around the neck of a small child creating the risk of serious accident Should you notice...

Page 214: ...nvironment Operating Temperature Requirements 0 to 40 C 32 to 104 F Operating Humidity 10 to 85 non condensation Do not place the camera in any of the following locations In an area exposed to direct...

Page 215: ...the covering off of the battery Do not try to take the battery apart Discarding or Transferring Ownership of a Memory Card or the Camera The format and delete functions of the camera do not actually...

Page 216: ...k and registered trademark are not used within the text of this manual SDXC Logo is a trademark of SD 3C LLC Microsoft Windows Internet Explorer Windows Media Windows Vista Windows 7 Windows 8 and Dir...

Page 217: ...automatically even if the battery is not fully charged If the battery has not been used for a very long time charging may terminate automatically after only about 60 minutes 1 Using a battery that has...

Page 218: ...e not using it A battery left in the camera can discharge and go dead which will require some time to charge when you need to use the camera Store batteries in a cool dry place 20 C 68 F or lower To p...

Page 219: ...s you record data to and delete data from a memory card a number of times it loses its ability to retain data Because of this periodic re formatting of a memory card is recommended Electrostatic charg...

Page 220: ...n Upper right Upper left Control Dial Off L R Key Off Double HDR Art On Image Size 16M Image Quality Normal Movie Quality FHD ISO Auto ISO High Limit Auto Zoom SR Single AF Area U Spot Anti Shake Stan...

Page 221: ...rimming Copy Divide Group CS Multi Print CS Frame Edit ECO Mode Off Screen Auto Eye Fi On FlashAir On Sounds Startup Sound 1 Half Shutter Sound 1 Shutter Sound 1 Operation Sound 1 Operation Vol 3 Play...

Page 222: ...ppens when a button is pressed Remove the battery from the camera and then reload them Charging The back lamp does not light red and the battery won t charge 1 Unplug the USB cable from the camera and...

Page 223: ...ge 49 2 You may be using Macro or Super Macro for scenery or portraits Use Auto Focus for scenery and portrait shots page 49 3 You may be trying to use Auto Focus or Infinity Focus when shooting a clo...

Page 224: ...page 54 Digital zoom will not go up to the maximum value 1 The digital zoom setting may be turned off Turn on digital zoom page 119 2 Zoom will not go up to the maximum value if the Zoom SR setting is...

Page 225: ...isabled Change the setting to Enabled page 200 Other The wrong date and time are displayed or the wrong date and time are being stored along with image data The date and time setting is off Set the co...

Page 226: ...tions and the image you are recording You can use 8 DISP to select what information you want to include on the display page 13 The time and date settings configured the first time after purchasing the...

Page 227: ...ter while the camera s USB settings are not compatible with the USB system of the printer page 173 Connecting to the network Camera power was turned off while image data was being copied to a computer...

Page 228: ...ct your retailer or a CASIO authorized service center The card is locked The LOCK switch of the SD SDHC or SDXC memory card loaded in the camera is in the locked position You cannot store images to or...

Page 229: ...x3456 Fine 10 71 MB 1 1072 Normal 5 57 MB 2 1654 3 2 4608x3072 Fine 9 43 MB 1 1214 Normal 4 92 MB 2 1873 16 9 4608x2592 Fine 7 83 MB 1 1466 Normal 4 1 MB 2 2221 10M 3648x2736 Fine 6 4 MB 2 1787 Normal...

Page 230: ...dio 40 0 Megabits second 1000 frames second 3 seconds 48 minutes 300 0 MB 13 minutes 10 seconds HS480 224x160 No audio 40 0 Megabits second 480 frames second 3 seconds 48 minutes 300 0 MB 13 minutes 2...

Page 231: ...nds 2 hours 13 minutes 15 minutes YouTube STD 640x480 Stereo 3 9 Megabits second 30 frames second 38 seconds 8 hours 12 minutes 15 minutes YouTube HS1000 224x64 No audio 40 0 Megabits second 1000 fram...

Page 232: ...city depends on image contents File size and data rate values are approximate and intended for reference only Actual values depend on the type of image being shot When using a memory card with a diffe...

Page 233: ...be selected only when shooting with ART SHOT or some Time Lapse scenes Effective Pixels 16 1 Megapixels Imaging Element Size 1 2 3 inch square pixel high speed CMOS Total Pixels 16 79 Megapixels Lens...

Page 234: ...the aperture value White Balance Auto Daylight Overcast Shade Day White Fluorescent Daylight Fluorescent Tungsten Manual WB Sensitivity Standard Output Sensitivity Snapshots Auto ISO 80 ISO 100 ISO 20...

Page 235: ...will be attained under actual operating conditions Frequency of flash zoom Auto Focus and High Speed CS usage configured settings the amount of time the camera is left turned on and ambient temperatur...

Page 236: ...tely 38 g 1 3 oz Input 100 to 240 V AC 50 60 Hz 90 mA Output 5 0 V DC 650 mA Operating Temperature Requirements 5 to 35 C 41 to 95 F Dimensions 64 6 W x 38 4 H x 24 D mm 2 5 W x 1 5 H x 0 9 D excludin...

Page 237: ...2013 CASIO COMPUTER CO LTD 6 2 Hon machi 1 chome Shibuya ku Tokyo 151 8543 Japan MA1311 B MF...

Reviews: