15
ENGINE INSTALLATION
The Motor you choose may have a different type
installation as show. We show an O.S. 1.20 motor,
this motor has more than enough power to make
this plane perform to its limits.
If you choose this powerful motor
then you must make sure that you go over
all high stress joints with white glue or a
epoxy.
Because of the size of propellers used
in these type of engines any kind of prop
strike on the ground, or any other type of
object, can cause structural damage that
might not be easily visible. When a accident
occurs you must check for damage though
out the plane before flying. This damage can
cause airframe failure at any time, so inspec-
tions must be thorough.
We will not warranty any structural failures
do to neglect or accidents.
1.
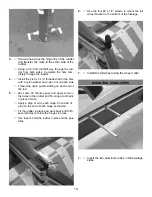
You will find both the horizontal and vertical
lines marked on the firewall.
The vertical line is off set to compensate for
the 2 degrees right thrust.
Mark your motor mount location from these
marks.
The front of the cowl is 6” from the firewall.
Caution:
Always use thread lock on any bolt
that is threading into metal threads.
1.
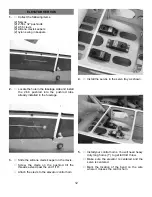
Locate the following items:
(2) nylon motor mounts
(4) 3mm x 25mm bolts
(4) 3mm t-nuts
(4) 3mm flat washers
(4) 3mm x 20mm self tapping screws
2.
Clamp the motor to the motor mounts and sit
flat on the table.
Put a piece of scrap wood in the prop position.
Measure from the table to piece of wood and
adjust motor until you have 6-1/8” on both
sides.
(Check your spinner for the proper clearance
required)


