


O
PERATION
M
ANUAL
- M
ODEL
97XX-Series
4-12
SECTION 4 - CURRENCY HANDLING
TRITON SYSTEMS, INC.
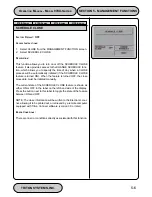
You may wish to record the denomination and number
of notes for use when balancing the note tray against
the tray/day close records.
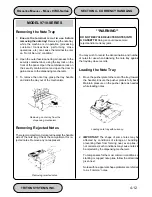
Loading the Note Tray
1.
Move the pusher plate to the rear of the tray (toward
the handle). Ensure the pusher plate is fully back.
Maintain pressure on the pusher plate as needed
while loading notes.
2.
IMPORTANT: The shape of some notes may be
affected by conditions of storage or bundling,
preventing them from forming neat, even piles. If
not corrected, such conditions may cause notes to
be rejected by the dispensing mechanism.
To compensate for the most common conditions of
slanting or cupped note piles, follow the directions
given next.
Notes with no apparent shape problems are referred
to as “common” notes.
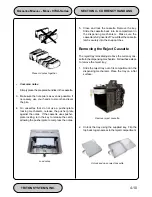
Removing the Note Tray
1.
Ensure the terminal is not in use before
removing the note tray! Removing the note tray
while the machine is in operation (processing
customer transactions, performing close
operations, etc.) can cause the terminal to enter
an “Out of Service” condition!
2.
Open the outer fascia panel to gain access to the
security container door, using the key lock on the
front of the panel. Open the combination lock on
the security container door and open the door to
gain access to the dispensing mechanism.
3.
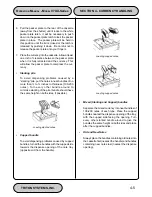
To remove the note tray, grasp the tray handle
and slide the tray out of the mechanism.
Removing Rejected Notes
The reject compartment is located nearest the handle
side of the note tray. Check the compartment for re-
jected notes. Remove any notes present.
Removing a note tray from the
dispensing mechanism.
Removing rejected notes.
Loading note tray with currency.
MODEL 9710-SERIES
**WARNING**
DO NOT RECYCLE REJECTED NOTES INTO
A CASSETTE! Doing so could cause more
rejects and/or currency jams.
Summary of Contents for Triton 9700
Page 1: ...Owner s manual Triton Owner s Manual 9700...
Page 12: ...SECTION 1 INTRODUCTION...
Page 22: ...SECTION 2 BASIC OPERATION...
Page 28: ...SECTION 3 INITIAL SETUP...
Page 36: ...SECTION 4 CURRENCY HANDLING...
Page 55: ......
Page 56: ...SECTION 5 MANAGEMENT FUNCTIONS...
Page 213: ......
Page 214: ...SECTION 6 MAINTENANCE...
Page 220: ...SECTION 7 JOURNAL ENTRIES...
Page 223: ......
Page 224: ...SECTION 8 ERROR RECOVERY...
Page 246: ...SECTION 9 CUSTOMER TRANSACTIONS...
Page 251: ......
Page 252: ...APPENDIX A MECHANICAL LOCK...
Page 255: ......
Page 256: ...APPENDIX B ELECTRONIC LOCK...
Page 259: ......
Page 260: ...APPENDIX C WARRANTY POLICY...


