HAVANA GAZEBO
MODEL NO. 088-0342-8
ASSEMBLY INSTRUCTIONS
Toll-free: 1-888-670-6684
IMPORTANT: Please read this manual carefully before beginning assembly of this product. Keep this manual for future reference.
Page 1: ...AVANA GAZEBO MODEL NO 088 0342 8 ASSEMBLY INSTRUCTIONS Toll free 1 888 670 6684 IMPORTANT Please read this manual carefully before beginning assembly of this product Keep this manual for future reference ...
Page 2: ... are not strong enough If more than one gazebo is set up keep a minimum distance of 10 3 m between the gazebos Any assembly or maintenance of the gazebo must be carried out by adults only Some parts may contain sharp edges Wear protective gloves if necessary Check all nuts and bolts periodically for tightness If required tighten them Repairing and replacing parts should be done by a qualified techn...
Page 3: ...uct underneath electrical lines Keep children under close supervision while they are playing around this product This product contains small parts which can be swallowed by children Keep fingers away from places where they can be pinched or trapped Do not attempt to assemble the gazebo if any part is missing IMPORTANT Please read and understand this manual before any assembly Before beginning assem...
Page 4: ...is will protect the parts from wear and tear Connect the left frame 1A to the right frame 1B on the upper and lower sides using M6 x 20 bolts AA and M6 flat washers BB Align the holes of the assembled frames 1A 1B with the holes of the poles 1C Secure the frames with the poles using four M6 x 20 screws AA and four M6 flat washers BB Connect the four short bars 2C to the four medium bars 2D Insert th...
Page 5: ...ew CC one M6 flat washer BB and one M6 nut DD for each side of the gazebo frame Step 8 Requires 3B 3C BB CC DD Insert the top poles 3C into the upper roof top connector 3B Secure them onto the corners of the lower roof assembly using an M6 x 40 screw CC an M6 flat washer BB and an M6 nut DD BB CC DD 2E 2D DD 3C 3B BB C C DD Step 7 Requires 3A Place the lower roof canopy 3A on top of the roof frame N...
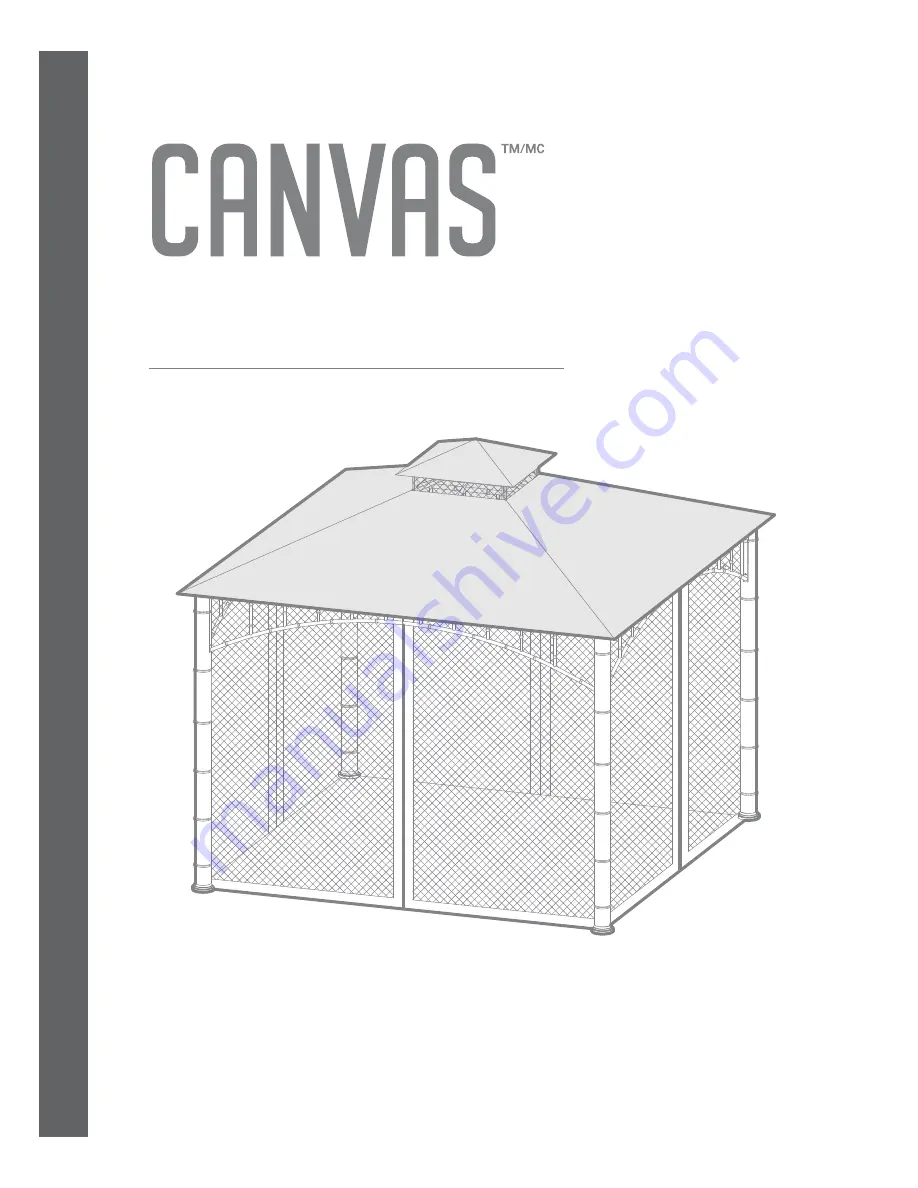
Page 6: ... and fit it to the four corners of the gazebo frame Hang the mosquito net 3E onto the outer tube around the assembled frame using the plastic rings 3E1 Note Use the inner tube for hanging privacy panels sold separately The gazebo is ready for use 3E1 3E 3A Step 9 Requires 3D Fit the top roof canopy 3D onto the top roof assembly 3D ...
Page 7: ...teel surface oxidation rusting will occur if this protective coating is scratched This is a natural process To minimize this condition it is recommended that care be taken when assembling and handling the product in order to prevent the paint from being scratched If scratching or damage occurs it is recommended to coat that area immediately with rust inhibiting paint included Surface rust can be r...