27
Configuring FTP Transfer Settings
2
F
T
P Settings and Image
T
ran
sfer
5
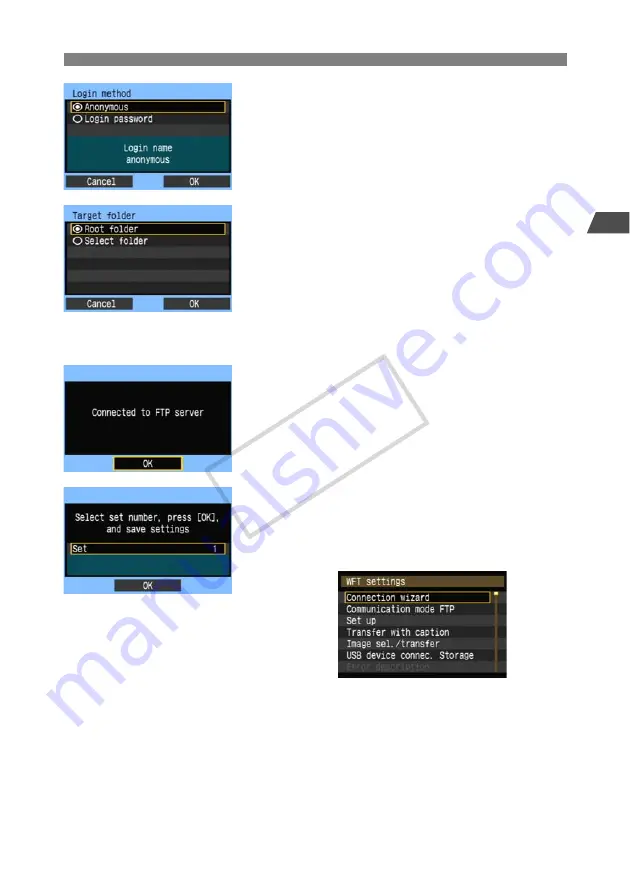
Complete the [
Login method
] settings.
Turn the <
5
> dial to select [
OK
], and then press
<
0
> to go to the next screen.
6
Complete the [
Target folder
] settings.
Select [
Root folder
] to have images saved in the
root folder as specified in FTP server settings.
(p.36)
Select [
Select folder
] to specify a subfolder in the
root folder. If no folder exists, a folder will be
created automatically.
Turn the <
5
> dial to select [
OK
], and then press
<
0
> to connect to the FTP server.
7
On the confirmation screen displayed next, select
[
OK
] and press <
0
>.
X
The <
LAN
> lamp is lit in green.
8
Press <
0
>. Turn the <
5
> dial to select the set
number, and then press <
0
>.
Turn the <
5
> dial to select [
OK
], and then press
<
0
>. After the connection wizard is closed, the
display reverts to the menu screen.
Settings information is stored on the camera. It is
not stored on the transmitter.
The FTP network settings are now complete.
COP
Y
Summary of Contents for WFT-E3
Page 16: ...16 COPY ...
Page 42: ...42 COPY ...
Page 51: ...51 5 Managing Settings Information COPY ...
Page 73: ...73 8 Troubleshooting COPY ...
Page 89: ...89 9 Reference COPY ...
Page 95: ...95 9 Reference COPY ...
Page 96: ...96 COPY ...
Page 101: ...101 Index 9 Reference T Troubleshooting 73 U USB connection 57 69 COPY ...


