Chapter 1
1-21
1.7.2 Other Precautions
1.7.2.1 Printhead
0008-6318
1. How to handle the printhead
Do not open the printhead package until you are ready to install the head.
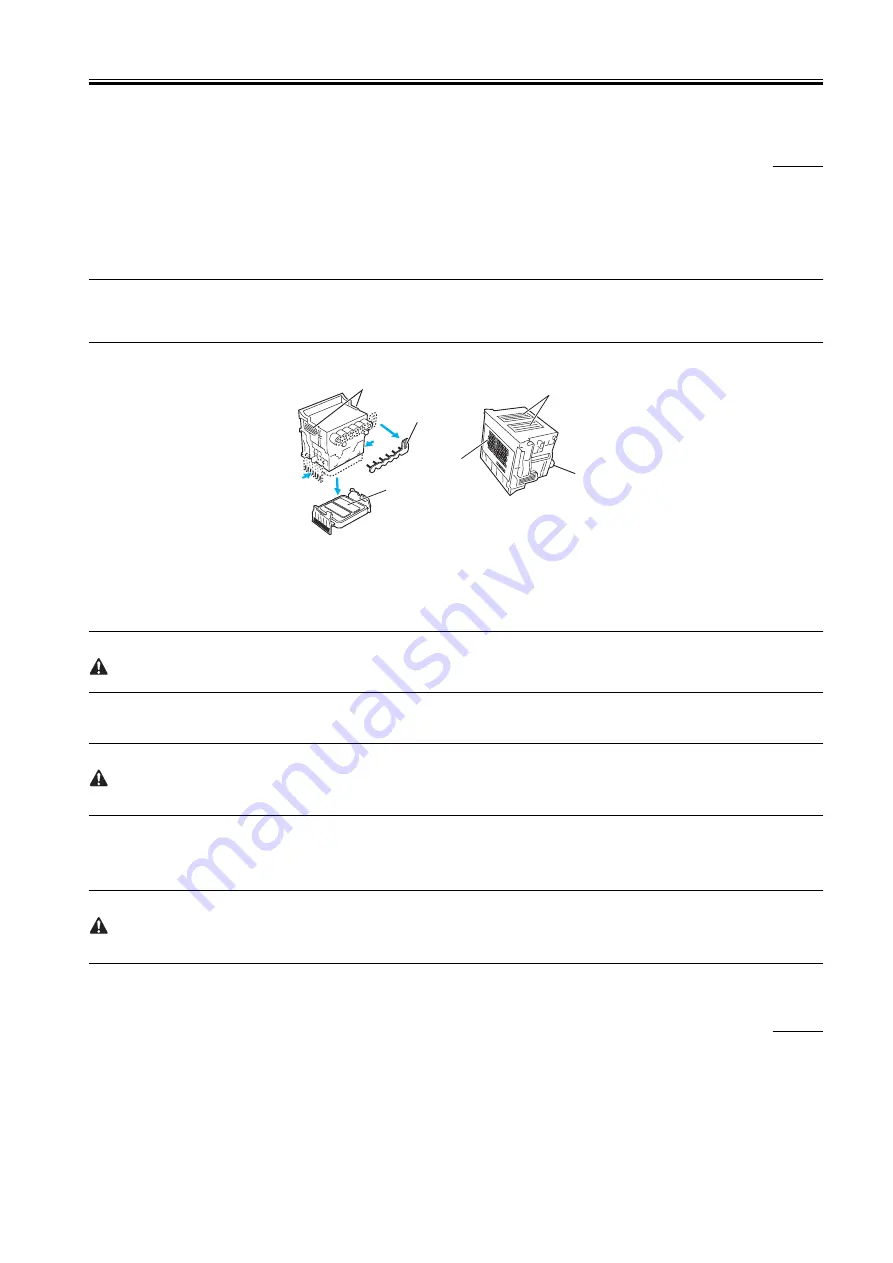
When installing the printhead in the printer, hold the knob, and then remove the protective material and protective cap, in that order. Do not replace the
protective cap once you have removed it from the printhead, since the cap may scratch the nozzles.
To prevent the nozzles from getting clogged with foreign matter or dried ink, install the printhead immediately after you remove the protective cap. Also
make sure to press down the locking lever of the printhead until you feel a click.
In addition, to prevent clogging of the nozzles, never touch the nozzle unit or ink supply unit of the printhead, or wipe it with tissue paper or anything else.
Also, be careful not to touch the electrical contact.
Never attempt to disassemble the printhead or to wash it with water.
MEMO:
If the nozzles are clogged or purging operation is poor, white horizontal lines can appear in the printed output. If the problem is not resolved by cleaning
operations, replace the printhead with a new one.
F-1-27
2. Capping
The printer will perform the capping operation when printing has finished or during standby due to errors, in order to protect the printhead and avoid ink
leakage.
If the power cord is accidentally unplugged, turn the power button off, reconnect the power cord, and turn the power button on to confirm that the printer
starts up properly and changes to the "Online" or "Offline" state, then power off the printer using the power button.
Improper 'capping' may cause clogged printhead nozzles due to dried ink or ink leakage from the printhead.
3. When the printer is not used for a long time
Keep the printhead installed in the printer even when it is not used for an extended period of time.
If the printhead is left uninstalled, printing failure may arise from clogged nozzles due to the depositing of foreign matter or dried ink when it is reinstalled.
Even if the head remains installed, the nozzle may dry out and cause printing failure if the ink is drained for transport.
4. Conductivity of ink
The ink used in this printer is electrically conductive. If ink leaks into the mechanical unit, wipe clean with a soft, well-wrung damp cloth. If ink leaks onto
electrical units, wipe them completely using tissue paper. In particular, if ink penetrates beneath the IC chips on the logic board and you cannot remove it
completely, replace with a new logic board.
If electrical units are powered on when ink has leaked, the units may be damaged.
Never connect the power cord when ink has leaked on the electrical units.
1.7.2.2 Ink Tank
0008-6319
1. Opening the ink tank
Do not open the ink tank until ready to use.
When installing the ink tank, shake it slowly 7 to 8 times before opening the seal. Otherwise, the ink ingredients may precipitate and reduce the print quality.
To prevent foreign matter from entering the ink supply unit, install the opened Ink tank mmediately.
2. Handling the ink tank
To prevent foreign matter from entering the ink flow path and causing ink suction and printing problems, never touch the ink port or terminal section of
the ink tank.
Knob
Protective material
Protective cap
Nozzle unit
Electrical contact
Ink port
Summary of Contents for W6400 Series
Page 1: ...Apr 5 2005 Service Manual W6400 Series W6400 ...
Page 2: ......
Page 6: ......
Page 12: ...Contents ...
Page 13: ...Chapter 1 PRODUCT DESCRIPTION ...
Page 14: ......
Page 16: ......
Page 40: ......
Page 41: ...Chapter 2 TECHNICAL REFERENCE ...
Page 42: ......
Page 79: ...Chapter 3 INSTALLATION ...
Page 80: ......
Page 82: ......
Page 86: ......
Page 87: ...Chapter 4 DISASSEMBLY REASSEMBLY ...
Page 88: ......
Page 90: ......
Page 115: ...Chapter 5 MAINTENANCE ...
Page 116: ......
Page 118: ......
Page 122: ......
Page 123: ...Chapter 6 TROUBLESHOOTING ...
Page 124: ......
Page 165: ...Chapter 6 6 39 F 6 7 Cover switch tool Cover switch tool ...
Page 166: ......
Page 167: ...Chapter 7 SERVICE MODE ...
Page 168: ......
Page 170: ......
Page 185: ...Chapter 8 ERROR CODE ...
Page 186: ......
Page 188: ......
Page 194: ......
Page 195: ...Apr 5 2005 ...
Page 196: ......


