Chapter 1
1-10
1.6 Basic Operation
1.6.1 Operation Panel
0008-6310
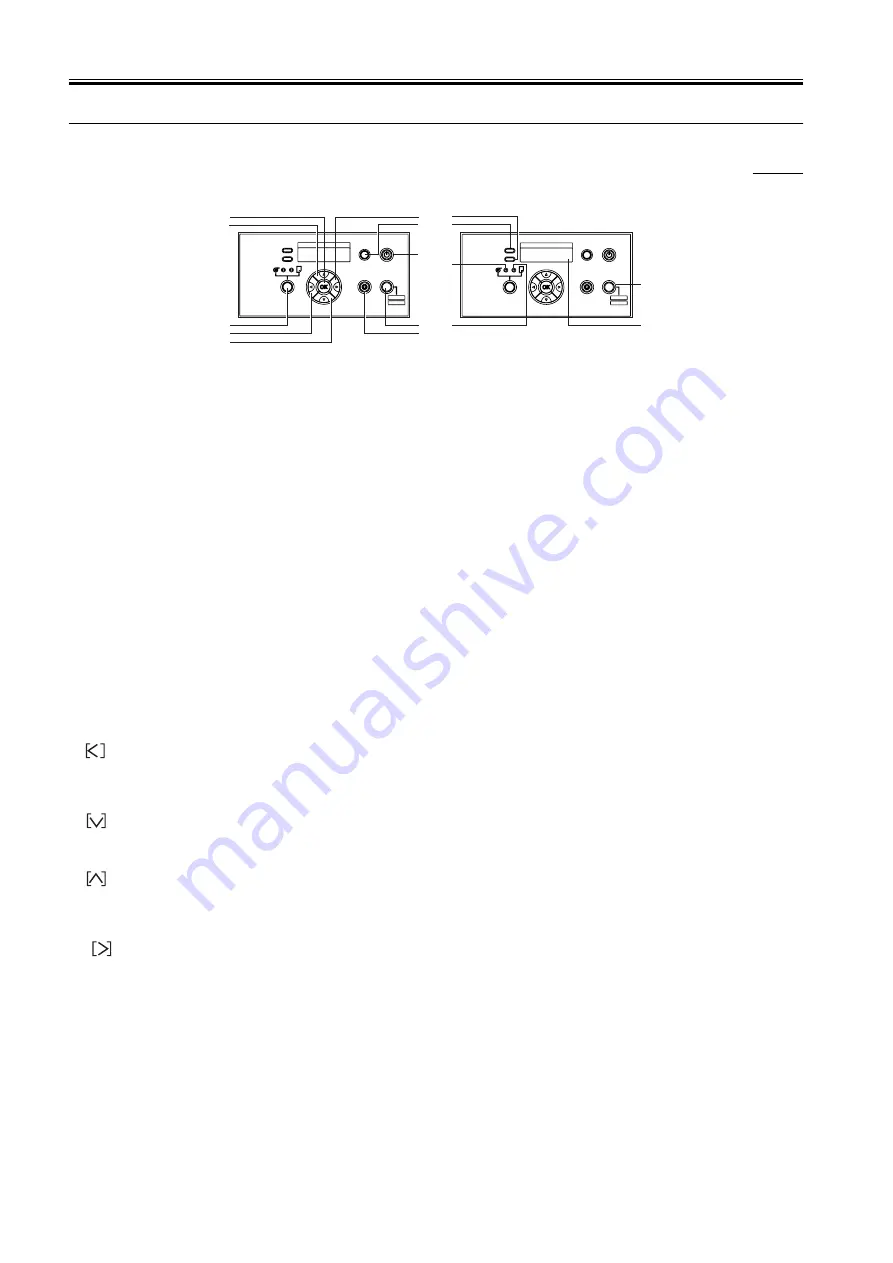
This section describes the function of the buttons and the meaning of the LEDs on the operation panel.
F-1-13
1) [Power] button
This button is used to turn the printer on and off.
When the power is off:
Pressing this buttons turns on the power.
When the power is on:
Holding down this button for about 1 or more seconds turns off the power.
2) [Online] button
This button switches between online status, offline status, and menu display.
Online status:
This button switches to offline status.
Offline status:
This button switches to menu display.
Menu display:
This button cancels the menu operation and switches to online status. Also, when maintenance card error is displayed, the printer can be
switched online by temporarily resetting the error. When any other error message is displayed or media is not loaded, however, the printer does not switch
to online status until the problem is resolved.
Job processing:
This button switches to the pause status and pauses processing of the job.
3) [Paper Source] button
Online status / Offline status / Menu display:
This button switches the paper source between roll media and cut sheets. However, the printer status cannot
be switched while the upper cover is opened.
4) [OK] button
When setting values are displayed:
This button sets or executes the selected value or operation.
5) [Information] button
This button displays a submenu. The submenu shows ink and maintenance cartridge, media, head height, head life and parts life information. "Head
Cleaning A" is performed when it is pressed for at least 3 seconds.
6) [Stop/Eject] button
Online status / Offline status / Menu display:
Holding down this button for 1 second or longer aborts the job in progress or ink drying and then discharges
the media.
Pause status:
Holding down this button for 1 seconds or longer aborts the paused job and discharges the media.
7)
button
Offline status:
Holding down this button for 1 second or longer moves the carriage to the center of platen.
When a menu is displayed:
This button functions as a selector button and is used to display the next option. This button functions as a selector button and
displays the previous item/setting.
8)
button
Offline status:
When roll media is loaded, this button functions as a manual feed button and feeds the media.
When a menu is displayed:
This button is used to go to the next lower-level menu.
9)
button
Offline status:
When roll media is loaded, this button functions as a manual feed button and reverse-feeds the media. When a cut sheet is loaded, the sheet
is discharged.
When a menu is displayed:
This button is used to return to the next higher-level menu.
10)
button
Offline status:
Holding down this button for 1 second or longer moves the carriage to the center of platen.
When a menu is displayed:
This button functions as a selector button and is used to display the next option. This button functions as a selector button and
displays the next item/setting.
11) DATA lamp
Flashing:
When the printer is printing, this lamp indicates that the printer is receiving or processing a job. When the printer is idle, it indicates that there
is a paused job, the printer is receiving a job that cannot be processed, or is receiving firmware data.
Off:
This indicates that there are no jobs.
12) Message lamp
On:
This indicates that a warning is displayed.
Flashing:
This indicates that there is an error or the printer is in service mode.
Off:
This indicates that operation is normal.
Button
Lamp
Power
Information
4
1
2
3
5
6
7
8
9
10
16
11
12
13
14
15
Cleaning
(3sec)
Stop/Eject
Online
Offline
Menu
Data
Message
Power
Information
Cleaning
(3sec)
Stop/Eject
Online
Offline
Menu
Data
Message
Summary of Contents for W6400 Series
Page 1: ...Apr 5 2005 Service Manual W6400 Series W6400 ...
Page 2: ......
Page 6: ......
Page 12: ...Contents ...
Page 13: ...Chapter 1 PRODUCT DESCRIPTION ...
Page 14: ......
Page 16: ......
Page 40: ......
Page 41: ...Chapter 2 TECHNICAL REFERENCE ...
Page 42: ......
Page 79: ...Chapter 3 INSTALLATION ...
Page 80: ......
Page 82: ......
Page 86: ......
Page 87: ...Chapter 4 DISASSEMBLY REASSEMBLY ...
Page 88: ......
Page 90: ......
Page 115: ...Chapter 5 MAINTENANCE ...
Page 116: ......
Page 118: ......
Page 122: ......
Page 123: ...Chapter 6 TROUBLESHOOTING ...
Page 124: ......
Page 165: ...Chapter 6 6 39 F 6 7 Cover switch tool Cover switch tool ...
Page 166: ......
Page 167: ...Chapter 7 SERVICE MODE ...
Page 168: ......
Page 170: ......
Page 185: ...Chapter 8 ERROR CODE ...
Page 186: ......
Page 188: ......
Page 194: ......
Page 195: ...Apr 5 2005 ...
Page 196: ......


