


Important
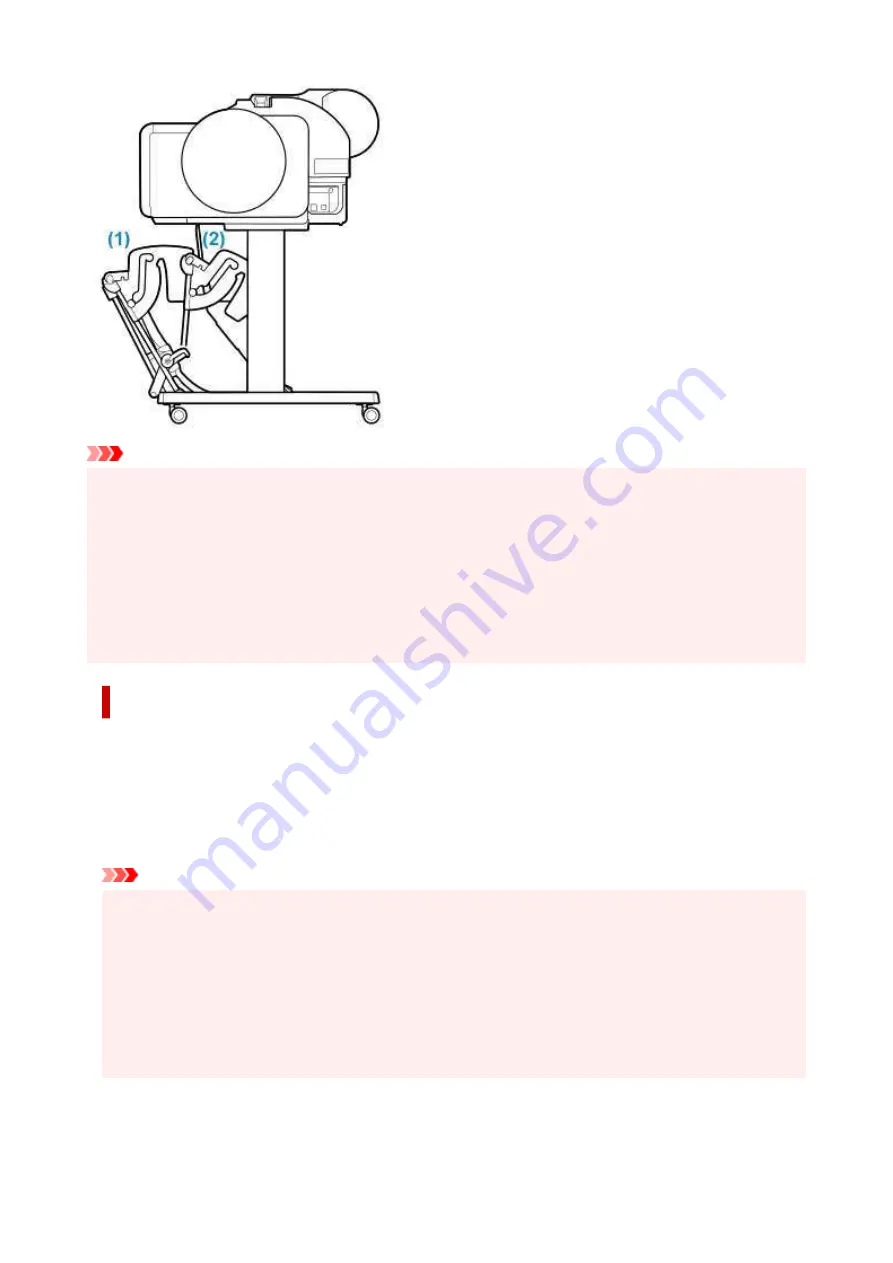
• When storing printed documents on the basket, always use it in position (1). If you do not, printed
documents may not be dropped into the basket, and the printed surface may become soiled.
• The number of sheets that can be collected in the basket is one. If printing multiple pages, print after
removing each sheet.
• The basket can hold printed documents from paper up to 48 inches (1219.2 mm) long.
• If the cloth part of the basket becomes dirty, wipe off the dirt without washing. Washing it may affect the
performance of the basket.
Convenient basket usage
When printing line drawings on plain paper, you can use the basket not only at the regular position but
also at two kinds of extended positions convenient for catching printed material.
In these extended positions, the basket can collected up to approximately 20 sheets of printed material.
The paper sizes that can be used with these extended positions are shown in the table below. Use the
best position that suits the paper size and orientation.
Important
• Use the regular position in the following situations. If you print multiple sheets in the regular position,
remove the printed material from the basket one sheet at a time.
• Paper other than plain paper
• Paper sizes not listed in the following table and printed material other than line drawings
• If the paper curls excessively due to the qualities of the paper or the usage environment
• If the paper curls excessively near the end of a roll of paper
• Return the basket to the regular position after printing.
98
Summary of Contents for TM-5300
Page 1: ...TM 5300 Online Manual English ...
Page 46: ... Borderless printing is not supported on sheets 46 ...
Page 55: ...55 ...
Page 85: ...5 Tap ON 85 ...
Page 95: ...95 ...
Page 96: ...Basket Using the Basket 96 ...
Page 105: ...4 Return to the regular position 105 ...
Page 115: ...115 ...
Page 142: ...For more on setting items on the operation panel Setting Items on Operation Panel 142 ...
Page 178: ...F Range which cannot be printed G Paper for printing 178 ...
Page 180: ...180 ...
Page 183: ... Even if the image runs off the edge of the paper it is rotated to expand the print range 183 ...
Page 186: ...A Output object area B Fit to long side post processing size 186 ...
Page 188: ... ON is selected when printing on roll 188 ...
Page 190: ...A Position of cut when OFF B Position of cut when ON 190 ...
Page 198: ...198 ...
Page 204: ...Printed without upper lower blank area 204 ...
Page 210: ... Printed image after reduced A Position of cut for A3 size 210 ...
Page 242: ...The resending setting is completed 242 ...
Page 249: ... H Cutter Blade A round bladed cutter for automatic paper cutting 249 ...
Page 255: ...Optional accessories Roll Holder Set Stand 255 ...
Page 264: ...264 ...
Page 317: ...7 Click OK to close screen 317 ...
Page 363: ...Adjusting Feed Amount Adjusting Feed Amount Adjusting Vacuum Strength 363 ...
Page 367: ...7 Tap paper to adjust A test pattern is printed for adjustment and adjustment is finished 367 ...
Page 378: ...Note For instructions on replacing the ink tanks see Replacing Ink Tanks 378 ...
Page 409: ...Cutter Blade Cutter Blade Replacing the Cutter Blade 409 ...
Page 417: ...Related Topic Cleaning the Print Heads 417 ...
Page 423: ...2 Close top cover 423 ...
Page 434: ...Specifications Specifications Print Area 434 ...
Page 461: ...Basic Printing Workflow Printing procedure Canceling print jobs Pausing Printing 461 ...
Page 479: ...Note The screen may differ slightly depending on the model you are using 479 ...
Page 481: ...Pausing Printing Pausing Printing 481 ...
Page 486: ...Printing from iOS Device AirPrint 486 ...
Page 500: ...Printing CAD Drawings Printing By Setting Print Purpose Printing from AutoCAD 500 ...
Page 533: ...Note Selecting Enlarged Reduced Printing changes the printable area of the document 533 ...
Page 605: ...In such cases take the appropriate action as described 605 ...
Page 649: ...Basic Print Job Operations Managing Job Queue Delete 649 ...
Page 775: ...Note To stop printing press the Stop button 775 ...
Page 786: ...1201 Cause The ink tank cover is open What to Do Close the ink tank cover 786 ...
Page 787: ...1210 Cause The ink tank cover is open What to Do Close the ink tank cover 787 ...
Page 813: ...1500 Cause The ink in the ink tank is running low What to Do Prepare a new ink tank 813 ...


