5
-3
S
et
ting a
Recor
d
ing
S
chedule
5
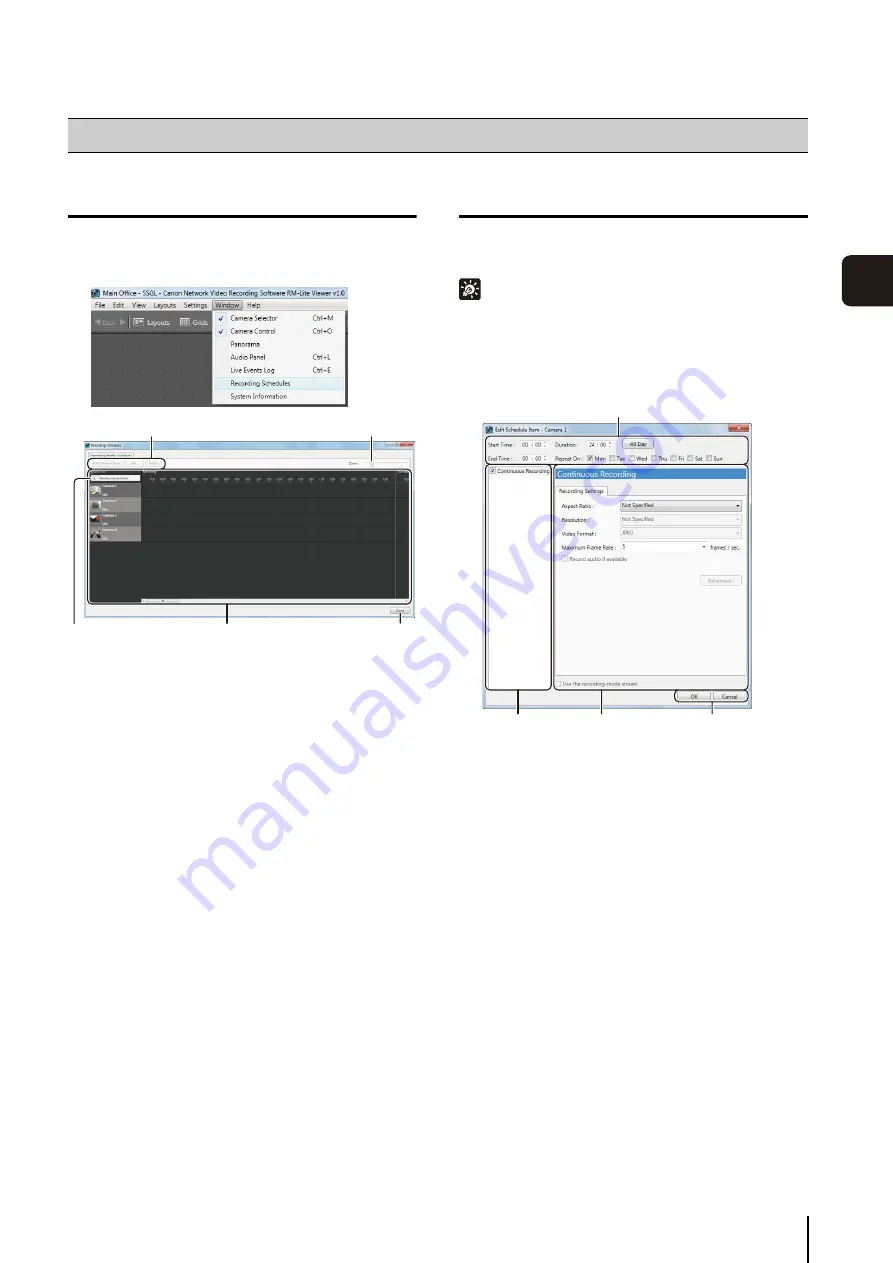
Display the [Recording Schedules] window
➀
[Add
S
chedule Item], [Edit], [Delete]
Add, edit or delete a schedule item.
➁
[Zoom] slider
Zoom in and zoom out the time line of the schedule
area.
➂
Camera search box
This cannot be used with RM-Lite.
➃
S
chedule area
Displays the currently registered cameras and their
corresponding weekly schedules, arranged by day of
the week.
➄
[Close]
Closes this window.
Set a Weekly Schedule
Hint
You can select more than one camera by holding down the Shift
key or Ctrl key and clicking the cameras.
➀
Recording time settings area
Specify the day of the week and the start and end time
of the recording period.
➁
Recording mode list
Select the recording mode.
Only continuous recording can be selected.
➂
Recording settings area
Configure the settings for the recording mode.
➃
[OK] and [Cancel]
Close the dialog box.
Record on a Regular Basis (Repeating Weekly Schedules)
1
Click [Window] > [Recording
S
chedules] to display the
[Recording
S
chedules] window.
➀
➁
➂
➃
➄
1
In the schedule area, click the camera that you want to
add the schedule to.
2
Click [Add
S
chedule Item] to display the [Edit
S
chedule
Item] dialog box.
➀
➁
➂
➃
Summary of Contents for RM-Lite 1.0
Page 7: ...vii ...
Page 12: ...xii ...
Page 22: ...1 10 ...
Page 23: ...Chapter 2 Setup How to install the software Settings after installation ...
Page 28: ...2 6 ...
Page 43: ...Chapter 4 Viewer Settings Configuring the Viewer Configuring a camera Creating a layout ...
Page 56: ...4 14 ...
Page 76: ...6 14 ...
Page 82: ...7 6 ...
Page 86: ...8 4 ...
Page 96: ...9 10 ...
Page 97: ...Appendix ...
Page 103: ...Index 10 7 Appendix ...


