Add a Camera
3
-11
S
to
rage
S
erver
S
et
tin
g
s
3
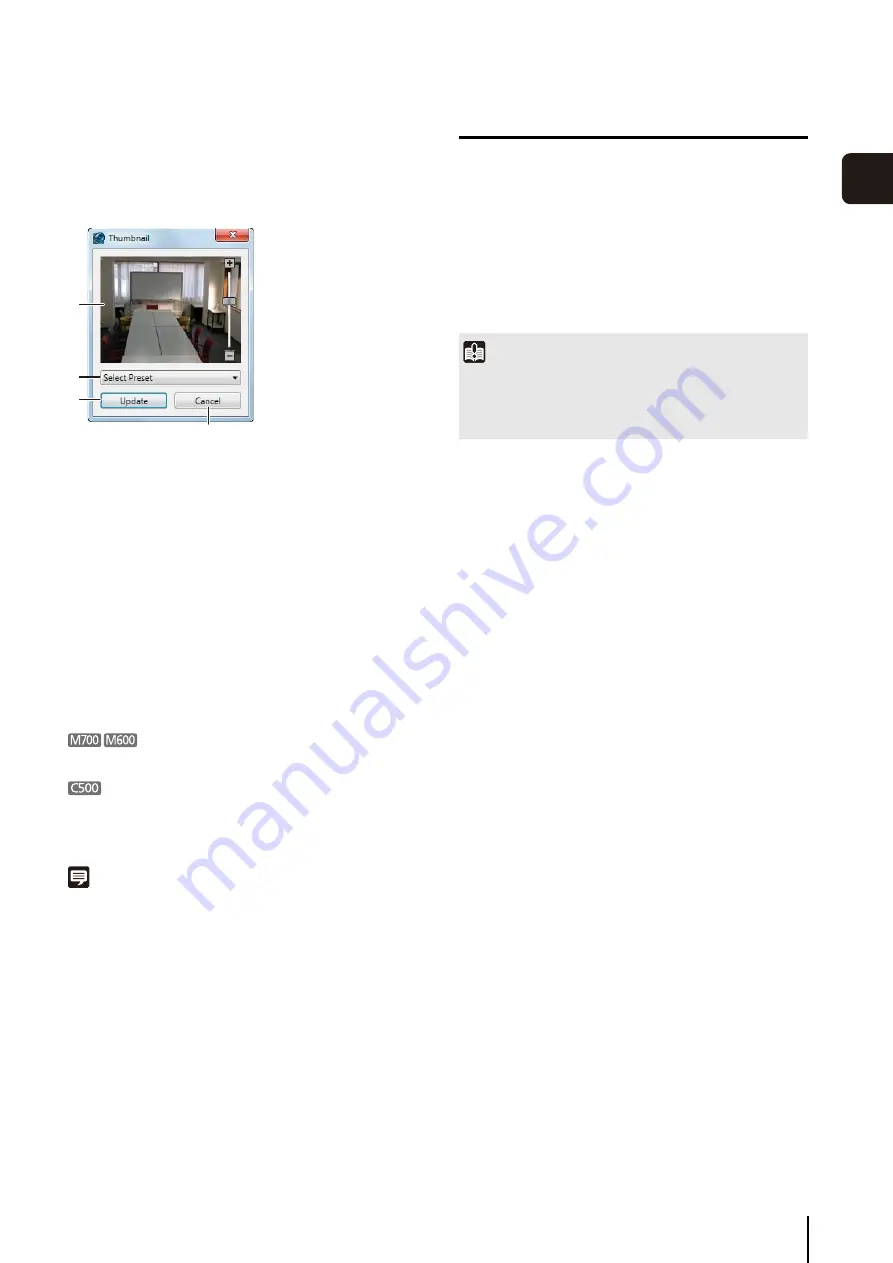
Change the Thumbnail Image of a Camera
You can change the thumbnail image of a camera.
In the [<camera name> Properties] dialog box, click the
[General] tab and click [Update] to display the
[Thumbnail] dialog box.
➀
Preview image
Drag the slider to change the zoom position of the
camera. Click in the preview image to change the
camera position.
➁
[
S
elect Preset]
Select a preset image stored on the camera.
➂
[Update]
Use the current preview image as the camera
thumbnail image. The [Thumbnail] dialog box closes
and the camera thumbnail image is updated.
➃
[Cancel]
Close the dialog box without updating the thumbnail
image.
You cannot use the pan/tilt/zoom feature.
• You cannot use the pan/tilt feature.
• You cannot use the zoom when the digital zoom is set
to [Disabled] on the camera.
Note
You must configure the presets first before starting operation. For
details, see the camera manual.
Remove a Camera
➀
➁
➂
➃
1
S
elect a camera in the list of cameras on the
[Cameras] tab.
2
Click [Remove].
3
A message is displayed asking if you want to remove
the camera. Click [Yes].
Important
If you remove a camera, you will no longer be able to play back
recordings made with the camera. If you need to play back the
recordings, use [Disable Camera] on the [Advanced] tab
instead of removing the camera.
Summary of Contents for RM-Lite 1.0
Page 7: ...vii ...
Page 12: ...xii ...
Page 22: ...1 10 ...
Page 23: ...Chapter 2 Setup How to install the software Settings after installation ...
Page 28: ...2 6 ...
Page 43: ...Chapter 4 Viewer Settings Configuring the Viewer Configuring a camera Creating a layout ...
Page 56: ...4 14 ...
Page 76: ...6 14 ...
Page 82: ...7 6 ...
Page 86: ...8 4 ...
Page 96: ...9 10 ...
Page 97: ...Appendix ...
Page 103: ...Index 10 7 Appendix ...


