123
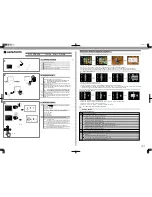
Change the orientation of images and save them as follows.
Choose [Rotate].
z
Press the
n
button, and then choose
[Rotate] on the
1
tab (p. 51).
Rotate the image.
z
Press the
qr
buttons to choose an image.
z
The image is rotated 90° each time you press
the
m
button.
z
To return to the menu screen, press the
n
button.
Follow these steps to deactivate automatic rotation by the camera, which
rotates images shot in vertical orientation so they are displayed vertically on
the camera.
z
Press the
n
button, choose [Auto
Rotate] on the
1
tab, and then choose [Off]
Rotating Images
Still Images
Movies
•
Movies with an image quality of
cannot be rotated.
•
Rotation is not possible when [Auto Rotate] is set to [Off].
Deactivating Auto Rotation
•
Images cannot be rotated when you set [Auto Rotate] to [Off].
Additionally, images already rotated will be displayed in the original
orientation.
Summary of Contents for PowerShot A4050 IS
Page 45: ...45 Camera Basics Basic camera operations and features 1 ...
Page 53: ...53 Auto Mode Convenient mode for easy shots with greater control over shooting 2 ...
Page 112: ...112 ...
Page 128: ...128 ...
Page 129: ...129 Setting Menu Customize or adjust basic camera functions for greater convenience 6 ...
Page 160: ...160 ...
Page 161: ...161 Appendix Helpful information when using the camera 8 ...
Page 173: ...Functions and Menu Tables 173 I P t N 3 7 8 8 Available or set automatically Not available ...
Page 175: ...Functions and Menu Tables 175 I P t N 6 6 Available or set automatically Not available ...
Page 177: ...Functions and Menu Tables 177 I P t N 5 5 Available or set automatically Not available ...
Page 179: ...Functions and Menu Tables 179 I P t N Available or set automatically Not available ...


