Important
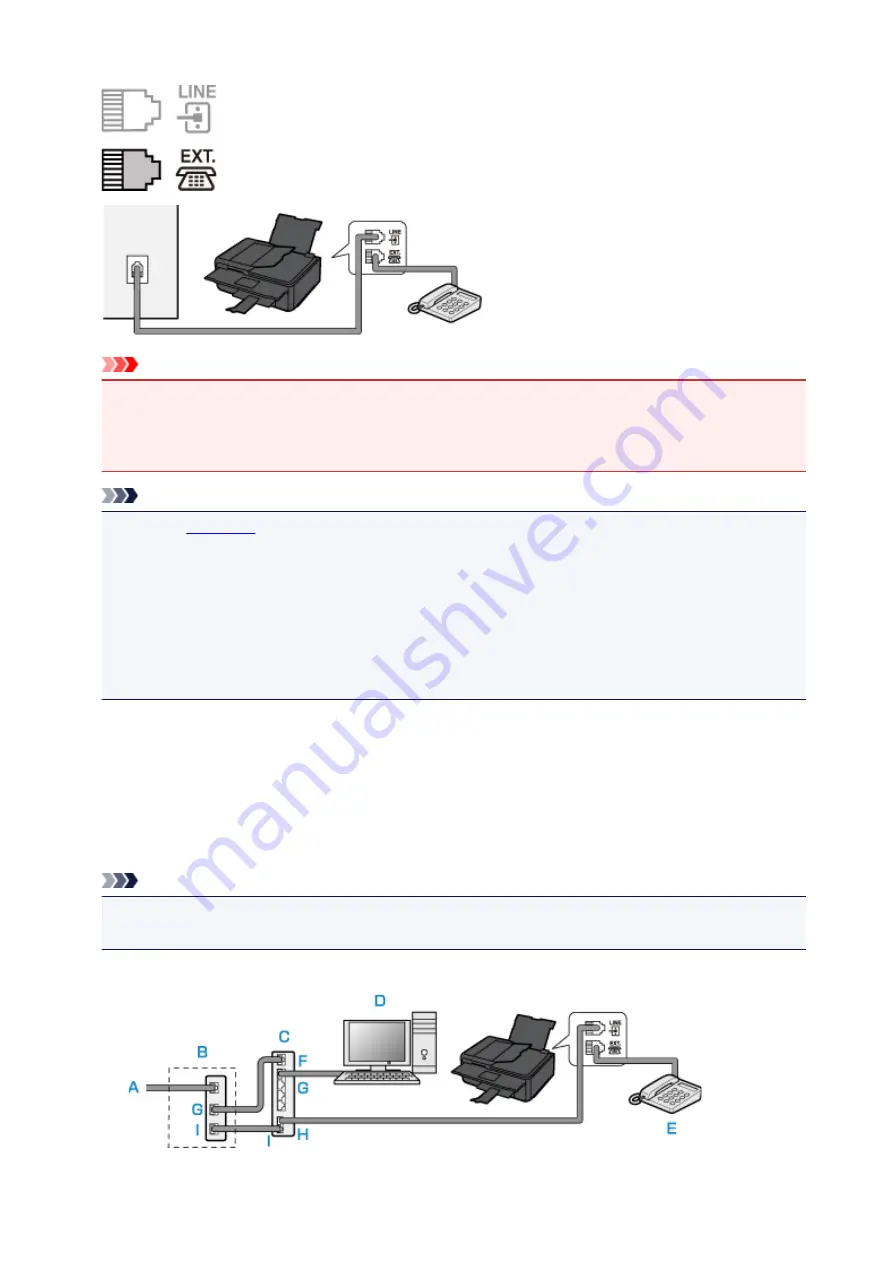
• Be sure to connect the telephone line before the printer is turned on.
If you connect the telephone line when the printer is turned on, turn the printer off and unplug the
power cord. Wait for 1 minute, and then connect the power plug.
Note
• Refer to
for the position of the telephone line jack and the external device jack.
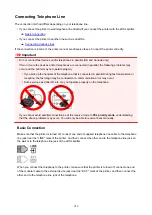
• Before connecting a telephone or answering device, remove the Telephone connector cap.
•
For users in the UK:
If the connector of the external device cannot be connected to the jack on the printer, you will need to
purchase a B.T. adapter to connect as follows:
Attach the B.T. adapter to the modular cable connecting the external device, and then connect the
B.T. adapter to the external device jack.
Connecting Various Lines
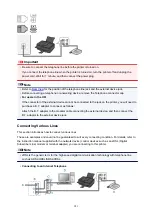
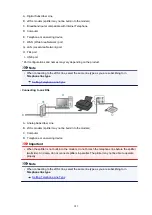
This section introduces how to connect various lines.
These are examples and could not be guaranteed to suit every connecting condition. For details, refer to
the instruction manual supplied with the network device (control devices such as an xDSL (Digital
Subscriber Line) modem or terminal adapter) you are connecting to this printer.
Note
• xDSL is the generic term for the high speed digital communication technology with telephone line
such as ADSL/HDSL/SDSL/VDSL.
•
Connecting to an Internet Telephone
281
Summary of Contents for PIXMA TR8560
Page 10: ...5012 493 5100 494 5200 495 5B00 496 6000 497 C000 498...
Page 45: ...Note Many other convenient faxing features are available Faxing 45...
Page 48: ...Notices when printing using web service Notice for Web Service Printing 48...
Page 96: ...Replacing Ink Tanks Replacing Ink Tanks Checking Ink Status on the Touch Screen Ink Tips 96...
Page 132: ...Safety Safety Precautions Regulatory Information WEEE EU EEA 132...
Page 155: ...Main Components Front View Rear View Inside View Operation Panel 155...
Page 181: ...For more on setting items on the operation panel Setting Items on Operation Panel 181...
Page 197: ...Language selection Changes the language for the messages and menus on the touch screen 197...
Page 270: ...Note To set the applications to integrate with see Settings Dialog 270...
Page 272: ...Scanning Multiple Documents at One Time from the ADF Auto Document Feeder 272...
Page 274: ...Scanning Tips Positioning Originals Scanning from Computer 274...
Page 291: ...8 Specify number of time and select OK 9 Select OK The Function list screen is displayed 291...
Page 339: ...6 Enter fax telephone numbers in To 339...
Page 342: ...Receiving Faxes Receiving Faxes Changing Paper Settings Memory Reception 342...
Page 352: ...Other Useful Fax Functions Document Stored in Printer s Memory 352...
Page 400: ...Other Network Problems Checking Network Information Restoring to Factory Defaults 400...
Page 423: ...Scanning Problems Mac OS Scanning Problems 423...
Page 424: ...Scanning Problems Scanner Does Not Work Scanner Driver Does Not Start 424...
Page 427: ...Faxing Problems Problems Sending Faxes Problems Receiving Faxes Telephone Problems 427...
Page 428: ...Problems Sending Faxes Cannot Send a Fax Errors Often Occur When You Send a Fax 428...
Page 438: ...Telephone Problems Cannot Dial Telephone Disconnects During a Call 438...
Page 450: ...Errors and Messages An Error Occurs Message Support Code Appears 450...


