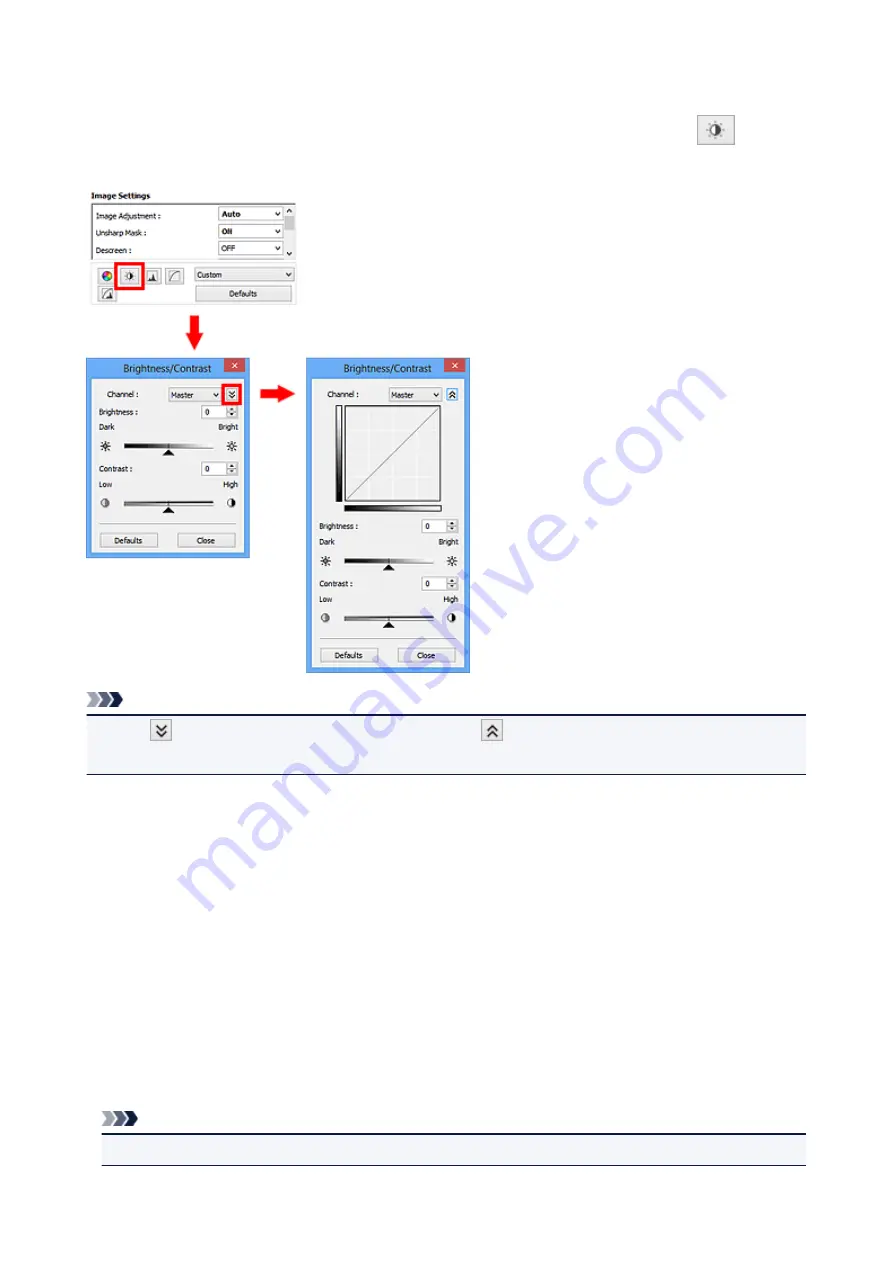
Adjusting Brightness and Contrast
You can adjust images that are too dark or bright, or too flat due to lack of contrast by using
(Brightness/Contrast) in ScanGear (scanner driver)'s
Advanced Mode
tab.
Note
• Click
(Down arrow) to switch to detailed view. Click
(Up arrow) to return to the previous view.
• Click
Defaults
to reset all adjustments in the current window.
Channel
Each dot of an image is a mixture of Red, Green, and Blue in various proportions (gradation). These
colors can be adjusted individually as a "channel."
Master
Adjust the Red, Green, and Blue combined.
Red
Adjust the Red channel.
Green
Adjust the Green channel.
Blue
Adjust the Blue channel.
Note
• Only
Grayscale
will be displayed in
Channel
when
Color Mode
is
Grayscale
.
702
Summary of Contents for PIXMA MG7500 Series
Page 90: ... 8 Display area The display changes based on the menu you select 90 ...
Page 126: ...Safety Guide Safety Precautions Regulatory and Safety Information 126 ...
Page 133: ...Main Components Front View Rear View Inside View Operation Panel 133 ...
Page 150: ...This opens another list of items Drag it in the same manner and tap a setting 150 ...
Page 175: ...175 ...
Page 181: ... D 0 25 inch 6 3 mm 181 ...
Page 204: ...Replacing an Ink Tank Replacing an Ink Tank Checking the Ink Status 204 ...
Page 258: ...Note The effects of the quiet mode may be less depending on the print quality settings 258 ...
Page 275: ...Language selection Changes the language for the messages and menus on the touch screen 275 ...
Page 290: ...Information about Network Connection Useful Information about Network Connection 290 ...
Page 337: ...5 Delete Deletes the selected IP address from the list 337 ...
Page 368: ...Checking the Ink Status with the Ink Lamps 368 ...
Page 375: ...375 ...
Page 403: ...Note Selecting Scaled changes the printable area of the document 403 ...
Page 445: ...Adjusting Brightness Adjusting Intensity Adjusting Contrast 445 ...
Page 542: ...Using the Slide Show Function Printing Photo While Viewing the Slide Show 542 ...
Page 566: ...PictBridge print settings 566 ...
Page 593: ...Scanning Scanning from a Computer Scanning from the Operation Panel of the Machine 593 ...
Page 676: ...Related Topic Scanning Items Larger than the Platen Image Stitch 676 ...
Page 697: ...697 ...
Page 720: ...Related Topic Scanning in Basic Mode 720 ...
Page 773: ...When scanning is completed the scanned image appears in the application 773 ...
Page 848: ...Disc Tray Does Not Feed Properly 848 ...
Page 851: ...Problems with Printing Quality Print Results Not Satisfactory Ink Is Not Ejected 851 ...
Page 958: ...1401 Cause The print head may be damaged Action Contact the service center 958 ...
Page 959: ...1403 Cause The print head may be damaged Action Contact the service center 959 ...
Page 960: ...1405 Cause The print head may be damaged Action Contact the service center 960 ...
Page 968: ...1660 Cause The ink tank is not installed Action Install the ink tank 968 ...
Page 1006: ...5B00 Cause Printer error has occurred Action Contact the service center 1006 ...
Page 1007: ...5B01 Cause Printer error has occurred Action Contact the service center 1007 ...
Page 1008: ...5B10 Cause Printer error has occurred Action Contact the service center 1008 ...
Page 1009: ...5B11 Cause Printer error has occurred Action Contact the service center 1009 ...


