4. Install the printer driver: [Custom installation]
Procedure
1.
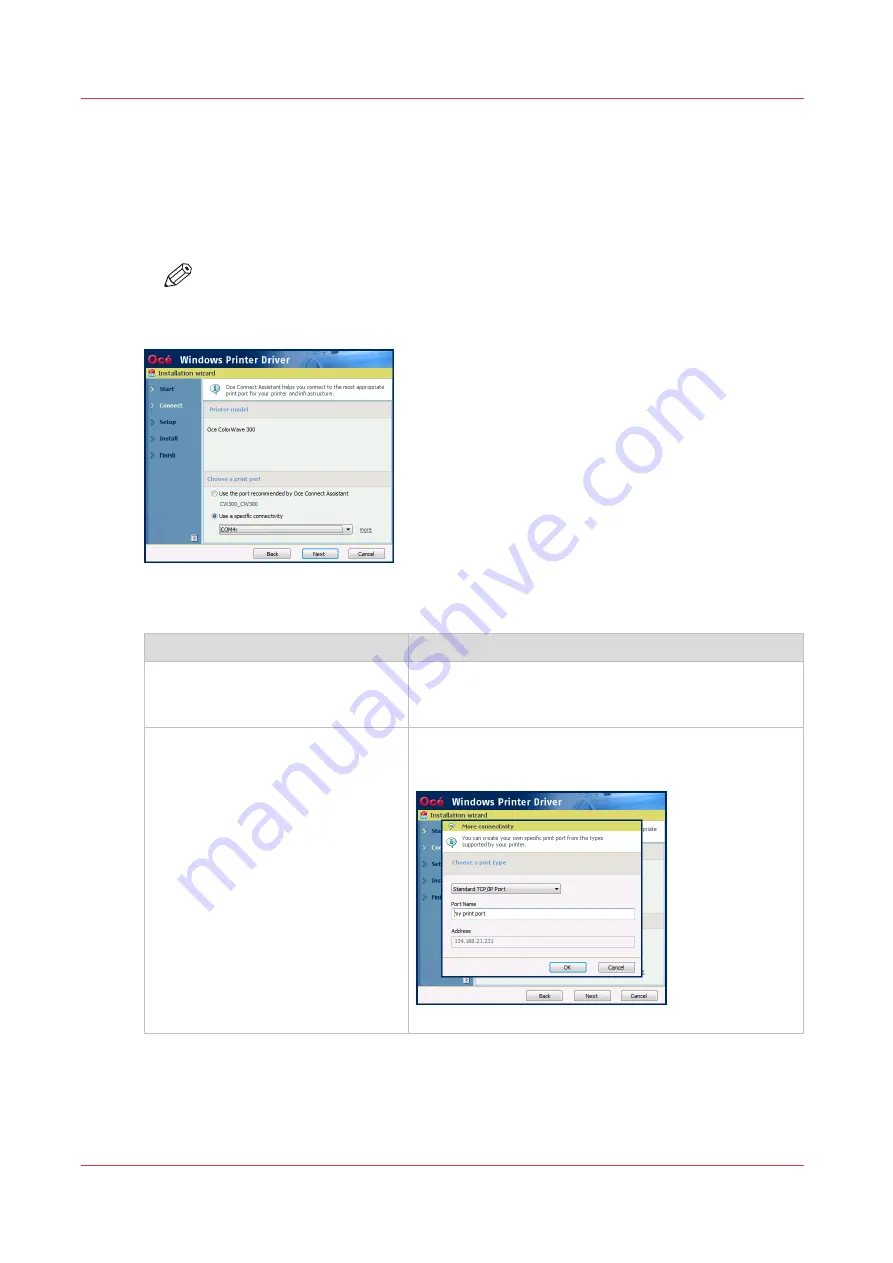
The Océ Connect Assistant is launched. It connects to the printer controller in order to retrieve the
printer model and the printer information.
When detected, the printer model is displayed. Else, select your printer model from the list.
NOTE
When you select the printer model from the list, there is no back-channel performed
during the installation.
[7] Define the print port
From this screen, you can also select the print port you want to use:
If you want to
Then
select the print port proposed by the
Océ Connect Assistant
1. Select [Use the port recommended by Oce Connect
Assistant.]
2. Click [Next].
define your own print port for a spe-
cific connectivity
1. Select [Use a specific connectivity].
2. Select a print port from the drop-down list, or click
[More] to define your own print port.
[8] Define more connectivity
4. Install the printer driver: [Custom installation]
66
Chapter 3 - Print via LPD/LPR
Océ TDS/TCS/TC Connectivity information for Windows environments
Summary of Contents for Oce TDS Series
Page 1: ...Administration guide Oc TDS TCS TC Systems Connectivity information for Windows environments...
Page 6: ...Contents 6 Oc TDS TCS TC Connectivity information for Windows environments...
Page 7: ...Chapter 1 Introduction...
Page 19: ...Chapter 2 Configure the print system controller...
Page 55: ...Chapter 3 Print via LPD LPR...
Page 97: ...Chapter 4 Print via FTP...
Page 101: ...Chapter 5 Print via WPD2 on a Failover Cluster...
Page 111: ...Chapter 6 Simple Network Management Protocol SNMP...
Page 117: ...Chapter 7 Troubleshooting...
Page 127: ...Chapter 8 Appendix A Oc TDS TCS systems basic procedures...
Page 131: ...Chapter 9 Appendix B You and Oc...
Page 137: ......


