


1
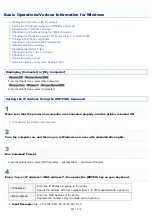
Run Command Prompt.
)URPWKH>6WDUW@PHQXVHOHFW>$OO3URJUDPV@ĺ>$FFHVVRULHV@ĺ>&RPPDQG3URPSW@
2
Enter "ping <the IP address of the printer>", then press the [ENTER] key on your keyboard.
Input Example:
"ping 192.168.0.215"
Correctly enter the IP address which is set for the printer. If the wrong IP address is entered, you cannot obtain an
appropriate check result.
If you are not sure about the IP address of the printer, see "
Checking the IP Address of the Printer
3
Check the displayed result.
When "Packets: Sent = 4, Received = 4, Lost = 0 (0% loss)," is displayed
The IP address is set properly.
When "Packets: Sent = 4, Received = 0, Lost = 4 (100% loss)," is displayed
Ask your network administrator about the problem.
4
Enter "exit", and then press [ENTER] on the keyboard to exit Command Prompt.
NOTE
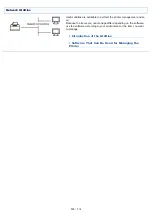
Checking and configuring the subnet
Enter "ipconfig" as a command in Command Prompt.
The network setting information of the computer appears. Confirm that the computer and printer are on the same subnet.
<Example>
Setting in a computer
Subnet mask: "255.255.255.0"
IP Address: "192.168.0.10"
The IP address of the printer needs to be "192.168.0.xxx". (xxx indicates an
arbitrary number.)
Checking the Processor Version of Windows Vista, 7, or Server 2008
If you are not sure whether you are using 32-bit Windows Vista/7/Server 2008 or 64-bit Windows Vista/7/Server 2008, you
can check that using the following procedure.
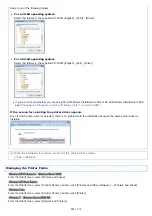
1
From the [Start] menu, select [Control Panel].
2
Display [System].
㻡㻜㻟㻌㻛㻌㻡㻝㻠
Summary of Contents for LBP7100Cn
Page 1: ......
Page 7: ...For Windows 8 Server 2012 Users 512 For Macintosh Users 513 Office Locations 514...
Page 21: ...7 Click Exit When the following screen appears you can remove the CD ROM...
Page 38: ...If the laser beam should escape and enter your eyes exposure may cause damage to your eyes...
Page 81: ......
Page 83: ...It takes approximately 60 seconds...
Page 88: ......
Page 105: ...0F40 02E Installing the Printer Driver Uninstalling the Printer Driver Driver Installation...
Page 119: ......
Page 121: ...2 Click Next Proceed to the Printer Information Screen...
Page 124: ......
Page 132: ...17 Click Exit When the following screen appears you can remove the CD ROM...
Page 153: ......
Page 174: ...3 Click OK For details on the basic printing procedure see Basic Printing Procedure...
Page 178: ...For details on the basic printing procedure see Basic Printing Procedure...
Page 180: ...Click OK For details on the basic printing procedure see Basic Printing Procedure...
Page 183: ...3 Click OK Then the Page Setup sheet reappears...
Page 187: ...Color 3 Click OK For details on the basic printing procedure see Basic Printing Procedure...
Page 196: ...3 Click OK For details on the basic printing procedure see Basic Printing Procedure...
Page 198: ...4 Click OK For details on the basic printing procedure see Basic Printing Procedure...
Page 204: ...Low...
Page 214: ...changed 4 Confirm the settings then click OK The printer folder reappears...
Page 249: ......
Page 255: ......
Page 277: ...WPA WPA2 PSK Settings Displays the WPA WPA2 PSK setting WEP Settings Displays the WEP setting...
Page 282: ...6 Click Close 7 Click Apply 8 Click OK NOTE...
Page 286: ......
Page 303: ...9 Click Finish...
Page 317: ...2 Click OK...
Page 319: ...4 Change the display language 1 Select a display language 2 Click OK...
Page 323: ......
Page 353: ......
Page 355: ...4 Click Edit 5 Configure the SNMPv1 protocol...
Page 362: ...4 Click Generate Key 5 Specify a key to be created...
Page 366: ...4 Click Register Key and Certificate 5 Click Install...
Page 372: ...8 Click Register...
Page 378: ......
Page 384: ...4 Click Initialize 5 Click OK to initialize the key and certificate CA certificate...
Page 389: ......
Page 392: ...2 Click IEEE 802 1X Settings 4 Click Edit 5 Select the Use IEEE 802 1X check box...
Page 393: ...6 Enter a login name 7 Select the Use TLS check box...
Page 397: ...4 Click Edit 5 Select the Use IEEE 802 1X check box...
Page 401: ......
Page 429: ...3 Click Next 4 Manually specify the port using Port Printer Information Screen...
Page 436: ...7 Disconnect the USB cable from the computer then restart Windows...