019A-040
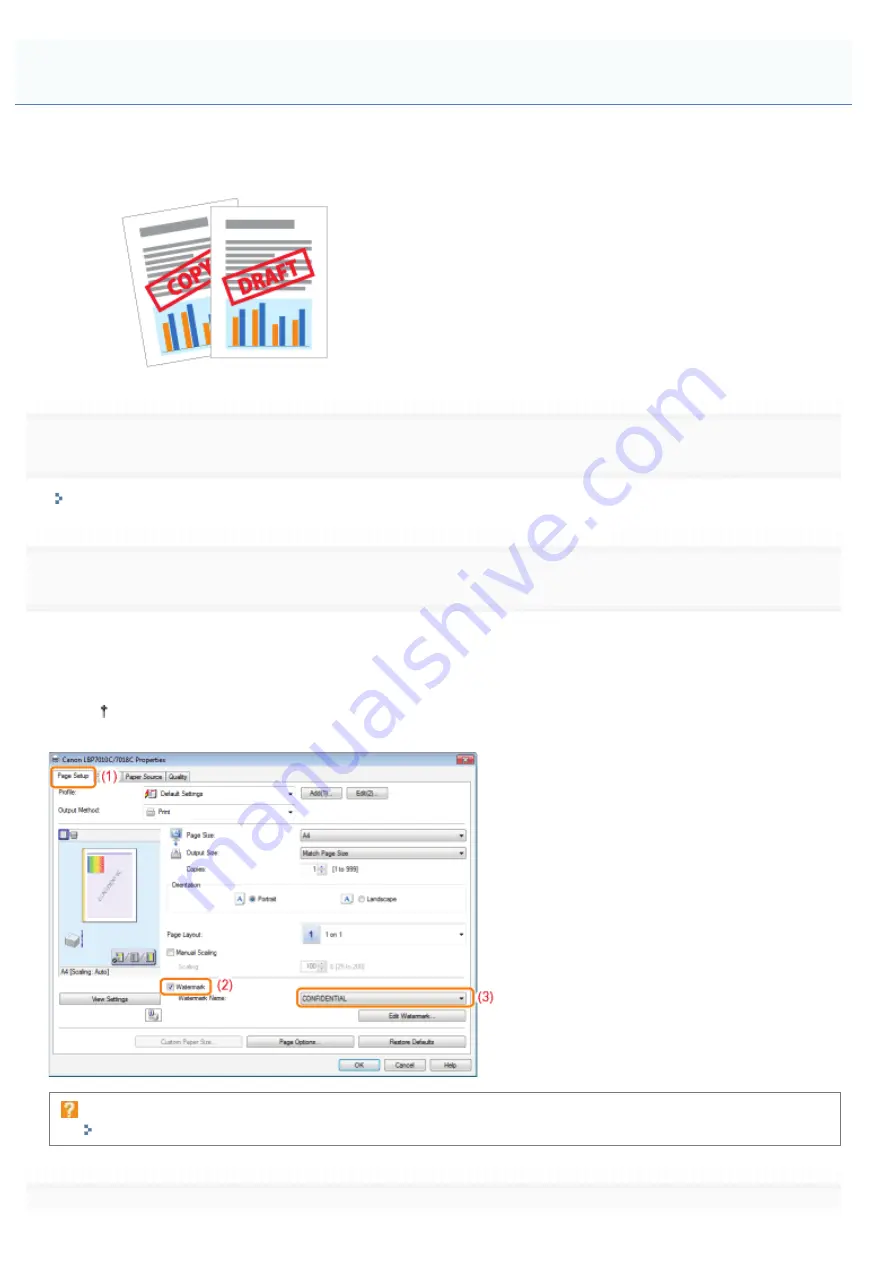
You can superimpose watermarks (such as [COPY] and [DRAFT]) over the documents created by an application.
Additionally, you can add new watermarks and edit or delete the added watermarks.
1
Display the setting screen of the printer driver.
"Displaying the Setting Screen"
2
Select a watermark.
(1) Display the [Page Setup] sheet.
(2) Select the [Watermark] check box.
(3) Select the character string to be printed as a watermark.
When adding, editing, or deleting a watermark, see "
Adding, Editing, or Deleting a Watermark
If you cannot select the [Watermark] check box
"
The Printer Driver Settings Cannot Be Changed
Adding a Watermark to a Document to Be Printed (Watermark Printing)
㻝㻤㻞㻌㻛㻌㻟㻠㻟
Summary of Contents for LBP7010C
Page 1: ...㻝㻌㻛㻌㻟㻠㻟 ...
Page 19: ...7 Click Exit When the following screen appears you can remove the CD ROM 㻝㻥㻌㻛㻌㻟㻠㻟 ...
Page 85: ...NOTE Calibration time It takes approximately 57 seconds 㻤㻡㻌㻛㻌㻟㻠㻟 ...
Page 92: ...㻥㻞㻌㻛㻌㻟㻠㻟 ...
Page 135: ...17 Click Exit When the following screen appears you can remove the CD ROM 㻝㻟㻡㻌㻛㻌㻟㻠㻟 ...
Page 137: ...If the User Account Control dialog box appears Click Yes or Continue 㻝㻟㻣㻌㻛㻌㻟㻠㻟 ...
Page 156: ...㻝㻡㻢㻌㻛㻌㻟㻠㻟 ...
Page 177: ...3 Click OK For details on the basic printing procedure see Basic Printing Procedure 㻝㻣㻣㻌㻛㻌㻟㻠㻟 ...
Page 181: ...For details on the basic printing procedure see Basic Printing Procedure 㻝㻤㻝㻌㻛㻌㻟㻠㻟 ...
Page 183: ...3 Click OK For details on the basic printing procedure see Basic Printing Procedure 㻝㻤㻟㻌㻛㻌㻟㻠㻟 ...
Page 186: ...3 Click OK Then the Page Setup sheet reappears 㻝㻤㻢㻌㻛㻌㻟㻠㻟 ...
Page 197: ...4 Click OK For details on the basic printing procedure see Basic Printing Procedure 㻝㻥㻣㻌㻛㻌㻟㻠㻟 ...
Page 201: ...3 Click OK For details on the basic printing procedure see Basic Printing Procedure 㻞㻜㻝㻌㻛㻌㻟㻠㻟 ...
Page 203: ...4 Click OK For details on the basic printing procedure see Basic Printing Procedure 㻞㻜㻟㻌㻛㻌㻟㻠㻟 ...
Page 207: ...4 Click OK For details on the basic printing procedure see Basic Printing Procedure 㻞㻜㻣㻌㻛㻌㻟㻠㻟 ...
Page 211: ... Low 㻞㻝㻝㻌㻛㻌㻟㻠㻟 ...
Page 221: ...4 Confirm the settings then click OK ĺ The printer folder reappears 㻞㻞㻝㻌㻛㻌㻟㻠㻟 ...
Page 273: ...4 Click OK 㻞㻣㻟㻌㻛㻌㻟㻠㻟 ...
Page 282: ...For details on the procedure for loading paper see Loading Paper 㻞㻤㻞㻌㻛㻌㻟㻠㻟 ...
Page 316: ...If you specify Special Settings C4 printing speed drops 㻟㻝㻢㻌㻛㻌㻟㻠㻟 ...
Page 341: ...㻟㻠㻝㻌㻛㻌㻟㻠㻟 ...


