4
Special
Copying
and
Box
Features
Job Build
4-43
Job Build
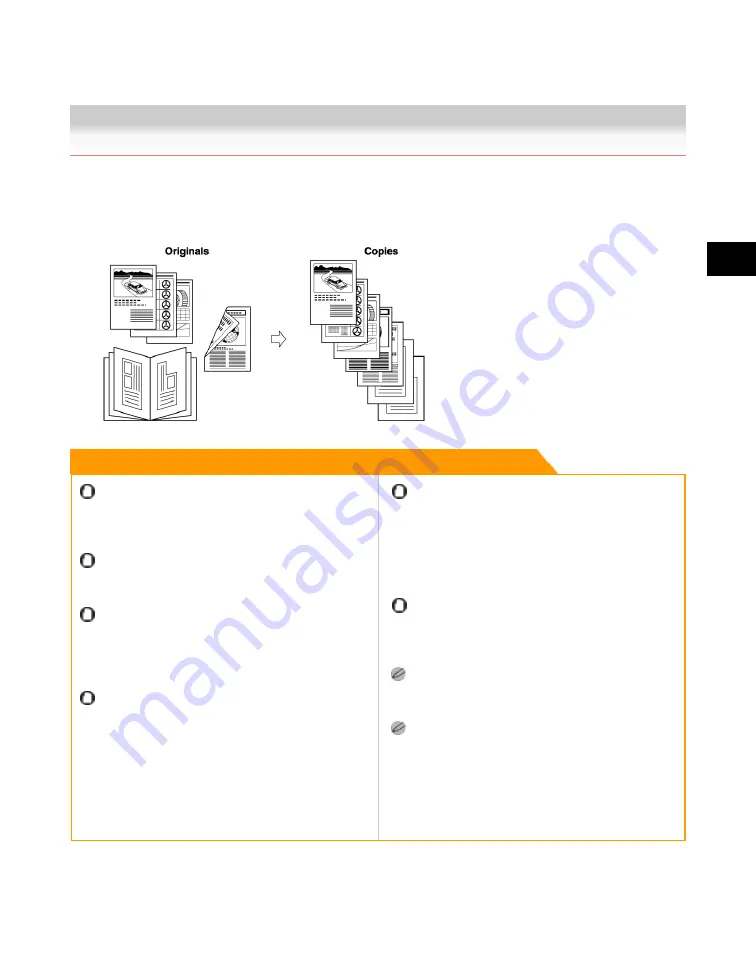
This mode enables you to scan originals that are too many to be placed at once, by dividing them into
multiple batches. You can use both the feeder and the platen glass for scanning. When copying, the
originals are printed as one document after all of the batches have been scanned.
Remark
The 2-Sided Original mode is available only if the
optional Feeder (DADF-U1) is attached
(standard-equipped for the iR3245N/iR3235N/
iR3225N).
For information on the modes which cannot be set in
combination with this mode, see "Combination of
Functions Chart(p.9-2)."
You cannot change the copy settings while the
machine is scanning originals in the Job Build mode.
You need to set the necessary copy/scan settings
beforehand, according to the type of originals or the
desired result.
If you place your originals in the feeder, remove the
originals from the original output area when the
scanning of each batch is complete.
When copying, you can change or specify the following
settings before scanning the next batch of originals
(i.e., between batches): the number of copies, 2-Sided
Original mode, original type, and copy exposure.
However, if you specify the Image Combination mode
together with the Job Build mode, you cannot change
the copy exposure and original type.
If you use the Job Block Combination mode, the Job
Build mode is automatically set for each batch of
originals. You cannot use the Job Build mode for the
combined document.
If you place different size originals in the feeder, set
the Different Size Originals mode. (See "Different Size
Originals(p.4-42).")
When copying, if you want to copy one-sided and
two-sided originals as two-sided copies, divide the
originals into one-sided and two-sided batches. For
example, if the first batch of originals to be copied
consists of two-sided originals, set the 2-Sided Original
mode accordingly. Thereafter, you have to manually
set or cancel the 2-Sided Original mode for each batch
of originals that you scan.
Acesst 1.0 6251194
Summary of Contents for iR3245
Page 2: ......
Page 13: ...chapter 1 Introduction to the Copy Functions ...
Page 43: ...1 Introduction to the Copy Functions Cancelling a Copy Job 1 31 Cancelling a Copy Job ...
Page 67: ...chapter 2 Introduction to the Mail Box Functions ...
Page 70: ...2 Introduction to the Mail Box Functions 2 4 Various Mail Box Functions ...
Page 104: ...2 Introduction to the Mail Box Functions 2 38 While Scanning While Scanning ...
Page 107: ...2 Introduction to the Mail Box Functions While Printing 2 41 While Printing ...
Page 135: ...2 Introduction to the Mail Box Functions Erasing a Document 2 69 3 Press Done ...
Page 150: ...2 Introduction to the Mail Box Functions 2 84 Erasing Part of a Document ...
Page 151: ...chapter 3 Basic Copying and Mail Box Features ...
Page 166: ...3 Basic Copying and Mail Box Features 3 16 Entire Image 2 Press Entire Image Done 3 Press ...
Page 255: ...chapter 4 Special Copying and Mail Box Features ...
Page 307: ...4 Special Copying and Mail Box Features Image Repeat 4 53 6 Press OK ...
Page 428: ...4 Special Copying and Mail Box Features 4 174 Date Printing ...
Page 429: ...chapter 5 Memory Features ...
Page 439: ...5 Memory Features Storing Scan Print Settings 5 11 Storing Scan Print Settings ...
Page 444: ...5 Memory Features 5 16 Naming a Memory Key Naming a Memory Key ...
Page 447: ...5 Memory Features Recalling Scan Print Settings 5 19 Recalling Scan Print Settings ...
Page 450: ...5 Memory Features 5 22 Erasing Scan Print Settings Erasing Scan Print Settings ...
Page 453: ...chapter 6 Sending and Receiving Documents Using the Inboxes ...
Page 469: ...chapter 7 Using the Express Copy Basic Features Screen ...
Page 581: ...chapter 8 Customizing Settings ...
Page 585: ...8 Customizing Settings Customizing Copy Settings 8 5 Customizing Copy Settings ...
Page 609: ...8 Customizing Settings Customizing Mail Box Settings 8 29 Customizing Mail Box Settings ...
Page 621: ...chapter 9 Appendix ...
Page 633: ......


