


35
Other Useful Functions
Pr
efac
e
O
ther U
seful
Func
tions
Cop
ying
Func
tion
Prin
ting
Func
tion
U
seful
Func
tions and
Settings
36
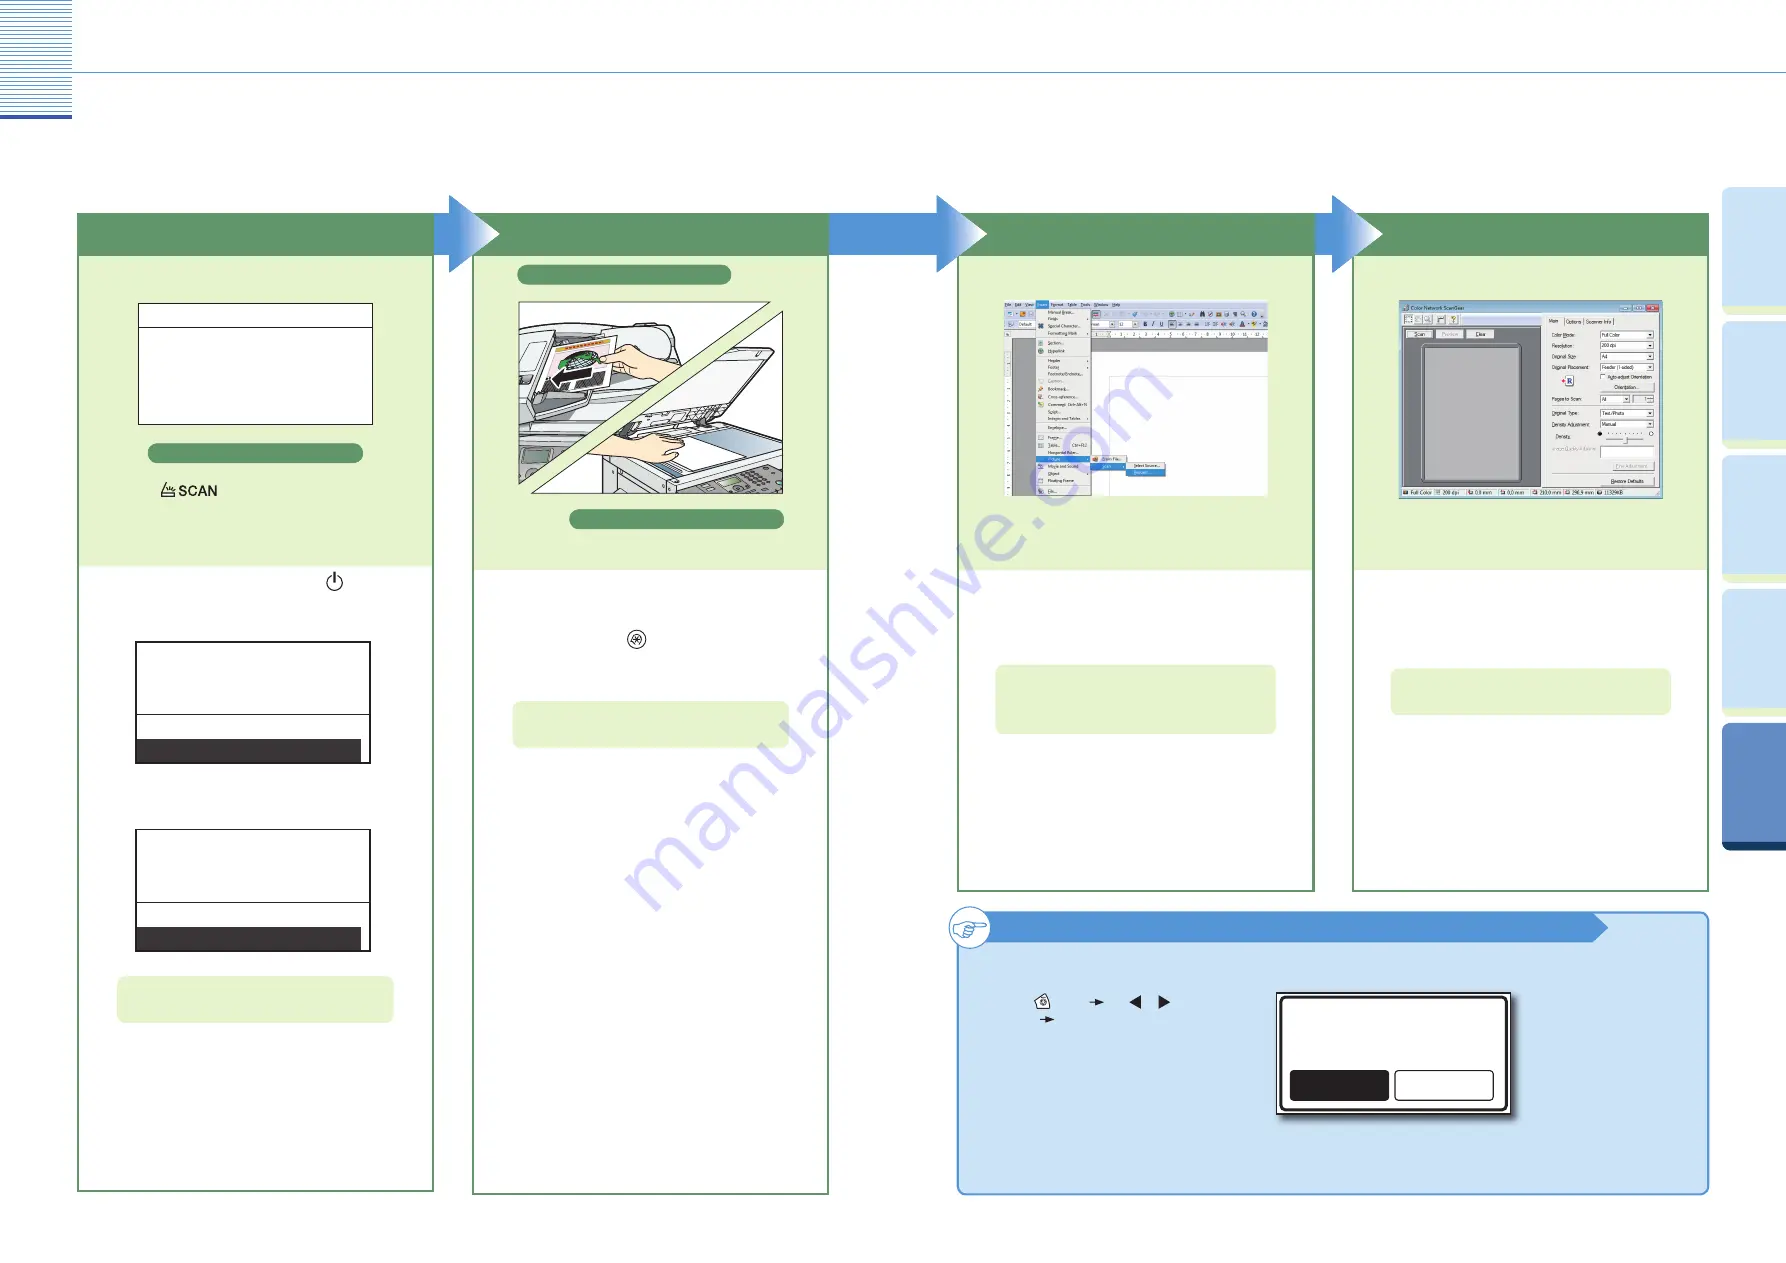
Start Scanning
Specify the scan settings that suit your
preferences, and click [Scan].
On the Color Network ScanGear Main Window, specify
the settings such as the Color Mode, Resolution, etc.
Click [Scan] to acquire the image.
When scanning is complete, remove your originals.
●
●
●
For more information, see the
Network ScanGear Guide
.
Scanning from a Computer
(Remote Scan)
The following is the basic procedure for remotely scanning originals and loading the scan to a computer. For more information, see the
references to other guides.
Open the Color Network ScanGear Main Window
Open a TWAIN-compliant application on your
computer desktop, and start the scanning
operation.
Make sure that the Color Network ScanGear is selected
as the scanner to be used.
Select the command to start scanning operation (such
as [Scan New] or [Acquire]).
●
●
The Color Network ScanGear Main Window appears.
For more information, see the documentation that
comes with your TWAIN-compliant application.
Place Your Originals
Place in the feeder
Place on the platen glass
Place your originals.
Close the feeder/platen cover after placing your
originals on the platen glass.
To set the scan settings such as data compression or
gamma values, press
(Additional Functions) and
select <Remote Scan Compress> or <Remote Scan
Gamma>.
●
●
For more information, see Chapter 3, “Useful Functions
and Settings,” in the
Reference Guide
.
Prepare
Ready to scan.
(Online)
Scan
Scan Standby Display
Press
to switch to the Scan mode.
If the machine is in the Sleep mode, press
(Power).
If the message <Dept. ID/Pass Input> appears, enter
the Department ID and password.
●
●
Dept. ID/Pass Input
Password:*******
ID Key after Input
When done press ID key
Dept. ID:0000001
If the message <Enter User ID/Pass> appears, enter the
User ID and password.
●
ID Key after Input
When done press ID key
User ID:User01
Password:******
Enter User ID/Pass
For more information, see Chapter 2, “Basic
Operations,” in the
Reference Guide
.
To cancel remote scanning
Scanning from a Computer
(Remote Scan)
Press
(Stop)
use or to select
<Yes>
press [OK].
Yes
No
Cancel?
* The screen shots shown below may diff er from the ones displayed on your computer, depending on the machine and optional equipment, version of Color
Network ScanGear, or operating system you are using.
* If you want to use the machine as a network scanner, it must be connected to a computer over an IPv4 network.
* The Color Network ScanGear driver is compatible only with the Windows operating systems.
* The Remote Scan function is available only if the optional Network Kit is attached.


