English
31
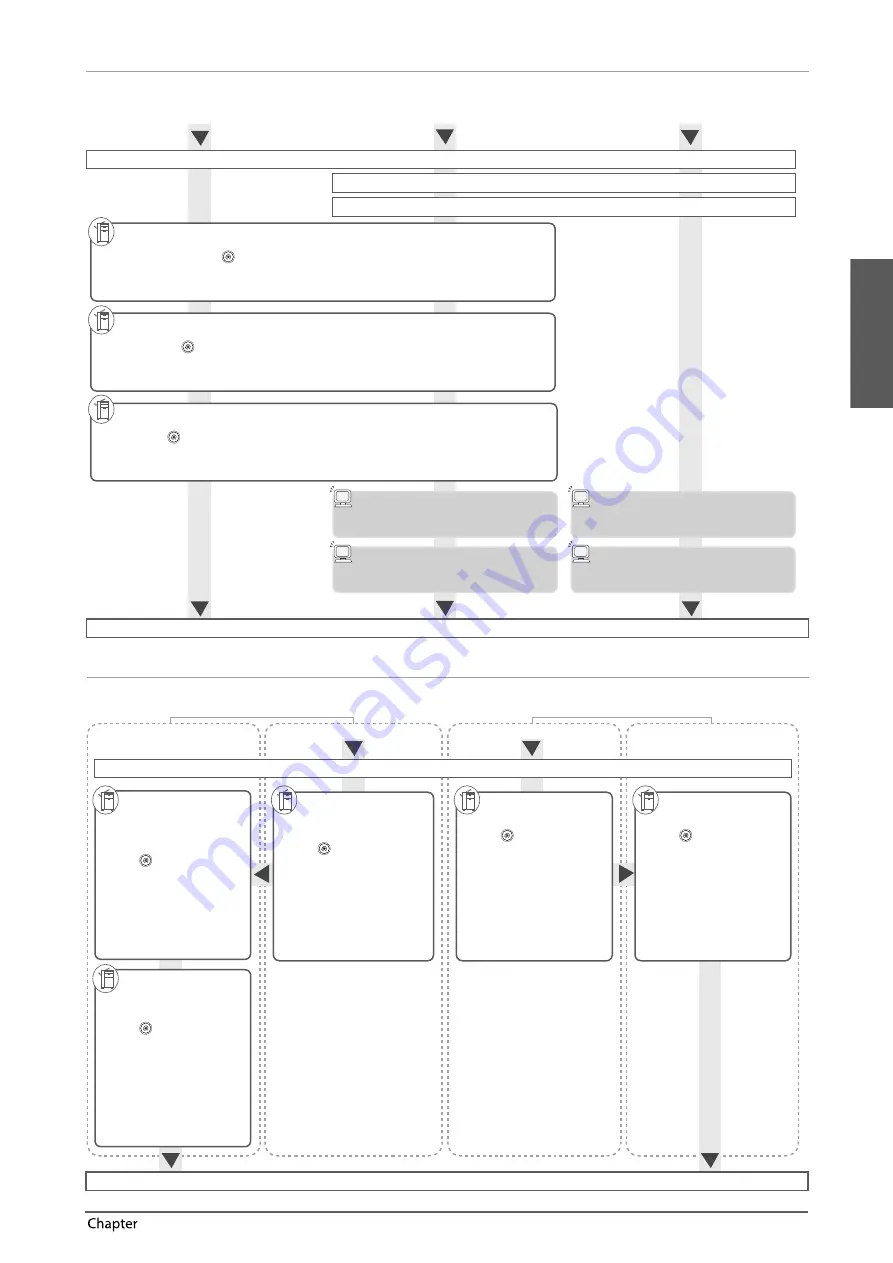
Flow of Basic Operations
2
Sending Faxes/Printing
Required Options: Fax board or Remote Fax Kit is required, depending on the fax function. An optional product is required, depending on the print function.
Sending Faxes from the Machine
Printing from a Computer
Sending Faxes from a Computer
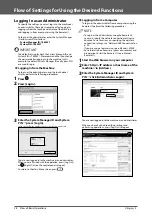
Logging In to the Machine as an Administrator
Network Connection: Network (TCP/IP, AppleTalk, Netware) or USB
Network Settings: SMB/CIFS (only if necessary)
Fax Line Settings
●
Press
→
[Function Settings]
→
[Send]
→
[Fax Settings].
Specify [Set Line], [Register Unit Telephone Number], [Register Unit Name], [Select Line Type].
►
e-Manual
> Settings/Registration
Printing the TX Terminal ID
●
Press
→
[Function Settings]
→
[Send]
→
[Common Settings]
→
[TX Terminal ID].
Specify [Print].
►
e-Manual
> Settings/Registration
Fax Driver Installation
Install the fax driver from the CD-ROM.
Printer Driver Installation
Install the printer driver from the CD-ROM.
Setting the Fax Options
Specify the properties.
Setting the Printer Options
Specify the properties.
Settings Completed
Sending/Receiving Remote Fax
Required Options: Fax board or Remote Fax Kit is required, depending on the fax function.
Receiving Remote Fax
Sending Remote Fax
Logging In to the Machine as an Administrator
Server Machine
Client Machine
Enabling
Remote Fax
●
Press
→
[Function
Settings]
→
[Send]
→
[Fax
Settings]
→
[Remote Fax
Settings].
Set [Use Remote Fax] to [On].
►
e-Manual
> Settings/
Registration
Server Machine
Client Machine
Remote Fax
Sending Settings
●
Press
→
[Function
Settings]
→
[Send]
→
[Fax
Settings]
→
[Remote Fax TX
Settings].
Set the IP address of the server.
►
e-Manual
> Settings/
Registration
Remote Fax
Receiving Settings
Example:
●
Press
→
[Function
Settings]
→
[Send]
→
[E-Mail/I-Fax Settings].
Select [Communication Settings]
→
set the e-mail server.
►
e-Manual
> Settings/
Registration
Registering the
Destination
(Client Machine)
Example:
●
Press
→
[Set Destination]
→
[Register Destinations]
→
[Register New Dest.]
→
[I-Fax].
Enter the name and IP address of the
client machine.
►
e-Manual
> Settings/
Registration
Setting the Client
Machine as Forwarding
Destination
●
Press
→
[Function
Settings]
→
[Receive/
Forward]
→
[Common
Settings]
→
[Forwarding
Settings]
→
[Register].
Set the registered client machine as
forwarding destination.
►
e-Manual
> Settings/
Registration
Settings Completed
Setting the Current Date and Time
●
Press
→
[Preferences]
→
[Timer/Energy Settings]
→
[Date/Time Settings].
Enter the date and time.
►
e-Manual
> Settings/Registration
Summary of Contents for imageRUNNER ADVANCE 6255i
Page 2: ......
Page 3: ...1 imageRUNNER ADVANCE 6275i 6265i 6255i User s Guide ...
Page 50: ...48 Flow of Basic Operations 2 ...
Page 81: ...1 imageRUNNER ADVANCE 6275i 6265i 6255i Guide de I utilisateur ...
Page 128: ...48 Flux des opérations de base 2 ...
Page 159: ...1 imageRUNNER ADVANCE 6275i 6265i 6255i Anwenderhandbuch ...
Page 206: ...48 Arbeitsablauf für einfache Vorgänge 2 ...
Page 237: ...1 imageRUNNER ADVANCE 6275i 6265i 6255i Guida per l utente ...
Page 284: ...48 Flusso delle operazioni principali 2 ...
Page 315: ...1 imageRUNNER ADVANCE 6275i 6265i 6255i Guía de usuario ...
Page 362: ...48 Flujo de funciones básicas 2 ...
Page 393: ......


