Clearing Paper Jams
7-5
T
rou
b
les
ho
ot
ing
7
4
After you have cleared all the paper jams, be sure to return all the
levers and covers to their original positions.
When all the steps are completed and return all the levers and covers to their original
positions, the LCD display returns to the Standby display.
If there is any paper that still needs to be removed, another On-Screen Instruction
appears on the LCD display.
Once you have removed all of the jammed paper in locations other than the optional
feeder, printing or copying resumes.
IMPORTANT
If a paper jam occurs in the feeder, you cannot continue operating the machine. Follow
the procedure to remove the jammed paper. (See “Feeder (DADF-P2) (Optional),” on
p. 7-19.)
NOTE
You do not have to re-enter the number of copies or prints, even if you are printing
multiple sets. The machine automatically recalculates the number of copies or prints to
make based on the number of sheets that have jammed.
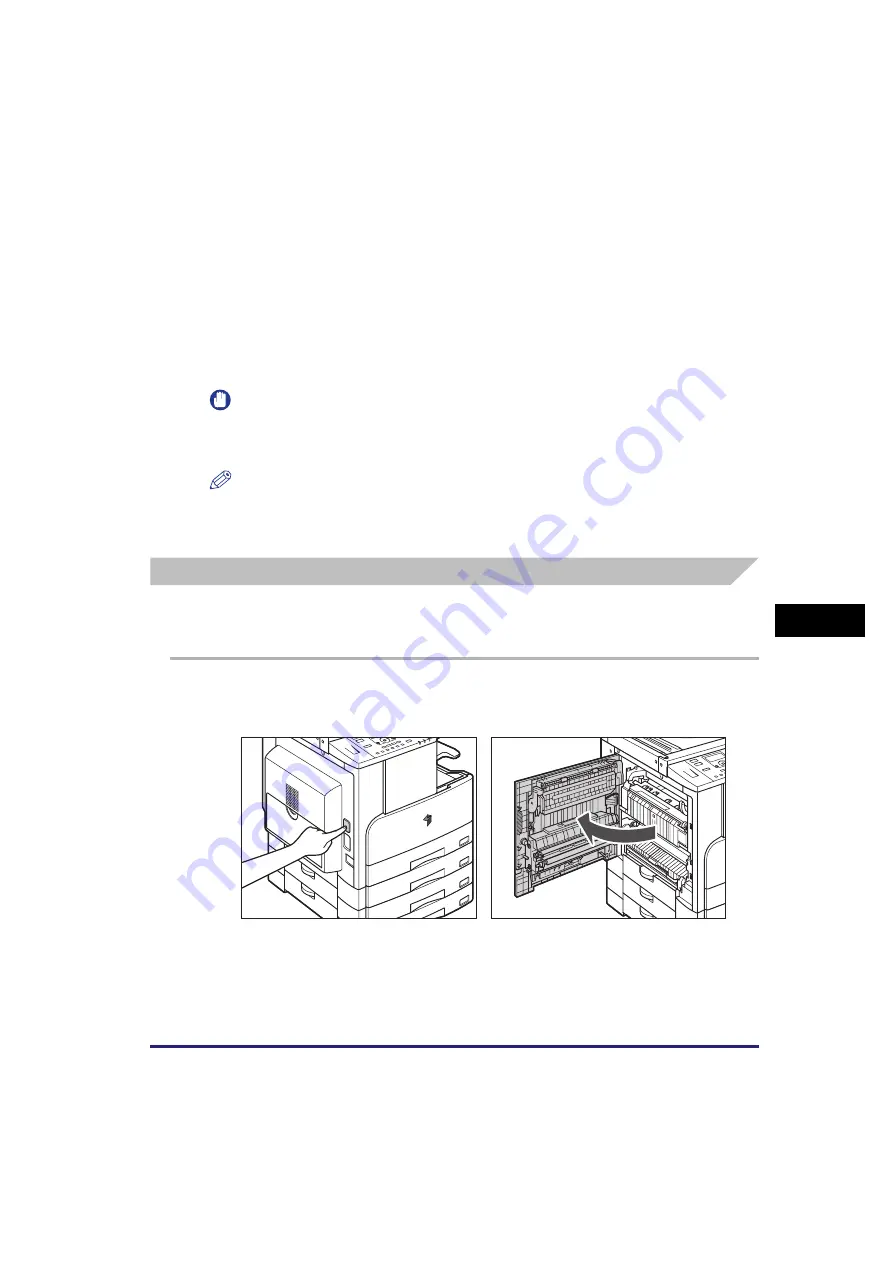
Fixing Unit
If a paper jam occurs in the fixing unit, follow the procedure described below to
remove the jammed paper.
1
Press the button on the left cover of the main unit, and open the
left cover.
Summary of Contents for imageRUNNER 2320
Page 2: ......
Page 3: ...imageRUNNER 2320 2318 Reference Guide ...
Page 32: ...xxx ...
Page 52: ...System Settings 1 20 Before You Start Using This Machine 1 ...
Page 138: ...Printing the User s Data List 3 44 Useful Functions and Settings 3 ...
Page 176: ...Accepting Jobs through the USB Interface Port 4 38 System Manager Settings 4 ...
Page 188: ...Cassette Feeding Module J1 K1 5 12 Optional Equipment 5 ...
Page 228: ...Consumables 6 40 Routine Maintenance 6 ...
Page 273: ...Sample Reports 8 7 Appendix 8 Sample Reports Department ID List User s Data List ...
Page 290: ...Index 8 24 Appendix 8 ...
Page 291: ......


