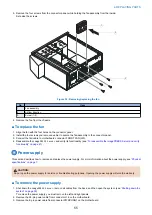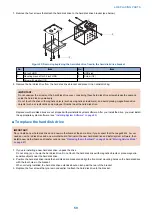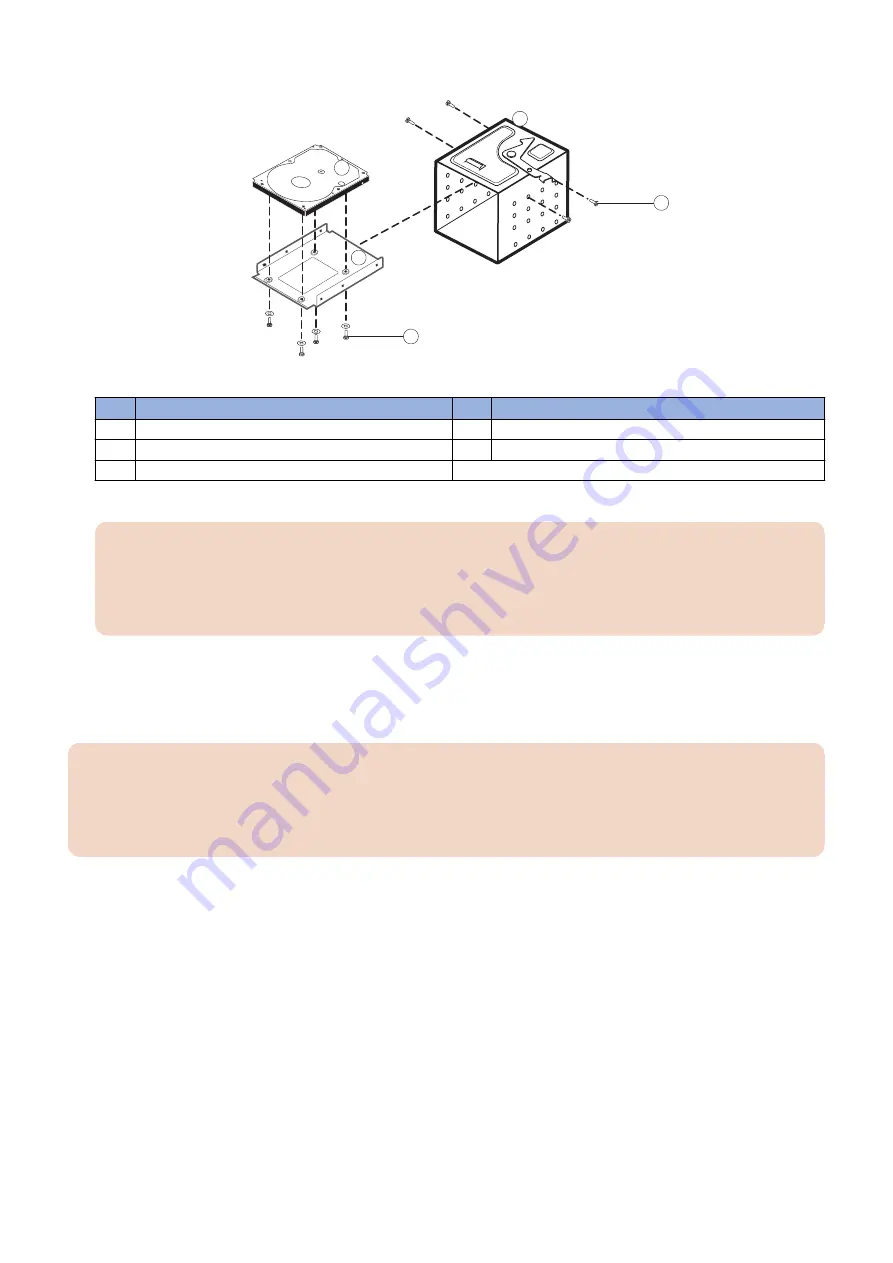
7. Remove the four screws that attach the hard disk drive to the hard disk drive bracket (see below).
1
2
4
5
3
Figure 35: Removing/replacing the hard disk drive from/in the hard disk drive bracket
No.
Item
No.
Item
1
2.5 inch HDD
4
HDD sled
2
Mounting bracket for 2.5 inch HDD
5
Screw (1/4)
3
Screw with washer (1/4)
8. Remove the hard disk drive from the hard disk drive bracket and place it in an antistatic bag.
IMPORTANT:
Do not unscrew the screws on the hard disk drive cover. Loosening these hard disk drive screws breaks the seal and
voids the hard disk drive warranty.
Do not touch the drive with magnetic objects (such as magnetic screwdrivers), and avoid placing magneticsensitive
objects (such as credit cards and employee ID cards) near the hard disk drive.
Replacement hard disk drives are not shipped with preinstalled system software. After you install the drive, you must install
the appropriate system software. (see
“Installing System Software” on page 80
)
■ To replace the hard disk drive
IMPORTANT:
Do not install a new hard disk drive and a new motherboard at the same time. If you suspect that the
imagePRESS Server
needs a new hard disk drive and a new motherboard, first install the new hard disk drive and install system software, then
install a new motherboard and transfer options. (see
“Replacing the motherboard” on page 44
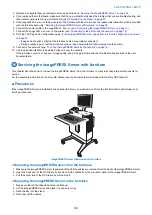
1. If you are installing a new hard disk drive, unpack the drive.
Do not drop, jar, or bump the hard disk drive. Do not touch the hard disk drive with magnetic objects or place magnetic-
sensitive objects near the hard disk drive.
2. Position the hard disk drive inside the hard disk drive bracket and align the front-most mounting holes on the hard disk drive
with the four holes in the bracket.
When correctly installed, the hard disk drive extends about an inch past the rear of the bracket.
3. Replace the four screws that you removed earlier to attach the hard disk drive to the bracket.
4. REPLACING PARTS
59
Summary of Contents for ImagePRESS Server H350 V2
Page 8: ...Introduction 1 Introduction 2 Specifications 7 ...
Page 17: ...INSTALLING HARDWARE 2 Installing Hardware 11 ...
Page 26: ...USING THE IMAGEPRESS SERVER 3 Using the imagePRESS Server 20 ...
Page 35: ...REPLACING PARTS 4 Replacing parts 29 ...
Page 86: ...INSTALLING SYSTEM SOFTWARE 6 Installing System Software 80 ...
Page 91: ...TROUBLESHOOTI NG 7 Troubleshooting 85 ...
Page 104: ...INSTALLATION PROCEDURE 8 Installation 98 Removable HDD Kit B5 108 ...

