Chapter 1
1-29
3) Select Settings/Registration > Adjustment/Maintenance > Maintenance > Clean Roller, and press Start.
[Reference]
- It takes approximately 20 seconds to clean the roller.
- A roller cleaning cannot be performed during printing.
1.1.1.6.5 Luster streak/uneven gloss in vertical scanning direction
0031-5485
[ Manual-related ]
Description
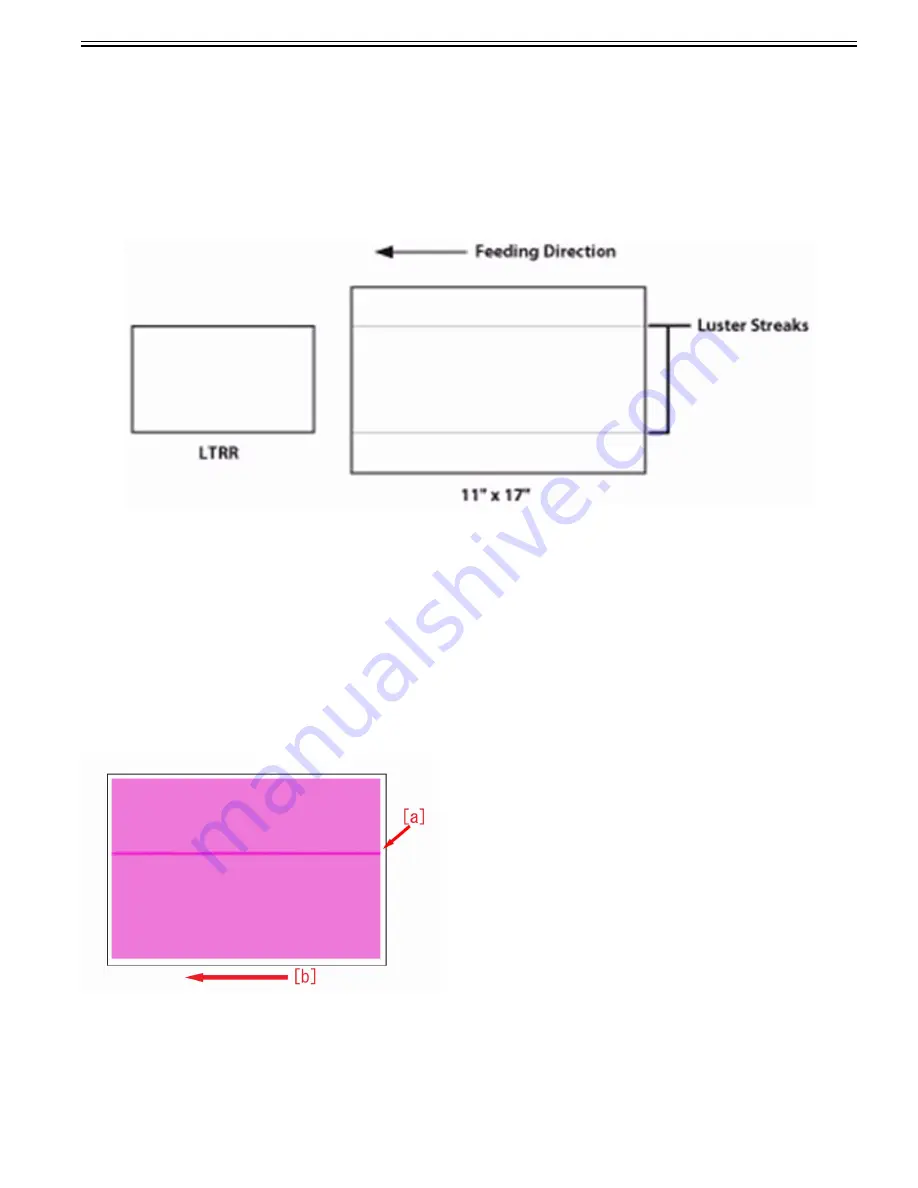
When paper with a longer width is used after copying or printing 100 or more sheets of paper with a shorter width (for example, when you use A3/11" x 17" paper
after A4R/LTRR paper), luster streak may appear on both edges in the feeding direction.
In addition, patches of uneven gloss may appear in the high density areas of the printed heavy paper or coated paper.
Field Remedy
Select Settings/Registration > Adjustment/Maintenance > Maintenance > Refresh Fixing Belt, and press Start.
[Reference]
- It takes approximately 120 seconds to clean the roller.
- The Fixing Belt cannot be refreshed during printing.
The Fixing Belt is automatically refreshed after printing a set number of sheets. If the frequency and time for implementing a refresh needs to be changed, select
Settings/Registration > Adjustment/Maintenance > Maintenance > Fixing Belt Auto Refresh Level, and increase or decrease the refresh operation using "-" and "+"
and then press OK.
1.1.1.6.6 Vertical line on image
0031-6396
[ Verified by Canon Inc. ]
Symptom
In high humidity environment, dark vertical line under 5mm in width [a] may appear on halftone image. [b] is the feeding direction.
Cause
Wax component contained in toner may attach to drum when pressed by drum cleaning blade.
When moisture gets on the area where wax is attached in high humidity environment, less amount of electricity is charged in such area. The above-mentioned symp-
tom occurs due to the difference in the amount of electricity charged between the areas where wax is attached and where it is not attached.
Service Work
1) Select Settings/Registration > Adjustment/Maintenance > Maintenance > Clean Inside Main Unit, and press "Start" button. The cleaning takes about 1 min.
Summary of Contents for imagePRESS C800 Series
Page 1: ...Dec 2 2014 Troubleshooting Guide imagePRESS C800 Series...
Page 2: ......
Page 6: ......
Page 8: ......
Page 9: ...Chapter 1 Correcting Faulty Images...
Page 10: ......
Page 14: ......
Page 114: ...Chapter 1 1 100 7 2 Select the envelope type press OK...
Page 165: ...Chapter 1 1 151 3 Pull the Tray all the way out...
Page 167: ...Chapter 1 1 153 5 Remove the Waste Toner Container...
Page 172: ...Chapter 1 1 158 2 Pull out the staple cartridge holding it by the green tab...
Page 180: ...Chapter 1 1 166 5 Push in the new staple case until it clicks to insert it...
Page 181: ...Chapter 1 1 167 6 Close the Cover for the saddle stitch staple cartridge...
Page 199: ...Chapter 1 1 185 b 1 Take out the Waste Toner Container 1...
Page 201: ...Chapter 1 1 187 b 2 Install the Waste Toner Joint 1 to the Waste Toner Container 2...
Page 206: ...Chapter 1 1 192 b 9 Remove the Prism 1 1 Screw 2 1 Hook 3...
Page 207: ...Chapter 1 1 193 b 10 Clean the toner adhered to the 2 A parts on the prism...
Page 208: ...Chapter 1 1 194 b 11 Clean the toner adhered to the A part of the Waste Toner Container...
Page 210: ...Chapter 1 1 196 2 Pull out the punch waste tray...
Page 217: ...Chapter 1 1 203 3 Discard the staple waste...
Page 239: ...Chapter 1 1 225 3 Press Memory Media 4 Select the target memory media...
Page 250: ...Chapter 1 1 236 Select Share files and folders using SMB Windows Select the account to be used...
Page 255: ...Dec 2 2014...
Page 256: ......


