


4
4
4-374
4-374
Parts Replacement and Cleaning > PCB > Removing 24V Power PCB 3
Parts Replacement and Cleaning > PCB > Removing 24V Power PCB 3
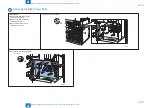
Removing 24V Power PCB 3
<Preparation>
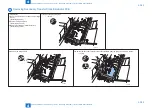
1) Remove the Rear Right Cover.
2) Remove the Rear Left Cover.
3) Remove Rear Lower Cover.
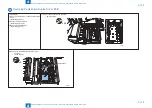
4) Remove the 24V Power PCB Unit.
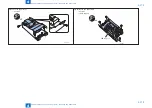
1) Remove the 24V power PCB 2 and the 24V power PCB
• 3 screws
x3
24V power PCB 3
24V power PCB 2
F-4-848
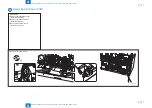
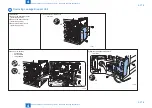
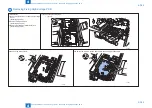
2) Remove the plate.
• 1 screw
F-4-849
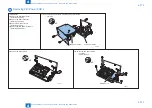
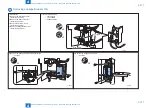
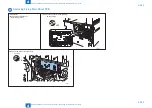
3) Remove the 24V power PCB3.
• 4 screws
• 1 PCB support
x4
PCB
サポート
PCB support
F-4-850
Summary of Contents for imagePRESS 1110
Page 242: ...3 3 Periodical Service Periodical Service Periodical service item ...
Page 655: ...5 5 Adjustment Adjustment Overview When replacing parts Major adjustment ...
Page 944: ...8 8 Service Mode Service Mode Overview COPIER FEEDER SORTER BOARD Situation Mode ...
Page 1555: ... Service Tools General Circuit Diagram General Timing Chart Operator Maintenance Appendix ...