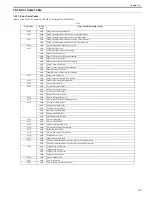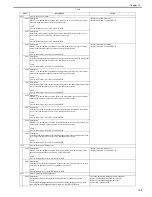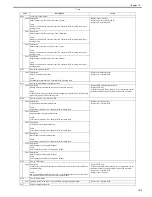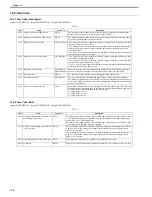
Chapter 15
15-1
15.1 Overview
15.1.1 Preface
0020-4716
imageCLASS MF9170c / imageCLASS MF9150c / imageCLASS MF8450c
Special management mode is the mode for users to solve a problem by themselves when an error occurs.
However, information about this mode is not disclosed to users.
Operators at call center ask users the occurrence situation and if they decide that users can solve this problem, they tell uses to use a measure with this mode to solve
the problem by themselves.
If an issue cannot be solved with this mode, restore the setting to original.
15.1.2 Entering the Special Management Mode
0020-4717
imageCLASS MF9170c / imageCLASS MF9150c / imageCLASS MF8450c
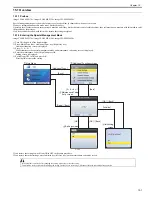
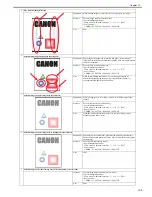
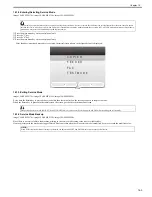
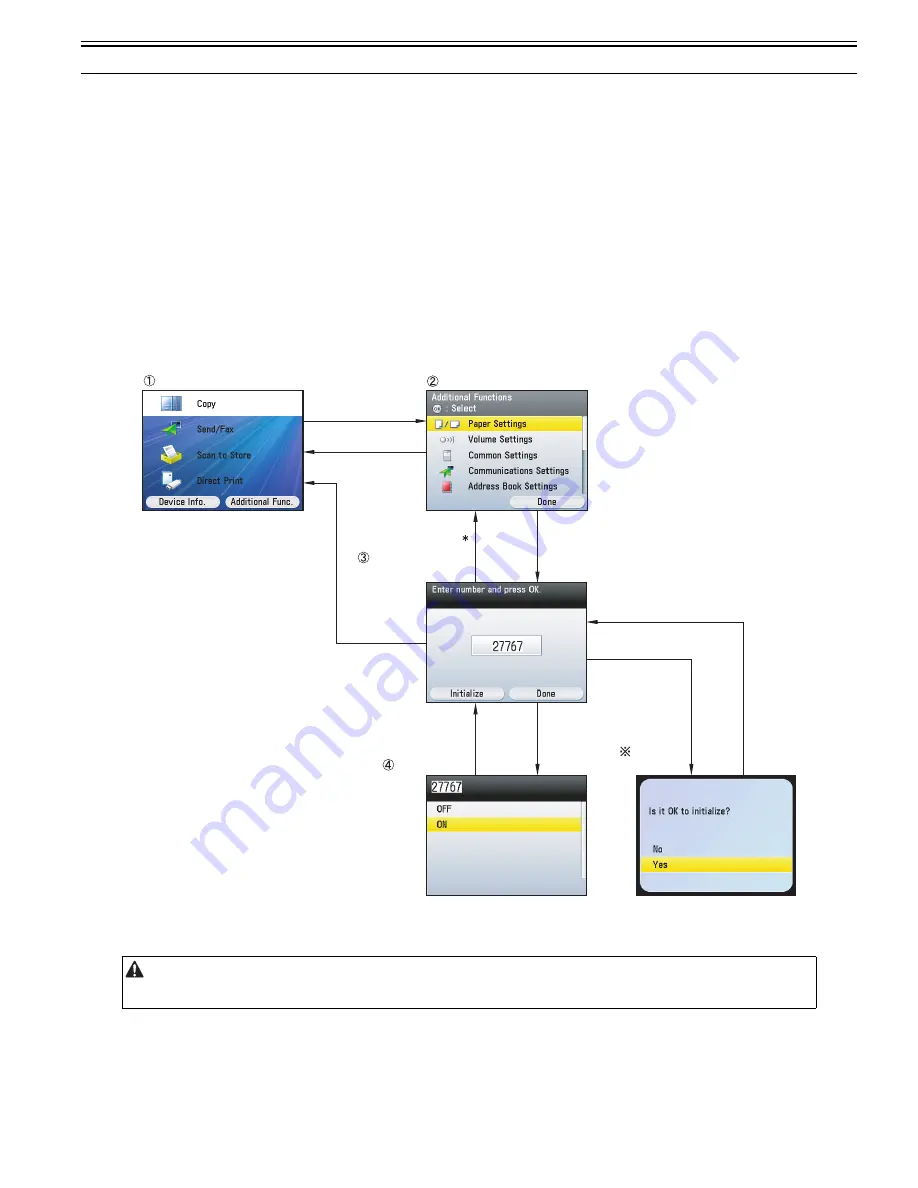
1) Turn ON the power of the host machine.
2) Press: Main Menu Key > Additional Func. key (Right Any key).
Additional function screen is displayed.
3) Press: 3 > 6 > 9 > *.
Mode transfers to the special management mode and maintenance code entry screen is displayed.
4) Enter the maintenance code (5 digit) and press OK.
Setting screen is displayed.
5) Switch from OFF to ON and press OK.
Pressing OK activates the setting.
F-15-1
If you restore the settings, switch from ON to OFF in the same procedure.
If you restore the initial settings, press Initialize key (left Any key) on the maintenance code entry screen.
- If the problem is not fixed after changing the setting, make sure to reset the setting.
- This machine receives jobs while changing the setting. In order not to receive jogs, disconnect the network cable before operation.
Main Menu
[Additional Func.]
Additional Functions screen
[Back]
[Back]
[Done] / [Back]
[OK] / [Back]
[OK] / [Back]
[OK]
[Initialize]
Maintenance Code
Entry screen
Setting screen
Initializing
screen
[3 > 6 > 9 > ]
Summary of Contents for imageCLASS MF8450c
Page 16: ...Chapter 1 Introduction ...
Page 55: ...Chapter 2 Basic Operation ...
Page 61: ...Chapter 3 Main Controller ...
Page 75: ...Chapter 4 Original Exposure System ...
Page 88: ...Chapter 5 Original Feeding System ...
Page 105: ...Chapter 6 Laser Exposure ...
Page 113: ...Chapter 7 Image Formation ...
Page 150: ...Chapter 8 Pickup and Feed System ...
Page 184: ...Chapter 9 Fixing System ...
Page 200: ...Chapter 10 External and Controls ...
Page 230: ...Chapter 11 Maintenance and Inspection ...
Page 233: ...Chapter 12 Measurement and Adjustments ...
Page 237: ...Chapter 13 Correcting Faulty Images ...
Page 260: ...Chapter 14 Error Code ...
Page 272: ...Chapter 15 Special Management Mode ...
Page 280: ...Chapter 16 Service Mode ...
Page 322: ...Chapter 17 Upgrading ...
Page 327: ...Chapter 17 17 4 3 Click Next F 17 4 4 Select a USB connected device and click Next F 17 5 ...
Page 328: ...Chapter 17 17 5 5 Click Start F 17 6 6 Click Yes F 17 7 Download will be started F 17 8 ...
Page 330: ...Chapter 18 Service Tools ...
Page 334: ...Appendix ...
Page 349: ......


