9-6
Troubleshooting
3
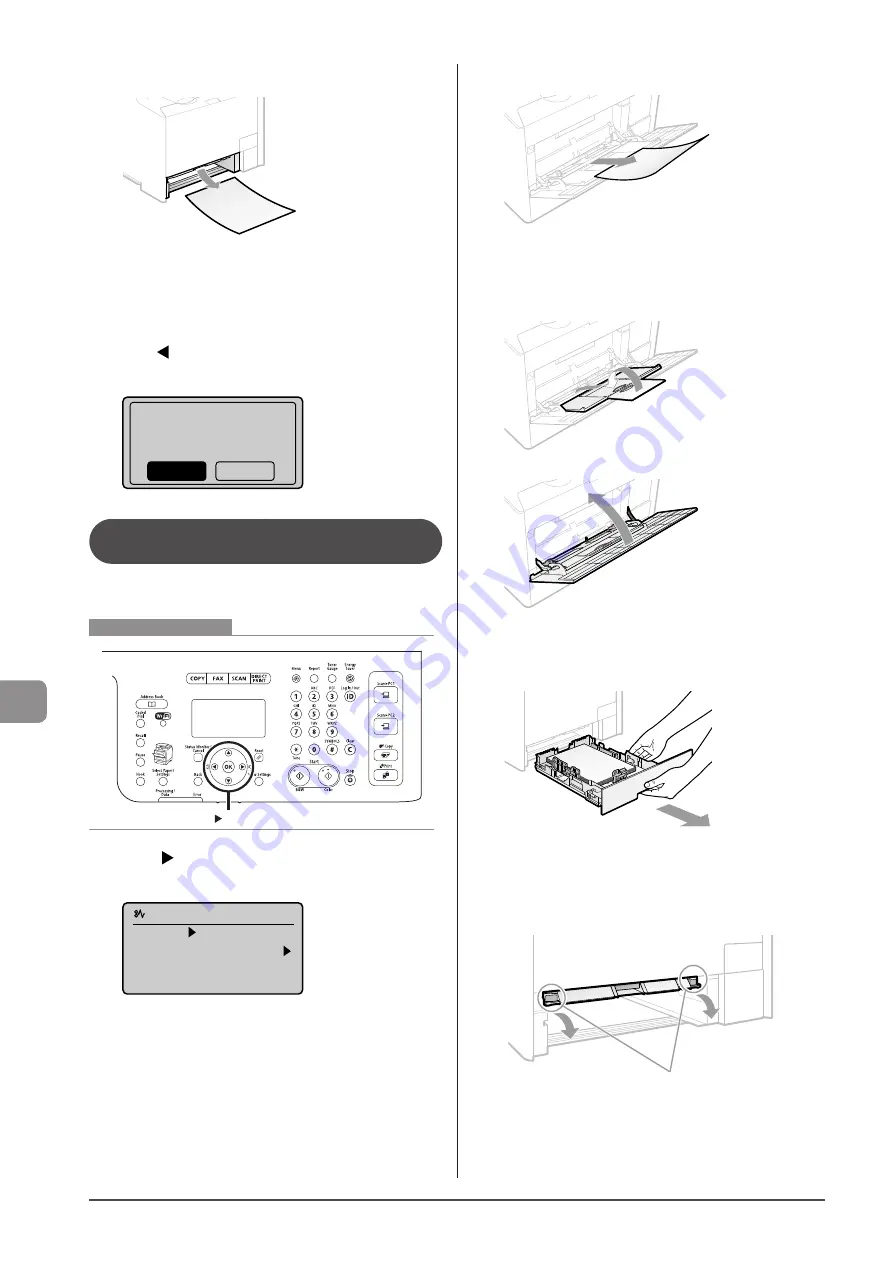
Remove the paper by pulling it gently.
4
Insert the paper cassette into the machine.
If the optional paper cassette (Cassette 2) is installed in
MF8380Cdw, close the optional paper cassette also.
5
When the following screen appears, select <Yes>
with [ ], and then press [OK].
The machine is ready to print.
Is all of the jammed
paper removed?
Yes
No
Paper Jams in the Multi-purpose Tray
(MF8380Cdw Only)
Referring to the procedure on the display, follow the steps
below to remove jammed paper.
OK
Keys to be used for this operation
1
Press [ ].
Press [OK] to exit the operation screen.
Paper jam.
Press [ ] to
display steps.
(End: Press OK)
2
Remove the paper by pulling it gently.
If the jammed paper cannot be removed easily
Do not try to remove it forcefully but proceed to Step 3.
3
Close the multi-purpose tray.
4
Pull out the paper cassette.
Hold the paper cassette with both hands.
5
Lower the manual feed transport guide.
(1) Hold the green tabs (A) on both sides.
(2) Push them down.
(A)
Summary of Contents for imageCLASS MF8380Cdw
Page 24: ...xxiv...
Page 40: ...1 16 Before Using the Machine...
Page 96: ...5 14 Registering Destinations in the Address Book...
Page 126: ...6 30 Using the Fax Functions...
Page 150: ...8 16 Maintenance...
Page 180: ...10 8 Registering Setting the Various Functions...
Page 188: ......
Page 189: ......
Page 190: ......
Page 191: ......


