Reg
ist
er
ing D
estina
tions in the A
ddr
ess B
ook
5-7
Storing/Editing One-Touch Keys
11
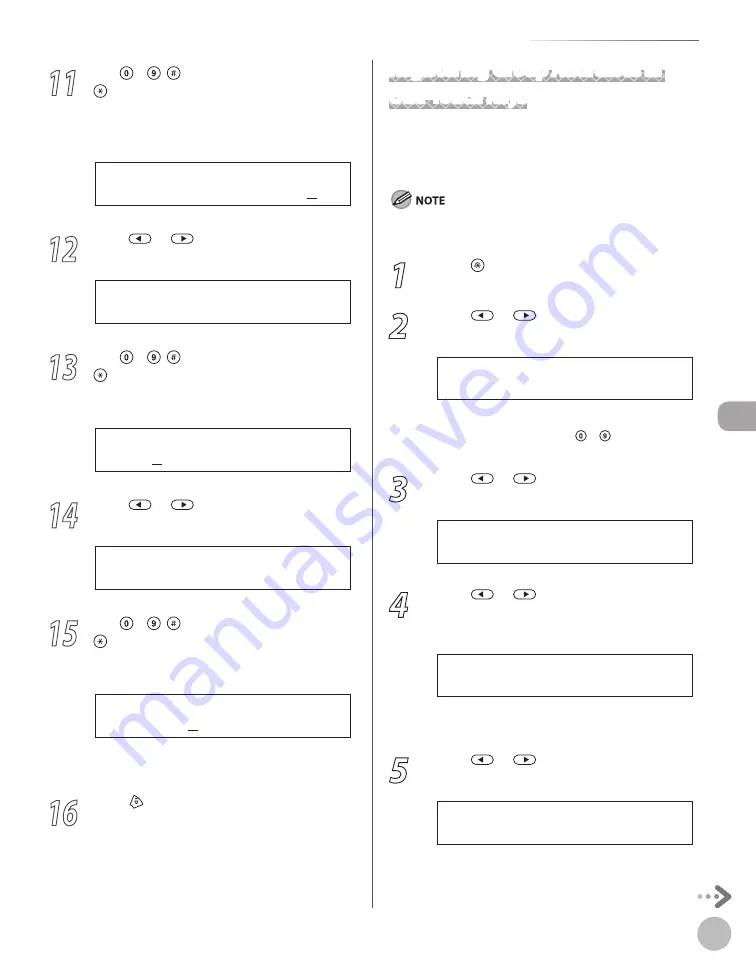
Use – , [numeric keys] and
[Tone] to specify the folder to which
the job is to be sent (120 characters
maximum), then press [OK].
s e r v e r 1 / h o m e / s h a r e
F I L E P A T H : a
Ex.
12
Press
or
to select <LOGIN NAME>,
then press [OK].
4 . L O G I N N A M E
1 - T O U C H S P D D I A L
13
Use – , [numeric keys] and
[Tone] to enter the login name (24
characters maximum), then press [OK].
c a n o n
L O G I N N A M E : a
Ex.
14
Press
or
to select <PASSWORD>,
then press [OK].
5 . P A S S W O R D
1 - T O U C H S P D D I A L
15
Use – , [numeric keys] and
[Tone] to enter the password (14
characters maximum), then press [OK].
1 2 3 X X X X
P A S S W O R D : a
Ex.
To register another one-touch key, repeat the
procedure from step 4.
16
Press [Stop/Reset] to return to the
standby mode.
Registering Group Addresses in
One-Touch Keys
The Group Address feature enables you to create a
group of up to 199 stored destinations as a single
destination.
The destinations must be registered in the one-touch keys
beforehand.
1
Press [Menu].
2
Press
or
to select <ADDRESS
BOOK SET.>, then press [OK].
5 . A D D R E S S B O O K S E T .
M E N U
If a password has been set for the Address Book,
enter the password using – [numeric keys],
then press [OK].
3
Press
or
to select <GROUP DIAL>,
then press [OK].
3 . G R O U P D I A L
A D D R E S S B O O K S E T .
4
Press
or
to select an empty one-
touch key that you want to set as the
group address, then press [OK].
[ 1 0 ] N O T R E G I S T E R E D
G R O U P D I A L
You can also select a one-touch key by pressing
the corresponding one-touch key.
5
Press
or
to select <SELECT ADD/
TEL NO>, then press [OK].
1 . S E L E C T A D D / T E L N O
G R O U P D I A L
Summary of Contents for imageCLASS MF5850dn
Page 34: ...Before Using the Machine 1 9 Operation Panel Send Operation Panel MF5880dn MF5850dn ...
Page 68: ...Copying 3 3 Overview of Copy Functions p 3 17 p 3 25 p 3 22 ...
Page 99: ...Copying 3 34 ...
Page 102: ...Printing 4 3 Overview of the Print Functions p 4 9 ...
Page 134: ...Fax 6 3 Overview of Fax Functions p 6 19 p 6 59 p 6 55 ...
Page 198: ...E Mail MF5880dn only 7 3 Overview of E Mail Functions ...
Page 203: ...E Mail MF5880dn only 7 8 ...
Page 206: ...Scanning 8 3 Overview of the Scanner Functions ...
Page 217: ...Scanning 8 14 ...


