background image

1

2

3

4

5

6

7

8

9

10

11

Back

Next

Previous

TOP

8-20

Before Using the 
Machine

Document and Paper

Copying

Sending and 
Receiving

Printing and 
Scanning

Network

Remote UI

System Manager 
Settings

Maintenance

Troubleshooting

Appendix

Index

Table of Contents

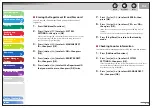
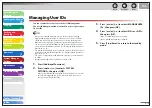
 3.

 Press 

[

] or [

] to select <ACCESS TO DEST.>, 

then press [OK]. 

 4.

 Press 

[

] or [

] to select <REST. REDIAL/

CALL>, then press [OK]. 

 5.

 Press 

[

] or [

] to select <ON> or <OFF>, 

then press [OK]. 

 6.

  Press [Stop/Reset] to return to the standby 

mode. 

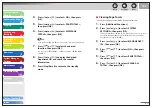
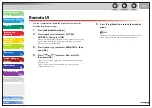
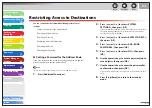
    Restricting  Broadcasting 

 You can specify whether or not to allow sending the documents to 
multiple recipients. 

 1.

  Press [Additional Functions]. 

 2.

 Press 

[

] or [

] to select <SYSTEM 

SETTINGS>, then press [OK]. 

 If the System Manager ID and System Password have been set, enter 
the System Manager ID and System Password using the numeric 
keys, then press [Log In/Out (ID)]. 

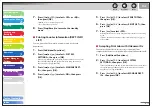
 3.

 Press 

[

] or [

] to select <ACCESS TO DEST.>, 

then press [OK]. 

 4.

 Press 

[

] or [

] to select <REST. MULTI 

DEST>, then press [OK]. 

 5.

 Press 

[

] or [

] to select <OFF>, <PROHIBIT> 

or <CONFIRMATION>, then press [OK]. 

 <OFF>: Allows sending the documents to multiple recipients. 
 <CONFIRMATION>: The message appears after pressing [Start] to 
confirm whether or not to send documents to multiple recipients. 
The message only appears when fax numbers are included in the 
recipients. 
 <PROHIBIT>: Does not allow sending the documents to multiple 
recipients. 

 6.

  Press [Stop/Reset] to return to the standby 

mode 

Summary of Contents for ImageCLASS MF4690

Page 1: ...d Receiving Printing and Scanning Network Remote UI System Manager Settings Maintenance Troubleshooting Appendix How to Use This Guide Table of Contents Index Please read this guide before operating t...

Page 2: ...Shooting Reference Guide This Document CD ROM Scanning Features Scanner Driver Guide CD ROM CD ROM Indicates the manual is supplied in PDF format in the accompanying CD ROM To view the manuals in PDF...

Page 3: ...ype of image Image Quality p 3 4 Adjust the density level of scanned images Density p 3 4 Enlarge or reduce copied images Zoom Ratio p 3 5 Sort copies by page order Collate Copying p 3 7 Make two side...

Page 4: ...g with Coded Dial Codes p 4 21 Specify multiple recipients as a group Sending to Group Addresses p 4 22 Look up a particular recipient Address Book Search p 4 23 Retry sending documents automatically...

Page 5: ...System Manager Settings Maintenance Troubleshooting Appendix Table of Contents Index Print a document from a PC Printing Online Help Specify detailed scanning options to suit various images Scanning...

Page 6: ...nager Settings Maintenance Troubleshooting Appendix Table of Contents Index Table of Contents Manuals for the Machine i Things You Can Do ii How to Use This Guide xxiv Using the Top Page xxiv Using th...

Page 7: ...ntents Index LCD Standby Mode 1 10 Copy Mode 1 10 Send Fax Mode 1 10 Scan Mode 1 10 Log In Mode 1 11 Department User ID Management 1 12 Procedure before Using the Machine 1 12 Procedure after Using th...

Page 8: ...k Remote UI System Manager Settings Maintenance Troubleshooting Appendix Table of Contents Index 2 Document and Paper 2 1 Document Requirements 2 2 Scanning Area 2 3 Loading Documents 2 4 On the Plate...

Page 9: ...aintenance Troubleshooting Appendix Table of Contents Index 3 Copying 3 1 Basic Copying Method 3 3 Scan Settings 3 4 Image Quality 3 4 Density 3 4 Zoom Ratio 3 5 Advanced Copy Features 3 7 Collate Cop...

Page 10: ...ents Index 4 Sending and Receiving 4 1 Basic Sending Method 4 5 Scan Settings 4 6 Image Quality Fax 4 6 Density 4 6 Send Settings E Mail File Server 4 7 Storing Editing Address Book 4 9 Storing Editin...

Page 11: ...ndex Advanced Sending Features 4 26 Broadcasting 4 26 Job Recall 4 27 PC Faxing 4 28 Customizing Sending Features 4 29 Setting Number of Retry Attempts E Mail File Server 4 29 Setting Automatic Redial...

Page 12: ...ceiving Features 4 36 FaxTel Optional Settings 4 36 DRPD Optional Settings 4 37 Manual Reception 4 37 Memory Reception 4 38 Memory Lock Reception 4 38 Forwarding Received Documents 4 41 Remote Recepti...

Page 13: ...s Maintenance Troubleshooting Appendix Table of Contents Index 5 Printing and Scanning 5 1 Printing Documents 5 2 Scanning to a Computer 5 3 Scanning to a USB Memory 5 4 Scanning to a USB Memory 5 4 S...

Page 14: ...ndex 6 Network 6 1 System Requirements 6 4 Printing or Sending a Fax from a Computer 6 4 Using E Mail 6 5 Sending Data to a File Server 6 5 Basic Network Settings 6 6 Interface Settings 6 6 Communicat...

Page 15: ...a Computer as a File Server 6 21 Settings from the Operation Panel 6 21 Configuring a Shared Folder 6 23 Additional Network Settings 6 35 TCP IP Settings 6 35 Startup Time Settings 6 41 Checking Netw...

Page 16: ...nance Troubleshooting Appendix Table of Contents Index Using the Remote UI 7 4 Starting the Remote UI 7 4 Displaying Device Status and Information 7 6 Job Management 7 7 Managing Print Jobs 7 7 Viewin...

Page 17: ...Import Export Function 7 27 Saving the Address Book 7 27 Loading an Address Book 7 28 Saving User Management Data in Files Export 7 29 Loading User Management Data Files Overwrite Import 7 30 Saving...

Page 18: ...le of Contents Index Department ID Management 8 6 Registering the Department ID Password and Page Limit 8 6 Changing the Password and Page Limit 8 8 Erasing the Department ID and Password 8 10 Checkin...

Page 19: ...ble of Contents Index Restricting Access to Destinations 8 17 Setting a Password for the Address Book 8 17 Restricting the New Address 8 18 Restricting PC Faxing 8 18 Confirming Entered Fax Numbers 8...

Page 20: ...oting Appendix Table of Contents Index Replacing the Toner Cartridge 9 10 Redistributing Toner 9 10 Replacing the Toner Cartridge with a New One 9 13 Recycling Used Cartridges 9 16 The Clean Earth Cam...

Page 21: ...shooting Appendix Table of Contents Index If LOAD CORRECT PAPER is displayed 10 29 Re Loading the Paper 10 29 Changing the Paper Size Setting 10 29 General Problems 10 30 Paper Feeding Problems 10 32...

Page 22: ...leshooting Appendix Table of Contents Index If You Cannot Solve a Problem 10 56 Customer Support U S A 10 56 Customer Support Canada 10 56 11 Appendix 11 1 Machine Settings 11 4 Printing USER S DATA L...

Page 23: ...INGS 11 28 ADJUST CLEANING 11 30 REPORT SETTINGS 11 32 SYSTEM SETTINGS 11 34 Summary of Reports and Lists 11 48 Printing Reports Automatically 11 49 TX REPORT 11 49 RX REPORT 11 50 ACTIVITY REPORT 11...

Page 24: ...fore Using the Machine Document and Paper Copying Sending and Receiving Printing and Scanning Network Remote UI System Manager Settings Maintenance Troubleshooting Appendix Table of Contents Index Che...

Page 25: ...xxiv Before Using the Machine Document and Paper Copying Sending and Receiving Printing and Scanning Network Remote UI System Manager Settings Maintenance Troubleshooting Appendix Table of Contents I...

Page 26: ...ext TOP xxv Before Using the Machine Document and Paper Copying Sending and Receiving Printing and Scanning Network Remote UI System Manager Settings Maintenance Troubleshooting Appendix Table of Cont...

Page 27: ...es you should keep in mind when using the machine Indicates a warning that may lead to death or serious injury if not observed Explains how to avoid actions that could injure you or damage your machin...

Page 28: ...pective owners Copyright Copyright 2007 by Canon Inc All rights reserved No part of this publication may be reproduced transmitted transcribed stored in a retrieval system or translated into any langu...

Page 29: ...ng and Scanning Network Remote UI System Manager Settings Maintenance Troubleshooting Appendix Table of Contents Index 1 Before Using the Machine Machine Components 1 3 Operation Panel 1 6 Main Operat...

Page 30: ...tenance Troubleshooting Appendix Table of Contents Index Department User ID Management 1 12 Procedure before Using the Machine 1 12 Procedure after Using the Machine 1 12 Toner Cartridge 1 13 Maintain...

Page 31: ...ne Components A ADF Automatic Document Feeder Holds documents and feeds them automatically into the scanning area B Slide guides Adjust to the width of the document C Document feeder tray Holds docume...

Page 32: ...e paper from falling off the output tray Open the paper stopper from its original position for LTR A4 paper For LGL paper pull out the output tray extension first and then open the paper stopper M Sli...

Page 33: ...anager Settings Maintenance Troubleshooting Appendix Index Table of Contents S Ethernet port Connect the network cable T USB port Connect the USB Universal Serial Bus cable U Rear cover Open this cove...

Page 34: ...on Panel Main Operation Panel A System Monitor key Press to check fax transmission print copy or report output status B View Settings key Press to confirm settings of the copy function C COPY key Pres...

Page 35: ...ey Press to collate copies or press to set 2 on 1 copying L Log In Out key ID key Press to operate the machine when the ID management is activated Also press to enable the ID management when you finis...

Page 36: ...ey Press to clear entered alphanumeric characters U key Press to increase the value for various settings Also press to see the next item in the menu V OK key Press to accept a set function or mode Als...

Page 37: ...dset of the external telephone B Recall Pause key Press to recall previously set send jobs including the destinations scan settings and send settings Press to enter a pause between or after the teleph...

Page 38: ...eiving Printing and Scanning Network Remote UI System Manager Settings Maintenance Troubleshooting Appendix Index Table of Contents LCD Standby Mode Copy Mode D E C B A O1 L T R 1 0 0 T E X T P H O T...

Page 39: ...ou can change the standby display which appears when the main power switch is turned on For details see Setting Menu on p 11 6 When the main power switch is turned on the LCD displays PLEASE WAIT firs...

Page 40: ...gement or User ID Management is set to ON in SYSTEM SETTINGS you must enter your ID and password to be able to operate the machine For details see Chapter 8 System Manager Settings Procedure before Us...

Page 41: ...the type of documents printed If your average document contains a lot of graphics tables or charts the life of the toner cartridge will be shorter as they consume more toner To purchase the Canon genu...

Page 42: ...rum protective shutter on the toner cartridge Print quality may deteriorate if the drum surface is exposed to light or is damaged Always hold the toner cartridge by its handle to avoid touching the dr...

Page 43: ...e amount of toner remaining in the toner cartridge by pressing the Toner Gauge key The toner level is displayed in the LCD at four levels If the toner gauge indicates that the toner is empty it is rec...

Page 44: ...n also enter values using numeric keys The default setting is 5 minutes 6 Press Stop Reset to return to the standby mode Energy Saver lights green when the machine enters the Sleep mode To resume the...
Page 45: ...s OK 5 Press or to select the desired interval then press OK You can set the interval from 1 to 9 minutes in one minute increments You can also enter values using numeric keys 6 Press Stop Reset to re...

Page 46: ...s is called Daylight Saving Time 1 Press Additional Functions 2 Press or to select TIMER SETTINGS then press OK 3 Press or to select DAYLIGHT SV TIME then press OK 4 Press or to select ON then press O...

Page 47: ...r Settings Maintenance Troubleshooting Appendix Index Table of Contents 13 Press or to select MONTH then press OK 14 Press or to select the month then press OK 15 Press or to select WEEK then press OK...

Page 48: ...ork Remote UI System Manager Settings Maintenance Troubleshooting Appendix Table of Contents Index 2 Document and Paper Document Requirements 2 2 Scanning Area 2 3 Loading Documents 2 4 On the Platen...

Page 49: ...x 356 mm Min 4 1 8 x 5 7 8 Min 105 x 148 5 mm Weight Max 4 4 lb 2 kg 11 to 28 lb bond 40 to 105 g m2 Quantity 1 sheet Max 35 sheets 2 Max 10 sheets for LGL documents 1 When copying a transparent docum...

Page 50: ...ing and Scanning Network Remote UI System Manager Settings Maintenance Troubleshooting Appendix Index Table of Contents Scanning Area Make sure your document s text and graphics fall within the shaded...

Page 51: ...Remote UI System Manager Settings Maintenance Troubleshooting Appendix Index Table of Contents Loading Documents On the Platen Glass 1 Lift up the ADF 2 Place your document face down 3 Align the docum...

Page 52: ...ntents 4 Gently close the ADF The document is ready for scanning When closing the ADF be careful not to get your fingers caught as this may result in personal injury Do not press down the ADF forceful...

Page 53: ...the document feeder tray The document is ready for scanning Do not add or remove documents while they are being scanned When scanning is complete remove the documents from the document delivery tray...

Page 54: ...x 14 76 x 127 to 216 x 356 mm Weight 16 to 43 lb bond 60 to 163 g m2 Quantity Max 250 sheets Height max 1 25 mm Max 1 sheet Type Plain Paper Plain Paper L Heavy Paper Heavy Paper H Transparency The d...

Page 55: ...ents Make sure the paper is free from dust lint and oil stains Be sure to test paper before purchasing large quantities Store all paper wrapped and on a flat surface until ready for use Keep opened pa...

Page 56: ...Printing and Scanning Network Remote UI System Manager Settings Maintenance Troubleshooting Appendix Index Table of Contents Printable Area The shaded area indicates the approximate printable area of...

Page 57: ...t on the different paper which is in the paper cassette Load paper one by one in the multi purpose tray The paper in the multi purpose tray is fed prior to the paper in the paper cassette The recommen...

Page 58: ...Table of Contents 2 When setting paper gently insert the paper into the multi purpose tray with the print side up When you load paper with a logo on position the paper with the print side up logo side...

Page 59: ...ce Troubleshooting Appendix Index Table of Contents 3 Slide the paper guides so that they fit to both sides of the paper If the paper guides are not adjusted correctly for the size of the paper the qu...

Page 60: ...cassette or multi purpose tray in step 3 and 6 1 Press Additional Functions 2 Press or to select PAPER SETTINGS then press OK 3 Press or to select CASSETTE or MP TRAY then press OK 4 Press or to selec...

Page 61: ...lowing paper types PLAIN PAPER or PLAIN PAPER L 1 for Plain paper 17 lb to 24 lb 64 g m2 to 90 g m2 HEAVY PAPER or HEAVY PAPER H 2 for Heavy paper Paper cassette 28 lb to 34 lb 105 g m2 to 128 g m2 Mu...

Page 62: ...ning Network Remote UI System Manager Settings Maintenance Troubleshooting Appendix Table of Contents Index 3 Copying Basic Copying Method 3 3 Scan Settings 3 4 Image Quality 3 4 Density 3 4 Zoom Rati...

Page 63: ...ine Document and Paper Copying Sending and Receiving Printing and Scanning Network Remote UI System Manager Settings Maintenance Troubleshooting Appendix Table of Contents Index Canceling Copy Jobs 3...

Page 64: ...bleshooting Appendix Index Table of Contents Basic Copying Method Follow this procedure to make a copy 1 Set documents For documents you can copy see Document Requirements on p 2 2 2 Press COPY When y...

Page 65: ...f you press Stop Reset Image Quality 1 Press COPY 2 Press Image Quality repeatedly to select the document type TEXT PHOTO For documents that contain text and photos TEXT PHOTO For documents that conta...

Page 66: ...all settings press Stop Reset When you switch the mode by pressing the mode keys such as SEND FAX all settings will be also canceled If you want to keep the settings set the density as following Addi...

Page 67: ...f Contents Zoom Designation You can reduce or enlarge images by any copy ratio in 1 increments The available copy ratios are from 50 to 200 1 Press COPY 2 Press Enlarge Reduce twice 3 Enter the copy r...

Page 68: ...1 Combination see p 3 8 at the same time select COLLATE 2 ON 1 then press OK If you want to use with Two Sided Copying at the same time go to step 3 on p 3 9 4 Use the numeric keys to enter the desire...

Page 69: ...ou want to use 2 ON 1 with Collate Copy see p 3 7 at the same time select COLLATE 2 ON 1 then press OK If you want to use with Two Sided Copying at the same time go to step 3 on p 3 9 4 Use the numeri...

Page 70: ...ns Paper size LTR and A4 Paper weight 17 to 21 lb 64 to 80 g m2 1 Set documents Place the first page on the platen glass if you are not using the ADF 2 Press COPY 3 Press 2 Sided repeatedly to select...

Page 71: ...e mode keys such as SEND FAX all settings will be also canceled If you want to keep the settings as the default see Setting Menu on p 11 6 Instead of performing step 4 you can just press OK In this ca...

Page 72: ...tion to test how the printouts will look with current settings The paper size must be LTR or A4 The paper type must be Plain Paper 17 to 21 lb 64 to 80 g m2 If the paper setting is not appropriate or...

Page 73: ...enance Troubleshooting Appendix Index Table of Contents Canceling Copy Jobs Cancel an ongoing job as follows 1 Press Stop Reset 2 When the STOP KEY PRESSED message appears press OK When scanning using...

Page 74: ...py jobs currently being processed Checking and Deleting Copy Jobs 1 Press System Monitor repeatedly to select COPY STATUS then press OK 2 Press or to scroll through the job list and check the status o...

Page 75: ...Remote UI System Manager Settings Maintenance Troubleshooting Appendix Table of Contents Index 4 Sending and Receiving Basic Sending Method 4 5 Scan Settings 4 6 Image Quality Fax 4 6 Density 4 6 Send...

Page 76: ...Network Remote UI System Manager Settings Maintenance Troubleshooting Appendix Table of Contents Index Specifying Destinations 4 20 Using One Touch Keys 4 20 Using Coded Dial Codes 4 21 Using Group A...

Page 77: ...ubleshooting Appendix Table of Contents Index Customizing Sending Features 4 29 Setting Number of Retry Attempts E Mail File Server 4 29 Setting Automatic Redialing Fax 4 29 Setting Detail Information...

Page 78: ...eceiving Features 4 36 FaxTel Optional Settings 4 36 DRPD Optional Settings 4 37 Manual Reception 4 37 Memory Reception 4 38 Memory Lock Reception 4 38 Forwarding Received Documents 4 41 Remote Recept...

Page 79: ...by the ADF You can only send one page by the platen glass 2 Press SEND FAX repeatedly to select the sending method then press OK If you want to send document to a file server you can specify the file...

Page 80: ...ity repeatedly to select the resolution then press OK FINE for fine print documents the resolution is twice that of STANDARD 200 x 200 dpi PHOTO for documents that contain photographs the resolution i...

Page 81: ...ending method then press OK To send documents to a file server select any sending method If you want to send color images to a file server or attached to an e mail message select E MAIL COLOR as a sen...

Page 82: ...press OK TEXT PHOTO For documents that contain text and photos TEXT For text documents PHOTO For documents that contain fine text or photos If you have selected PDF COMPACT as the file format in step...

Page 83: ...y pressing Coded Dial followed by three digit code You can register up to 192 coded dial codes including group addresses Using Group Addresses p 4 22 You can specify groups of destinations registered...

Page 84: ...mber then press OK You can also select a one touch key or coded dial code by pressing the corresponding one touch key or Coded Dial followed by the desired three digit code 5 Press or to select FAX th...

Page 85: ...errors occur during fax transmissions try the setting from LONG DISTANCE 1 through LONG DISTANCE 3 14 Press or to select TX SPEED then press OK 15 Press or to select the sending speed 33600 bps 14400...

Page 86: ...hree digit code 5 Press or to select E MAIL then press OK 6 Press or to select E MAIL ADDRESS then press OK 7 Enter the address you register max 120 digits with the numeric keys then press OK To regis...

Page 87: ...to enter the name of the file server on the network up to 120 characters then press OK H O S T N A M E 1 c a n o n 0 1 Ex 8 Press or to select NAME then press OK 9 Use the numeric keys to enter the de...

Page 88: ...TEL NUMBER ENTRY or E MAIL ADDRESS then press OK You can edit HOST NAME NAME FILE PATH LOGIN NAME and PASSWORD when you edit file server addresses 6 Go back to the wrong digit with when you edit a fa...

Page 89: ...1 you want to delete then press OK You can also select a one touch key or coded dial code by pressing the corresponding one touch key or Coded Dial followed by the desired three digit code 5 Press or...

Page 90: ...tinations you want to register in the group max 199 destinations until all destinations are registered then press OK To enter a destination stored under a one touch key press the desired one touch key...

Page 91: ...the group then press OK For details on specifying a destination from Address Book see Registering Group Addresses on p 4 15 7 Press Stop Reset to return to the standby mode Deleting Destination from...

Page 92: ...ded Dial then enter the three digit code using the numeric keys 5 Press or to select NAME then press OK 6 Press repeatedly to go back to a wrong character then press Clear To delete the entire name pr...

Page 93: ...Printing and Scanning Network Remote UI System Manager Settings Maintenance Troubleshooting Appendix Index Table of Contents 6 Press Clear repeatedly until all destinations are deleted then press OK W...

Page 94: ...ents Place the first page on the platen glass if you are not using the ADF 2 Press SEND FAX repeatedly to select the sending method then press OK To send documents to a file server select any sending...

Page 95: ...ess OK To send documents to a file server select any sending method 3 Press Coded Dial 4 Enter the desired three digit code 000 to 191 with the numeric keys T E L 0 1 2 3 X X X X X X 0 0 1 C A N O N E...

Page 96: ...ch key or Coded Dial followed by the three digit code under which the desired address group is registered If you pressed a wrong key or code press Clear and perform step 3 again If you want to adjust...

Page 97: ...not using the ADF 2 Press SEND FAX 3 Press Address Book repeatedly to select NAME SEARCH or ADD TEL SEARCH then press OK If no recipient is registered in Address Book NOT REGISTERED is displayed NAME...

Page 98: ...t the image quality and density see Scan Settings on p 4 6 7 Press Start When you set the documents on the platen glass press or to select the document size then press Start for each document When sca...

Page 99: ...nal telephone to the machine see Set Up the Machine in the Starter Guide 2 Load the document in the ADF 3 Press SEND FAX repeatedly to select FAX then press OK If you want to adjust the image quality...

Page 100: ...recipients using broadcasting If you want to send color images to multiple recipients send documents one by one or otherwise send documents as black and white images See Send Settings E Mail File Ser...

Page 101: ...tinations scan settings and send settings which have been set and then send your documents When REST REDIAL CALL is set to ON Recall Pause is not available See Restricting Job Recall on p 8 19 1 Set d...

Page 102: ...e fax driver is installed To check if the driver is installed see Installing Uninstalling Software in the Starter Guide For details on the fax driver settings see Online Help How to display the print...

Page 103: ...ETTINGS then press OK 3 Press or to select TX RX COMMON SET then press OK 4 Press or to select TX SETTINGS then press OK 5 Press or to select RETRY TIMES then press OK 6 Use or numeric keys to enter t...

Page 104: ...ess OK 10 Use or numeric keys to enter the time 2 to 99 minutes in one minute increments between redials then press OK 11 Press or to select TX ERROR REDIAL then press OK 12 Press or to select ON or O...

Page 105: ...to select TX FILE NAME then press OK 7 Use the numeric keys to enter the document s name up to 24 characters then press OK 8 Press or to select SUBJECT then press OK 9 Use the numeric keys to enter t...

Page 106: ...rty you will need to connect an external telephone to the machine 1 Press SEND FAX 2 Press SEND FAX repeatedly to select FAX then press OK 3 Press Hook Make sure to confirm the dial tone before enteri...

Page 107: ...Stop Reset to return to the standby mode Dialing an Overseas Number With Pauses When you dial or register an overseas number you may need to insert a pause within the number 1 Set documents Place the...
Page 108: ...se at the end of the number The letter P appears at the end of the fax number Pauses entered at the end of fax numbers are always 10 seconds long 7 Press Start When you set the documents on the platen...

Page 109: ...calls automatically if an external telephone is connected to the machine For optional settings see FaxTel Optional Settings on p 4 36 AnsMode Receives faxes automatically and records voice messages DR...

Page 110: ...tions 2 Press or to select TX RX SETTINGS then press OK 3 Press or to select FAX SETTINGS then press OK 4 Press or to select RX SETTINGS then press OK 5 Press or to select FAX TEL OPT SET then press O...

Page 111: ...INGS then press OK 3 Press or to select FAX SETTINGS then press OK 4 Press or to select RX SETTINGS then press OK 5 Press or to select DRPD SELECT FAX then press OK 6 Press or to select a ring pattern...

Page 112: ...s memory can store differs depending on the other party s machine Once the pages are printed they are deleted from the memory If the memory becomes full you will not be able to receive the remaining...

Page 113: ...keys to enter the memory lock reception password up to seven digits then press OK P A S S W O R D 1 2 3 4 5 6 7 Ex 8 Press or to select REPORT PRINT then press OK 9 Press or to select ON or OFF then p...

Page 114: ...S T A R T T I M E 0 0 0 0 Ex 14 Press or to select MEM RX END TIME then press OK 15 Use the numeric keys to enter the end time then press OK 16 Press Stop Reset to return to the standby mode Printing...
Page 115: ...ff the forward mode see Specifying Forwarding Settings on p 7 15 Forwarding Documents Received in Memory 1 Press System Monitor repeatedly to select TX RX STATUS then press OK 2 Press or to select the...

Page 116: ...to select FORWARD ERR STATUS then press OK 2 Press or to select the desired document then press OK 3 Press or to select PRINT or CANCEL then press OK If MEMORY LOCK is ON in COMMUNICATIONS in SYSTEM...

Page 117: ...o select ON then press OK 7 Press Clear twice to delete the default remote reception ID of 25 8 Use the numeric keys to enter a new remote reception ID a combination of two characters using 0 to 9 and...

Page 118: ...nts are printed on one side of the paper when PAPER SIZE is not set to LTR or A4 See Setting Paper Size and Type on p 2 13 1 Press Additional Functions 2 Press or to select TX RX SETTINGS then press O...

Page 119: ...REDUCE DIRECTION skip to step 11 8 Press or to select AUTO or FIXED REDUCTION then press OK If you select AUTO adjust the image reduction automatically Skip to step 10 9 Press or to select a preset re...

Page 120: ...bleshooting Appendix Index Table of Contents Canceling TX RX Jobs Cancel an ongoing job sending or receiving as follows 1 Press Stop Reset 2 When the STOP KEY PRESSED message appears press OK When sca...

Page 121: ...THE LOG to OFF in SYSTEM SETTINGS transmission reception result does not appear in the LCD 2 Press or to view the required transmission reception result 3 Press Stop Reset to return to the standby mod...

Page 122: ...ng Receiving Documents Stored in Memory 1 Press System Monitor repeatedly to select TX RX STATUS then press OK 2 Press or to scroll through the job list If you want to delete the job go to step 3 Othe...

Page 123: ...ngs Maintenance Troubleshooting Appendix Table of Contents Index 5 Printing and Scanning Printing Documents 5 2 Scanning to a Computer 5 3 Scanning to a USB Memory 5 4 Scanning to a USB Memory 5 4 Sca...

Page 124: ...n the screen may vary depending on your application and or OS 1 From an open document on an application click File Print 2 Select the printer icon for the machine Canon MF4600 Series UFRII LT Canon MF...

Page 125: ...puter Follow this procedure to scan a document to your computer Make sure that the scanner driver is installed To check if the driver is installed see Installing Uninstalling Software in the Starter G...

Page 126: ...2GB USB memory with security function or card readers are not supported USB memory used with an extension cable is not supported Use of a USB memory through a USB hub is not supported A USB memory tha...

Page 127: ...canceled If this happens press OK to return to standby mode When MEMORY FULL is displayed print send or delete any documents stored in memory When USB MEMORY FULL is displayed delete any documents sto...

Page 128: ...atedly to select USB MEMORY B W or USB MEMORY COLOR then press OK 4 Press Density 5 Press or to adjust the density then press OK to make dark documents lighter to make light documents darker 6 Press S...

Page 129: ...nts in JPEG format 7 Press or to select the resolution then press OK USB Memory B W 200X200dpi 300X300dpi 400X400dpi 600X600dpi 150X150dpi 200X100dpi USB Memory Color 200X200dpi 300X300dpi 100X100dpi...

Page 130: ...e STOP KEY PRESSED message appears press OK S T O P K E Y P R E S S E D P R E S S O K K E Y 3 Click OK on the computer screen Canceling Scan Jobs to a USB Memory 1 Press Stop Reset 2 When the STOP KEY...

Page 131: ...ator is turned on When the Processing Data indicator is turned off all print jobs are erased from the memory Checking and Deleting Print Jobs 1 Press System Monitor repeatedly to select PRINT STATUS t...

Page 132: ...ing Appendix Table of Contents Index 6 Network System Requirements 6 4 Printing or Sending a Fax from a Computer 6 4 Using E Mail 6 5 Sending Data to a File Server 6 5 Basic Network Settings 6 6 Inter...

Page 133: ...m Manager Settings Maintenance Troubleshooting Appendix Table of Contents Index Setting Up E Mail 6 16 Settings from the Operation Panel 6 16 Setting Up a Computer as a File Server 6 21 Settings from...

Page 134: ...d Receiving Printing and Scanning Network Remote UI System Manager Settings Maintenance Troubleshooting Appendix Table of Contents Index Machine Management 6 44 Machine Management Using Web Browser Re...

Page 135: ...the machine is compatible Printing or Sending a Fax from a Computer The following system environments are compatible when printing or sending a fax from a computer OS Microsoft Windows 98 98SE Microso...

Page 136: ...he machine sends e mail to mail servers using SMTP The machine can receive incoming messages from a mail server using the POP3 protocol or directly using the machine s own SMTP receiving function If t...

Page 137: ...that the network administrator perform the following procedures 1 Network Cable Connection See Set the Machine for Network Usage in the Starter Guide Connect the machine to your network using the netw...

Page 138: ...e communication mode Half duplex Full duplex and Ethernet type 10Base T 100BaseTX Skip to step 11 MANUAL You have to manually specify the communication mode and Ethernet type If you reconnect the netw...

Page 139: ...l Functions 2 Press or to select SYSTEM SETTINGS then press OK If the System Manager ID and System Password have been set enter the System Manager ID and System Password using the numeric keys then pr...

Page 140: ...or to select ON then press OK If you do not need to specify SNMP WRITABLE 2 skip to step 15 13 Press or to select SNMP WRITABLE 2 then press OK 14 Press or to select ON then press OK 15 Press Stop Res...

Page 141: ...he System Manager ID and System Password have been set enter the System Manager ID and System Password using the numeric keys then press Log In Out ID 3 Press or to select NETWORK SETTINGS then press...

Page 142: ...Machine for Network Usage in the Starter Guide Specify the machine s IP address so that the machine and the network computer can communicate before making protocol settings Any of the following can b...

Page 143: ...standby mode then restart the machine Machine Connection Method LPD Raw Connecting to a TCP IP Network All computers that use the machine must have TCP IP client software installed and must be enabled...

Page 144: ...sk bar Printers and Faxes For Windows XP Home Edition click start on the Windows task bar Control Panel Printers and Other Hardware Printers and Faxes 2 Right click the icon of the printer you install...

Page 145: ...Click Close to close the Printer Ports dialog box 10 In the printer properties dialog box click Configure Port Click LPR under Protocol enter a print queue in Queue Name under LPR Settings If you want...

Page 146: ...s XP Professional Server 2003 click start on the Windows task bar Printers and Faxes For Windows XP Home Edition click start on the Windows task bar Control Panel Printers and Other Hardware Printers...

Page 147: ...e Specify the machine s IP address so that the machine and the network computer can communicate before making protocol settings Any of the following can be used to specify the settings Machine s opera...

Page 148: ...I fax images and communication error notices only You must register the host name of the machine with the DNS server if you want to receive e mail using the machine s own SMTP receiving function 7 Pr...

Page 149: ...14 Press or to select SMTP AUTH then press OK OFF Does not use an SMTP server that requires SMTP Authentication Skip to step 19 ON Uses an SMTP server that requires SMTP Authentication method for auth...

Page 150: ...a h o s t _ n a m e c o m p c o m Ex You can specify any user name the part of the address located in front of the symbol Enter the host name after the symbol in the e mail address In this example the...

Page 151: ...6 Use the numeric keys to enter the password for access to the POP server then press OK 27 Press or to select POP INTERVAL then press OK 28 Use or numeric keys to set the interval at which you want to...

Page 152: ...sage in the Starter Guide Specify the machine s IP address so that the machine and the network computer can communicate before making protocol settings Any of the following can be used to specify the...

Page 153: ...name for another computer or printer on the same network You cannot enter a character string that includes blanks 7 Press or to select WORKGROUP then press OK 8 Use the numeric keys to enter the name...

Page 154: ...a sample shared folder configuration Depending on your environment the actual configuration procedure may differ Windows 98 Me If a suitable Windows 2000 XP Server 2003 Vista machine is available on y...

Page 155: ...ck File and Print Sharing click I want to be able to give others access to my files click OK To specify the access control method click the Access Control tab select the level of access control If you...

Page 156: ...assword Enter a password If Depends on Password is selected enter a password not longer than 8 alphanumeric characters for full access Confirm the settings you entered click OK If User level access co...

Page 157: ...in step 2 A maximum of 120 alphanumeric characters can be entered for HOST NAME on the operation panel A maximum of 120 alphanumeric characters can be entered for FILE PATH and a maximum of 24 alphan...

Page 158: ...s Confirm that Client for Microsoft Networks File and Printer Sharing for Microsoft Networks and Internet Protocol Version 4 TCP IPv4 are all selected If any of these functions is not selected select...

Page 159: ...rties dialog box in the General sheet click Advanced In the Advanced TCP IP Settings dialog box click the WINS tab in the WINS sheet click Enable NetBIOS over TCP IP Click OK until all the dialog boxe...

Page 160: ...puter Name dialog box confirm NetBIOS computer name Click Cancel until all the dialog boxes are closed For Windows 2000 Right click the My Computer icon on the desktop click Properties Click the Netwo...

Page 161: ...count Control dialog box appears For Windows Vista Click Start on the Windows taskbar right click Computer click Manage to open the Computer Management window For Windows 2000 Right click the My Compu...

Page 162: ...ot longer than 14 alphanumeric characters If User must change password at next logon is selected any new users added must change their passwords in order to send data from the machine You cannot chang...

Page 163: ...or Windows 2000 XP Server 2003 Right click the folder you want to share using Explorer click Properties On the Sharing sheet click Share this folder enter the share name in Share name 8 Set security T...

Page 164: ...eck both Write and Read or a higher access authority Click OK close the properties dialog box of the shared folder To display the Security tab in Windows XP follow the procedures below For details abo...

Page 165: ...cters can be entered for FILE PATH Enter each of these items on the server using no more than their allowable number of characters If you change the language of the LCD display HOST NAME and FILE PATH...

Page 166: ...r on a TCP TCP IP network with a unique IP address 1 Press Additional Functions 2 Press or to select SYSTEM SETTINGS then press OK If the System Manager ID and System Password have been set enter the...

Page 167: ...network domain name then press OK Ex D O M A I N N A M E a o r g c o m p a n y c o m 14 Press or to select DNS DYNA UPDATE then press OK 15 Press or to select ON or OFF then press OK OFF Does not use...

Page 168: ...e System Manager ID and System Password using the numeric keys then press Log In Out ID 3 Press or to select NETWORK SETTINGS then press OK 4 Press or to select TCP IP SETTINGS then press OK 5 Press o...

Page 169: ...Log In Out ID 3 Press or to select NETWORK SETTINGS then press OK 4 Press or to select TCP IP SETTINGS then press OK 5 Press or to select USE HTTP then press OK 6 Press or to select ON or OFF then pre...

Page 170: ...e numeric keys to enter the port number then press OK 8 Press Stop Reset to return to the standby mode 9 Restart the machine IP Address Range Settings You can restrict the machine access from the comp...

Page 171: ...press OK 10 Press or to select from IP ADDRESS 1 through IP ADDRESS 4 then press OK 11 Press or to select START IP ADDRESS then press OK 12 Use the numeric keys to enter the start IP address then pre...

Page 172: ...not been specified 7 Press or to select from PERMIT RX ADD1 through PERMIT RX ADD5 then press OK 8 Use the numeric keys to enter the MAC address of the computer allowed to access the machine then pre...

Page 173: ...the System Manager ID and System Password have been set enter the System Manager ID and System Password using the numeric keys then press Log In Out ID 3 Press or to select NETWORK SETTINGS then pres...

Page 174: ...onal Functions 2 Press or to select SYSTEM SETTINGS then press OK If the System Manager ID and System Password have been set enter the System Manager ID and System Password using the numeric keys then...

Page 175: ...nage it on a web browser For using Remote UI see Using the Remote UI on p 7 4 Machine Management Using NetSpot Device Installer NetSpot Device Installer is utility software for specifying the initial...

Page 176: ...Remote UI System Manager Settings Maintenance Troubleshooting Appendix Table of Contents Index 7 Remote UI System Requirements 7 3 Windows 7 3 Macintosh 7 3 Using the Remote UI 7 4 Starting the Remote...

Page 177: ...Settings 7 12 Customizing System Information 7 12 Specifying Forwarding Settings 7 15 Managing the Department User ID 7 21 Import Export Function 7 27 Saving the Address Book 7 27 Loading an Address...

Page 178: ...ts The Remote UI has been confirmed to work in the following system environments Windows OS Microsoft Windows 98 98SE Microsoft Windows Me Microsoft Windows 2000 Professional Microsoft Windows XP Micr...

Page 179: ...Remote UI select VIEW IP ADDRESS in NETWORK SETTINGS located in the SYSTEM SETTINGS and verify the IP address of the machine If you do not know the IP address consult with your network administrator...

Page 180: ...en you logon the Remote UI A Displays the current status of the machine etc B Takes you to the Remote UI top page C Updates refreshes the currently displayed screen with the latest information D Displ...

Page 181: ...of the machine and any error messages To check details of errors click Error Information Information Displays information related to the machine such as the system manager s information and the locat...

Page 182: ...e Remote UI to manage print jobs that are being processed by the machine or are held in the print queue If Permit End user s Job Operation is not selected in Register ID and Password or Register Passw...

Page 183: ...ired job click You cannot recover the job once it is deleted Viewing the Activity Log The Remote UI enables you to view the Activity Log of send jobs The Activity Log shows up to 40 recent transaction...

Page 184: ...ble of Contents Managing the Address Book The Remote UI enables you to view and modify the Address Book data You can also access these setting menus from the operation panel of the machine For details...

Page 185: ...g Appendix Index Table of Contents To edit the information click Edit make the necessary changes on the Change Address screen click OK To register a new address Click None or any number for which None...

Page 186: ...hooting Appendix Index Table of Contents Select One touch Speed Dial or Coded Dial from the drop down list select the check box next to the number to register for the group dialing click OK Make sure...

Page 187: ...ing Appendix Index Table of Contents Customizing System Settings Customizing System Information The Remote UI enables you to specify the machine s system settings You can also access the system settin...

Page 188: ...Scanning Network Remote UI System Manager Settings Maintenance Troubleshooting Appendix Index Table of Contents To protect the Restrict New Addresses Click Restrict Access to Destinations Specify the...

Page 189: ...en you access the SYSTEM SETTINGS menu from the operation panel or when you logon the Remote UI System Manager ID Sets the System Manager ID seven digits maximum Set Change Password Select this check...

Page 190: ...rwarding settings in two ways and depending on the settings the function will work differently Forwarding conditions are set the machine will forward only documents that meet specified conditions Forw...

Page 191: ...rding conditions Click Add New Conditions Specify the necessary fields click OK Receive Type Select Fax or I Fax for the receiving mode Condition Name Enter a name for the forwarding condition If you...

Page 192: ...rs entered contains Forwards the document if the Fax Number information contains the characters entered does not contain Forwards the document if the Fax Number information does not contain the charac...

Page 193: ...on Specify an address from the Address Book by clicking Address Book select the desired address from the displayed list click OK Forwarding Settings If you are forwarding documents to an e mail addres...

Page 194: ...ode from Receive Type If you select All all the forwarding settings stored in the machine are displayed To view change the registered forwarding settings Click the condition name to display the curren...

Page 195: ...hine Document and Paper Copying Sending and Receiving Printing and Scanning Network Remote UI System Manager Settings Maintenance Troubleshooting Appendix Index Table of Contents To print a list of th...

Page 196: ...11 4 Department ID User Management is displayed only when you are in the Administrator Mode When you use Department ID Management you need to set both the System Manager ID and password to restrict th...

Page 197: ...ds click OK Department ID registration screen Department ID Enter the Department ID number seven digits maximum Set Password Select this check box to set a password for the Department ID Password Ente...

Page 198: ...the character entered for Password an error dialog box appears Department ID Enter the Department ID number the user belongs to seven digits maximum If the Department ID Management mode is set be sure...

Page 199: ...ect Enable Department ID Management or Enable User Management click OK to activate the management mode Enable Department ID Management When this check box is selected Department ID Management becomes...

Page 200: ...Department ID Management and User ID Management you need to assign a Department ID for each user A user without a Department ID cannot use the machine Accept Print Jobs with Unknown Ids Select the ch...

Page 201: ...x Table of Contents To delete the registered department user ID Select the check box next to the department user ID to delete click Delete You can click Change List View to switch the management list...

Page 202: ...rough the Remote UI The Import Export operation may take more than a few minutes to complete Do not turn the machine s main power off until the operation is complete Otherwise the machine may malfunct...

Page 203: ...hine from saved files If the machine is in the Sleep mode press Energy Saver on the operation panel to cancel the Sleep mode before performing an Import operation When you register the contents of a n...

Page 204: ...pendix Index Table of Contents 2 Click Import 3 Click Browse select the file to import click OK Do not import any files while the machine is executing other jobs Saving User Management Data in Files E...

Page 205: ...y the location where you want to save the file The file is saved in the specified location Loading User Management Data Files Overwrite Import You can load User Management Data into the machine from s...

Page 206: ...ttings Maintenance Troubleshooting Appendix Index Table of Contents 2 Click Import 3 Click Browse select the file to import click OK Do not import any files while the machine is executing other jobs I...

Page 207: ...endix Index Table of Contents Saving Additional Functions Settings in Files Export You can store Additional Functions settings as a file in your computer 1 Click Add Func select Import Export from the...

Page 208: ...Index Table of Contents Loading Additional Functions Settings Files Overwrite Import You can load Additional Functions settings into the machine from saved files If the machine is in the Sleep mode p...

Page 209: ...itional Functions settings are imported the System Manager ID and Network Settings are automatically overwritten The machine must be restarted to enable the imported Additional Functions settings Afte...

Page 210: ...ntents Device Custom Settings The Remote UI enables you to edit the machine s custom settings You can also access these setting menus from the Operation Panel of the machine For details see Machine Se...

Page 211: ...ntents Index 8 System Manager Settings Specifying the System Manager Settings 8 3 Device Information Settings 8 5 Department ID Management 8 6 Registering the Department ID Password and Page Limit 8 6...

Page 212: ...endix Table of Contents Index Managing User IDs 8 14 Handling Documents with Forwarding Errors 8 15 Remote UI 8 16 Restricting Access to Destinations 8 17 Setting a Password for the Address Book 8 17...

Page 213: ...n enter a maximum of 32 characters for the System Manager s name The maximum number of digits that you can store for the System Manager ID and System Password is seven If you enter fewer than seven di...

Page 214: ...System Manager Settings Maintenance Troubleshooting Appendix Index Table of Contents 6 Press or to select SYSTEM PASSWORD then press OK 7 Use the numeric keys to enter a number then press OK 8 Press...

Page 215: ...nal Functions 2 Press or to select SYSTEM SETTINGS then press OK If the System Manager ID and System Password have been set enter the System Manager ID and System Password using the numeric keys then...

Page 216: ...need to set both the System Manager ID and password to restrict the access to the SYSTEM SETTINGS menu from the operation panel or using the Remote UI Otherwise all users will be considered as System...

Page 217: ...GISTER DEPT ID then press OK 6 Press or to select the number to which department will be designated then press OK 7 Use the numeric keys to enter the Department ID then press OK If you do not want to...

Page 218: ...en press OK You can set the page limit from 0 to 999 999 pages Once a page limit is reached copying scanning or printing is not possible The page limit refers to the number of printed surfaces Therefo...

Page 219: ...IMIT SET then press OK 11 Press or to select the desired function then press OK You can select TOTAL PRINT LIMIT COPY LIMIT BLACK SCAN LIMIT COLOR SCAN LIMIT or PRINT LIMIT 12 Press or to select ON or...

Page 220: ...ID then press OK 4 Press or to select ON then press OK 5 Press or to select REGISTER DEPT ID then press OK 6 Press or to select the Department ID that you want to erase then press OK twice 7 Press or...

Page 221: ...en press OK You can select TOTAL PRINT COPY SCAN COLOR SCAN or PRINT 8 Press or to display the desired Department ID and check the counter information 9 Press Stop Reset to return to the standby mode...

Page 222: ...Manager ID and System Password using the numeric keys then press Log In Out ID 3 Press or to select MANAGE DEPT ID then press OK 4 Press or to select ON then press OK 5 Press or to select PAGE TOTALS...

Page 223: ...Index Table of Contents 4 Press or to select ON then press OK 5 Press or to select PDL JOBS W OUT ID then press OK 6 Press or to select ON or OFF then press OK ON The machine accepts print jobs from...

Page 224: ...ss the SYSTEM SETTINGS menu from the operation panel or use the Remote UI without restriction See Managing the Department User ID on p 7 21 The User ID and password can be registered only from the Rem...

Page 225: ...ess or to select SYSTEM SETTINGS then press OK If the System Manager ID and System Password have been set enter the System Manager ID and System Password using the numeric keys then press Log In Out I...

Page 226: ...lect SYSTEM SETTINGS then press OK If the System Manager ID and System Password have been set enter the System Manager ID and System Password using the numeric keys then press Log In Out ID 3 Press or...

Page 227: ...en for entering the password appears when you attempt to edit the Address Book If you want to cancel password protection select OFF in step 5 1 Press Additional Functions 2 Press or to select SYSTEM S...

Page 228: ...TEM SETTINGS then press OK If the System Manager ID and System Password have been set enter the System Manager ID and System Password using the numeric keys then press Log In Out ID 3 Press or to sele...

Page 229: ...If the System Manager ID and System Password have been set enter the System Manager ID and System Password using the numeric keys then press Log In Out ID 3 Press or to select ACCESS TO DEST then pres...

Page 230: ...ss Additional Functions 2 Press or to select SYSTEM SETTINGS then press OK If the System Manager ID and System Password have been set enter the System Manager ID and System Password using the numeric...

Page 231: ...ng the System Monitor screen When you set CHECKING THE LOG to OFF the job log does not appear on the System Monitor screen When you set CHECKING THE LOG to OFF the Activity Report will not print autom...

Page 232: ...one on the back of the machine You can use a USB memory connected to the USB port on the front of the machine regardless of this setting 1 Press Additional Functions 2 Press or to select SYSTEM SETTI...

Page 233: ...ubleshooting Appendix Table of Contents Index 9 Maintenance Cleaning the Machine 9 2 Exterior 9 2 Interior 9 2 Fuser Roller 9 6 Scanning area 9 6 Replacing the Toner Cartridge 9 10 Redistributing Tone...

Page 234: ...one or any other chemical cleaner to clean the machine These can damage the machine components When you turn off the main power switch the documents stored in memory will be erased To check the jobs s...

Page 235: ...anning platform until it is locked A You will hear an audible click 3 Open the toner cover B using the knob which covers over on dent A 4 Remove the toner cartridge To avoid exposing the toner cartrid...

Page 236: ...t touch the fixing assembly A as it becomes very hot during use Do not touch the transfer roller B as this can damage the machine If loose toner comes into contact with your skin or clothing wash with...

Page 237: ...etwork Remote UI System Manager Settings Maintenance Troubleshooting Appendix Index Table of Contents 8 Push the toner cartridge to make sure it is properly set in the machine 9 Close the toner cover...

Page 238: ...aced Load a sheet of blank LTR paper into the multi purpose tray and start cleaning Cleaning the roller takes approximately 130 seconds When some jobs are stored in memory this function is not availab...

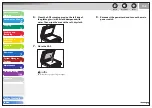
Page 239: ...the ADF with a cloth dampened with water Then wipe the area with a soft dry cloth Do not dampen the cloth too much as this may tear the document or damage the machine 3 Close the ADF Be careful not to...

Page 240: ...anager Settings Maintenance Troubleshooting Appendix Index Table of Contents 2 Open the ADF cover 3 Clean the rollers A inside the ADF with a cloth dampened with water Then wipe the area with a soft d...

Page 241: ...Remote UI System Manager Settings Maintenance Troubleshooting Appendix Index Table of Contents 6 Clean the ADF scanning area on the left side of the platen glass with a cloth dampened with water Then...

Page 242: ...documents without replacing the toner cartridge set CONT PRINTING to KEEP PRINTING in RX SETTINGS of TX RX COMMON SET in TX RX SETTINGS See Setting Menu on p 11 6 When CONT PRINTING is set to KEEP PRI...

Page 243: ...of Contents 3 Remove the toner cartridge 4 Gently rock the toner cartridge five or six times to distribute toner evenly 5 Hold the toner cartridge by its handle The arrow A on the toner cartridge sho...

Page 244: ...ting Appendix Index Table of Contents 6 Insert the cartridge so that the protrusion on the right side of the toner cartridge A fits into the guide B located on the right side of the machine and slide...

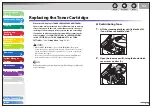
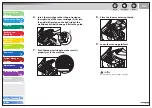
Page 245: ...ng Appendix Index Table of Contents Replacing the Toner Cartridge with a New One 1 Lift the scanning platform until it is locked A You will hear an audible click 2 Open the toner cover B using the kno...

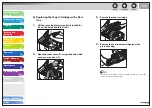
Page 246: ...ridge five or six times to distribute toner inside 6 Hold the toner cartridge with one hand and pull the seal completely out Do not pull the seal out at an angle 7 Hold the toner cartridge by its hand...

Page 247: ...ing Appendix Index Table of Contents 8 Insert the cartridge so that the protrusion on the right side of the toner cartridge A fits into the guide B located on the right side of the machine and slide i...

Page 248: ...gn which supports four critical environmental areas Recycling in the Workplace Conserving Environmental Resources Scientific Research and Education Encouraging Outdoors Appreciation The remaining Clea...

Page 249: ...not refilled You are not entitled to a tax deduction or rebate for the return of empty cartridges This program may be modified or discontinued without notice U S A PROGRAM Packaging Option A 1 Single...

Page 250: ...Please be sure that the shipment does not exceed UPS specifications Maximum weight 70 lb 31 8 kg Maximum length 108 in 2 743 mm Maximum girth length 2 x width 2 x height 130 in 3 302 mm If your shipme...

Page 251: ...your UPS driver when you receive your next regular delivery or Take the shipment to your local UPS receiving point Option B MBE Drop off Take the shipment to a participating MBE Mail Boxes Etc Center...

Page 252: ...n pays the postage Deposit your empty cartridge in any full size street mailbox or take it to your local Canada Post outlet or franchise Option B Volume Box Return eight or more cartridges We encourag...

Page 253: ...rking to preserve endangered species is a long standing Canon interest To this end for every cartridge collected Canon Canada donates 1 shared equally between World Wildlife Fund Canada and the Nature...

Page 254: ...this procedure to avoid vibration damage to the machine when transporting it over a long distance 1 Turn off the main power switch 2 Disconnect the power cord and all the cables from the back of the...

Page 255: ...ntents 6 Remove the toner cartridge To avoid exposing the toner cartridge to light place it in its protective bag or wrap it in a thick cloth Do not open the drum protective shutter on the toner cartr...

Page 256: ...ng Network Remote UI System Manager Settings Maintenance Troubleshooting Appendix Index Table of Contents 9 Remove the dust cover from the paper cassette 10 Open the front panel of the paper cassette...

Page 257: ...ble of Contents 13 Detach the Document feeder tray 14 Make sure all the covers are closed 15 Grip the handles on both sides of the machine and lift it carefully as shown in the illustration below Do n...

Page 258: ...ote UI System Manager Settings Maintenance Troubleshooting Appendix Table of Contents Index 10Troubleshooting Clearing Jams 10 3 Document Jams 10 3 Paper Jams 10 5 LCD Messages 10 13 Error Codes 10 21...

Page 259: ...ger Settings Maintenance Troubleshooting Appendix Table of Contents Index Sending Receiving Problems 10 33 Sending Problems 10 33 Receiving Problems 10 38 Copying Problems 10 44 Printing Problems 10 4...

Page 260: ...quirements for use See Paper Requirements on p 2 7 Make sure you have removed any scraps of paper from the inside of the machine When removing jammed documents or paper take care not to cut your hands...

Page 261: ...stem Manager Settings Maintenance Troubleshooting Appendix Index Table of Contents 1 Open the ADF cover 2 Hold both sides of any jammed documents and gently pull them out straight upward Do not pull t...

Page 262: ...then hold both sides of any jammed documents and gently pull them out 6 Close the ADF Be careful not to get your fingers caught Paper Jams When PAPER JAM LIFT PANEL TO OPEN appears on the LCD display...

Page 263: ...e items might be damaged if they come into contact with the parts inside of the machine To avoid exposing the toner cartridge to light place it in its protective bag or wrap it in a thick cloth Do not...

Page 264: ...Maintenance Troubleshooting Appendix Index Table of Contents 5 Gently pull the jammed paper between the fixing assembly A and transfer roller B until the leading edge emerges from the machine Do not t...

Page 265: ...tridge should be facing away from you and pointing down Do not open the drum protective shutter on the toner cartridge Print quality may deteriorate if the drum surface is exposed to light or is damag...

Page 266: ...nting and Scanning Network Remote UI System Manager Settings Maintenance Troubleshooting Appendix Index Table of Contents 10 Close the toner cover using the tab 11 Lower the scanning platform Be caref...

Page 267: ...mote UI System Manager Settings Maintenance Troubleshooting Appendix Index Table of Contents 14 Remove the paper in the paper cassette 15 Hold both sides of the jammed paper and slowly pull it out in...

Page 268: ...ing Printing and Scanning Network Remote UI System Manager Settings Maintenance Troubleshooting Appendix Index Table of Contents 17 Close the front panel of the paper cassette 18 Set the dust cover on...

Page 269: ...the jammed paper and gently pull it out upward This operation is required only when OPEN REAR COVER appears on the LCD display If the jammed paper is badly folded similar to the folds of an accordion...

Page 270: ...ents in memory Also print send or delete any documents stored in memory CANNOT PRINT RX DATA FIX ERROR TO PRINT Description The machine temporarily received the fax in memory because an error of some...

Page 271: ...ister a group to contain more than three levels of subgroups Modify the group so that it contains three levels of groups or less CHANGE PAPERSIZE Description The paper size is not appropriate for a tw...

Page 272: ...ion When using a color sending you can specify only one recipient Send one by one or use black and white sending DATA ERROR PRESS START KEY Description The machine may have trouble Action Press Start...

Page 273: ...is full of data or the number of file limit has reached Action Get enough space in the USB memory or organize your destination folder from your computer FEEDER PAPER JAM CHECK THE FEEDER Description...

Page 274: ...using the paper cassette For report or list set the paper size to LTR LGL A4 OFICIO BRAZIL OFICIO MEXICO OFICIO FOLIO or FLSP and then load paper of the same size MEMORY FULL Description The machine i...

Page 275: ...n Register the one touch key or coded dial code that is not used NOT REGISTERED Description No destination is registered for the one touch key or coded dial code you pressed Action Register the destin...

Page 276: ...is ready SAME FILE NAME Description The same file name exists when you are scanning a document to a USB memory Action Press OK and rename the file START AGAIN Description A transmission error has occ...

Page 277: ...MORY FULL Description The USB memory is full of data or the number of file limit has reached Action Get enough space in the USB memory or organize your destination folder from your computer USB USB PO...

Page 278: ...anning Network Remote UI System Manager Settings Maintenance Troubleshooting Appendix Index Table of Contents Error Codes An error code is a four digit code shown on an ERROR TX REPORT or an ERROR RX...

Page 279: ...ng Description A document takes a long time to receive Action Contact the other party and ask them to reduce their scanning resolution or divide the document into smaller parts for sending 0005 Descri...

Page 280: ...0401 Description The USB memory is full of data or the number of file limit has reached Action Get enough space in the USB memory or organize your destination folder from your computer 0403 Descriptio...

Page 281: ...OMMUNICATIONS in SYSTEM SETTINGS Action Select a lower resolution Action Set DIVIDE INTO PAGES to ON in send settings 0752 Description Some kind of error occurred in the machine when sending a color e...

Page 282: ...is not set Action Check TCP IP SETTINGS in NETWORK SETTINGS in SYSTEM SETTINGS Description When the machine was turned ON an IP address was not assigned to the machine by the DHCP RARP or BOOTP serve...

Page 283: ...NGS in NETWORK SETTINGS in SYSTEM SETTINGS Description Connection to the DNS server failed Action Check that the DNS server is functioning normally 0804 Description You have no permission to access th...

Page 284: ...ings and then ask the sender to resend the data 0820 Description You have received data that cannot be processed BASE 64 or uuencode is incorrect Action Check the settings and then ask the sender to r...

Page 285: ...k Remote UI System Manager Settings Maintenance Troubleshooting Appendix Index Table of Contents 0839 Description The user name or password for the SMTP authentication in SMTP AUTH is incorrect Action...

Page 286: ...ize paper as shown on LCD display then press OK to resume the job The machine re starts printing Changing the Paper Size Setting 1 Press Additional Functions 2 Press or to select PAPER SETTINGS then p...

Page 287: ...er Is the main power switch turned on Turn on the main power switch Q A Q A Q A The Error indicator flashes Does the machine feed paper correctly or is there paper in the paper cassette or multi purpo...

Page 288: ...of Contents Nothing appears in the LCD Is the power cord plugged in securely Check that the power cord is securely plugged into the machine and into the wall outlet If the machine is plugged into a po...

Page 289: ...le sheets feed together into the machine Is the paper loaded correctly Make sure the paper is correctly loaded See Set Up the Machine in the Starter Guide Does the machine contain too many sheets Make...

Page 290: ...mmediately Is the e mail address you entered or the e mail or file server address registered in the Address Book correct Make sure the e mail address you entered or the e mail or file server address r...

Page 291: ...FAX repeatedly to select FAX then press OK to show the fax standby display Is the document loaded correctly Make sure the document is correctly loaded See Loading Documents on p 2 4 Make sure the sca...

Page 292: ...roperly Make sure there is a dial tone when you press Hook or when you lift the handset of any external telephone connected to the machine If there is no dial tone contact your local telephone company...

Page 293: ...text or photographs send it directly rather than using a memory transmission Is a document stored in memory leaving little memory available Print send or delete any documents stored in memory Q A Q A...

Page 294: ...rection Mode ECM Does the recipient s machine support ECM If the recipient s machine does not support ECM the document is sent in normal mode without error checking Q A Q A Q A Errors occur frequently...

Page 295: ...the appropriate network settings are not specified Confirm this with your system administrator Q A Q A Cannot receive a fax automatically Is the machine set to receive automatically For the machine to...

Page 296: ...hat an answering machine is connected to the machine and that it is turned on with an outgoing message properly recorded See Basic Receiving Method on p 4 35 Are documents stored in memory leaving lit...

Page 297: ...nual receiving again If you press Start when documents are set on the ADF it automatically switches to manual sending Print quality is poor Is the toner low or unevenly distributed Redistribute the to...

Page 298: ...n p 2 13 Received faxes print blotched or unevenly Is ECM RX set to ON ECM Error Correction Mode should eliminate such problems See TX RX SETTINGS on p 11 11 However if the telephone lines are in poor...

Page 299: ...ansmission will take extra time Set ECM RX to OFF See TX RX SETTINGS on p 11 11 Is the resolution of the sender s machine set higher Contact to the sender and make sure the resolution of the sender s...

Page 300: ...System Manager Settings Maintenance Troubleshooting Appendix Index Table of Contents Is the sender s machine functioning properly Ask the sender to check that the machine is functioning properly Canno...

Page 301: ...e Set Up the Machine in the Starter Guide Is the cartridge out of toner Replace the toner cartridge See Replacing the Toner Cartridge on p 9 10 Q A Q A Q A Copy is too light or has uneven density Is t...

Page 302: ...machine See Set Up the Machine in the Starter Guide Make sure the paper delivery slot is free of obstructions A Q A Q A Q A A Copy is not clear Is the correct type of paper loaded in the machine Make...

Page 303: ...ing and Receiving Printing and Scanning Network Remote UI System Manager Settings Maintenance Troubleshooting Appendix Index Table of Contents The alarm sounds or MEMORY FULL appears in the LCD when m...

Page 304: ...Up the Machine in the Starter Guide Is the cartridge out of toner Replace the toner cartridge See Replacing the Toner Cartridge on p 9 10 Q A Q A Q A Printout is too light or has uneven density Is th...

Page 305: ...ure the paper is correctly loaded in the machine See Set Up the Machine in the Starter Guide Make sure the Output tray is free of obstructions See Machine Components on p 1 3 A Q A Q A Q A A Printout...

Page 306: ...others Are there any jobs remaining in the print queue A print job may be stuck in the print queue when it could not be finished due to an expected interruption When this happens follow this procedur...

Page 307: ...anager Settings Maintenance Troubleshooting Appendix Index Table of Contents For Windows 98 Me 1 Click Start on the Windows task bar Settings Printers double click the icon of the printer you installe...

Page 308: ...d in and turned on Is the main power switch turned on Turn on the main power switch Is the machine set for the correct telephone line type Make sure the machine is set for the correct telephone line t...

Page 309: ...ing Uninstalling Software in the Starter Guide Make sure the correct machine is set as the output destination for the computer that is printing in Printers and Faxes or Print Manager Q A Q A Q A A Is...

Page 310: ...r IP address set on the machine exist on the network Check that the file or mail server s host name or IP address set on the machine is correct A Q A Q A Does the DNS server exist on an external netwo...

Page 311: ...e machine In this case check the SNMP community name See SNMP on p 6 8 Q A Q A Q A Unable to send data share files Windows File Sharing Are File sharing settings for the shared folder correct Check th...

Page 312: ...s Book settings Any sent or received documents stored in memory are backed up for about 30 minutes During a power cut functions are limited as follows You cannot send receive copy scan or print docume...

Page 313: ...ww canon ca Free live technical support 9 A M to 8 P M EST Monday through Friday excluding holidays for products still under warranty 1 800 652 2666 For the location of the authorized service facility...

Page 314: ...Remote UI System Manager Settings Maintenance Troubleshooting Appendix Table of Contents Index 11Appendix Machine Settings 11 4 Printing USER S DATA LIST 11 4 Accessing the Setting Menu 11 4 Setting M...

Page 315: ...ix Table of Contents Index TIMER SETTINGS 11 28 ADJUST CLEANING 11 30 REPORT SETTINGS 11 32 SYSTEM SETTINGS 11 34 Summary of Reports and Lists 11 48 Printing Reports Automatically 11 49 TX REPORT 11 4...

Page 316: ...aper Copying Sending and Receiving Printing and Scanning Network Remote UI System Manager Settings Maintenance Troubleshooting Appendix Table of Contents Index Checking and Deleting Jobs 11 55 Checkin...

Page 317: ...ng USER S DATA LIST 1 Press Additional Functions 2 Press or to select REPORT SETTINGS then press OK 3 Press or to select LIST PRINT then press OK 4 Press or to select USER DATA LIST then press OK 5 Pr...

Page 318: ...bleshooting Appendix Index Table of Contents 3 Press or to select a submenu then press OK For details on the submenu see Setting Menu on p 11 6 4 To register the settings or go to a submenu item press...

Page 319: ...ption 1 CASSETTE Sets the paper size and type on the paper cassette See Setting Paper Size and Type on p 2 13 2 MP TRAY Sets the paper size and type on the purpose tray See Setting Paper Size and Type...

Page 320: ...DONE TONE Beeps when a document is received ERROR ONLY 1 3 OFF ON 1 3 7 SCAN DONE TONE Beeps when scanning is completed ERROR ONLY 1 3 OFF ON 1 3 8 PRINT DONE TONE Beeps when printing is completed ER...

Page 321: ...rint jobs See PRINTER SETTINGS on p 11 23 4 PRINTER DENSITY Recalibrates the density adjustment scale if differences between the image in the document and the print occur 1 9 This function is not effe...

Page 322: ...t setting for copying 1 IMAGE QUALITY Sets the document type for copying TEXT PHOTO TEXT PHOTO TEXT PHOTO 2 DENSITY Sets the density for copying MANUAL 1 9 AUTO 3 ZOOM RATIO Sets the zoom ratio for co...

Page 323: ...eshooting Appendix Table of Contents Index COPY SETTINGS 6 2 SIDED Sets whether to make the two sided copies automatically OFF 1 2 SIDED 2 SHARPNESS Adjusts the sharpness of the copied image 1 9 3 PAP...

Page 324: ...tarter Guide 2 DATA COMPRESSION Sets the compression ratio for color scanned data A high compression ratio reduces the amount of memory used for the document but results in low quality images On the c...

Page 325: ...IFF B W PDF COMPACT JPEG 4 ORIGINAL TYPE Sets the default original type for the document you send TEXT PHOTO TEXT PHOTO 5 DIVIDE INTO PAGES Sets whether to use DIVIDE INTO PAGES as default OFF ON 6 SE...

Page 326: ...E MARK Prefixes your number with the abbreviations FAX or TEL in your sender information FAX TEL 8 COLOR TX GAMMA Sets the gamma value for color scanned data If the set value corresponds to the gamma...

Page 327: ...per See Two Sided Printing on p 4 44 OFF ON 2 RECEIVE REDUCTION Sets whether the received images print out at a reduced size See Received Image Reduction on p 4 44 ON Image reduction is turned on 1 RX...

Page 328: ...2 FAX SETTINGS Sets the fax features 1 RX MODE Selects the receive mode See Set the Machine for Receiving Faxes in the Starter Guide FaxOnly FaxTel AnsMode DRPD Manual 2 USER SETTINGS Specifies the ba...

Page 329: ...tically when the other line is busy or a transmission error occurs See Setting Automatic Redialing Fax on p 4 29 ON Customizes the redial operation 1 REDIAL TIMES Sets the number of retries 1TIMES 10T...

Page 330: ...s the time the machine takes to check whether a call is a fax or a voice call 0SEC 30SEC 2 F T RING TIME Selects the ring length for voice calls 15SEC 300SEC 3 F T SWITCH ACTION Selects whether the ma...

Page 331: ...See Remote Reception on p 4 42 ON The machine enables remote receiving REMOTE RX ID You can dial a code on remote extension to start receiving a document A combination of two characters using 0 to 9 a...

Page 332: ...ed Dial Codes on p 4 10 FAX Registers fax numbers 1 TEL NUMBER ENTRY Registers the recipient s fax number max 120 digits including spaces 2 NAME Registers the recipient s name max 16 characters includ...

Page 333: ...e name of the file server max 120 characters 2 NAME Registers the recipient s name max 16 characters including spaces 3 FILE PATH Registers the path to the file server max 120 characters 4 LOGIN NAME...

Page 334: ...The optional setting is not set ON The optional setting is set 1 LONG DISTANCE Selects a mode for documents you are sending DOMESTIC LONG DISTANCE 1 LONG DISTANCE 2 LONG DISTANCE 3 See Registering Fax...

Page 335: ...haracters including spaces 3 FILE PATH Registers the path to the file server max 120 characters 4 LOGIN NAME Registers the login name to access the file server max 24 characters 5 PASSWORD Registers t...

Page 336: ...DEFAULT PAPERTYPE Sets the default paper type for print jobs This machine has internally defined optimal print modes for each specified paper type PLAIN PAPER PLAIN PAPER L HEAVY PAPER HEAVY PAPER H...

Page 337: ...s the page margin in inches or millimeters INCHES 01 90INCHES 01 90INCHES mm 50 0mm 50 0mm 7 COLLATE Sets whether to collate the printouts automatically OFF ON 8 ERROR TIME OUT Sets the length of time...

Page 338: ...paced scalable font 4 00 999 75 5 PITCH Specifies the pitch for the default font This item appears when the number in FONT NUMBER is that of a fixed pitch scalable font 00 44 99 99 6 FORM LINES Sets t...

Page 339: ...n does not change such as the beginning of the next line YES The print head moves to the beginning of the next line when line feed code is received 10 ENLARGE A4 Sets whether to expand the printable a...

Page 340: ...a stable texture and distinct gradation by enhancing the contrast of tone This setting is appropriate for printing image data such as photographic images GRADATION Prints with a smooth gradation and...

Page 341: ...See Setting Time Zone on p 1 17 3 DATE TYPE SELECT Sets the date format MM DD YYYY DD MM YYYY YYYY MM DD 4 AUTO SLEEP TIME Sets the auto sleep mode when the machine remains idle for a certain period o...

Page 342: ...Paper Copying Sending and Receiving Printing and Scanning Network Remote UI System Manager Settings Maintenance Troubleshooting Appendix Table of Contents Index TIMER SETTINGS 1 START DATE TIME Sets...

Page 343: ...the printouts for copying receiving info and reports When this setting is set to ON the density of printouts may become light OFF ON 3 SPECIAL MODE U Select to improve print quality in high temperatur...

Page 344: ...s MODE1 Sets the density of printouts becomes two levels lighter than normal condition MODE2 Sets the density of printouts becomes four levels lighter than normal condition 6 SPECIAL MODE X Sets wheth...

Page 345: ...NLY Prints a report only when a transmission error occurs REPORT WITH TX IMAGE Sets whether to print the first page of the document under the report OFF ON OUTPUT YES Prints a report every time you se...

Page 346: ...t max last 40 transactions manually Press to select YES If you do not want to print the list press to select NO 2 SPEED DIAL LIST Prints the list of destinations registered in Address Book 1 1 TOUCH L...

Page 347: ...ID Sets the system manager ID seven digits 2 SYSTEM PASSWORD Sets the system manager password seven digits 3 SYSTEM MANAGER Sets the system manager name max 32 characters including spaces 2 DEVICE INF...

Page 348: ...page limit is used OFF ON 000000 999999 2 COPY LIMIT Sets if the copy limit is used OFF ON 000000 999999 3 BLACK SCAN LIMIT Sets if the scan limit is used OFF ON 000000 999999 4 COLOR SCAN LIMIT Sets...

Page 349: ...TOTAL Clears counter information Press to select YES If you do not want to clear the settings press to select NO 3 PRINT LIST Prints counter information Press to select YES If you do not want to print...

Page 350: ...cates an IP address to the machine manually 2 IP ADDRESS Registers a fixed IP address to the machine See Set the Machine for Network Usage in the Starter Guide 3 SUBNET MASK Registers a fixed subnet m...

Page 351: ...NS 1 WINS RESOLUTION Sets whether to resolve a name with WINS OFF ON 2 WINS SERVER Registers the IP address of a WINS server 7 LPD PRINT Sets whether to use LPD as the print application ON OFF 8 RAW P...

Page 352: ...ult 110 6 SMTP TX 0 65535 default 25 7 SNMP 0 65535 default 161 11 SET IP ADD RANGE Sets whether to restrict the range of IP addresses OFF Disables restriction of IP address of computers ON Enables re...

Page 353: ...ess filter ON Specifies a MAC address filter to access MAC address must be entered for each setting 1 PERMIT RX ADD1 2 PERMIT RX ADD2 3 PERMIT RX ADD3 4 PERMIT RX ADD4 5 PERMIT RX ADD5 2 USE SMB CLIEN...

Page 354: ...ic 3 COMMUNITY NAME 2 Sets SNMP community name 2 4 SNMP WRITABLE 1 Enables computers on the network to access the machine and modify its settings ON OFF 5 SNMP WRITABLE 2 Enables computers on the netw...

Page 355: ...ion mode HALF DUPLEX FULL DUPLEX 2 ETHERNET TYPE Selects the Ethernet type 10 BASE T 100 BASE TX 6 VIEW IP ADDRESS Checks the current network settings 1 IP ADDRESS Checks the IP address 2 SUBNET MASK...

Page 356: ...in the POP server before sending e mail OFF Disables SMTP Authentication ON Enables SMTP Authentication 1 USER 2 PASSWORD 5 E MAIL ADDRESS Enters the e mail address your machine will use max 64 chara...

Page 357: ...separate files when it is sent if its size exceeds the data size you specify OFF ON 2 FAX SETTINGS Sets the facsimile communication 1 TX START SPEED Sets the transmission start speed for faxes 33600b...

Page 358: ...ck reception 1 MEM RX START TIME 2 MEM RX END TIME 7 FORWARD ERR SET Sets the machine to print and or store received documents when document forwarding fails 1 PRINT Sets whether to print out the imag...

Page 359: ...ddress Book OFF ON 2 1 Registration of group addresses is not restricted 2 You can still make calls using an external phone 3 FAX DRIVER TX Sets whether to restrict sending faxes from a computer using...

Page 360: ...ble of Contents Index SYSTEM SETTINGS 10 CHECKING THE LOG Sets whether to allow displaying the log ON Enables confirmation of logs using System Monitor OFF Disables confirmation of logs using System M...

Page 361: ...recipient addresses registered to all the coded codes CODED DIAL LIST 2 Lists the detailed data of CODED DIAL LIST GROUP DIAL LIST Lists groups registered for group addresses USER S DATA LIST Lists a...

Page 362: ...OK 4 Press or to select TX REPORT then press OK 5 Press or to select the setting you want then press OK PRINT ERROR ONLY Prints a report only when a transmission error occurs OUTPUT YES Prints a repor...

Page 363: ...IME USE Transmission duration PAGES SENT Number of pages sent RESULT Result of transaction OK Transmission successful NG Transmission failed STOP Transmission manually canceled before completion BUSY...

Page 364: ...s Book ST TIME Transmission time TIME USE Transmission duration PGS Number of pages received RESULT Result of transaction OK Reception successful NG Reception failed STOP Reception manually canceled b...

Page 365: ...sted chronologically ON Prints a report with the transmission and reception results separated in a report 9 Press Stop Reset to return to the standby mode Report Items The following items are displaye...
Page 366: ...A LIST see Printing USER S DATA LIST on p 11 4 For information on each report or list see Summary of Reports and Lists on p 11 48 To print DEPT INFO LIST see Printing Counter Information DEPT INFO LIS...

Page 367: ...T Prints 1 TOUCH LIST CODED DIAL LIST Prints CODED DIAL LIST GROUP DIAL LIST Prints GROUP DIAL LIST 6 Press to select YES Printing starts and the screen automatically returns to the standby mode If yo...
Page 368: ...ppendix Index Table of Contents Checking and Deleting Jobs System monitor enables you to monitor the status of the report jobs currently being processed Checking and Deleting Report Jobs 1 Press Syste...

Page 369: ...tem Manager Settings Maintenance Troubleshooting Appendix Index Table of Contents Checking Remaining Memory You can check the remaining memory according to the status of the machine 1 Press System Mon...

Page 370: ...of various types in a group address and assign a one touch key or coded dial code to this group Registering a destination in the Address Book saves you the effort of entering that destination s addre...

Page 371: ...es to identify the call as an incoming document When the receiving fax detects this signal it automatically starts to receive the fax transmission The majority of fax machines in use today can send an...

Page 372: ...alls depending on the distinctive ring patterns assigned to different numbers Subscription to a DRPD service offered by some telephone companies is required E ECM Error Correction Mode The ability of...

Page 373: ...ost on the Internet This name resolution process uses DNS Domain Name System G G3 Group 3 fax machine Defined by CCITT ITU T Uses encoding schemes to transmit image data while reducing the amount of d...

Page 374: ...omputer Interface port The machine comes with one USB port located on the back of the machine You attach the cable that connects your computer and machine to this port Internet Protocol IP The underly...

Page 375: ...e other relatively limited area Log in Entering a password as a means of user authentication to start a computer session or access to a service LPD Line Printer Daemon A daemon is a program that runs...

Page 376: ...tration and for entering coded dial codes O One Touch keys The numbered keys on the operation panel that may be registered as single or a group of destinations Once a destination or group of destinati...

Page 377: ...row of color dots in the mosaic of color dots constitutes one raster graphic In a printer a raster graphic is used as the master image from which a page is printed because the image can be transferre...

Page 378: ...ter that convert vector graphic descriptions from a computer into raster graphic images that can be printed Rotary pulse A telephone dialing system where a dial is rotated to send pulses to the teleph...

Page 379: ...net Mask SUBNETwork mask The method used to determine which subgroup or subnet an IP address belongs to on TCP IP networks all devices whose IP addresses have the same prefix would belong to the same...

Page 380: ...Sending U URL Uniform Resource Locator A standard way of specifying the location of an object usually a web page on the Internet The URL for a web page would look something like this http www w3 org...

Page 381: ...T 11 4 11 19 Address button 7 5 ADF 1 3 2 5 ADJUST CLEANING 11 4 11 30 Advanced sending features 4 26 AnsMode 4 35 Auto clear time 1 17 Automatic document feeder 1 3 Automatic redialing 4 29 Auto retr...

Page 382: ...cking counter information 8 10 Clearing page totals 8 11 Printing counter information 8 12 Department IDs Managing 7 21 Device button 7 5 Device information settings 8 5 Document Jams 10 3 Loading 2 4...

Page 383: ...0 13 Standby mode 1 10 Legal 2 7 Letter 2 7 Loading Document 2 4 Envelopes 2 10 Paper 2 10 Log In Out key 1 7 Log in mode 1 11 M Machine Checking status 7 6 Customizing settings 7 35 Machine component...

Page 384: ...method 4 35 Receiving features 4 36 Receiving features 4 36 Recycling cartridge 9 16 CANADA PROGRAM 9 20 U S A PROGRAM 9 17 Redistributing toner 9 10 Remote reception 4 42 Remote reception ID 4 42 Rem...

Page 385: ...ID 8 3 System Manager settings 8 1 System monitor 3 13 4 47 5 9 11 55 System Monitor key 1 6 System Password 8 3 System requirements Network 6 4 Remote UI 7 3 SYSTEM SETTINGS 11 4 11 34 System setting...

Page 386: ...ne Document and Paper Copying Sending and Receiving Printing and Scanning Network Remote UI System Manager Settings Maintenance Troubleshooting Appendix Table of Contents Index V View Settings key 1 6...

Page 387: ...Doumer 92414 Courbevoie Cedex France CANON COMMUNICATION IMAGE FRANCE S A S 12 rue de I Industrie 92414 Courbevoie Cedex France CANON U K LTD Woodhatch Reigate Surrey RH2 8BF United Kingdom CANON DEUT...

Reviews: