


Basic Copy Operations
15A8-015
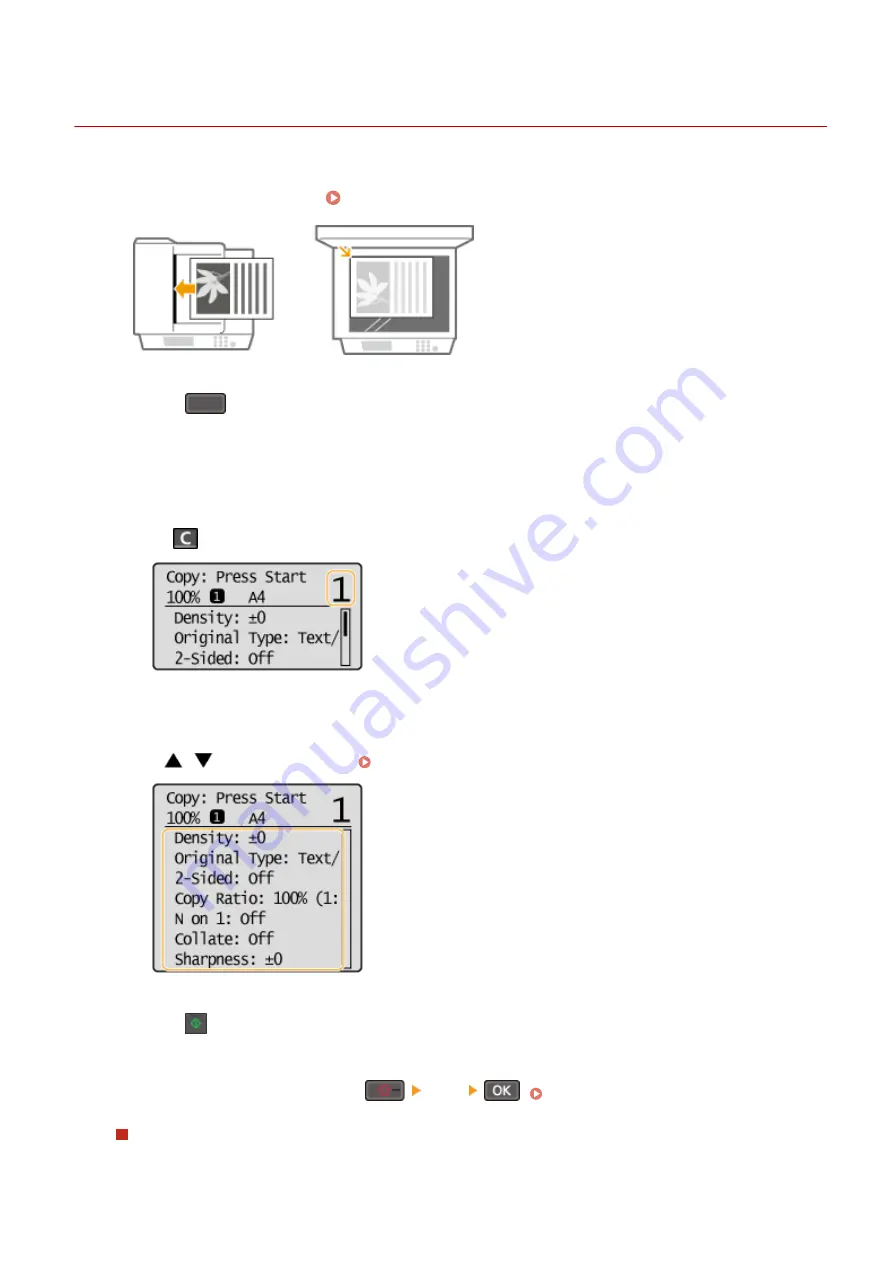
1
Place the document(s). Placing Documents(P. 38)
2
Press
(COPY/SCAN) to switch to the Copy mode screen.
3
Enter the number of copies using the numeric keys.
●
Enter a quantity from 1 to 999.
●
Press
to cancel the entered quantity.
4
Specify the copy settings as necessary.
●
Use
/
to select the settings. Various Copy Settings(P. 69)
5
Press
.
●
Copying starts.
●
If you want to cancel copying, press
<Yes>
When placing documents in the feeder in step 1 (MF244dw)
The document is automatically scanned.
Copying
65
Summary of Contents for imageclass MF232W
Page 1: ...MF244dw MF232w MF231 User s Guide USRMA 1398 00 2016 10 en Copyright CANON INC 2016 ...
Page 80: ...LINKS Basic Copy Operations P 65 Adjusting Density P 72 Copying 74 ...
Page 96: ...Managing Documents and Checking the Machine Status P 278 Using the Machine as a Printer 90 ...
Page 132: ...LINKS Printing a Document P 87 Various Print Settings P 95 Using the Machine as a Printer 126 ...
Page 248: ...Configuring Printer Ports P 201 Security 242 ...
Page 264: ... The machine does not support use of a certificate revocation list CRL Security 258 ...
Page 287: ...LINKS Remote UI Screens P 275 Using Remote UI MF244dw MF232w 281 ...
Page 346: ...Troubleshooting 340 ...
Page 438: ...Manual Display Settings 15A8 080 Appendix 432 ...
Page 448: ...Appendix 442 ...
Page 466: ... 12 JPEG this software is based in part on the work of the Independent JPEG Group ...


