Fixing Unit
0W20-066
Dirt may adhere to the fixing units inside the machine and cause black streaks to appear on printouts. To clean the
fixing unit, perform the following procedure. Note that you cannot clean the fixing unit when the machine has
documents waiting to be printed. To clean the fixing unit, you need plain A4 or Letter size paper. Set the paper in the
paper drawer or multi-purpose tray ( Loading Paper in the Paper Drawer(P. 37) Loading Paper in the Multi-
Purpose Tray(P. 41) ) before performing the following procedure.
●
Cleaning consumes the toner cartridge. Make sure that there is sufficient toner cartridge remaining
beforehand. Checking the Amount Remaining in the Toner Cartridge(P. 397)
1
Press
.
2
Use
/
to select <Adjustment/Maintenance>, and press
.
3
Select <Clean Fixing Assembly>, and press
.
4
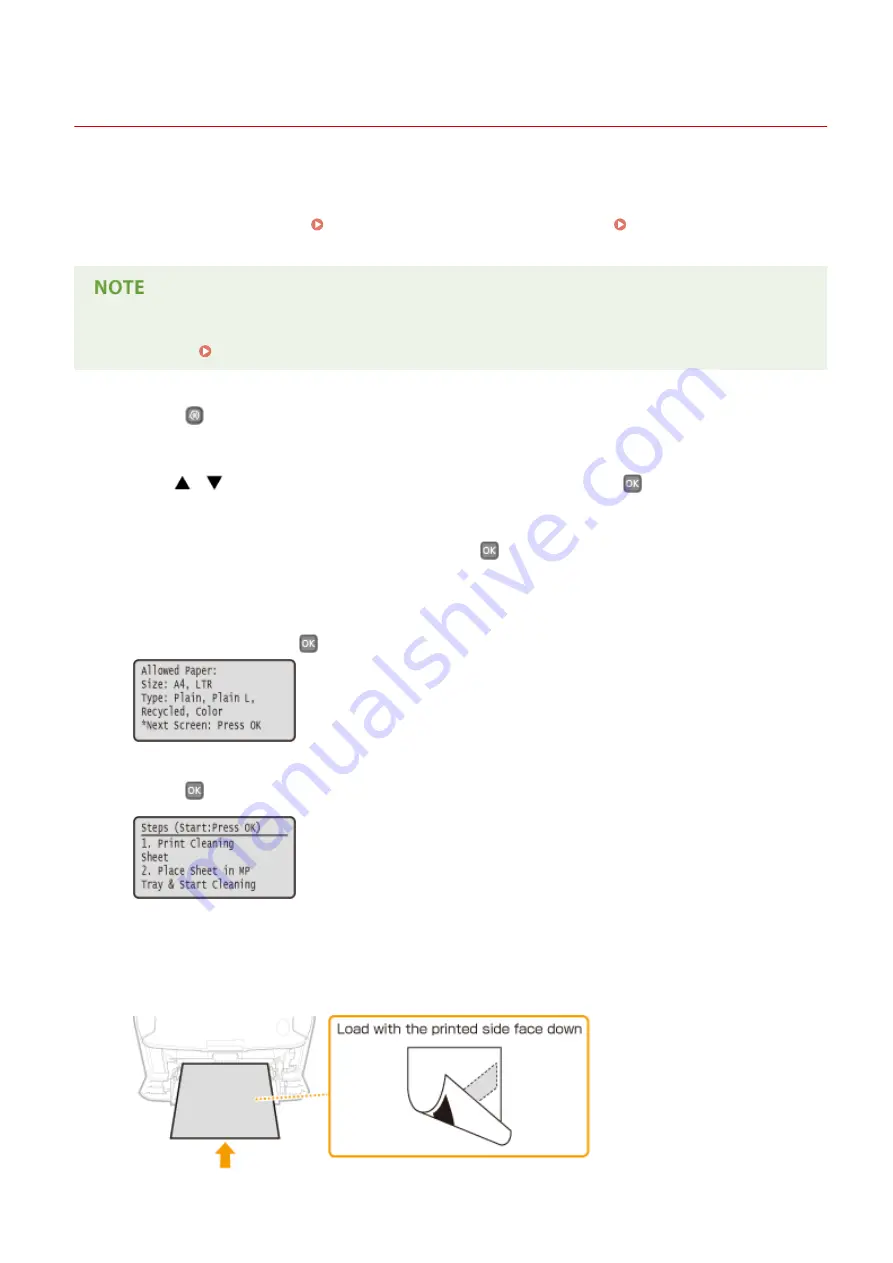
Check that the size and type of paper displayed on the screen is loaded in the
machine, and press
.
5
Press
.
➠
The cleaning sheet is printed out.
6
Load the printed cleaning sheet in the multi-purpose tray, with the printed side face
down.
Maintenance
394
Summary of Contents for imageclass LBP251dw
Page 1: ...LBP252dw LBP251dw User s Guide USRMA 0786 00 2016 06 en Copyright CANON INC 2015 ...
Page 35: ...LINKS Using the Operation Panel P 30 Basic Operations 29 ...
Page 69: ...Exiting Sleep Mode Press any key on the operation panel Basic Operations 63 ...
Page 75: ...Printing 69 ...
Page 83: ...LINKS Basic Printing Operations P 70 Checking the Printing Status and Log P 78 Printing 77 ...
Page 117: ...LINKS Printing via Secure Print P 112 Printing 111 ...
Page 122: ...Checking the Printing Status and Log P 78 Printing 116 ...
Page 178: ...3 Click OK 4 Click Close LINKS Setting Up Print Server P 173 Network 172 ...
Page 233: ...LINKS Configuring Printer Ports P 168 Security 227 ...
Page 316: ...0 Auto Shutdown is disabled 1 to 4 to 8 hr Setting Menu List 310 ...
Page 355: ...Troubleshooting 349 ...
Page 470: ...Appendix 464 ...
Page 478: ...Manual Display Settings 0W20 08J Appendix 472 ...


