Preparing the Camera
42
Setting the Screen to Black & White
The viewfinder and LCD screen display in color by default but you can set
them to black & white. Even when the screen is black & white, onscreen
text and icons will still be displayed in color.
1 Open the display selection menu for the viewfinder or LCD screen.
• [
Assistance Functions]
>
[B&W Image]
>
[Display on LCD] or
[Display on VF]
2 Select [On] and then press SET.
• You can also change the video output from the MON. and HDMI OUT terminals (together) to black & white.
• Repeat steps 1 and 2 as necessary to select other screens/video outputs.
3 Open the B&W image’s [Activate] submenu.
[
Assistance Functions]
>
[B&W Image]
>
[Activate]
4 Select [On] and then press SET.
Using a Tripod
The camera is shipped with the TB-1 Tripod Base for tripods with 0.95 cm (3/8") screws.
You can mount the camera on a tripod but do not use tripods with mounting screws
longer than 5.5 mm (0.2 in.) as this may cause damage to the camera.
Using a Tripod with 0.64 cm (1/4") Mounting
Screws
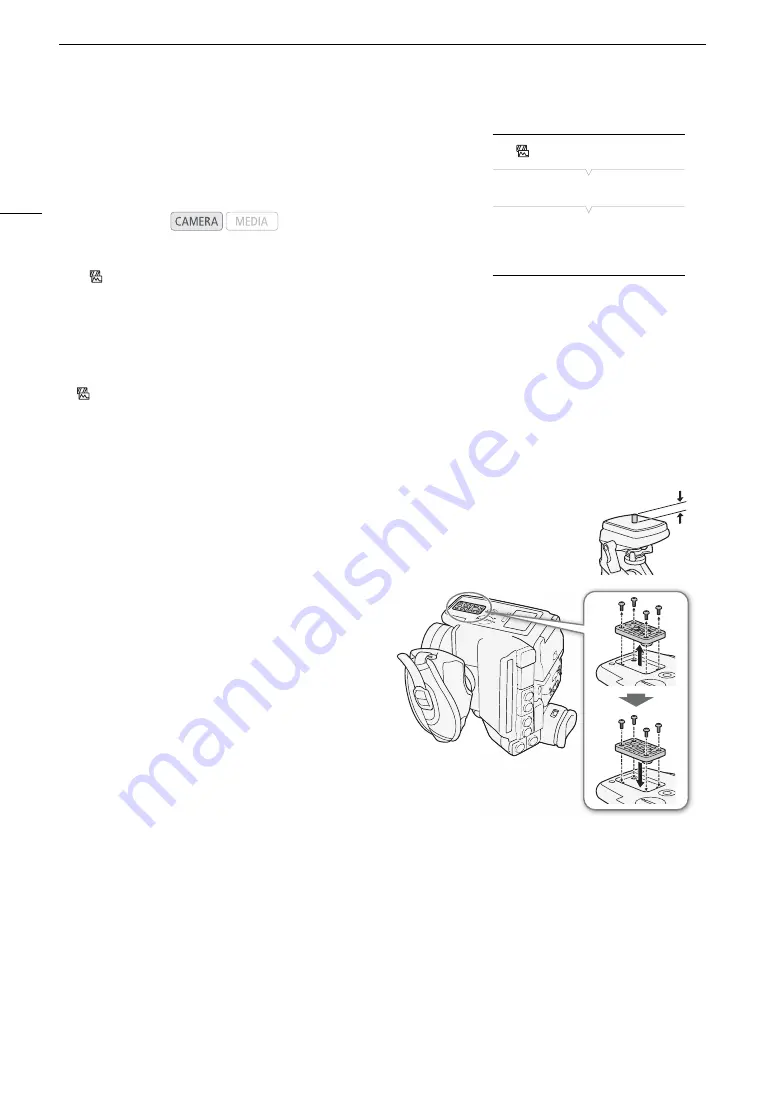
To use a tripod with 0.64 cm (1/4") mounting screws, first
attach the supplied tripod adapter base to the camera
and then attach the tripod to the adapter base.
1 Remove the original TB-1 Tripod Base from the
camera.
• Remove the 4 screws and then remove the base.
2 Attach the supplied tripod adapter base for 0.64 cm
(1/4") tripods.
• Firmly screw in the 4 screws.
3 Attach the tripod.
• Firmly screw in the tripod screw.
Operating modes:
[
Assistance Functions]
[B&W Image]
[Activate] ….. [Off]
[Display on LCD] ….. [On]
[Display on VF] ….. [On]
5.5 mm
햲
햳
Summary of Contents for EOS C300 Mark II
Page 1: ...PUB DIE 0477 000B Instruction Manual Digital Cinema Camera ...
Page 130: ...Browser Remote Controlling the Camera via Wi Fi 130 ...
Page 160: ...Clip Operations 160 ...
Page 174: ...Developing RAW Clips 174 ...
Page 180: ...Deleting Photos 180 ...


