27
Preparing the Power Supply
Checking the Remaining Battery Charge
When the camera is turned on, you can check the approximate remaining battery usage time (in minutes) by
looking at any recording/playback screen or the [Battery/Hour Meter] status screen (
A
197). You can also
check the approximate charge level on the battery pack itself.
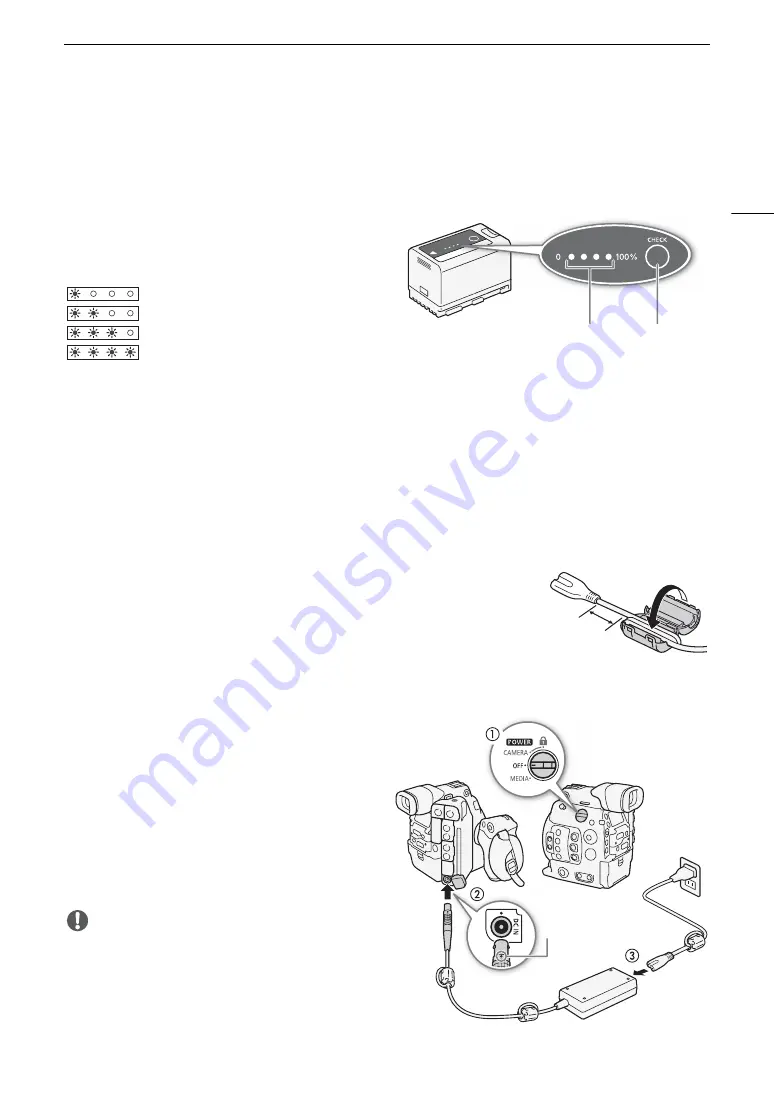
Press the CHECK button on the battery pack. An
indicator will light for approximately 3 seconds and show
the approximate remaining battery charge.
0-25%
26-50%
51-75%
76-100%
Using a Power Outlet
You can also power the camera directly from a power outlet using the supplied CA-A10 AC Adapter. While the
camera is powered using a power outlet, you can replace the battery pack even when the camera is turned on.
Attaching the Ferrite Core
Before using the supplied CA-A10 AC Adapter, attach the supplied ferrite core to the power cord. This can help
reduce the likelihood of RF interference.
1 Attach the ferrite core to the power cord about 4 cm (1.6 in.) from the plug that
goes into the AC adapter.
2 Pass the cable through the center of the core and wrap it around the core
twice and close the ferrite core.
• For use in North America, you only need to wrap the cable around the core
once.
Connecting the AC Adapter
1 Set the
Q
switch to OFF.
2 Connect the AC adapter’s DC plug to the DC IN
terminal on the camera.
• Align the cable so the red dot on the plug is facing
up.
• To disconnect the AC adapter, pull back the
metallic tip of the plug and then disconnect the
cable from the terminal.
3 Connect the power cord to the AC adapter and plug
it into a power outlet.
IMPORTANT
• Make sure to turn off the camera before connecting
or disconnecting the AC adapter.
• When using the AC adapter, do not fix it permanently
to one place as this may cause a malfunction.
CHECK button
Battery charge
indicator
4 cm
DC IN
terminal
facing up
Summary of Contents for EOS C300 Mark II
Page 1: ...PUB DIE 0477 000B Instruction Manual Digital Cinema Camera ...
Page 130: ...Browser Remote Controlling the Camera via Wi Fi 130 ...
Page 160: ...Clip Operations 160 ...
Page 174: ...Developing RAW Clips 174 ...
Page 180: ...Deleting Photos 180 ...


