


63
White Balance
White Balance
The camcorder uses an electronic white balance process to calibrate the picture and ensure accurate colors
under different lighting conditions. There are 4 methods of setting the white balance.
Custom white balance: You can use a white object to establish the white balance and set it to one of two custom
white balance positions,
Å
A or
Å
B.
Preset white balance: Set the white balance to
¼
(daylight) or
(incandescent lamp). Preset white balance
settings can be further fine-tuned within a range of -9 to 9.
Set color temperature: Allows you to set the color temperature between 2,000 K and 15,000 K.
Auto white balance: The camcorder automatically adjusts the white balance to the optimal level.
NOTES
• The [Color Matrix] (
A
96) and [White Balance] (
A
97, 98) custom picture settings take precedence over the
white balance settings.
• You can use the [
w
Other Functions]
>
[Custom Function]
>
[Shockless WB] setting (
A
99) to make the
transition look smoother when you change the white balance settings.
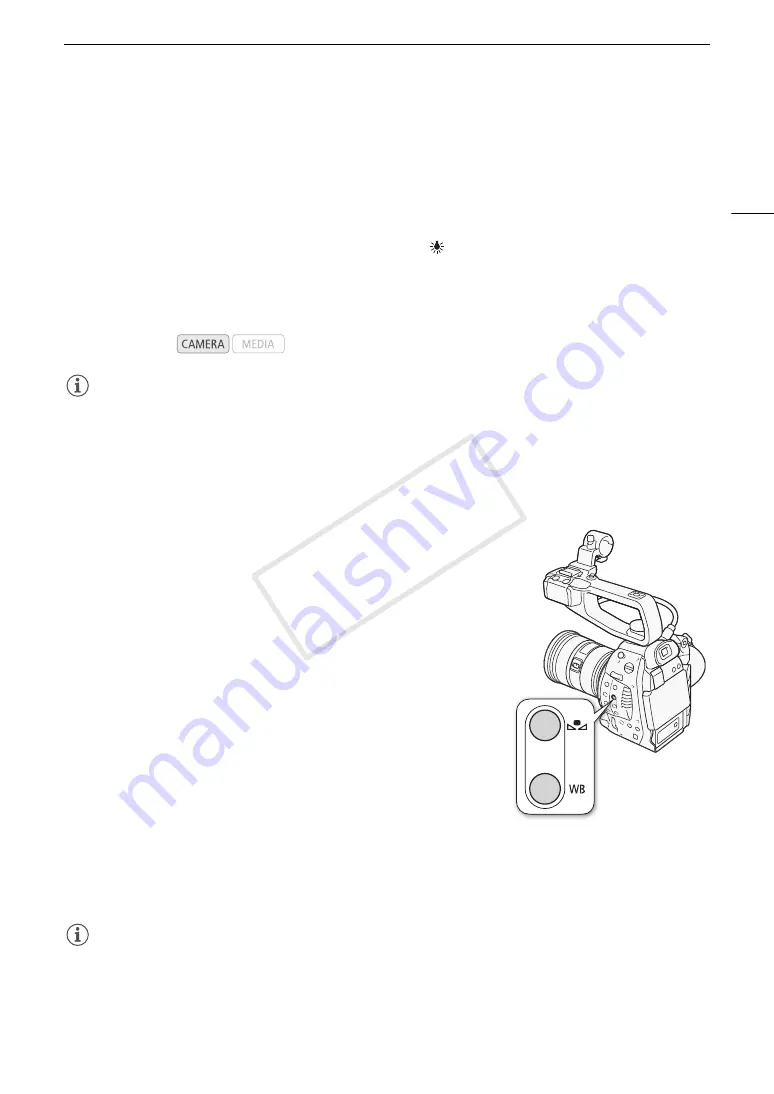
Custom White Balance
1 Press the WB button.
• The white balance mode icon will be highlighted in orange.
• You can also select the white balance mode icon using only the
joystick (
A
53).
2 Push the joystick up/down to select the
Å
A or
Å
B icon.
• If a custom white balance has been stored previously, press the
joystick to set the stored custom white balance. You do not need to
perform the rest of the procedure.
• If a custom white balance has not yet been stored, the custom white
balance icon
Å
A or
Å
B and default value (5,500 K) will flash slowly.
Continue the procedure to establish the custom white balance.
3 Point the camcorder at a white object so that it fills the whole
screen.
• Use the same lighting conditions you plan to use when recording.
4 Press the
Å
button.
• The
Å
A or
Å
B icon will flash quickly.
• Make sure the white object fills the screen until the procedure is completed.
• After the icon stops flashing, the procedure is completed. The setting is retained even if you turn off the
camcorder.
NOTES
• Readjust the custom white balance if the light source or ND filter setting changes.
• Very rarely and depending on the light source,
Å
may keep flashing (it will change to a slow flashing). The
result will still be better than with the auto white balance.
Operating modes:
COP
Y
Summary of Contents for EOS C100
Page 1: ...Instruction Manual HD Camcorder PUB DIE 0429 001C COPY ...
Page 10: ...10 COPY ...
Page 44: ...Adjusting the Black Balance 44 COPY ...
Page 112: ...Clip Operations 112 COPY ...
Page 120: ...Saving Clips to a Computer 120 COPY ...
Page 128: ...Photo Operations 128 COPY ...


