411
d
Transferring Images to a Computer
5
Transfer the image.
On the computer screen, check that
EOS Utility’s main window is
displayed.
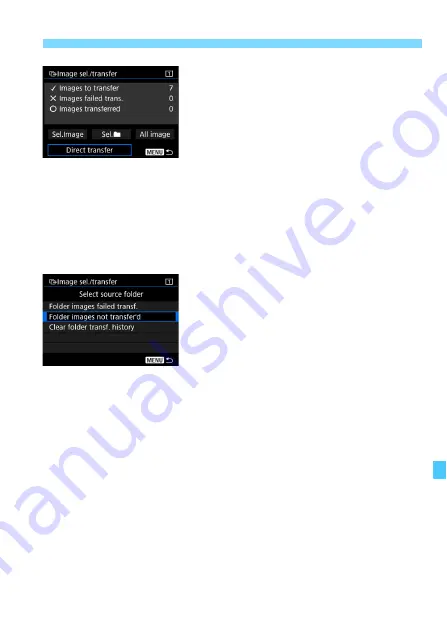
Select [
Direct transfer
], then press
<
0
>.
On the confirmation dialog, select
[
OK
] to transfer the images to the
computer.
Images selected with [
Sel.
n
] and
[
All image
] can also be transferred in
this way.
Sel.
n
Select [
Sel.
n
] and select [
Folder
images not transfer’d
]. When you
select a folder, all the images in that
folder not yet transferred to the computer
will be selected.
Selecting [
Folder images failed transf.
] will select the selected folder’s
images that failed to transfer.
Selecting [
Clear folder transf. history
] will clear the transfer history of
the images in the selected folder. After clearing the transfer history, you
can select [
Folder images not transfer’d
] and transfer all the images
in the folder again.
Summary of Contents for EOS-1 D X Mark II G
Page 40: ...40 ...
Page 86: ...86 ...
Page 210: ...210 ...
Page 226: ...226 ...
Page 270: ...270 ...
Page 476: ...476 ...
Page 540: ...540 ...
Page 541: ...541 ...
Page 542: ...542 ...
Page 543: ...543 ...
Page 544: ...544 ...
Page 545: ...545 ...
Page 546: ...546 ...
Page 547: ...547 ...
Page 548: ...548 ...
Page 549: ...549 15 Software Overview I ...
Page 561: ......


