Continued on the following page >>
7. Processing the Image (QA Mode Screen)
– 81 –
7.7 POSITION
You can trim the image and perform geometric transformations here.
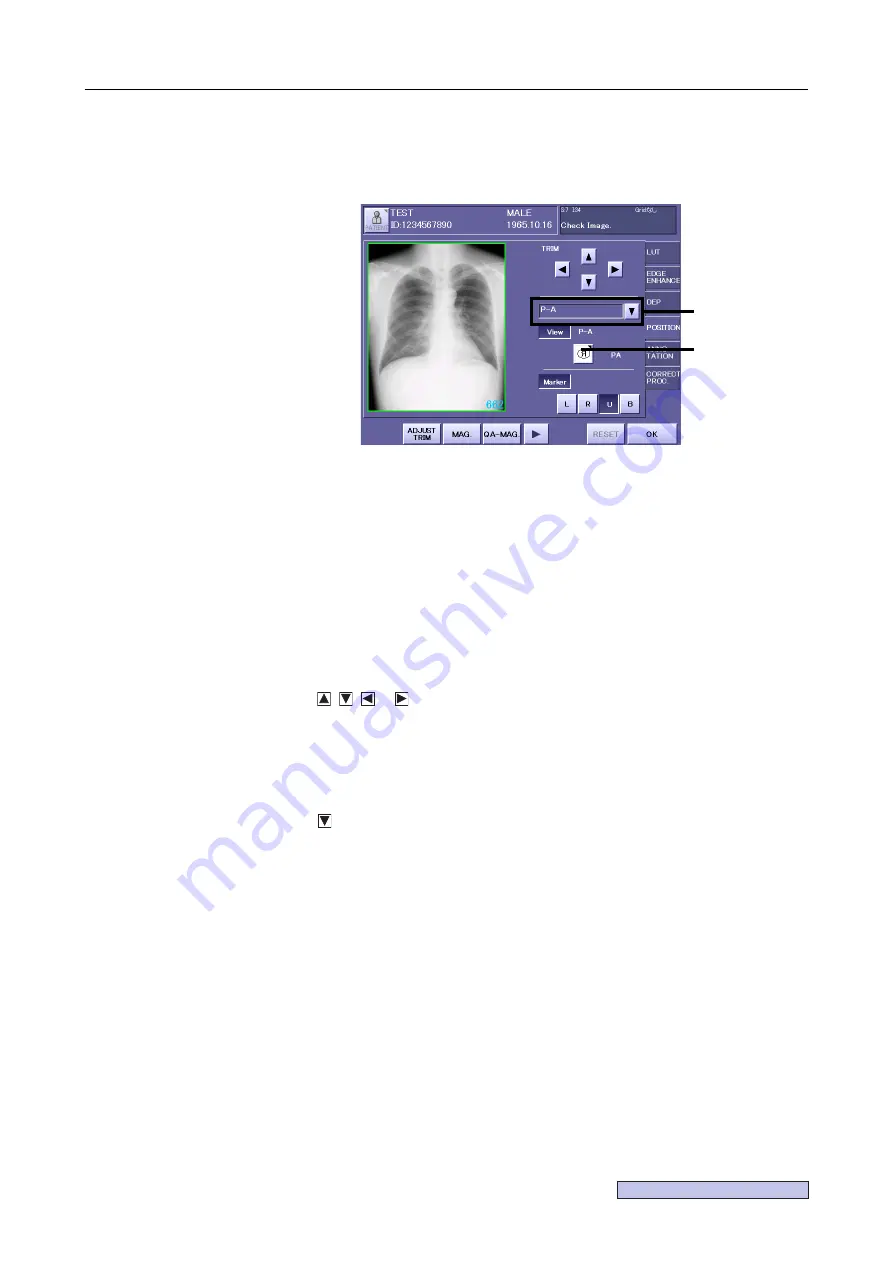
POSITION Screen
7.7.1 Changing the Trim
1
Select the option to be adjusted.
Touch
[ADJUST TRIM/ADJUST ROI]
to select the range.
2
Set the range.
If
[ADJUST TRIM]
was selected, set the trimming area
(
→
, and if
[ADJUST
ROI]
was selected, adjust the density adjustment area
(
→
.
3
Move the frame.
Touch , , or to move the frame. A red frame is moved if
[ADJUST TRIM]
was
selected, and a red-purple frame is moved if
[ADJUST ROI]
was selected.
7.7.2 Changing Marks
1
Select the mark name.
Touch to select from the list.
2
Enable the mark.
Touch and highlight (white character)
[View]
. When
View
is enabled,
Annotation
and
DICOM Output
are enabled.
When Link Setting
(
→
Setup Guide)
is set to
[ENABLE]
,
Link
is displayed.
Mark list window
Orientation button
Summary of Contents for CXDI-1
Page 9: ...Starting Up Shutting Down 1 Starting Up Shutting Down the CXDI ...
Page 15: ...Exposure and Output 2 Taking an Image 3 Output Control Process Viewer ...
Page 38: ...2 Taking an Image 30 ...
Page 60: ...5 Viewing Multiple Images Multi View Screen 52 ...
Page 70: ...6 Browsing Completed Studies Study List 62 ...
Page 71: ...Processing the Image 7 Processing the Image QA Mode Screen ...
Page 103: ...CXDI Adjustment 8 Calibration 9 Self test ...
Page 110: ...8 Calibration 102 ...
Page 116: ...9 Self test 108 ...
Page 117: ...Troubleshooting 10 Before Calling a Service Engineer 11 Questions and Answers ...
Page 136: ...11 Questions and Answers 128 ...
Page 156: ...B Using the Rejection Reason Input Function 148 ...
Page 162: ...C Using the Sensor Unit Attach Detach Function 154 ...
Page 169: ......


