7. Processing the Image (QA Mode Screen)
– 76 –
7.5 EDGE ENHANCE.
NOTE:
When parameters are set to excessively high values, artifacts may be
generated or effective image information may be degraded.
If you think the image looks as if it has been over-processed, set the
parameters to lower values, or void the process.
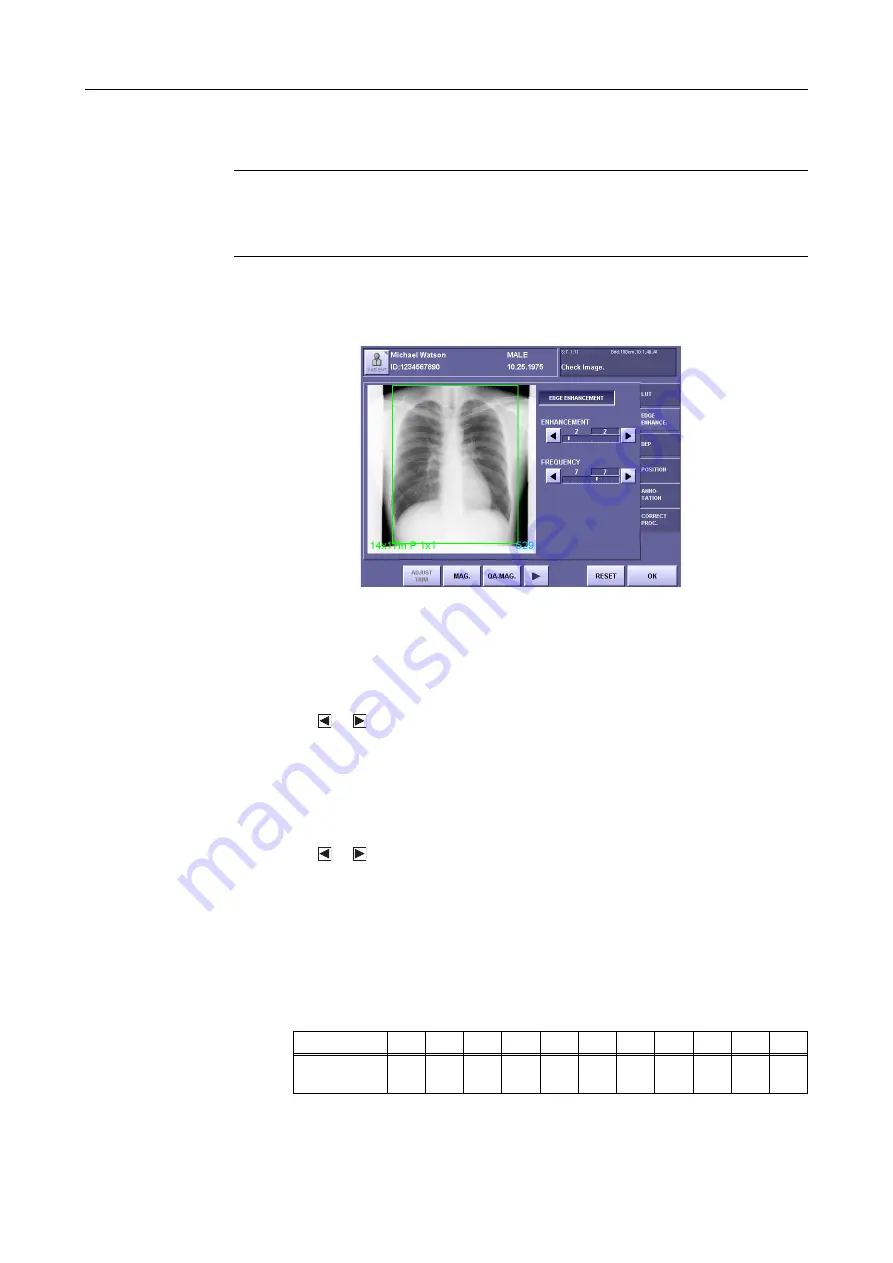
The edge enhancement process emphasizes the edges of the image and sharpens the image.
However, it is difficult to check the effect of changes by modifying the parameters in the QA
screen.
EDGE ENHANCE Screen
1
Enable edge enhancement.
Touch and highlight (white character)
[EDGE ENHANCEMENT]
.
2
Set the degree of enhancement.
Touch or to select a setting from
1 to 11
.
The displayed value on the left is the saved value, and the value on the right is the
modified value.
The effect is proportional to the setting value.
Higher values result in higher emphasis, and lower values result in lower emphasis.
3
Set the enhancement frequency.
Touch or to select a setting from
1 to 11
.
The displayed value on the left is the saved value, and the value on the right is the
modified value.
The larger the value, the clearer the definition of detailed (high frequency) structures, such as
bone trabeculae. Low frequency values result in clearer definition of larger (low
frequency) structures, such as soft tissue.
The settings and corresponding frequencies are shown below:
Table 7.5.1: Setting Values – Enhancement Frequency
Setting
1
2
3
4
5
6
7
8
9
10
11
FREQUENCY
(lp/mm)
0.06 0.08 0.11 0.15 0.20 0.27 0.36 0.47 0.69 0.81 1.28
Summary of Contents for CXDI-1
Page 9: ...Starting Up Shutting Down 1 Starting Up Shutting Down the CXDI ...
Page 15: ...Exposure and Output 2 Taking an Image 3 Output Control Process Viewer ...
Page 38: ...2 Taking an Image 30 ...
Page 60: ...5 Viewing Multiple Images Multi View Screen 52 ...
Page 70: ...6 Browsing Completed Studies Study List 62 ...
Page 71: ...Processing the Image 7 Processing the Image QA Mode Screen ...
Page 103: ...CXDI Adjustment 8 Calibration 9 Self test ...
Page 110: ...8 Calibration 102 ...
Page 116: ...9 Self test 108 ...
Page 117: ...Troubleshooting 10 Before Calling a Service Engineer 11 Questions and Answers ...
Page 136: ...11 Questions and Answers 128 ...
Page 156: ...B Using the Rejection Reason Input Function 148 ...
Page 162: ...C Using the Sensor Unit Attach Detach Function 154 ...
Page 169: ......


