


Print side 1
Print side 2
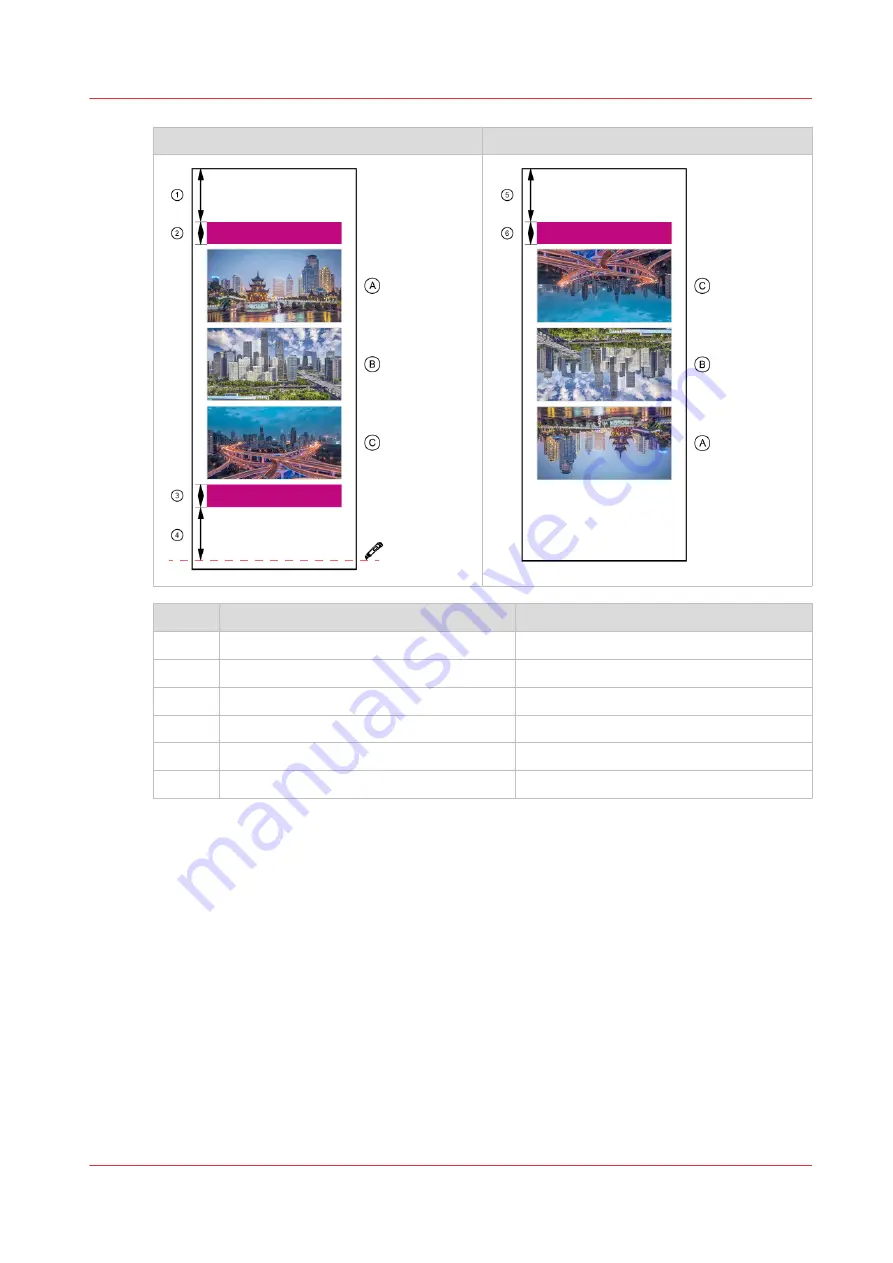
Strip
Function
Length of the strip
1
Leading strip
1600 mm (63 inch)
2
Lead-in image
250 mm (9.84 inch)
3
Lead-out image
250 mm (9.84 inch)
4
Trailing strip with a cutting line
1600 mm (63 inch)
5
Leading strip
1600 mm (63 inch)
6
Lead-in image
250 mm (9.84 inch)
Be aware you have to rotate the job for the inside 180 degrees.
The lead-in and lead-out images are used by the AAC to measure and correct for additional media
step errors caused by the ink layer of side 1, while printing side 2.
Procedure
1.
Load a media roll on position 2 in the media drawer, with the flap pointing towards you.
2.
Pull the media towards you.
3.
Uncurl the media using an empty roll.
4.
Turn the media back onto the roll in the drawer.
5.
Load the media in the inside printing manner, see
Load weak media for inside printing on
.
6.
Place a new empty take-up roll core and push the media shaft back on the winder.
Print double-sided with manual cut
Chapter 4 - Handle the media
147
Summary of Contents for Colorado 1650
Page 1: ...Colorado 1650 Extended operation guide 2020 2022 Canon Production Printing ...
Page 9: ...Chapter 1 Introduction ...
Page 17: ...Chapter 2 Safety information ...
Page 28: ...Safety System 28 Chapter 2 Safety information ...
Page 29: ...Chapter 3 Explore the system ...
Page 36: ...The components of the printer top cover open 36 Chapter 3 Explore the system ...
Page 37: ...Chapter 4 Handle the media ...
Page 81: ...FLXfinish in the RIP Chapter 4 Handle the media 81 ...
Page 162: ...Unload a media roll from the drawer 162 Chapter 4 Handle the media ...
Page 163: ...Chapter 5 Print a job ...
Page 172: ...Use the PRISMAsync Remote Control app 172 Chapter 5 Print a job ...
Page 173: ...Chapter 6 Maintain the system ...
Page 263: ...Chapter 7 Improve quality ...
Page 273: ...Chapter 8 Configure the network and security settings ...
Page 304: ...Enable system installation from USB 304 Chapter 8 Configure the network and security settings ...
Page 305: ...Chapter 9 Troubleshooting and support ...
Page 369: ...Chapter 10 Regulation Notices ...
Page 383: ......


