


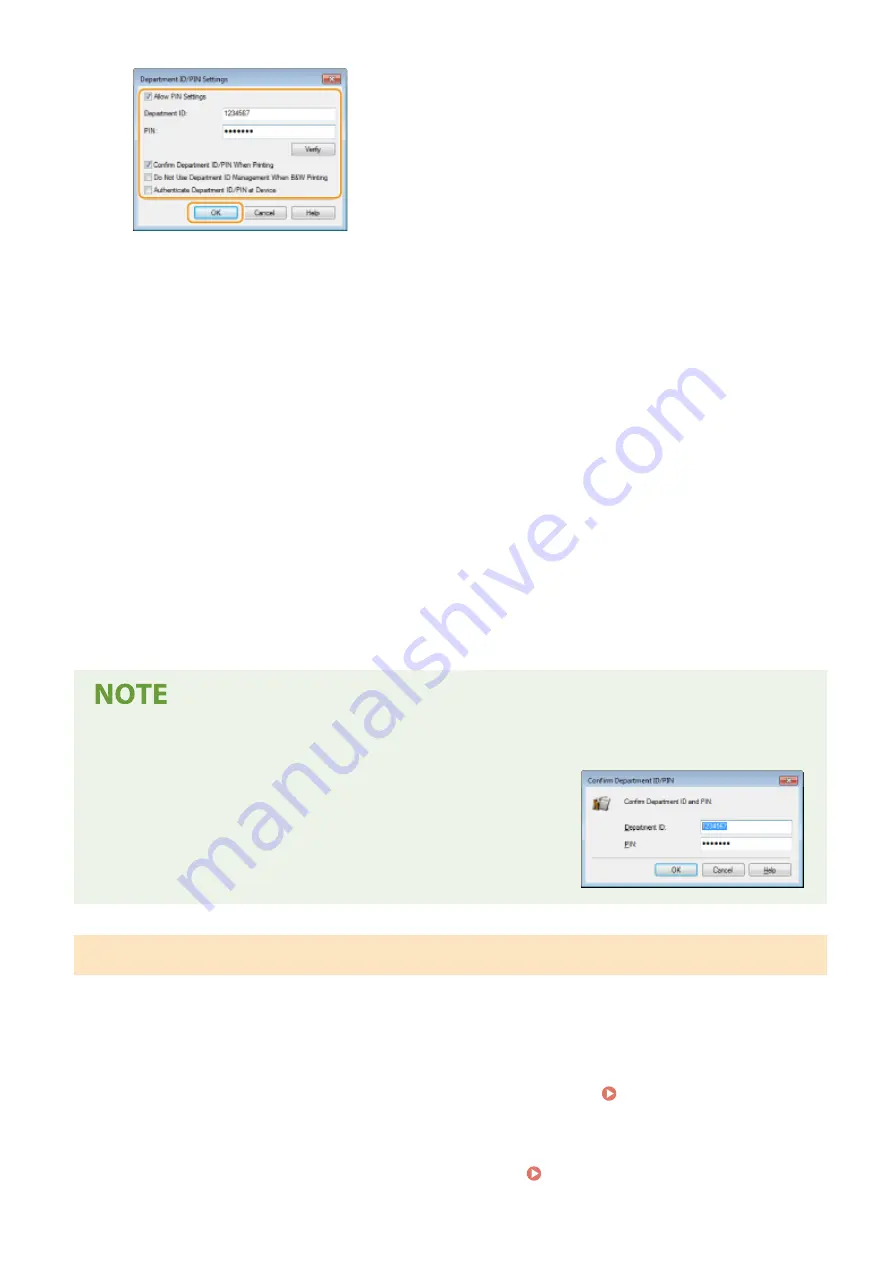
[Allow PIN Setting]
Select the check box to enable the PIN setting.
[Department ID]
Enter the Department ID number.
[PIN]
Enter the PIN corresponding to the Department ID as necessary.
[Verify]
Click to verify that the correct ID and PIN are entered. This function is not available if the machine and the
computer are connected via a USB or WSD (Web Services on Devices) port.
[Confirm Department ID/PIN When Printing]/[Confirm Department ID/PIN When Sending Faxes]
Select the check box to display the [Confirm Department ID/PIN] pop-up screen each time you send job from
a computer.
[Do Not Use Department ID Management When B&W Printing]
Select the check box to send black and white print data as an unknown ID job.
[Authenticate Department ID/PIN at Device]
Select the check box if the machine and the computer are connected via a USB or WSD port.
7
Click [OK].
Logging in to the machine
●
When you try to send job from a computer when Department ID
Management is enabled, the following pop-up screen is displayed
(unless the [Confirm Department ID/PIN When Printing]/[Confirm
Department ID/PIN When Sending Faxes] check box is cleared):
Blocking Jobs When Department ID Is Unknown
If you do not change the default settings, any user can print from a computer, scan (via <Computer> and <Remote
Scanner>), send a PC fax from a computer, or make black and white copies without entering an ID and PIN even when
Department ID Management is enabled for the machine. You can change the default settings so that the machine
cannot be used for these functions without a correct ID and PIN.
1
Start the Remote UI and log in to System Manager Mode. Starting Remote
UI(P. 428)
2
Click [Settings/Registration] on the Portal page. Remote UI Screen(P. 429)
Managing the Machine
369
Summary of Contents for Color imageCLASS MF746Cdw
Page 13: ...LINKS Viewing User s Guide P 689 Setting Up 5...
Page 113: ...Basic Operations 105...
Page 166: ...Basic Operations 158...
Page 183: ...5 Select Apply LINKS Basic Operation P 132 Basic Operations 175...
Page 201: ...Saving Data to a USB Memory Device P 294 Basic Operations 193...
Page 229: ...Sending and Receiving Faxes via the Internet Using Internet Fax I Fax P 255 Faxing 221...
Page 251: ...6 Select Apply Faxing 243...
Page 332: ...Sending I Faxes P 256 Scanning 324...
Page 335: ...LINKS Checking Status and Log for Scanned Originals P 309 Scanning 327...
Page 338: ...LINKS Using ScanGear MF P 331 Scanning 330...
Page 361: ...5 Specify the destination 6 Click Fax Fax sending starts Linking with Mobile Devices 353...
Page 418: ...LINKS Configuring the Key and Certificate for TLS P 389 Managing the Machine 410...
Page 447: ...5 Click Edit 6 Specify the required settings 7 Click OK Managing the Machine 439...
Page 458: ...You cannot set or change the security policy on this machine Managing the Machine 450...
Page 586: ...Off Only When Error Occurs Setting Menu List 578...
Page 637: ...5 Select Apply Maintenance 629...
Page 650: ...Troubleshooting FAQ Troubleshooting FAQ 643 Troubleshooting FAQ 642...
Page 689: ...Appendix 681...
Page 730: ...19 MD4 RSA Data Security Inc MD4 Message Digest Algorithm...
Page 761: ...19 MD4 RSA Data Security Inc MD4 Message Digest Algorithm...


