background image

QT5-2916-V01

©CANON INC. 2010

PRINTED IN THAILAND

IMPRIME EN THAILANDE

ENGLIS

H

FRAN

ÇAIS

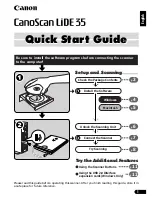
Quick Start Guide
Guide de démarrage rapide

XXXXXXXX

CANON CANADA INC.
6390 Dixie Road, Mississauga, Ontario, L5T 1P7 Canada

Summary of Contents for CanoScan 9000F

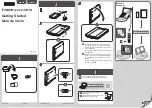
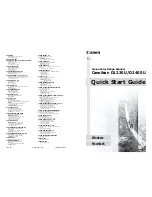
Page 1: ...5 2916 V01 CANON INC 2010 PRINTED IN THAILAND IMPRIME EN THAILANDE ENGLISH FRANÇAIS Quick Start Guide Guide de démarrage rapide XXXXXXXX CANON CANADA INC 6390 Dixie Road Mississauga Ontario L5T 1P7 Canada ...

Page 2: ...tore it in a safe place for future reference Table of Contents Safety Precautions 2 Using the Scanner Buttons 11 Package Contents 4 Scanning with MP Navigator EX 12 Installing the Software 5 Scanning Film 13 Preparing the Scanner 8 Specifications 17 Try Scanning 10 Quick Start Guide Quick Start Guide ...

Page 3: ...it may cause fire or damage About the Power Supply WARNING Do not plug the power cord into outlets with voltages other than the specified voltages Incorrect voltages may result in fire or electrical shock Do not place heavy objects on pull or excessively bend twist or tie the power cord Damaged wires may cause fire or electrical shock Unplug the power cord from the outlet periodically and use a dr...

Page 4: ... or the cables are damaged by plugging unplugging fire or electrical shock may result When transporting the scanner always unplug the cables Damaged cables could cause fire or electrical shock If anything enters the scanner immediately unplug the power cord Then contact your retailer or Canon Customer Support Help Desk CAUTION Do not release the document cover until it completely opens closes If t...

Page 5: ...avigator EX and troubleshooting Adobe Photoshop Elements DVD Refer to the instruction sheet for installing In this guide Windows Vista operating system Ultimate screenshots are used to illustrate explanations common to all operating systems Additionally the every edition of Windows 7 operating system is referred to as Windows 7 the every edition of Windows Vista as Windows Vista and Windows XP Hom...

Page 6: ... dialog boxes will not appear Do NOT connect the scanner to a computer before installing the software If you connect the scanner unplug the USB cable from the computer When the Found New Hardware screen appears unplug the USB cable from the computer and click Cancel The screen may close automatically when the USB cable is unplugged Quit all running applications before installation For Windows Unin...

Page 7: ...efully read the License Agreement and then click Yes to proceed For Macintosh skip step 6 and go to step 7 6 For Windows carefully read the Please Allow All Install Wizard Processes screen and then click Next 7 Follow the on screen instructions to perform the installation For Macintosh skip step 8 and go to step 9 ...

Page 8: ...ructions For Windows Click Restart After restarting the computer Solution Menu will appear For Macintosh Click Exit Solution Menu icon will be registered in the Dock Solution Menu You can select either MP Navigator EX or On Screen Manual Make sure to remove the CD ROM from the drive and store it in a safe place If you encounter a problem during installation see Troubleshooting in On Screen Manual ...

Page 9: ...rd the unlock mark 3 Close the document cover The document cover is locked temporarily at an angle of about 50 degrees Handle the scanner with both hands Be careful not to drop the scanner When you carry or transport the scanner press the ON button to turn the power off and then make sure to slide the scanner lock switch toward the lock mark to fasten the scanning unit Unlock Mark ...

Page 10: ...hile the POWER lamp is lighting or blinking the scanning unit does not move correctly Only use the USB cable and the power cord provided with the scanner Use of other cables may lead to a malfunction Do not touch the metallic parts of the USB connector Always attach the power cord to the scanner before plugging into the electrical outlet Reversing this order may lead to malfunctions When the scann...

Page 11: ...r Macintosh Click the Solution Menu icon in the Dock then click Scan import photos or documents 4 Click Photos Documents Platen 1 5 Select Color Photo in Document Type 6 Click Scan to start scanning 7 When prompted that the scanning completed click Exit 8 Click Save to save the image and close MP Navigator EX 2 Do not move the scanner while it is operating Do not see the light source directly duri...

Page 12: ... you need to restart the computer before using the scanner buttons first When you press the scanner buttons the POWER lamp gets blinking AUTO SCAN Button Discriminates the document type automatically then scans and saves it with appropriate settings PDF Buttons PDF buttons allow you to easily create PDF files according to your needs Note that these buttons are not labeled on the scanner COLOR Butt...

Page 13: ...t by following procedure For Windows Select Start All Programs Canon Utilities MP Navigator EX 3 1 and click MP Navigator EX 3 1 For Macintosh Open Applications Canon Utilities folders then double click the MP Navigator EX 3 1 icon The navigation mode window of MP Navigator EX is displayed Features of MP Navigator EX MP Navigator EX is constituted of the following three sheets by the function For ...

Page 14: ...he protective sheet in a safe place so that it will not get bent or broken Always put the protective sheet back when you are not scanning film to protect the light source in the document cover Use a blower brush to remove any dust from the film which will affect the image quality and take care to hold the film by its edges to avoid transferring dirt or fingerprints to it Do not block the Calibrati...

Page 15: ...lms c Align the Film Guide s tab with the FILM symbol on the platen glass of the scanner then open the Film Holder and remove the Film Retainer Sheet d Place the film face down e Close the Film Holder Leave a gap of 5 mm or greater between films when placing two or more 120 format films on the platen glass Ensure that there is no gap between the edge of the film and the Film Guide on the side near...

Page 16: ...ppear after following Instruction A turn the film strip over and place it in the Film Holder with the Film Retainer Sheet on top so that the film edges are held down for scanning Then preview the image in ScanGear and click the Mirror button to reverse the image before initiating the final scan To avoid damaging the film always place the glossy side the side without an illustration of the Film Ret...

Page 17: ... the scanner while it is operating Do not move the scanner while it is operating Do not leave the film strip in the Film Guide for an extended period of time as heat from the unit may damage the film For more information on scanning film see Scanning Film in On Screen Manual When you finished scanning films put the protective sheet back on the document cover Insert the tab on the bottom of the pro...

Page 18: ...solution 25 19200 dpi ScanGear Scanning Bit Depth Color 48 bit input 16 bit input for each color RGB 48 bit or 24 bit output 16 bit or 8 bit output for each color RGB Grayscale 48 bit input 16 bit input for each color RGB 16 bit 2 or 8 bit output Interface Hi Speed USB 3 Maximum Document Size A4 Letter 216 x 297 mm Film Type Number of Frames 35 mm strip 12 frames max 35 mm slide 4 frames max 120 f...

Page 19: ...s type of waste could have a possible negative impact on the environment and human health due to potentially hazardous substances that are generally associated with EEE At the same time your cooperation in the correct disposal of this product will contribute to the effective usage of natural resources For more information about where you can drop off your waste equipment for recycling please conta...

Page 20: ...onsulter ultérieurement Table des matières Précautions de sécurité 2 Utilisation des boutons du scanner 11 Contenu de l emballage 4 Numérisation avec MP Navigator EX 12 Installation des logiciels 5 Numérisation d un film 13 Préparation du scanner 8 Fiche technique 17 Essai de numérisation 10 Guide de démarrage rapide Guide de démarrage rapide ...

Page 21: ...mentation sur des prises ne fournissant pas les tensions spécifiées Des tensions incorrectes pourraient créer des risques d incendie ou d électrocution Ne placez pas d objets lourds sur le cordon d alimentation et évitez de tirer fortement sur ce dernier de le plier de façon excessive de le tordre ou de le nouer Des fils endommagés pourraient provoquer un incendie ou une électrocution Débranchez l...

Page 22: ...ntact avec les pièces électriques ou si les câbles sont endommagés lors du branchement débranchement cela peut provoquer un incendie ou une électrocution Débranchez toujours les câbles lorsque vous transportez le scanner Des câbles endommagés pourraient provoquer un incendie ou une électrocution Si un objet quelconque pénètre dans le scanner débranchez immédiatement le cordon d alimentation Contac...

Page 23: ...toshop Elements Pour toute information sur l installation reportez vous au feuillet d instructions Dans ce guide des captures d écran provenant de Windows Vista operating system Ultimate Edition sont utilisées pour illustrer les explications communes à tous les systèmes d exploitation De plus toute édition du système d exploitation Windows 7 est dénommé Windows 7 toute édition de Windows Vista est...

Page 24: ...paraissent pas Ne connectez PAS le scanner à un ordinateur avant d installer les logiciels Si vous connectez le scanner débranchez le câble USB de l ordinateur Lorsque l écran Nouveau matériel détecté apparaît débranchez le câble USB de l ordinateur puis cliquez sur Annuler L écran peut se fermer automatiquement dès que vous débranchez le câble USB Quittez toutes les applications en cours avant de...

Page 25: ...e contrat de licence puis cliquez sur Oui pour continuer Sous Macintosh ignorez l étape 6 et passez à l étape 7 6 Sous Windows lisez attentivement l écran Autorisez tous les processus de l assistant d installation puis cliquez sur Suivant 7 Suivez les instructions qui s affichent afin de procéder àl installation Sous Macintosh ignorez l étape 8 et passez à l étape 9 ...

Page 26: ... Windows cliquez sur Redémarrer Après le redémarrage de l ordinateur le Solution Menu apparaît Sous Macintosh cliquez sur Quitter L icône Solution Menu sera enregistrée dans le Dock Solution Menu Vous pouvez sélectionner MP Navigator EX ou Manuel en ligne N oubliez pas de retirer le CD ROM du lecteur et de le ranger dans un lieu sûr Si vous rencontrez des problèmes lors de l installation reportez ...

Page 27: ... Fermez le couvercle du scanner Le couvercle du scanner est verrouillé provisoirement avec un angle de verrouillage de 50 degrés Manipulez le scanner des deux mains Veillez à ne pas le laisser tomber Lorsque vous transportez le scanner appuyez sur le bouton MARCHE pour le mettre hors tension puis veillez à faire glisser le bouton de verrouillage du scanner vers le repère de verrouillage pour attac...

Page 28: ...ION est allumé ou clignote l unité de numérisation ne se déplace pas correctement Utilisez exclusivement le câble USB et le cordon d alimentation fournis avec le scanner L utilisation d autres câbles peut provoquer un dysfonctionnement Ne touchez pas les pièces métalliques du connecteur USB Raccordez toujours le cordon d alimentation au scanner avant de le brancher sur la prise électrique L invers...

Page 29: ...u sur le Dock puis sur Numériser Importer des photos ou des documents 4 Cliquez sur Photos Documents vitre 1 5 Sélectionnez Photo couleur dans Type de document 6 Cliquez sur Numériser pour lancer la numérisation 7 Lorsque le message de fin de numérisation s affiche cliquez sur Quitter 8 Cliquez sur Enregistrer pour enregistrer l image et fermer MP Navigator EX 2 Ne déplacez pas le scanner pendant ...

Page 30: ...s devez commencer par redémarrer l ordinateur avant d utiliser les boutons du scanner Lorsque vous appuyez sur les boutons du scanner le voyant ALIMENTATION se met à clignoter Bouton AUTO SCAN Détermine automatiquement le type du document puis le numérise et l enregistre selon les paramètres appropriés Boutons PDF Les boutons PDF vous permettent de créer aisément des fichiers PDF selon vos besoins...

Page 31: ... procédant comme suit Sous Windows sélectionnez Démarrer Programmes Tous les programmes Canon Utilities MP Navigator EX 3 1 puis cliquez sur MP Navigator EX 3 1 Sous Macintosh ouvrez les dossiers Application s Canon Utilities puis double cliquez sur l icône MP Navigator EX 3 1 La fenêtre du mode de navigation de MP Navigator EX s ouvre Fonctionnalités de MP Navigator EX MP Navigator EX se compose ...

Page 32: ... pliée ou déchirée Remettez toujours la feuille de protection en place lorsque vous ne numérisez pas de film afin de protéger la source lumineuse dans le couvercle du scanner Utilisez une brosse soufflante pour éliminer les poussières éventuellement présentes sur le film et susceptibles d affecter la qualité de l image puis veillez à saisir le film par ses bords afin d éviter de déposer de la pous...

Page 33: ...rmat 120 c Alignez la languette du guide de film avec le symbole FILM sur la vitre d exposition du scanner puis ouvrez le support de film et retirez la feuille de maintien du film d Placez le film face vers le bas e Fermez le support de film Laissez un espace de 5mm ou plus entre les films lorsque vous placez deux films au format 120 ou plus sur la vitre d exposition Veillez à ce qu il n y ait auc...

Page 34: ...ent malgré les précautions décrites A retournez la pellicule et placez la dans le support de film en la surmontant de la feuille de maintien du film afin que les bords du film soient maintenus vers le bas durant la numérisation Ensuite prévisualisez l image dans ScanGear et cliquez sur le bouton Miroir pour inverser l image avant de lancer la numérisation finale Pour éviter d endommager le film pl...

Page 35: ...nctionnement Ne déplacez pas le scanner pendant son fonctionnement Ne laissez pas le film dans son guide de film pendant une période prolongée car la chaleur provenant de l appareil risque d endommager le film Pour plus d informations sur la numérisation d un film reportez vous à la section Numérisation d un film du Manuel en ligne Lorsque vous avez terminé de scanner les films remettez la feuille...

Page 36: ...ution au choix 25 19200 ppp ScanGear Nombre de bits de numérisation Couleur Entrée 48 bits entrée 16 bits pour chaque couleur RVB Sortie 48 ou 24 bits sortie 16 ou 8 bits pour chaque couleur RVB Niveaux de gris Entrée 48 bits entrée 16 bits pour chaque couleur RGB sortie 16 bits 2 ou 8 bits Interface USB Hi Speed 3 Taille de document maximale A4 Lettre 216 x 297 mm Type de film Nombre de vues Pell...

Page 37: ...ions d élimination de ce type de déchet peut avoir des effets négatifs sur l environnement et la santé publique car ces produits EEE contiennent généralement des substances qui peuvent être dangereuses Parallèlement votre entière coopération à la bonne mise au rebut de ce produit favorisera une meilleure utilisation des ressources naturelles Pour obtenir plus d informations sur les points de colle...

Page 38: ...er there is no guarantee that interference will not occur in a particular installation If this equipment does cause harmful interference to radio or television reception which can be determined by turning the equipment off and on the user is encouraged to try to correct the interference by one or more of the following measures Reorient or relocate the receiving antenna Increase the separation betw...

Page 39: ...5 2916 V01 CANON INC 2010 PRINTED IN THAILAND IMPRIME EN THAILANDE ENGLISH FRANÇAIS Quick Start Guide Guide de démarrage rapide XXXXXXXX CANON CANADA INC 6390 Dixie Road Mississauga Ontario L5T 1P7 Canada ...

Reviews: