


5.
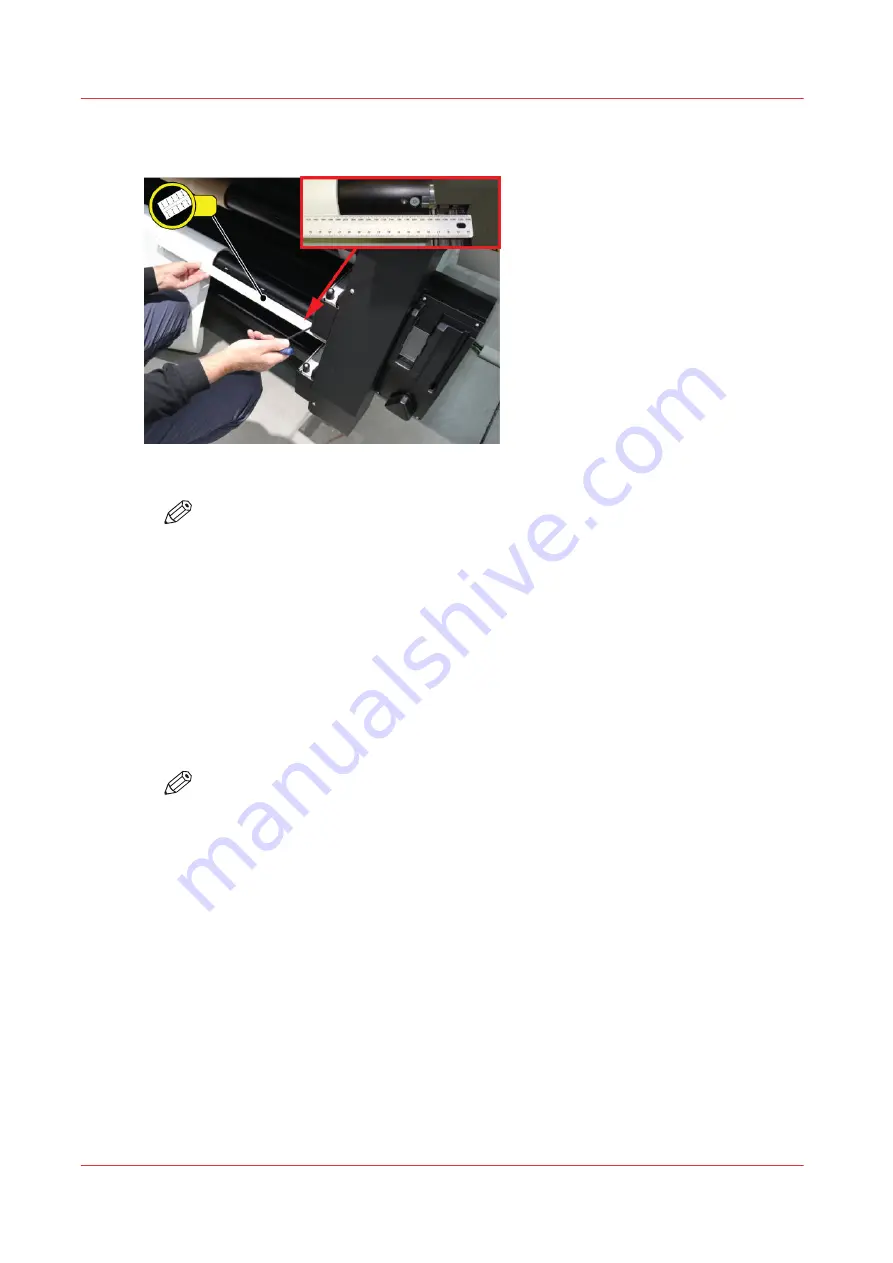
Accurately center the media using the supplied ruler. Media should be centered within 1mm on
the ruler.
[33] Ruler to Center Media
NOTE
The supplied ruler has both metric (millimetres) and imperial (inches) scales. When a
media roll is centered on the shaft, and the ruler is placed as shown in the photo, the
value on the ruler scale will match the width of the roll.
6.
Lock the supply media shaft core locks by turning the 5mm hex key clock-wise.
7.
Re-check that the media is still centered as locking the core may cause the roll to shift (usually the
shift is from 1 to 2 millimetres to the right).
Next: Load an Empty Core and Install it in the Take-up Position
8.
Place an empty media shaft on a suitable work surface and unlock the media shaft locks with the
5mm hex key.
9.
Slide an empty media core that is at least as long as the supply media width onto the take-up
shaft.
10.
Roughly center the core and then insert the shaft into the Take-up (top) position on the RMO unit.
NOTE
Make sure that the core lock and coupler end of the shaft are on the right side of the
printer.
11.
Lock the take-up media shaft core locks with the 5mm hex key.
Result
The RMO is now ready to print on the roll media.
Load Media - Standard Method
The standard way to load media is quick and efficient and ensures minimum waste of material.
However, for some longer print jobs or when you use media that is more flexible and therefore
harder to achieve good alignment, there is an alternate method that will be described in the next
section. Straight loading of roll media is very important to avoid wrinkles and banding in the
print, especially on longer print job runs. If you want to ensure that a media is loaded straight or
if you see an inverted light/dark banding across the media, we recommend the alternative
method.
Load Media - Standard Method
102
Chapter 7 - Roll Media Option
Summary of Contents for Arizona 1300 Series
Page 1: ...Arizona 1300 Series User guide Canon Production Printing 2018 2020 ...
Page 6: ...Contents 6 ...
Page 7: ...Chapter 1 Introduction ...
Page 11: ...Chapter 2 Product Compliance ...
Page 14: ...Product Compliance 14 Chapter 2 Product Compliance ...
Page 15: ...Chapter 3 Safety Information ...
Page 38: ...Roll Media Safety Awareness 38 Chapter 3 Safety Information ...
Page 39: ...Chapter 4 Navigate the User Interface ...
Page 62: ...Software Update Module 62 Chapter 4 Navigate the User Interface ...
Page 63: ...Chapter 5 Operate the Printer ...
Page 85: ...Chapter 6 Operate the Arizona 13x0 XT ...
Page 93: ...Chapter 7 Roll Media Option ...
Page 120: ...Media Edge Protectors 120 Chapter 7 Roll Media Option ...
Page 121: ...Chapter 8 Static Suppression Option ...
Page 125: ...Chapter 9 Manage a White Ink Workflow ...
Page 173: ...Chapter 10 Ink System Management ...
Page 178: ...Change Ink Bags 178 Chapter 10 Ink System Management ...
Page 179: ...Chapter 11 Maintenance ...
Page 223: ...Chapter 12 Troubleshooting and Support ...
Page 234: ...Install software updates without Remote Service 234 Chapter 12 Troubleshooting and Support ...
Page 235: ...Chapter 13 Regulation Notices ...
Page 241: ...Appendix A Application Information ...
Page 247: ......


