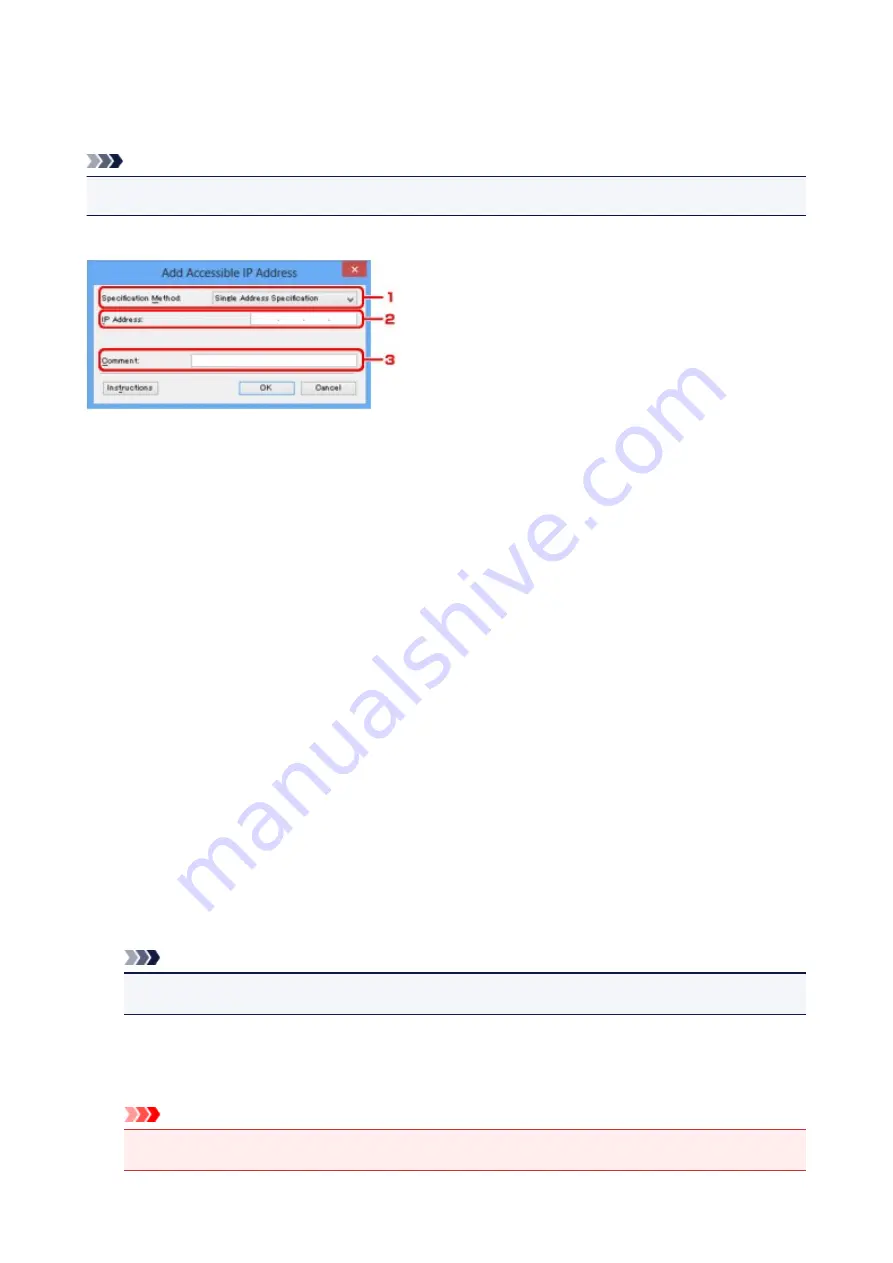
Edit Accessible IP Address Screen/Add Accessible IP Address
Screen
Note
• This screen is not available depending on the printer you are using.
The example screenshots in this section refer to the
Add Accessible IP Address
Screen.
1.
Specification Method:
Select either
Single Address Specification
or
Range Specification
to add the IP address(es).
Single Address Specification
Specify each IP address separately.
Range Specification
Specify a range of successive IP addresses.
2.
IP Address:
Enter the IP address of a computer or a network device to allow access when you selected
Single
Address Specification
in
Specification Method:
.
An IP address is expressed as four values ranging from 0 to 255.
Start IP Address:
Enter the first IP address in the range of addresses of the computers or network devices to allow
access when you selected
Range Specification
in
Specification Method:
.
An IP address is expressed as four values ranging from 0 to 255.
End IP Address:
Enter the last IP address in the range of addresses of the computers or network devices to allow
access when you selected
Range Specification
in
Specification Method:
.
An IP address is expressed as four values ranging from 0 to 255.
Note
• The
Start IP Address:
must be a smaller value than the
End IP Address:
.
3.
Comment:
Optionally enter any information to identify the device, such as the name of the computer.
Important
• Comments will be displayed only on the computer used to enter them.
261
Summary of Contents for 9491B003
Page 66: ...66 ...
Page 94: ...Manual Online This function displays the Online Manual 94 ...
Page 106: ...Safety Guide Safety Precautions Regulatory and Safety Information 106 ...
Page 113: ...Main Components Front View Rear View Inside View Operation Panel 113 ...
Page 125: ...Use the or button B to change the setting then press the OK button C 125 ...
Page 126: ...Loading Paper Loading Paper 126 ...
Page 150: ...Replacing an Ink Tank Replacing an Ink Tank Checking the Ink Status 150 ...
Page 168: ...Aligning the Print Head Position Manually from Your Computer 168 ...
Page 179: ...Related Topic Cleaning the Print Heads from Your Computer 179 ...
Page 199: ...About Quiet setting 199 ...
Page 212: ...Information about Network Connection Useful Information about Network Connection 212 ...
Page 259: ...5 Delete Deletes the selected IP address from the list 259 ...
Page 301: ...Administrator Settings Sharing the Printer on a Network 301 ...
Page 308: ...Printing Printing from a Computer Paper setting for Printing 308 ...
Page 326: ...Note Selecting Scaled changes the printable area of the document 326 ...
Page 337: ...Related Topic Changing the Printer Operation Mode 337 ...
Page 361: ...Note During Grayscale Printing inks other than black ink may be used as well 361 ...
Page 366: ...Adjusting Intensity Adjusting Contrast 366 ...
Page 407: ...Printing a Color Document in Monochrome Displaying the Print Results before Printing 407 ...
Page 489: ...Problems with Printing Quality Print Results Not Satisfactory Ink Is Not Ejected 489 ...
Page 522: ...About Errors Messages Displayed If an Error Occurs A Message Is Displayed 522 ...
Page 551: ...1660 Cause The ink tank is not installed Action Install the ink tank 551 ...
Page 587: ...5500 Cause Ink tank has not been properly recognized Action Contact the service center 587 ...
Page 588: ...5501 Cause Ink tank has not been properly recognized Action Contact the service center 588 ...
Page 589: ...5B00 Cause Printer error has occurred Action Contact the service center 589 ...
Page 590: ...5B01 Cause Printer error has occurred Action Contact the service center 590 ...


